Replace the Fabric Interconnect F1-4 QDR Fabric Board
The Fabric Interconnect F1-4 Fabric Board is on the rear of the chassis. To replace the Fabric Interconnect F1-4 QDR Fabric Board, you will need a #2 Phillips-head screwdriver.
Note - This procedure is applicable to replacing a QDR Fabric Board with another QDR Fabric Board. If you are upgrading from a non-QDR Fabric Board to a QDR Fabric Board, use the procedure documented in Upgrading a DDR Fabric Board to a QDR Fabric Board.
To replace the Fabric Interconnect F1-4 QDR Fabric Board, follow this procedure:
- Power down the Fabric Interconnect.
- Disconnect all cables attached to the server ports, as well as any other cables that could interfere with the Fabric Board's removal.
-
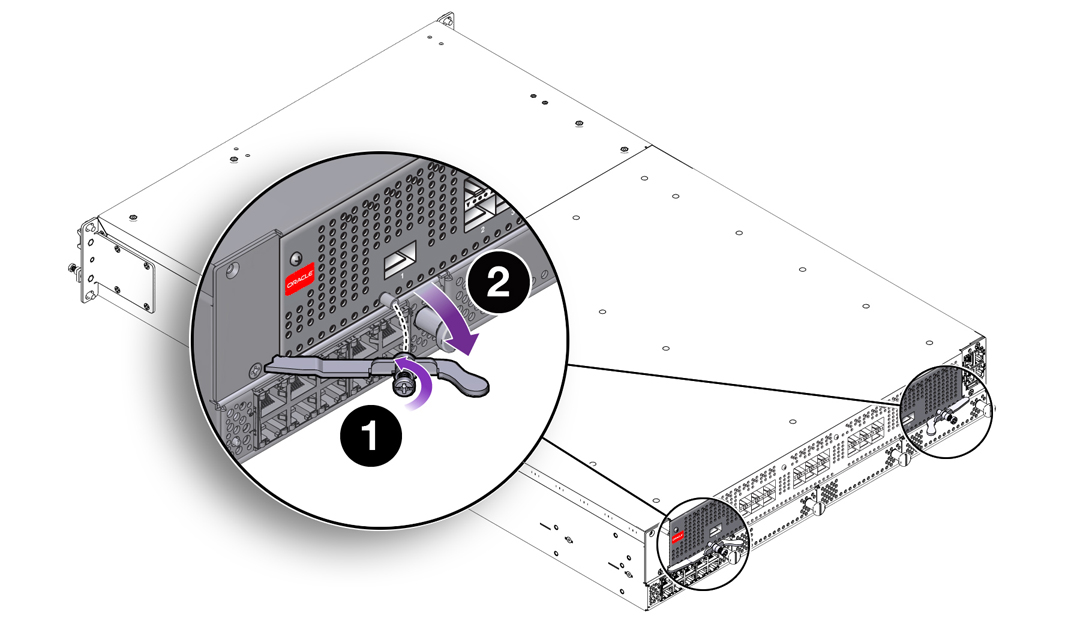
Using a screwdriver, loosen the captive screws in the release levers by
turning them counterclockwise (1). Unlocking the Fabric Interconnect F1-4's Fabric Board.
Figure 79 Unlocking the Fabric Interconnect F1-4's Fabric Board

-
When the screws are loose, grasp the Fabric Board's handles and
simultaneously pivot them outward (2) as shown in Unlocking the Fabric Interconnect F1-4's Fabric Board. The handles act as levers that
disconnect the Fabric Board from the Fabric Interconnect F1-4 midplane. As a
result, you might encounter some resistance when you first apply pressure to
pivot the handles outward.

Caution - Make sure to pivot the Fabric Board handles in a horizontal plane. Do not apply upward or downward pressure on the Fabric Board's handles when you are removing the Fabric Board. You need to pivot the Fabric Board handles outward just until you feel the Fabric Board disconnect from the midplane. Do not force the Fabric Board handles wider than is required to disconnect the Fabric Board.
-
After the Fabric Board has disconnected from the Fabric Interconnect F1-4
midplane, gently slide the Fabric Board out of the chassis, making sure to
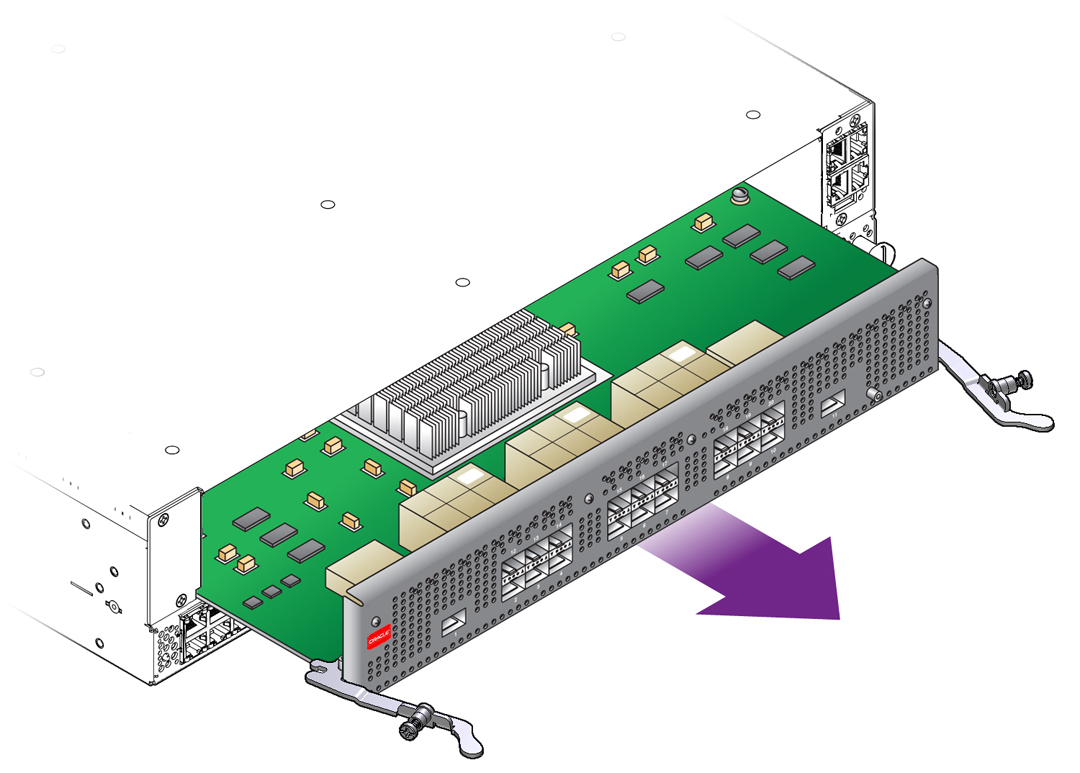
support the Fabric Board from underneath (the sheet metal side). See Removing the Fabric Interconnect F1-4 Fabric Board.
Figure 80 Removing the Fabric Interconnect F1-4 Fabric Board

- Remove the QDR Fabric Board from the packaging, and orient the module so that it is right side up.
-
Orient the QDR Fabric Board so that the sheet metal surface is on the
bottom, and pivot the QDR Fabric Board's handles so that they are pointing
directly towards you—not flush with the module.
At the far end of each of the Fabric Board's handles, notice there is a notch. This notch will meet a part in the chassis, and allow you to lock the Fabric Board into the system midplane and power channel.
-
Supporting the QDR Fabric Board under the sheet metal bottom, hold the
Fabric Board level and align it with the empty Fabric Board bay in the
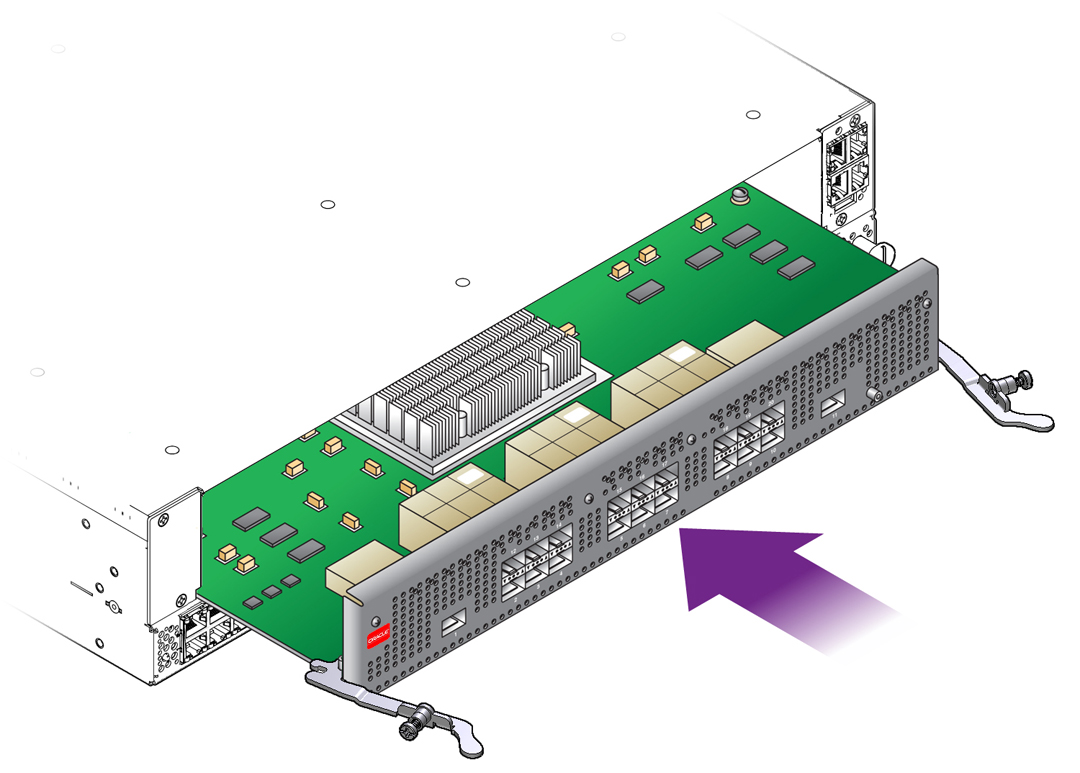
Fabric Interconnect. Inserting a QDR Fabric Board into a Fabric Interconnect F1-4 shows aligning and inserting the Fabric
Board.

Caution - Pay attention to the leading edges of the Fabric Board—the edges that will contact and insert into the chassis first. These edges must be kept horizontal. If you tip one side of the Fabric Board, it possible to insert the Fabric Board incorrectly. Make sure you hold the Fabric Board level while you insert it.
Figure 81 Inserting a QDR Fabric Board into a Fabric Interconnect F1-4

-
When the Fabric Board is properly aligned, gently slide it in until you
feel some resistance, then check the notches at the end of the Fabric
Board's handles to make sure they are contacting the guides on the inside of
the chassis.

Caution - Do not force the Fabric Board into place. If it does not slide in easily, remove it and attempt to insert it again. Make sure that the leading edges are level, and you are keeping the Fabric board level while you slide it in.
-
When the notches and guides are properly positioned, press the Fabric
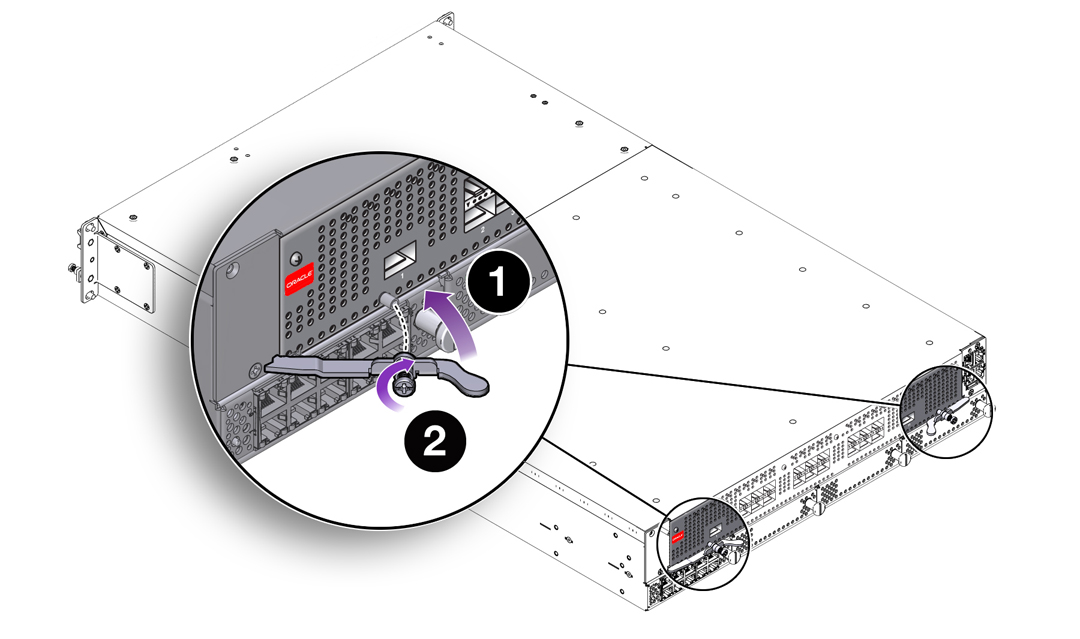
Board's handles inward to seat the Fabric Board (1) as shown in Seating a QDR Fabric Board into a Fabric Interconnect F1-4. The Fabric Board is
properly seated when it and its handles lie flush against the chassis.
Figure 82 Seating a QDR Fabric Board into a Fabric Interconnect F1-4


Caution - Do not force the levers. They should glide easily when properly aligned. If you feel uneven resistance or the release levers do not move easily, gently swing the levers away from each other, partially remove the Fabric Board, and attempt Step 10 through Step 12 in Upgrade a Fabric Interconnect F1-4 to a QDR Fabric Board while paying attention to how the release levers contact the edge of the chassis.
-
When the release levers have correctly locked the QDR Fabric Board into
the chassis, use the screwdriver to secure the captive screws in the release
levers (2).

Caution - When tightening screws, make sure to tighten them to lightly snug. Do not overtighten screws or they can break.
-
Reconnect the Fabric Interconnect to facility power, then power on the
Fabric Interconnect, and allow it to completely boot up.
The Fabric Board will boot, and when the board completes is bootup and passes to runtime, the Power LED will glow. The Power LED does not glow until the Fabric Board is in runtime.