Attach the Right Angle Bracket in a 27” Sun/Oracle Rack
With the chassis on the rail kit, follow these steps to install the right angle brackets for a 27” Sun/Oracle equipment rack:
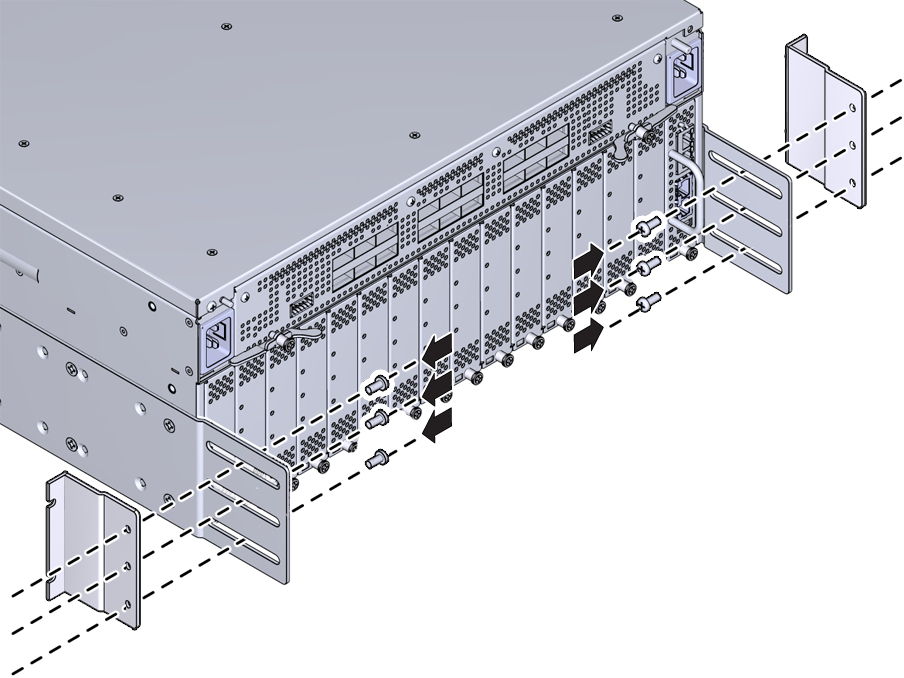
- Align the 27” angle bracket (7068910 Rev 03 or later) so that it is outside of the side panels. Make sure that the angle bracket's fold fits together with the fold in the side panel.
-
From inside the side panels, insert the 10-32 flat-head screws through the
slots in the side panel and into the angle bracket's screw holes. Each angle
bracket requires 3 screws. Attaching Angle Brackets for 27” Rack to the Side Panels shows aligning
the angle brackets and inserting the screws. When the angle brackets are
correctly installed, the slotted surface will lie flush against the rack
posts.
Figure 14 Attaching Angle Brackets for 27” Rack to the Side Panels

Make sure the screw holes in the angle brackets lie flush against the slotted edge of the side panels. The slotted edge of the angle bracket will attach to the rack post.
-
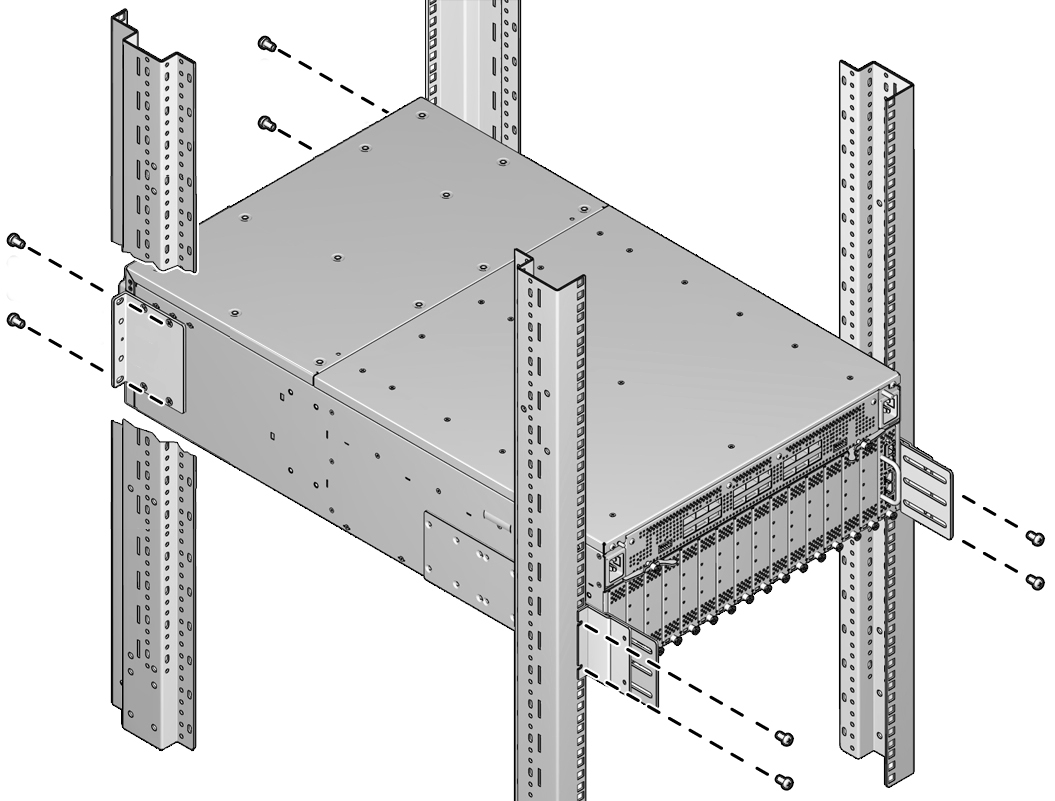
When the angle brackets are installed on the side panel, insert the
pan-head screws (10-32, 12-24, or M6) through the slotted edge of the angle
bracket, into the chassis and tighten the screws to attach the chassis to
the rack. Each point of attachment to the rack requires two screws. Attaching the Chassis to the Rack Posts shows attaching the chassis to the
rack.
Note - The Oracle/Sun 27” rack is untapped, so you will need to use cage clips to attach equipment. You will need to install the M6 cage nuts into the blanks in the rack, then use the M6 screws to secure the equipment into the rack.Figure 15 Attaching the Chassis to the Rack Posts


Caution - When the chassis is completely installed, check all screws to make sure they are tight. If any screws are loose, make sure to tighten them. All screws must be tightened before removing the rail kit.
-
When all screws are tightened, and the chassis is installed and secured to
the rack, you can remove the rail kit.
Note - It is not mandatory to remove the rail kit, but if you do, an extra 1U of vertical rack space becomes available. - Install I/O modules as documented in Installing an I/O Module.
- As an option, you can install the cable management assembly (CMA). If you want to install the CMA, see Installing the Cable Management Assembly.