Replace the Fabric Interconnect F1-4 DDR Fabric Board
The Fabric Interconnect F1-4 Fabric Board is on the rear of the chassis, and connects to a threaded standoff on the mounting bracket.
To replace the Fabric Interconnect F1-4 Fabric Board, you will need a #2 Phillips-head screwdriver.
To remove the Fabric Interconnect F1-4 Fabric Board, follow this procedure:
- Power down the Fabric Interconnect.
- Disconnect all cables attached to the server ports, as well as any other cables that could interfere with the Fabric Board's removal.
-
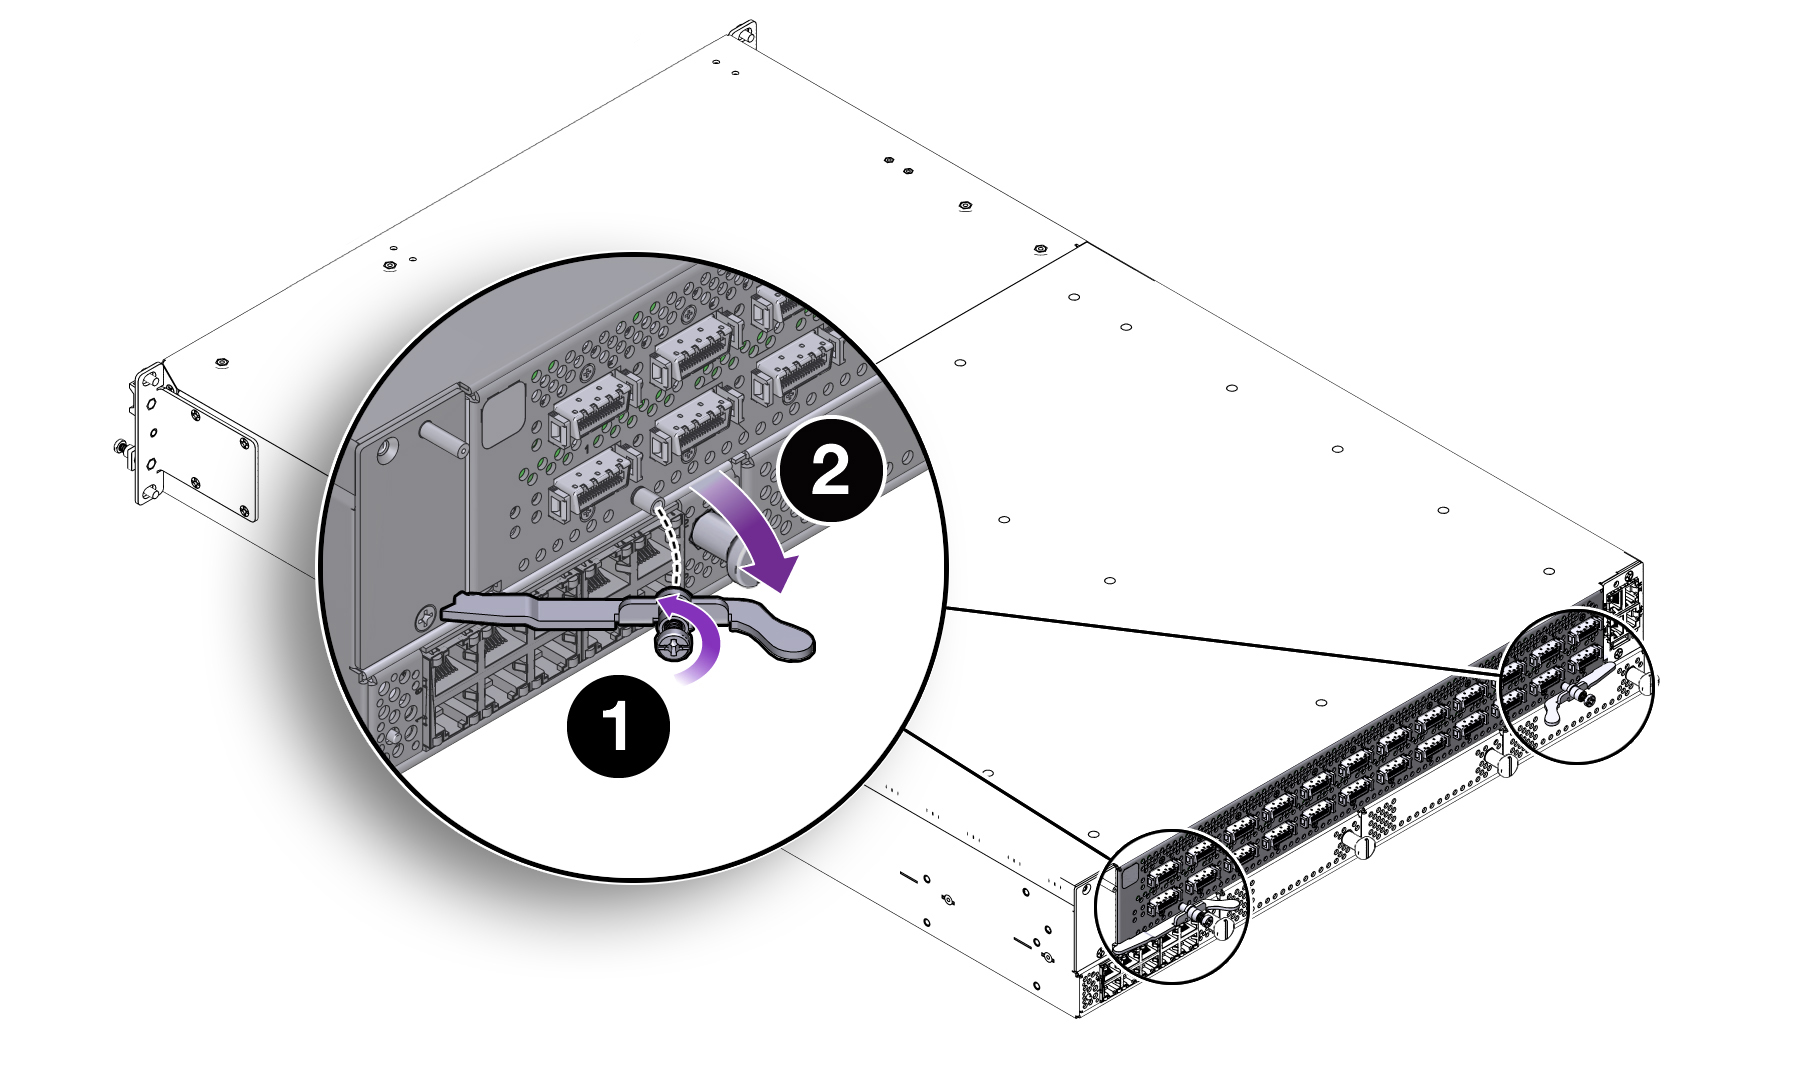
Using a screwdriver, loosen the captive screws in the release levers by
turning them counterclockwise (1). Unlocking the Fabric Interconnect F1-4's Fabric Board.
Figure 71 Unlocking the Fabric Interconnect F1-4's Fabric Board

-
When the screws are loose, grasp the Fabric Board's handles and
simultaneously pivot them outward (2) as shown in Unlocking the Fabric Interconnect F1-4's Fabric Board. The handles act as levers that
disconnect the Fabric Board from the Fabric Interconnect F1-4 midplane. As a
result, you might encounter some resistance when you first apply pressure to
pivot the handles outward.

Caution - Make sure to pivot the Fabric Board handles in a horizontal plane. Do not apply upward or downward pressure on the Fabric Board's handles when you are removing the Fabric Board. You need to pivot the Fabric Board handles outward just until you feel the Fabric Board disconnect from the midplane. Do not force the Fabric Board handles wider than is required to disconnect the Fabric Board.
-
After the Fabric Board has disconnected from the Fabric Interconnect F1-4
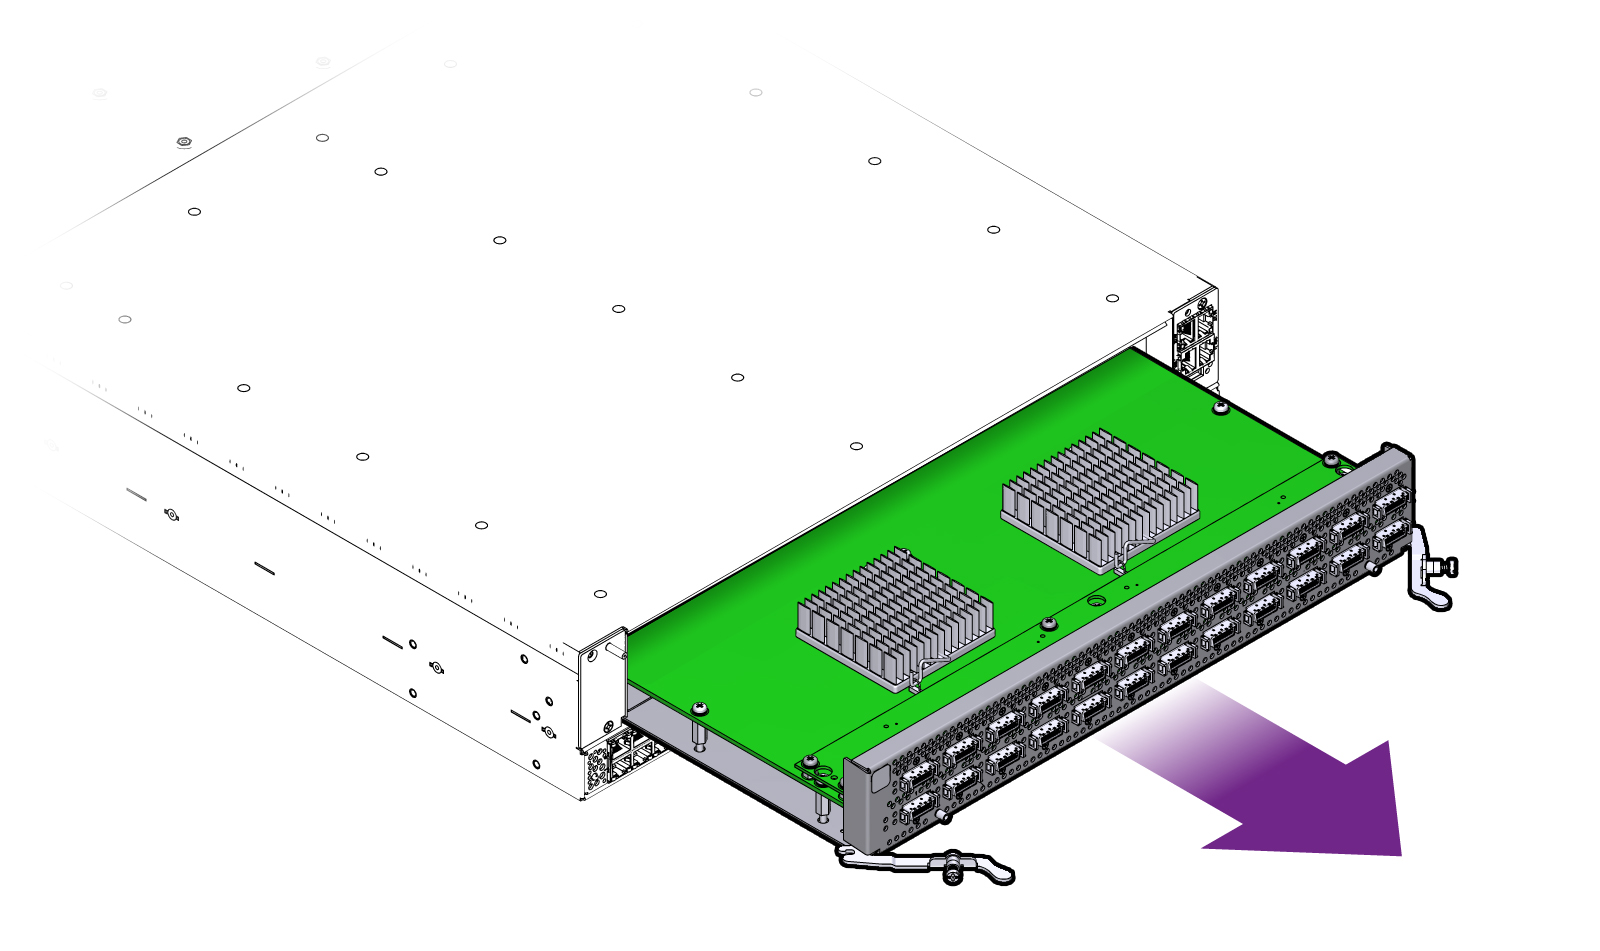
midplane, gently slide the Fabric Board out of the chassis, making sure to
support the Fabric Board from underneath (the sheet metal side). See Removing the Fabric Interconnect F1-4 Fabric Board.
Figure 72 Removing the Fabric Interconnect F1-4 Fabric Board
