Activate approval for roles

When you activate approval for roles, every time a role gets assigned to a user (either in Oracle Life Sciences IAMS or by a self-service registration) an access request is generated. The Customer Delegated Administrator (CDA) with the Approver role must review all access requests and either approve or reject them.

To learn more about access requests and administrator approval, see Manage access requests.

Note:

This task is completed by Oracle as part of your organization's initial set up. However, you can follow the step-by-step instructions in this document in case you need to do it yourself. For example, if new roles get added for your organization. See Tasks that Oracle completes for you.
Before you can activate approvals, you must Request the creation of the Approver role and Create user account for the Approver.
  1. Sign in to Oracle Life Sciences IAMS as described in Bookmark and sign in directly to Oracle Life Sciences IAMS.
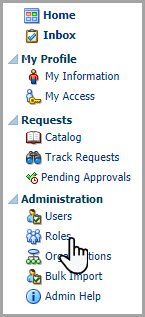
  2. Expand Administration in the left panel and click Roles.
    In the left pane, Roles appears below the Administration heading
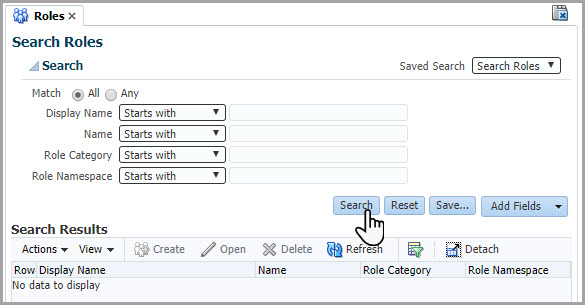
  3. Above the Search Results section, click Search.
    On the Roles tab, the Search button is below the Search section
    All of your organization's roles appear in the Search Results table.
  4. In the list of roles, find the given user role.
    Make sure you repeat these stepas to activate approval for all the necessary roles in all the applicable environments. These are:
    • clinicalone-CNE needed to access Oracle Clinical One Platform
    • clinicalone-CNE_AssignGlobalRoles needed for product administrators that need to assign global roles in Oracle Clinical One Platform.
    • inthub-CNE needed to access Oracle Clinical One Digital Gateway if your organization requires to manage integrations.
  5. Click the link in the Display Name column for the role.
    The role appears in the Search Results section, and you click the value in the Display Name column
  6. In the row of controls at the top of the page, click Set Approval Options.
    The Set Approval Options button appears in a toolbar below the name of the role
  7. In the dialog box, select the following options:
    • Activate Approval
    • Notify the user on request status: When selected, users who request access receive a notification after the access request is approved or rejected.
  8. Click Submit.
    The following message appears: Approval activated for the role.
Next step: Publish the roles.