Step 6 Create a Transition
This step shows you how to create and edit a transition. You can use the diagrammer to drag and drop a transition between states and then edit the transition properties. Any changes made in the diagrammer are immediately saved.
In this step, you will create a transition between State 1 Entry and State 2 See Opportunities that executes after an opportunity record is saved for the first time.
To create and edit a transition:
-
If you haven't already, complete Step 5 Create Actions.
-
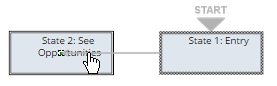
In the diagrammer, hover over the End icon on State 1 Entry. The cursor becomes a filled half-circle.
-
Drag and hover over State 2 See Opportunities. The following screenshot shows how the cursor becomes an arrow and you can drag it to the required state:
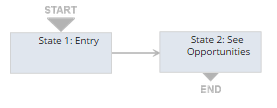
The diagrammer creates a transition when you release the mouse and State 2 Opportunities becomes the new exit (End) state. You can also click and drag the states to new locations. The following screenshot shows a transition between state 1 and state 2:
 Note:
Note:You can also create and edit a transition by editing the state properties for the state that you want to transition from and clicking the New Transition button.
-
Select the transition in the diagrammer and click the Edit icon in the context panel.
-
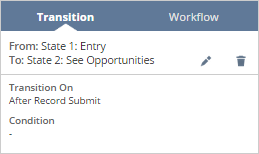
In the Workflow Transition window, select After Record Submit for the Transition On property.
-
Click Save.
-
Make sure that the transition in the context panel matches the following screenshot:
-
To continue with the tutorial, proceed to Step 7 Initiate and Validate the Workflow.