Setting Up the SuiteProjects Pro Exchange Integration
Support for Exchange Integration Manager (EIM) will end on January 13, 2026. After this date, you will not receive any updates, issue fixes, or customer support for EIM.
Effective October 1, 2026, you may not be able to use EIM to integrate SuiteProjects Pro with Exchange Online. The EIM installer and all access to SuiteProjects Pro from EIM may be removed in future.
If your organization uses the EIM desktop application to integrate SuiteProjects Pro with Exchange Online or Exchange Server, switch to an alternative solution before October 1, 2026. For more information, see End of Support for Exchange Integration Manager.
You must configure Exchange Integration Manager before you can use the Exchange Integration Engine to run the integration and transfer SuiteProjects Pro transactions such as task assignments, bookings, and time off requests (or schedule requests) to Microsoft Exchange as a calendar event in user mailboxes.
Use Exchange Integration Setup to configure the SuiteProjects Pro <> Exchange integration.
For an overview of the main Exchange Integration Setup window and menu options, see Exchange Integration Setup Overview
To set up the SuiteProjects Pro <> Exchange integration:
-
Launch SuiteProjects Pro Exchange Integration Setup. To do so, do one of the following:
-
Go to the application installation directory (the default installation directory is
C:\Program Files (x86)\SuiteProjectsPro\ExchangeManager). Click SuiteProjectsProExchange.exe. -
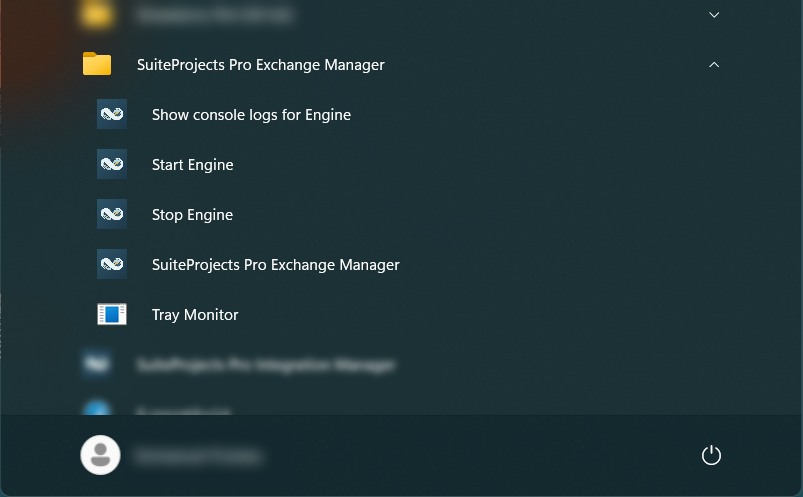
Go to the Windows start menu, scroll down to SuiteProjects Pro Exchange Manager, expand the program folder and click SuiteProjects Pro Exchange Manager.

-
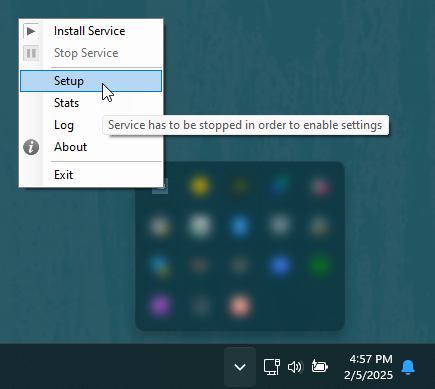
If you installed Exchange Integration Manager 5.0 or later version and selected Start tray monitor now during the installation, right-click the SuiteProjects Pro Icon in the taskbar system tray and click Setup.

-
-
Enter the details to connect Exchange Integration Manager with your SuiteProjects Pro account. See Connecting Exchange Integration Manager with your SuiteProjects Pro account.
-
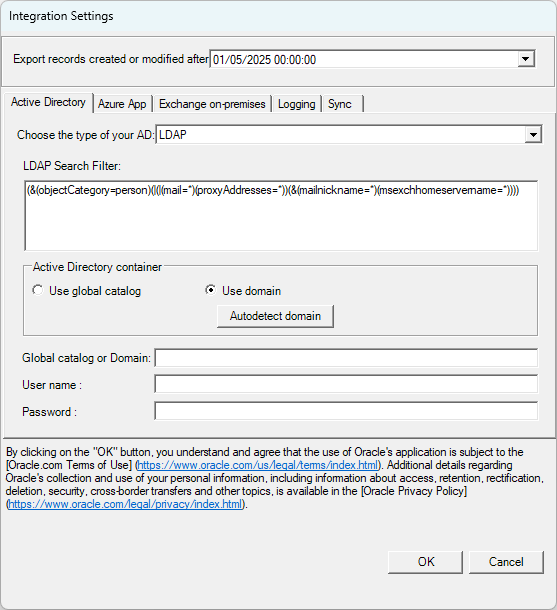
Go to Options > Integration Settings.
The Integration Settings window appears.

-
Select a date from the Export records created or modified after dropdown list. When running the SuiteProjects Pro <> Exchange integration, only the task assignments, bookings, and time off requests created or modified after this date are exported to user mailboxes as calendar events.
-
Enter the details to connect Exchange Integration Manager with Active Directory and Exchange.
You can use the SuiteProjects Pro <> Exchange integration with an on-premise Windows domain network configuration, a cloud-based environment, or an hybrid configuration. See Infrastructure.
-
Before you can connect Exchange Integration Manager with Microsoft Entra ID (formerly Azure Active Directory), Exchange Online, or both, register Exchange Integration Manager with the Microsoft identity platform. See Registering Exchange Integration Manager With Microsoft Identity Platform.
-
Enter the details to connect Exchange Integration Manager with Active Directory (on-premise) or Microsoft Entra ID. When connected, Exchange Integration Setup sources user mailbox information from Active Directory or Microsoft Entra ID. You can also enter user mailbox information manually or import it from a CSV file. See Editing Exchange User Mailbox Information.
-
On-premise Active Directory - For more information, see Connecting Exchange Integration Manager with On-Premise Active Directory Using LDAP.
-
Microsoft Entra ID - For more information, see Connecting Exchange Integration Manager with Microsoft Entra ID or Exchange Online.
-
-
Enter the details to connect Exchange Integration Manager with Exchange. You can use Exchange Integration Manager to exchange information between SuiteProjects Pro and user mailboxes that are stored in on-premise Exchange Server organizations, in Exchange Online Organizations, or in a combination of both Exchange Server and Exchange Online organizations.
-
On-premise Exchange (mailboxes stored in Exchange Server organizations) - For more information, see Connecting Exchange Integration Manager with On-Premise Exchange Server.
-
Exchange Online (mailboxes stored in Exchange Online organizations) - For more information, see Connecting Exchange Integration Manager with Microsoft Entra ID or Exchange Online.
-
-
-
(Optional) Configure Exchange Integration Manager to send integration log automatically by email. See Sending Exchange Integration Manager Logs to a Designated Email Address.
-
(Optional) Enable and configure the bidirectional integration. You can use the bidirectional integration or Exchange <> SuiteProjects Pro synchronization to import calendar events created by a user in an email client into SuiteProjects Pro as bookings for that user, and update these bookings when changes are made to the calendar events in the email client. See Configuring the Synchronization of SuiteProjects Pro Bookings and Exchange Calendar Events.
-
(Optional) Map booking types in SuiteProjects Pro to specific "Show As" designation for the calendar event in Exchange user mailboxes so that the resulting calendar event shows as Free, Tentative, Busy, or Out of Office, depending on the booking type. You can also exclude bookings from the export, depending on the booking type. See Mapping SuiteProjects Pro Booking Type to Exchange Calendar Event 'Show As' Designation.
-
Map SuiteProjects Pro user and Exchange user mailbox information using the table on the main Exchange Integration Setup window. See Mapping SuiteProjects Pro Users and Exchange User Mailboxes.
-
Click File > Save to save the integration configuration and mapping information.
-
Click File > Exit to close Exchange Integration Setup.
-
(Optional) Review and change advanced settings in the Windows registry. See Exchange Integration Manager Registry Settings.