How to Use External Routing

You configure an external routing service that dynamically determines the participants in the workflow. If this routing policy is specified, all other participant types are ignored. It is assumed that the external routing service provides a list of participant types (single approver, serial approver, parallel approver, and so on) at runtime to determine the routing of the task.

Use this option if you do not want to use any of the routing rules to determine task assignees. In this case, all the logic of task assignment is delegated to the external routing service.

Note:

If you select Use External Routing in the Configure Assignment dialog box, specify a Java class, and click OK to exit, the next time you open this dialog box, the other two selections (Route task to all participants, in order specified and Use Advanced Rules) no longer appear in the drop-down list. To access all three selections again, you must delete the entire assignment.

To use external routing
  1. Drag and drop External Routing Service from the Workflow Editor Components window.

    The Use External Routing edit box displays.

  2. Click the Edit icon.

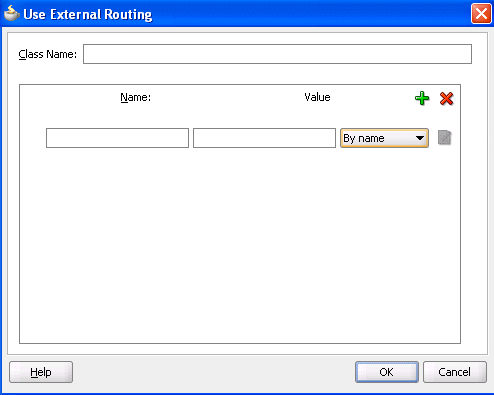
    The External Routing dialog box appears, as shown in Figure 29-45.

    Figure 29-45 Use External Routing Dialog

    Description of Figure 29-45 follows
    Description of "Figure 29-45 Use External Routing Dialog"
  3. In the Class Name field, enter the fully qualified class file name (for example, the org.mycompany.tasks.RoutingService class name). This class must implement the following interface:
    oracle.bpel.services.workflow.task.IAssignmentService
    
  4. Add name and pair value parameters by name or XPath expression that can be passed to the external service, as shown in Table 29-14.

    Table 29-14 External Routing

    Field Description

    By Name

    Enter a name in the Name field and a value in the Value field.

    By Expression

    Enter a name and dynamically enter a value by clicking the icon to the right of the field to display the Expression Builder dialog box.

  5. Click the Add icon to add additional name and pair value parameters.