3 EPAP Graphical User Interface
This chapter provides a detailed description of the EPAP Graphical User Interface (GUI).
3.1 Overview of EPAP Graphical User Interface (GUI)
EPAP uses a Web-based user interface in a typical client-server paradigm. The front end appears on a Web browser. See Compatible Browsers for supported browsers. The back end operates on the MPS platform.
The graphical user interface display has three different sections:
- Banner header section for displaying the real-time status of the MPS servers
- Menu section for selecting desired actions
- Work area section for filling out requested information and displaying results
The banner header sections communicate directly with the GUI Server process on the MPS. The menu and work area sections primarily consist of CSS3 and HTML5 generated by Ajax and CGI (Common Gateway Interface) scripts on the back end. Perl socket programming, along with CGI scripts, are used for the watchers. The banner displays the current EPAP IP and Status, PDBA IP and Status, Timer, Oracle Logo, Watchers, Alarm Indicators and Message History. The banner contains the EPAP A and B areas, both PDBA areas, and the busy icon.
An http or https (Hypertext Transfer Protocol) Web server starts the process of handling requests from browsers. It receives the requests and loads the document. If the document is a simple HTML file, the http or https Web server returns the document to the browser. The EPAP software may also connect with the GUI server to request actions be performed. HTML output from the script is returned to the browser and displayed.
For GUI differences related to Standalone PDB EPAP, see Standalone PDB EPAP.
Figure 3-1 shows the architecture view of the EPAP user interface.
Figure 3-1 Process Architecture View of the EPAP UI

3.1.1 EPAP Support for HTTPS on GUI
The EPAP Support for HTTPS on GUI feature allows users to configure how the GUI can be accessed: by standard HTTP (Hypertext Transfer Protocol), by HTTPS (Secure Hypertext Transfer Protocol), or by both.
In standard HTTP protocol, the data transfer between the web server and the GUI is not encrypted; therefore, it can be captured by any network analyzer and viewed.
Secure HTTP (HTTPS) supports encryption of data exchanged between the web server and the browser.
EPAP allows admin user group members to configure the EPAP GUI. The admin group user can disable HTTP. The ability to configure HTTP and HTTPS and the ability to disable HTTP can be limited to a specific user class or group.
Starting the Non-secure Web-based GUI
To start the non-secure web GUI, first start a web browser (Chromium-based Edge browser). In the Address field, enter one of the following URLs and press Go:
-
http://<EPAP_server_IP_address>/ -
< EPAP_server_IP_address> -
< EPAP_server_hostname>
If the HTTP interface is disabled, the browser displays an error message.
Note:
GUI cannot be opened using the server hostname for Segmented PDBonly EPAP as the hostname and the alias for GUI interface in the /etc/hosts do not match.Starting the Secure Web-based GUI
To start the secure web-based GUI, first start a web browser (Chromium-based Edge browser). In the Address field, enter any of the following URLs and press 'Go':
- https://<EPAP_server_IP_address>/
- https://<EPAP_server_hostname>/
If the HTTPS interface is disabled, the browser displays an error message.
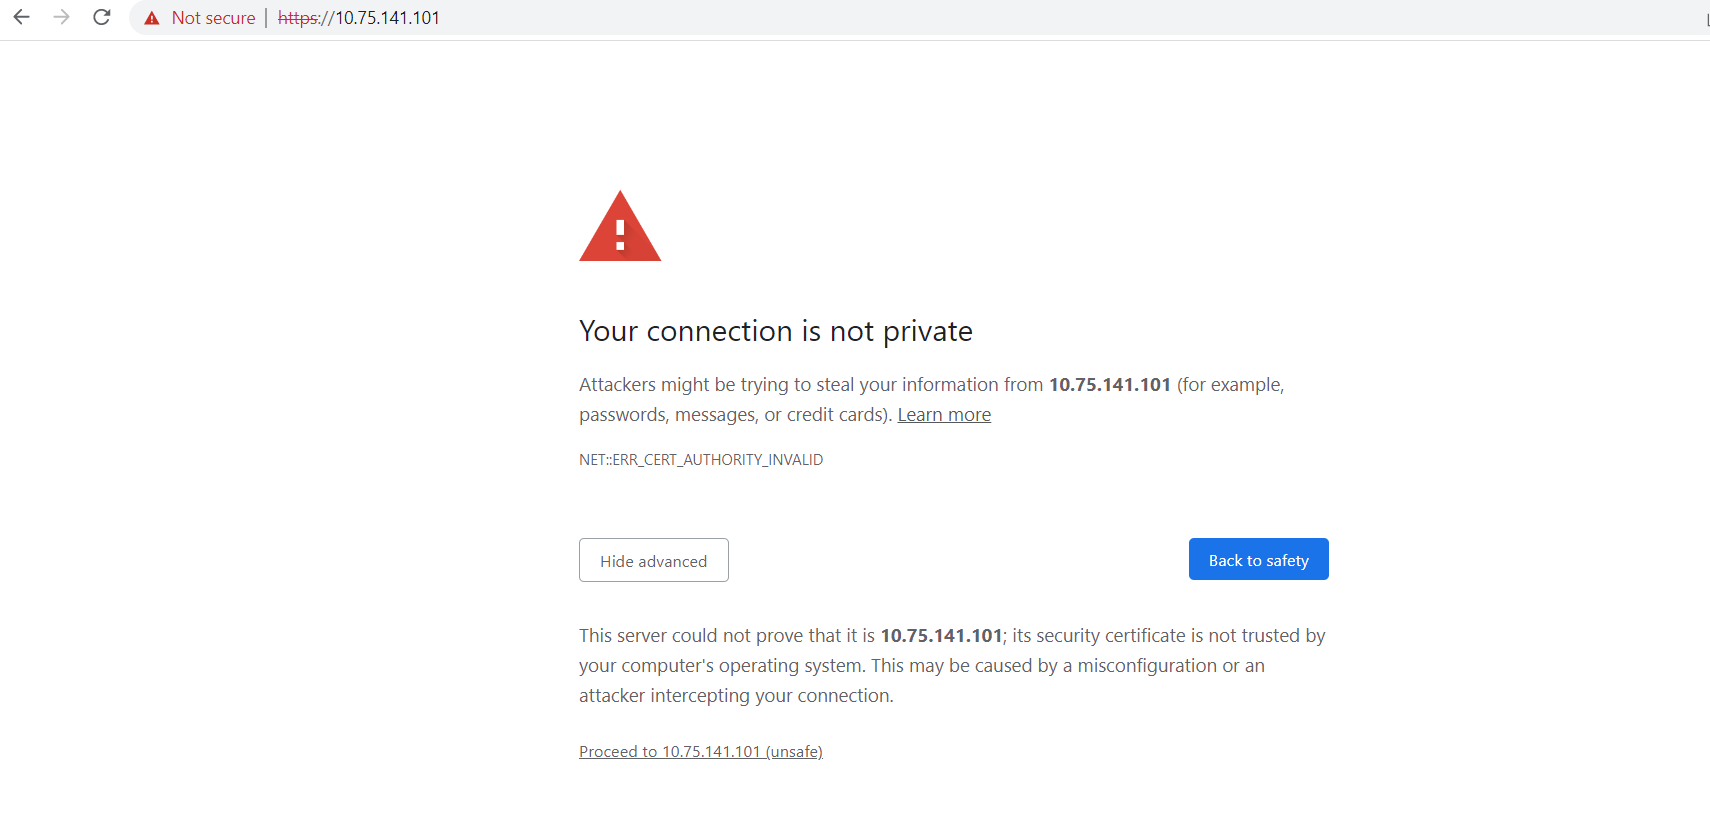
Opening HTTPS Mode Without Installing Security Certificate
Opening the EPAP GUI in HTTPS mode without installing the security certificate causes the following menu tabs to fail to open:
Process Control
- Start Software
- Stop Software
Maintenance
- Force Standby
- View Status (Mixed EPAP)
- Change Status (Mixed EPAP)
- Decode MPS Alarm
- RTDB Audit
- View Enabled (Mixed EPAP)
- Change Enabled (Mixed EPAP)
- Automatic PDB/RTDB Backup
- EPAP Security
- View Security Configuration
- Change Security Configuration
RTDB (Mixed EPAP menu)
- Maintenance
- Reload from Remote
- Backup RTDB
- Restore RTDB
- Configure Record Delay
Debug
- Capture Log Files
- Manage Logs & Backups
- Set Debug Levels (Mixed EPAP)
Platform
- Run Health Check
- Reboot the MPS
PDBA
- Process Control
- Start PDBA Software
- Stop PDBA Software
- View PDBA Status
- Manage Data
- IMSI Range
- Add
- Update
- Delete
- Prov BL
- Add
- Delete
- Retrieve
- IMSI Range
- Authorized IP List
- Add Authorized IP
- Modify Authorized IP
- Removed Authorized IP
- Maintenance
- Backup
- List Backups
- Backup the PDB
- Restore the PDB
- Transaction Log Params
- View Params
- Change Params
- Number Prefixes
- View Prefixes
- Change Prefixes
- Logs
- Set Log Params
- Backup
User Administration
- Authorized IPs
- Add Authorized IP
- Removed Authorized IP
- Change UI IP Authorization
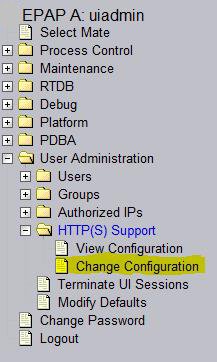
- HTTP(S) Support
- Change Configuration
- Modify Defaults
Note:
GUI cannot be opened using the server hostname for Segmented PDBonly EPAP as the hostname and the alias for GUI interface in the /etc/hosts do not match.3.1.1.1 Enabling HTTPS and Installing Security Certificate
This procedure configures the PDB databases on an Active Site. Perform the following procedure to enable HTTPS and install the Security Certificate.
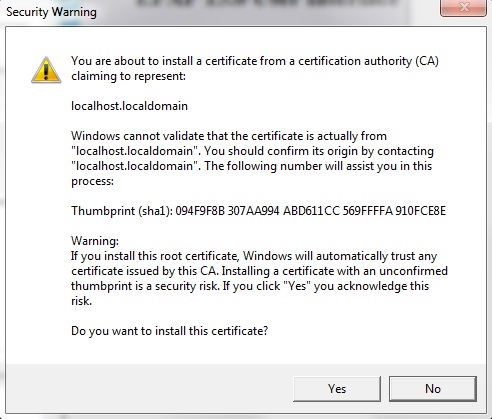
To access the EPAP GUI on Chromium-based Edge Browser in secure mode (https), exceptions are required for two ports: 443 and 8002.
The exception for port 443 is automatically added. The exception for port 8002 must be manually added by completing the following steps:
- Open Mozilla Firefox.
- Select .
- Select .
- Select the Servers tab, then select Add Exception.
- Enter https://<server_gui_ip>:8002 and select Get Certificate to add the port exception.
- Select Confirm Security Exception to finish.
Note:
The user must complete the port exception steps for both IPv4 and IPv6 server IPs.
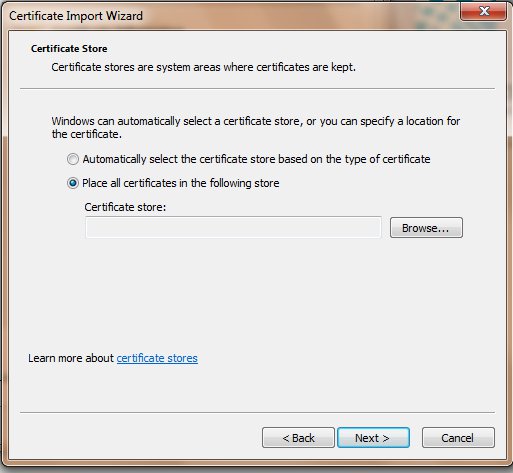
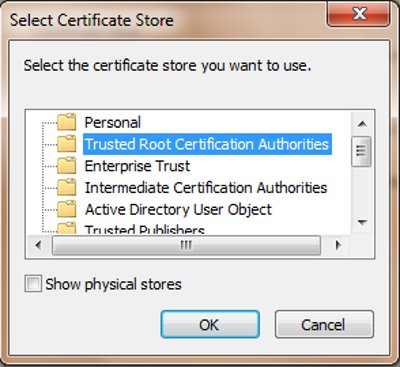
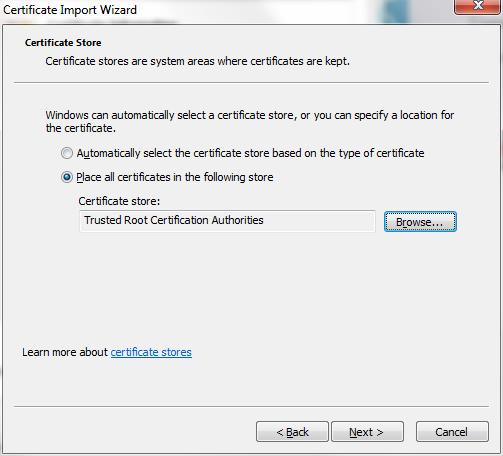
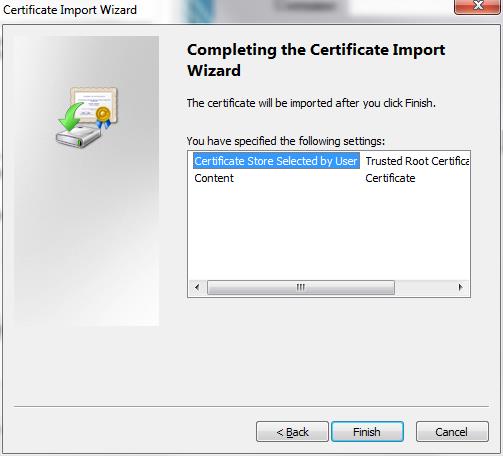
To install the certificate on Microsoft Edge®, complete the following steps:
- Start Microsoft Edge®.
- Install the certificate on Microsoft Edge®.
- Close Edge and open the GUI again to check if the certificate is installed.
To open the EPAP GUI with IPv6 IP on Microsoft Edge®, complete the following steps:
- Start Microsoft Edge®.
- Select .
- Select the Connections tab, then select LAN Settings.
- Uncheck all boxes under Automatic configuration and ensure the box for Use a proxy server for your LAN is unchecked. Click OK.
- Close the current sesson of Microsoft Edge®.
- Open a new session of Edge and open the IPv6 GUI.
3.1.2 Login Screen
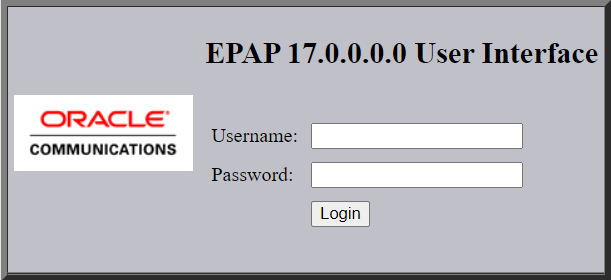
The first screen of the EPAP User Interface (UI) is the login screen. Two fields are prompted for on this screen: Username and Password. To log in, enter a valid user name and password, then click the Login button. These fields provide the user identification and verification.
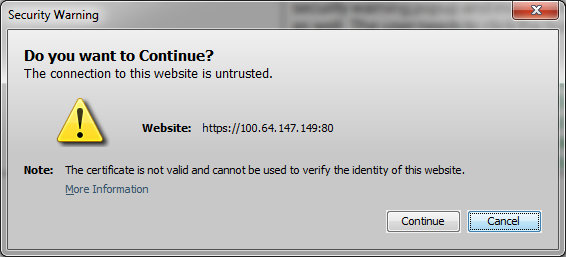
After logging in, a Security Warning dialog box alerts the user that the connection is untrusted. The user clicks Continue to proceed to the second Security Warning dialog box.
Figure 3-18 Security Warning for Untrusted Connection
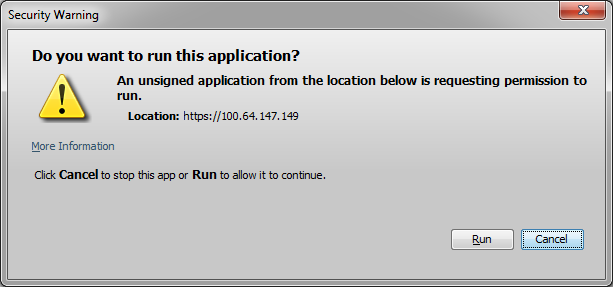
The second Security Warning dialog box asks the user whether to run the unsigned application. The user clicks Run to run the application.
Figure 3-19 Security Warning for Unsigned Application
When a user logs in successfully, the screen workspace indicates that the user is logged in.
When a user logs into the EPAP UI, the user does not need to log in again if the web browser session remains active and if no user in the admin user group changes the HTTPS configuration. Subsequent user authentication is handled with cookies, which are stored in the browser of the user and are retained during the browser operation. If a user in the admin user group changes the HTTPS configuration from only HTTP to only HTTPS, all logged -n users are disconnected. Similarly, if a user in the admin user group changes the HTTPS configuration from only HTTPS to only HTTP, all logged-in users are disconnected. For more information, see EPAP Support for HTTPS on GUI.
The user uses the Logout menu option to terminate the session. Alternatively, the user can be logged out by session inactivity (interval defined by User Administration), by disabling in the HTTP or HTTPS configuration, by administrator termination, and by selection of another window using another independent browser.
3.1.3 EPAP GUI Main Screen
The EPAP graphical user interface main screen is composed of three frames, or window sections. The topmost frame is the banner. The banner frame extends the entire width of the browser window. The remainder of the browser window is divided vertically into two frames of unequal width. The smaller frame on the left is the menu section. The larger frame on the right is the workspace section.
EPAP Banner Components
The EPAP A and EPAP B areas contain information and displays to inform the user about the status and operation of the servers.
Figure 3-20 EPAP GUI
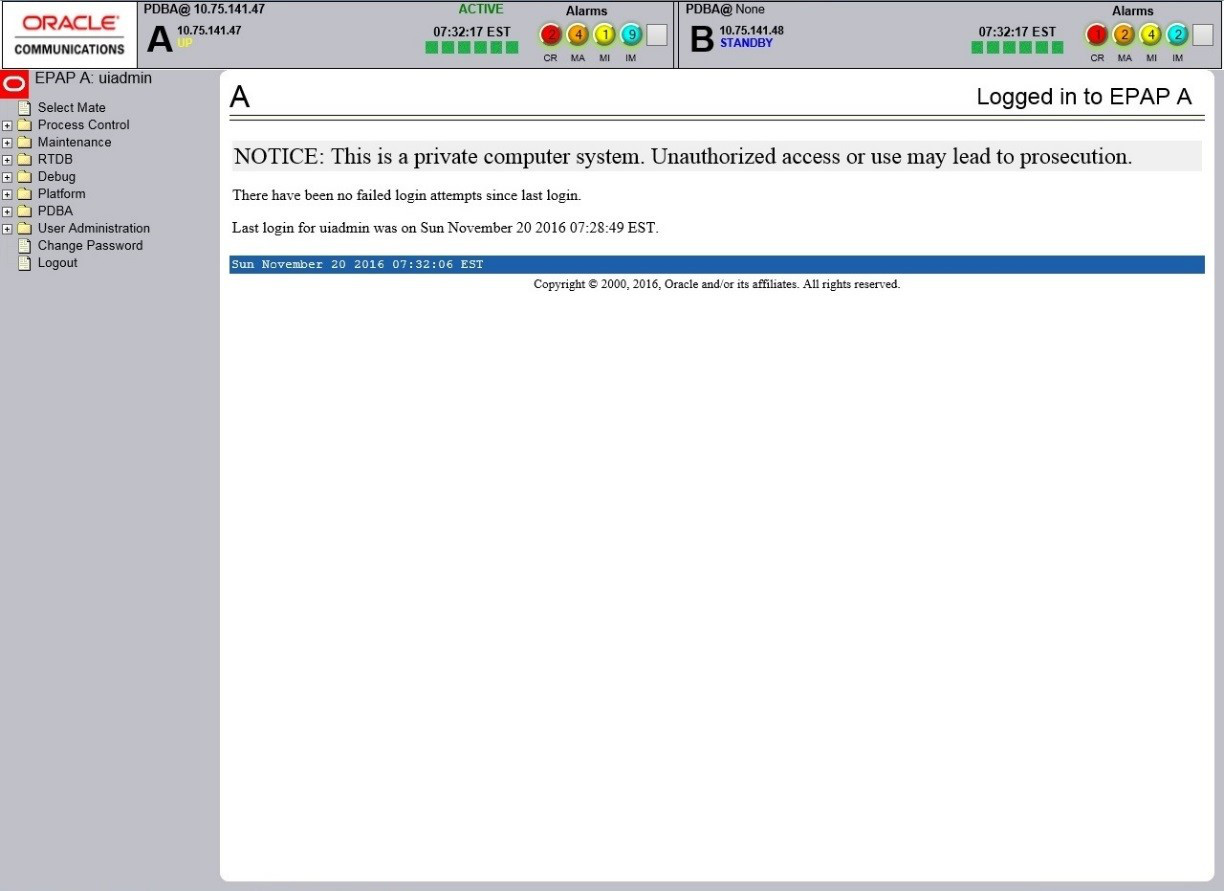
Tool tips are displayed for all EPAP banner components. Tool tips are activated when the mouse cursor (mouse-over event) is placed over the component. Each tip is unique to the banner component. The components of the EPAP Banner are displayed in Figure 3-21:
Figure 3-21 EPAP Banner Components

PDBA and EPAP Status
The first row of the EPAP banner displays the PDBA details with PDBA IP and its status. This displays the details of both the Local PDBA and Remote PDBA. The color coding is applied for the different statuses of the PDBA, as seen in Table 3-1.
Table 3-1 PDBA Status
| Status | Description | Color Code |
|---|---|---|
| NONE | No established connection currently exists to the EPAP GUI server. This can result because of connectivity problems or because the GUI server is not running | Black |
| DOWN | EPAP was contacted, but the PDBA software is not running | Red |
| STANDBY | PDBA software is running as STANDBY | Blue |
| ACTIVE | PDBA software is running as ACTIVE | Green |
| REPLERR | PDBA detected presence of a PDB replication failure | Red |
| ACTIVE (By Proxy) | PDBA is running on EPAP B using the PDBA Proxy feature, when EPAP A goes down | Green |
| TERMINATED | Connection has been closed by the server | Red |
The second row of the EPAP banner displays the EPAP details. This includes the MPS side, MPS IP, MPS status, Timer, Alarm Indicators, Message History, Watchers (if enabled) and acronyms for alarms and informational messages (CR, MA, MI and Info Msg). This MPS panel is dependent on the EPAP configuration. There are two panels for mixed EPAP configuration (both for MPS A and MPS B) and a single panel for PDBonly configuration (MPS A). The different statuses of the EPAP are seen in Table 3-2.
Table 3-2 EPAP Status
| Status | Description | Color Code |
|---|---|---|
| NONE | No established connection currently exists to the EPAP GUI server. This can result because of connectivity problems or because the GUI server is not running | Black |
| DOWN | The maintenance task is not running. The box may be running or not | Red |
| UP | The maintenance task is running (UP), but the EPAP is experiencing some problem that prevents is from becoming ACTIVE or STANDBY. This condition can result from a hardware, software, or database problem | Yellow |
| FORCED STANDBY | This EPAP has been forced into standby state by the user | Yellow |
| ACTIVE | This EPAP is actively responsible for provisioning the Service Module cards with data. It is also the machine that has the connection to the primary Service Module cards for the passage of maintenance and alarm information | Green |
| TERMINATED | Connection has been closed by the server | Red |
Alarm Functionality
The first three indicators (from left) are the alarm indicators on the EPAP GUI. These indicators displays the number of respective alarms on the EPAP. The left indicator indicates the Critical alarms; it turns red when a Critical alarm occurs. The middle indicator indicates the major alarms, and turns orange when a Major alarm is raised. The right indicator indicates the Minor alarm, and turns yellow when Minor alarm is raised. A maximum of 99 alarm counts can be displayed, considering the sum of all 3 alarm types. The indicator will remain brown if no alarm of that type is raised on the EPAP, as seen in Figure 3-22.
Figure 3-22 EPAP GUI With No Raised Alarms

Clicking on any of the alarm indicators displays the details of each prevailing alarm on the EPAP, depending on which alarm indicator is clicked, in a new window. The new window with alarm details will remain persistent until either the GUI is terminated or the user logs out of the GUI. The user will have to close all opened alarm windows manually. The details of alarm include:
- Alarm severity and type (heading)
- Alarm name
For more information about the alarm categories, refer to Decode MPS Alarm.
Information Messages
The fourth indicator (from left) for each MPS side is the informational messages indicator. It displays all the current informational banner messages on the EPAP system. It also displays the number of informational banner messages on the EPAP. A max total of 99 information banner messages can be displayed on the indicator. The information message indicator will remain brown if there is no information banner message on EPAP. Clicking on the indicator will display the details of each informational banner message in a new tab. The details include:
- Time when the banner message was raised
- Information banner message
Timer
The time, along with the time zone, is displayed on the MPS panel. It displays the time of the MPS on MPS A and MPS B (not on PDBonly configuration). The time will change dynamically on the MPS panel. The time zone displayed will be the time zone that is configured on the EPAP.
Watchers
The watchers are the utility on the EPAP that provides the information about the processes running on the EPAP system. The processes that are monitored by watchers including the following (in the order from left to right):
- PDBA
- Topnode A
- Topnode B
- Prov
- RTDB
- Maint
- PDBA Proxy (only on EPAP B)
When the above processes are working as expected, these watchers are green in color; otherwise, the watchers turn red if there is some error in any of the processes. These watchers are optional for the user. By default the watchers will be disabled and it not visible on the EPAP GUI. It can be enabled/disabled by the user by executing the $ /usr/TKCL/epap/bin/setDebug <EPAP GUI User> <Enable/Disable Flag> command, where Flag is either 0 (disable) or 1 (enable).
The user will have to re-open the GUI (with the user for which the watchers have been enabled/disabled) to see the change on the EPAP GUI.
Figure 3-23 EPAP GUI With Watchers When Processes Are Not Running
Banner Sessions
The banner session works according to the banner session termination value. The session will remain valid according to the idle timeout value or session timeout value. If the banner is kept idle for more than the idle timeout value, then it will be terminated, resulting in updating the banner components value with a terminated status on the GUI banner.
Figure 3-24 EPAP GUI Terminated Session
Menu Section
The EPAP graphical user interface menu is located in the left frame of EPAP browser interface. At the top of the frame is the software system title, EPAP, and a letter designation of the selected MPS machine, either A or B. One or more submenus appear below the title, depending on the access privilege of the user who views the menu. An icon accompanies the name of each submenu.
By clicking on the name or folder icon of a directory, the user may expand and contract the listing of submenu contents in the typical “tree-menu” fashion. Directory contents may be either menu actions or more submenus. When you click the Menu actions, the output is displayed in the workspace section, which is the right frame of EPAP browser interface.
Workspace Section
The results of menu actions are displayed in the workspace section. The content of the workspace section can be various things such as prompts or status reports. Every menu action that writes to the workspace uses a standard format.
The format for the workspace is a page header and footer. In the header, the left-justified letter A or B designates which MPS server this menu action affects. The right-justified menu will also display the action title. The footer consists of a bar and text with the time when the page was generated, as well as Oracle copyright notice information.
Workspace Syntax Checking
The web browser user interface uses layers of syntax checking to validate user input for text-entry fields.
- Mouse-over syntax check: For many of the entry fields, a list of syntax hints can be displayed when the mouse is moved over the field.
- Pop-up syntax checking: When the Submit button is clicked, syntax is verified on the client side by code running on the user's browser. Incorrect syntax appears in a pop-up window, which contains a description of the syntax error. When the window is dismissed, the error can be corrected, and the input submitted again.
- Back-end syntax checking: When the Submit button has been clicked and the client side syntax checking has found no errors, back-end syntax checking is performed. If back-end syntax checking detects an error, it is displayed in the work space with an associated error code.
3.2 EPAP Graphical User Interface Menus
The EPAP menu is the main menu of the EPAP application. It provides the functions of the EPAP User Interface. Figure 3-25 shows the EPAP main menu.
Figure 3-25 EPAP Menu
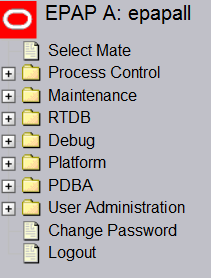
The EPAP menu provides three actions common to all users: Select Mate, Change Password, and Logout. All the remaining actions are options assignable by the system administrator to groups and individual users.
Table 3-3 Summary of IPv6 Support on Different Features
| Feature | Supported Configuration |
|---|---|
| Configure File Transfer | IPv4 or IPv6 |
| Auto PDB/RTDB backup | IPv4 or IPv6 |
| PDBA Authorized IP | All IPv4 or all IPv6 or Mixed |
| EPAP Authorized IP | All IPv4 or all IPv6 or Mixed |
| Static NAT Addresses | IPv4 only |
3.2.1 Select Mate
The Select Mate menu selection changes the menus and workspace areas to point to the EPAP mate. This selection exchanges the status of the active and standby EPAPs. This basic action is available to all users and is accessible from the main menu (Figure 3-25).
If you are using EPAP A at the main menu, and you want to switch to EPAP B, you click the Select Mate button on the main menu. The initial sign-on screen for the alternate server will be displayed.
The Select Mate action does not cause the contents of the banner to change. However, the side (server) changes in the workspace and at the top of the menu area to indicate the active EPAP.
3.2.2 Process Control Menu
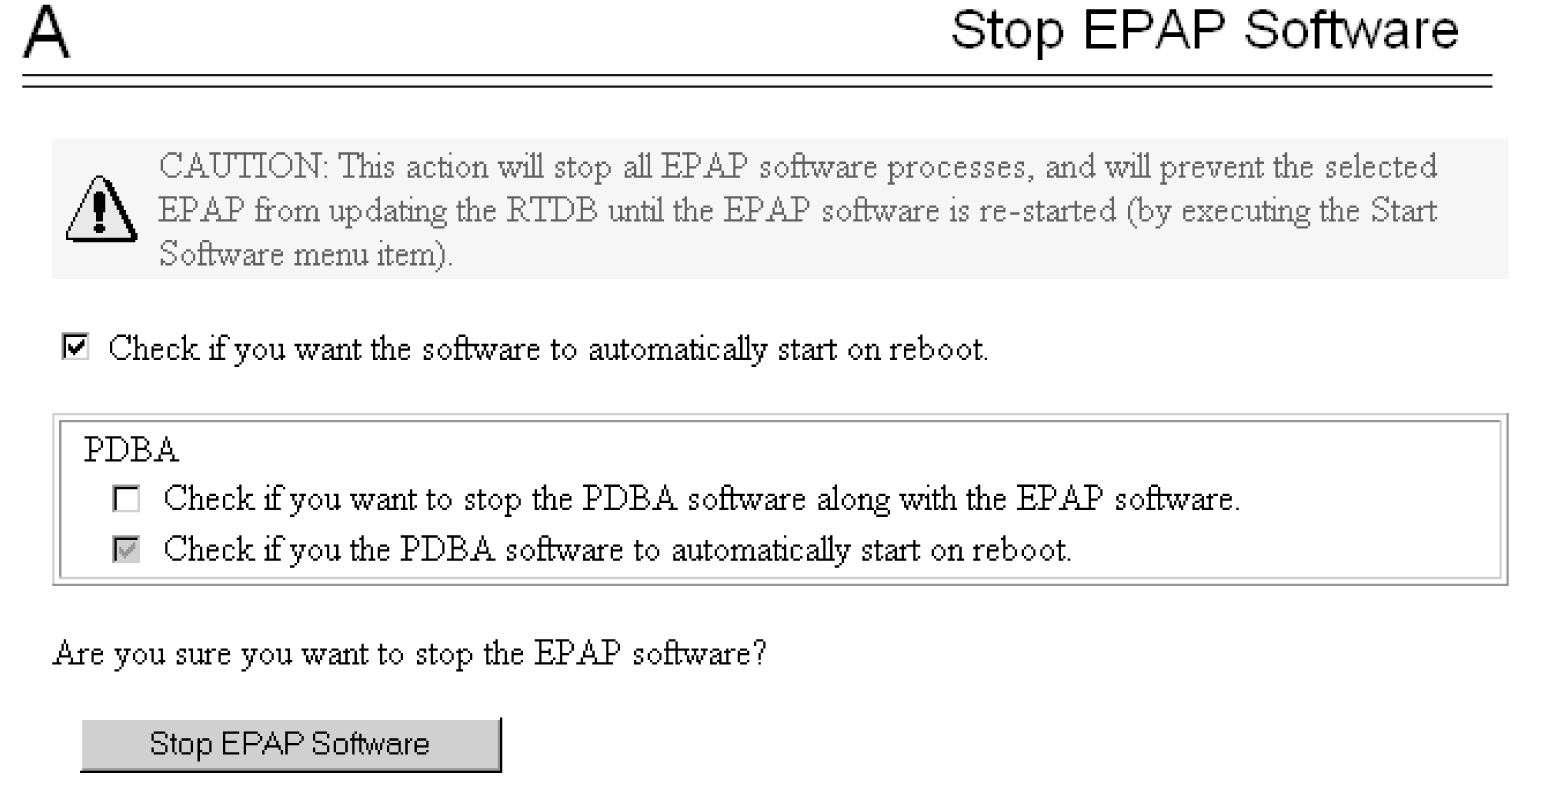
The Process Control menu provides the start and stop software actions.
Start EPAP Software
The Start EPAP Software menu option contains a button to confirm that you do want to start or stop the software processes and a checkbox to start the PDBA.
3.2.3 Maintenance Menu
3.2.3.1 Force Standby
The Maintenance / Force Standby menu gives the user the ability to view the EPAP status and change the status.
The Force Standby menu provides the following actions:
View Status
The View Status screen displays whether or not EPAP is currently in a forced standby state.
Figure 3-27 View Forced Standby Status Screen

Change Status
The Change Status screen displays the current state of the selected EPAP. If the EPAP is not currently in forced standby mode, this screen lets the user force it into standby mode.
If the EPAP is currently in forced standby mode, the user can remove the standby restriction on the selected EPAP. See the Change Forced Standby Status screen.
Figure 3-28 Change Forced Standby Status Screen

Table 3-4 Rules for Change Forced Standby Status
|
Semantic Rules |
Error Code |
|
|
A connection to the EPAP maintenance process must be available |
E1005 |
|
|
Other Messages |
||
|
Condition |
Message Text |
|
|
Standby restriction removed |
Forced standby restriction removed from EPAP <selected EPAP>. |
|
|
Forced standby completed |
EPAP <selected EPAP> now in forced standby mode |
|
3.2.3.2 Display Release Levels
Transaction Log Menu
The Transaction Log menu consists of:
-
Retrieve Entries
-
Export to File
Retrieve Entries Screen
The Retrieve Entries screen lets the user retrieve log entries from the transaction log. The user is prompted for the start and end time range, along with the maximum number of records to display to the screen.
Figure 3-29 Retrieve Entries from Transaction Log Screen
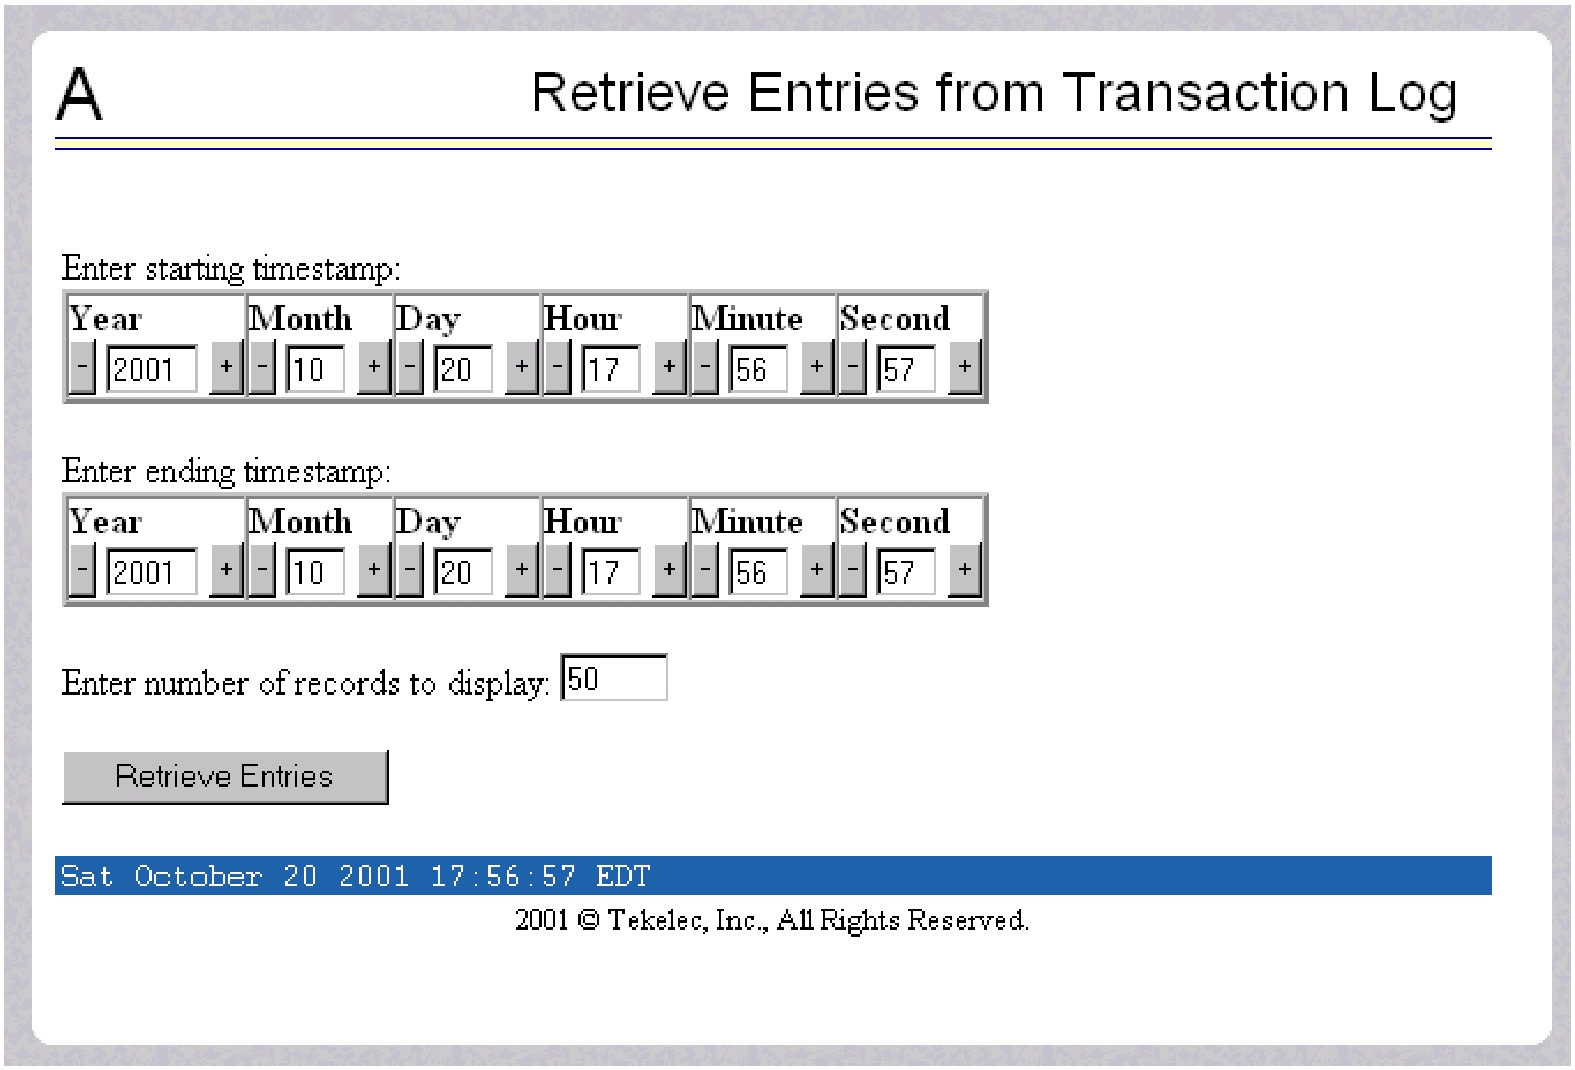
Table 3-6 shows the syntactic and semantic rules for retrieving transaction log entries.
Table 3-5 Rules for Retrieving Transaction Log Entries
|
Syntax Rules |
Error Code |
|
|
Dates/Times must be valid: Field Valid Range Year: 0000 - 9999 Month: 01 - 12 Day:01 - 31 Hour: 00 - 23 Minute: 00 - 59 Second: 00 - 59 (The day must be appropriate for the month and year.) |
E1002 |
|
|
Maximum number of records must be in the range of 1 to 10,000 |
E1002 |
|
|
Semantic Rules |
Error Code |
|
|
Transaction log task must successfully process query |
E1039 |
|
|
Transaction log task must create a file containing the result |
E1040 |
|
|
UI task must successfully parse the result |
E1041 |
|
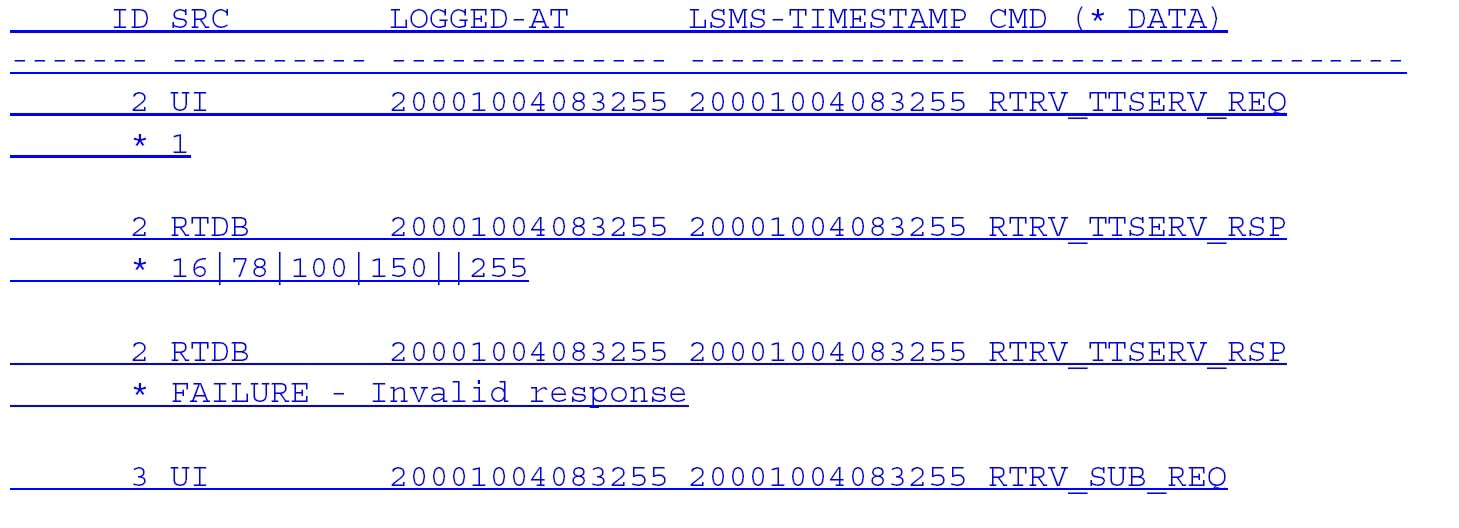
See Figure 3-30 for a sample of the output from the Retrieve Transaction Log, followed by a table with the output field descriptions.
Figure 3-30 Sample of Retrieve Transaction Log Entry Output
|
Output Field Descriptions |
|||
|
Field |
Description |
||
|
ID |
This field represents a unique identifier for the corresponding transaction. It is used internally with the Transaction log to correlate commands and responses. Any entries with the same ID are part of the same transaction. This field is used by customer service or engineering to investigate an issue. |
||
|
SRC |
This field stores the source of the corresponding transaction. The SRC field correlates to an internal task with the EPAP software and is used to determine the originator of the transaction. This field is used by customer service or engineering to investigate an issue. |
||
|
LOGGED-AT |
This field is the timestamp when the transaction was logged by the EPAP software. The format is: “yyyyMMddhhmmss” which indicates: |
||
|
yyyy: |
Year |
||
|
MM: |
Month |
||
|
dd: |
Day |
||
|
hh: |
Hour |
||
|
mm: |
Minute |
||
|
ss: |
Second |
||
|
LSMS- TIMESTAMP |
This field is the timestamp from the LSMS for the transaction. |
||
|
CMD (* DATA) |
This field contains a command identifier string and the command string from the LSMS. Command strings too long to be displayed on one line are not truncated. |
||
For details about the contents of the Transaction Log, refer to Figure 3-30, which shows sample output as obtained by the Retrieve Entries action.
Table 3-6 shows the syntactic and semantic rules for exporting the transaction log.
Table 3-6 Rules for Exporting the Transaction Log
|
Syntax Rules |
Error Code |
|
|
Response must be a valid UNIX file name |
E1002 |
|
|
Semantic Rules |
Error Code |
|
|
The file must be createable |
E1042 |
|
|
Transaction log task must create the export file containing the result |
E1042 |
|
3.2.3.3 Decode MPS Alarm
The Maintenance / Decode EAGLE MPS Alarm screen lets the user decode the EAGLE output of MPS alarms. The user enters the 16-character hexadecimal string from the EAGLE rept-stat-mps command. The strings are encoded from one of the following five categories, which are reported by UAM alarm data strings:
-
Critical Platform Alarm (UAM #0370, alarm data h‘1000 . . .’)
-
Major Platform Alarm (UAM #0372, alarm data h‘3000 . . .’)
-
Major Application Alarm (UAM #0373, alarm data h‘4000 . . .’)
-
Minor Platform Alarm (UAM #0374, alarm data h‘5000 . . .’)
-
Minor Application Alarm (UAM #0375, alarm data h‘6000 . . .’)
The string included in the alarm messages is decoded into a category and a list of each MPS alarm that the hexadecimal string represents. The user should compare the decoded category with the source of the hex string as a sanity check. Message details can be found in Alarms and Maintenance Guide.
Table 3-7 shows the syntactic and semantic rules for the Decode Eagle MPS Alarm.
Table 3-7 Rules for the Decode Eagle MPS Alarm
|
Syntax Rules |
Error Code |
|
|
Entry must be a 16 character hexadecimal string |
E1002 |
|
|
Semantic Rules |
Error Code |
|
|
The hexadecimal string must be properly encoded from one of the above five alarm categories |
E1046 |
|
3.2.3.4 RTDB Audit
The Maintenance / RTDB Audit menu lets the user view and change the auditing of the selected EPAP.
The RTDB Audit menu provides:
View Enabled
The Maintenance / RTDB Audit / View Enable menu selection lets the user view the status of RTDB audit enabled:.
Change Enabled
The Maintenance / RTDB Audit / Change Enabled screen turns auditing on and off for the RTDB that is on the selected EPAP. The user interface detects the whether RTDB audit is engaged or disengaged, and provides the associated screen to toggle the state.
Table 3-8 shows the syntactic and semantic rules for the Change Enabled screen of RTDB Audit.
Table 3-8 Rules for the Change Enabled of RTDB Audit
|
Syntax Rules |
Error Code |
|
|
A connection to the RTDB process must be available. |
E1005 |
|
|
Other Messages |
||
|
Condition |
Message Text |
|
|
Audit turned off |
RTDB auditing disabled for EPAP <selected EPAP>. |
|
|
Audit turned on |
RTDB auditing enabled for EPAP <selected EPAP>. |
|
3.2.3.5 Configure File Transfer
This screen has several different functions. This screen can be used to:
-
Define the location of where the results of the automatic import are stored.
-
Provide the options for enabling/disabling the Automatic Export capability.
-
Provide a mechanism for testing the connection to the remote machine. This is done by using the username/ password and IP address provided to attempt to make an SFTP connection to the remote machine. The status of the connection is then displayed . This test is run anytime the data on this screen is entered or modified.
This screen consists of the following fields:
- Choice of IPv4 or IPv6 remote system address:
- The user is allowed to configure IPv4 only remote system address
- The user is allowed to configure IPv6 only remote system address
- On dual stack - the user is allowed to configure IPv4 or IPv6 remote system address
- Remote System IP Address - the IP address from where the data will be exported (customer system).
- Remote System User Name - required for logging onto the customer system
- Remote System Password - required for logging onto the customer system. This password will be stored in encrypted format.
- Remote System SFTP Location - the location of the directory on the customer system.
- File Export to Remote System - this is used to return the results of the import file (default = enabled ).
The Configure File Transfer Screen is shown in Figure 3-31.
Figure 3-31 Configure File Transfer Screen

3.2.3.6 Automatic PDB/RTDB Backup
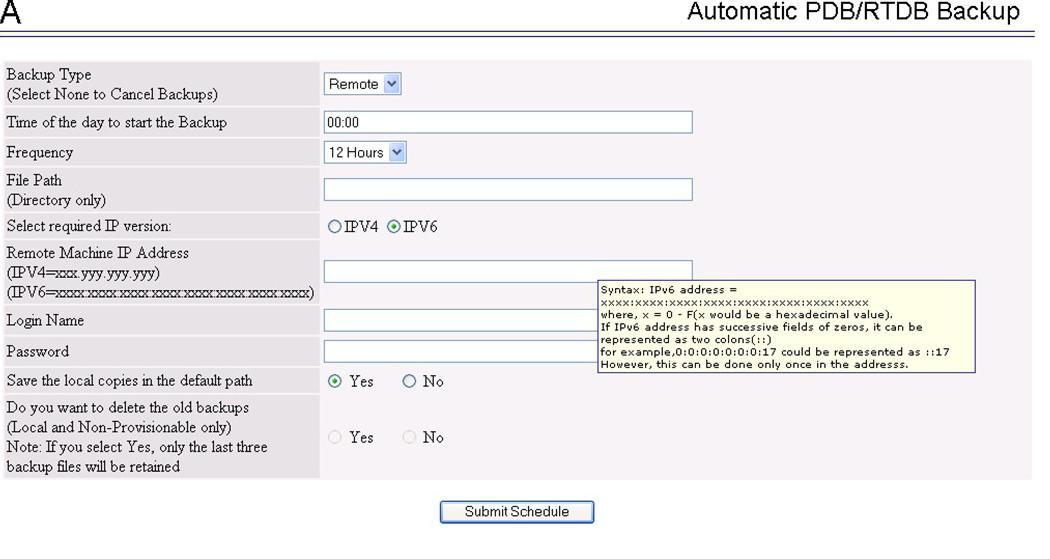
This screen is used to configure the Automatic PDB/RTDB Backup using either IPv4 or IPv6 addresses for a remote machine IP. The options for backup type are:
- Local - Backup is stored on the same EPAP server
- Mate - Backup is stored on the mate EPAP server
- Remote - Backup is stored on a remote server
- None - No backup is scheduled and cancel all previously scheduled backups. This will not affect a backup that is currently in progress.
Note:
Verify there is adequate disk space (approximately 17 GB of disk space is required per backup) to store backup files locally, on the mate, or on a remote server. If there is inadequate disk space to store 3 copies on the local or mate, stored backups will not be overwritten, and backup operation failure alarms will be generated.
Use Table 3-9 as a guide when populating the Automatic PDB/RTDB Backup screen. See Figure 3-32.
Table 3-9 Mandatory and Optional Parameters
| Parameter | Backup Type | ||
|---|---|---|---|
| Local | Mate | Remote | |
|
Time of the day to start the Backup |
Mandatory |
Mandatory |
Mandatory |
|
Frequency |
Mandatory |
Mandatory |
Mandatory |
|
File Path (Directory only) |
Optional |
Optional |
Mandatory |
|
Remote Machine IP Address (xxx.xxx.xxx.xxx) |
Not Applicable |
Not Applicable |
Mandatory |
|
Login Name |
Not Applicable |
Not Applicable |
Mandatory |
|
Password |
Not Applicable |
Not Applicable |
Mandatory |
|
Save the local copies in the default path |
Not Applicable |
Optional |
Mandatory |
|
Do you want to delete the old backups (Local and Mate only) Note: If you choose Yes, only the last three backup files, including the current one will be kept. |
Mandatory |
Mandatory |
Not Applicable |
Oracle recommends that this Automatic PDB/RTDB Backup be performed on a daily (24 hour) basis. If the 12-hour frequency is selected, the first backup will always be created in the AM. For example, if the Time of the day to start the backup is selected as 15:00, the first backup will be created at 3 AM and then subsequent backups at 12-hour intervals.
The default file path where subdirectories are created (in the mate and locally) is /var/TKLC/epap/free/.
In the case of mate and remote backup destinations, a local copy is saved (even if the option not to save the local copy was selected) if the transfer of the file fails after the backup has been created on the local machine. This file is located at the default file path. In the case of mate and remote backup destinations, a local copy is saved (even if the option not to save the local copy was selected) if the transfer of the file fails after the backup has been created on the local machine. This file is located at the default file path.
PDB only maintains a single copy of backup file, if this backup file is already present automatic backup will fail for PDB. Therefore it is required to schedule remote transfer of PDB backup file using Configure File Transfer as described in section Configure File Transfer.
If the Automatic PDB/RTDB backups are being directed to a remote server, then before scheduling:
- The SFTP must be installed at the remote server
- The connection to the remote server must be validated
- Verify there is adequate disk space (approximately 17 GB of disk space is required per backup)
- Verify user name and password.
When using the Automatic PDB/RTDB Backup screen to configure the automatic backup, follow these semantic rules:
Backup Type - Select None to cancel Backups.
Time of the Day should be in hh:mm 24 hour (14:03) format.
File path (in remote only) should be the absolute path from root /backups/xxxx
IP address should be in xxx.yyy.zzz.aaa format (192.168.210.111).
Password entered by the user will be displayed in asterisks (*)
Figure 3-32 Automatic PDB/RTDB Backup Screen
3.2.3.7 Schedule EPAP Tasks
Maintenance /Schedule EPAP Task
This screen is used to Schedule EPAP Tasks. Through this screen the customer has a choice of what tasks to be scheduled as well as the day and time of day for the execution of the tasks.
The tasks can be scheduled at a specific time for each of the following repeat periods: at specific minute, at specific hour, every N number of days (N can be up to 30), on specific days of the week, on a specified day of the month, or on a specified day of the year.
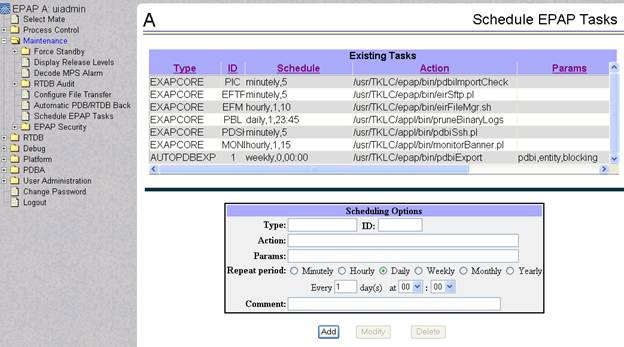
The Schedule EPAP Tasks screen is used to display any existing tasks and to create a task by specifying the type, ID, Action, Parameters, as well as the time and repeat period. In addition, a Comment field is available to describe the task.
Figure 3-33 Schedule EPAP Tasks Screen
Existing Tasks
The Existing Tasks portion at the top of the screen displays all currently scheduled tasks in table format.
Clicking on a column heading causes the entries in that column to be sorted, either alphabetically or numerically, depending on whether the column entries start with a letter or a number. Clicking the column again sorts the entries in the opposite order.
Clicking on a row causes the data contained in that task to be displayed in the data entry fields below the table, to view, modify or to delete the tasks.
Scheduling Options
The Scheduling Options section of the Schedule Tasks screen allows the user to choose how often to repeat the scheduled task and to specify the exact day and time. The appearance of this section changes depending on which Repeat Period radio button is selected:
The following fields are the same among the various Repeat Period selections (for more information
- Type:
- Type of the task can be specified in this field.
- ID:
- ID of the task can be specified in this field.
- Action:
- Action of the task specified by adding the path for the task.
- Parameters:
- Parameters for the task can be specified in this field.
- Comment:
- Use this optional field to add comments about Tasks. The content of this field is stored and displayed on the GUI, but it is not used otherwise.
Variable Fields in Scheduling Options
The following sections describe how the Scheduling Options fields change depending on the Repeat Period that is selected.
Minutely Repeat Period
To schedule the task to be run minutely, select the minutely radio button, select the minute and optionally enter a comment.
Hourly Repeat Period
To schedule the task to be run hourly, select the hourly radio button, select the hour, select the minute and optionally enter a comment.
Daily Repeat Period
Note:
Although the maximum value allowed in the day(s) field is 30.Weekly Repeat Period
To schedule the task to be run each week, select the Weekly radio button, select one or more days of the week, select the time and optionally enter a comment.
Monthly Repeat Period
Note:
For months that do not contain the number of days specified in the Day field, the task will run on the first day of the following month. (For example, if the Day field value is 29, the task will run on March 1 rather in February for any year that is not a leap year.)Yearly Repeat Period
To schedule the tasks to be run one day each year, select the Yearly radio button, select a numeric day of the year, select the day of the month, select the time, and optionally enter a comment.
Add, Modify, and Delete Buttons
- Add
-
To add a scheduled EPAP Task, enter all the data to describe the task, and click the Add button.
If the task, as described by the current data in the data entry fields, does not exactly match an existing task, a new task is scheduled. If the task exactly matches an existing task, an error message is displayed.
- Modify
- To modify a scheduled EPAP Task, click that task in the Existing Tasks in Tasks table, change any data that describes the task, and click the Modify button. The Modify button is selectable only when an entry in the Existing Tasks table at the top of the screen has been selected and one or more fields other than Type and ID on the screen have been changed.
- Delete
-
To delete a scheduled Task, click that task in the Existing EPAP Tasks table, and click the Delete button.
The Delete button is selectable only when an entry in the Existing Tasks table at the top of the screen has been selected.
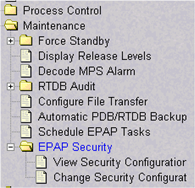
3.2.3.8 EPAP Security
-
Restrict/Allow command line access to server root account.
- Restrict/Allow server access to only authorized IPs or to all.
Figure 3-34 EPAP Security menu
View Security Configuration
- Restrict command line access to server root account.
- Restrict server access to only authorized IPs or to all.
When the value of Restrict remote access to server root account is set to No, root can access the server using ssh. When the value of Restrict remote access to server root account is set to Yes, root cannot directly access the server using ssh. However, the user can ssh to the server as epapdev and then do an su - root to access the server as root.
When the value of Restrict server access to authorized IPs is set to No, the server can be accessed from any IP address. When the value of Restrict server access to authorized IPs is set to Yes, the server can be accessed only from the IP addresses that are added in file /etc/hosts.allow.
Figure 3-35 View Security Configuration

Change Security Configuration
This menu allows the user to change security access for EPAP server on which the GUI is open. The user can change the following two configurations:
- Restrict/Allow command line access to server root account.
- Restrict/Allow server access to only authorized IPs or to all.
Figure 3-36 Change Security Configuration

3.2.4 RTDB Menu
The RTDB (Real-Time Database) Menu allows the user to interact with the RTDB for status, reloading, and updating.
The RTDB menu supports viewing the RTDB and performing maintenance tasks:
3.2.4.1 View RTDB Status
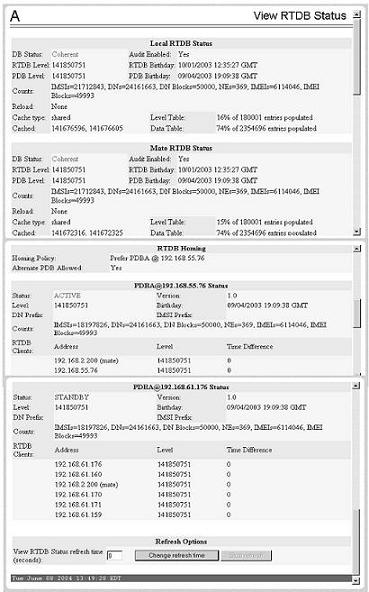
The RTDB / View RTDB Status screen displays the current level and birthday of the EPAP RTDBs. This selection displays the RTDB status information for both the selected EPAP and its mate. The status information reports the DB level and the DB birthday (date and time of the creation of the database). The RTDB Status refresh time can be viewed and changed with this screen.
Note:
The IMSI count returned from the RTDB and the IMSI count returned from the PDB may not match when there is both G-Flex and EIR data. Any IMSI created for EIR that does not have a G-Flex IMSI association is not included in the IMSI counts of the PDB. The PDB reports only G-Flex IMSIs. The RTDB reports the total of G-Flex and EIR IMSIs as one count.Figure 3-37 View RTDB Status Screen
3.2.4.2 RTDB Menu - Maintenance
3.2.4.2.1 Reload RTDB from PDBA
The RTDB / Maintenance / Reload RTDB from PDBA screen reloads the RTDB with a copy of the data from the local PDBA.
Note:
If the RTDBs have different birthdates (as a result of this reload), you must perform a Reload RTDB from Remote on the mate EPAP (see Reload RTDB from Remote). RTDBs with different birthdates may not take updates or update the Service Module cards.See Table 3-10 for the rules about reloading the RTDB from the PDBA.
Table 3-10 Rules for the Reload RTDB from PDBA
|
Semantic Rules |
Error Code |
|
|
Other Messages |
||
|
Condition |
Message Text |
|
3.2.4.2.2 Reload RTDB from Remote
The RTDB / Maintenance / Reload RTDB from Remote screen makes a copy of the RTDB from the specified source machine, either the mate EPAP or a specified IPv4 or IPv6 address. Note: the EPAP software must be stopped on both of the machines involved:
Figure 3-38 Reload RTDB from Remote Screen

See Table 3-11 for the rules about reloading the RTDB from a remote.
Table 3-11 Rules for the Reload RTDB from Remote
|
Semantic Rules |
Error Code |
|
|
The mate EPAP must be available. |
E1006 |
|
|
RTDB must acknowledge receipt of the reload request within 15 seconds. |
E1031 |
|
|
Other Messages |
||
|
Condition |
Message Text |
|
|
RTDB reload started. |
RTDB reload started. You will be notified when the reload is complete. |
|
|
RTDB reload complete. |
RTDB successfully reloaded from mate EPAP. You must remove the STANDBY restriction (by logging in as user 'epapmaint' and executing the “Remove Standby Restriction” menu item) before the selected EPAP can update the RTDB. |
|
To perform the copy of the RTDB contents, select the source machine and press the Begin RTDB Reload from Remote button.
3.2.4.2.3 Backup the RTDB
The RTDB / Maintenance / Backup the RTDB screen allows the user to backup the RTDB to a specified file on the selected EPAP. The software must be stopped on the selected EPAP for the backup to be allowed to ensure that no updates are occurring:
See also Table 3-12 for the rules about backing up a RTDB.
Figure 3-39 Backup the RTDB Screen

Table 3-12 Rules for Backup the RTDB Screen
|
Semantic Rules |
Error Code |
|
|
The device must exist. |
E1019 |
|
|
Other Messages |
||
|
Condition |
Message Text |
|
|
Backup started. |
Backup in progress. The backup requires approximately 35 minutes. You will be notified when the backup is complete |
|
|
Backup did not start. |
Backup failed. |
|
|
Backup complete. |
RTDB backup complete. |
|
3.2.4.2.4 Restore the RTDB
The RTDB / Maintenance / Restore the RTDB screen allows the user to restore the RTDB from the specified file on the selected EPAP. The software must be stopped on the selected EPAP for the restore action to be allowed to ensure that no other updates are occurring.
Note:
If the RTDBs have different birthdates (as a result of this restore), you must perform a Reload RTDB from Remote on the mate EPAP (see Reload RTDB from Remote). RTDBs with different birthdates may not take updates or update the Service Module cards.See also Table 3-13 for the rules about backing up a RTDB.
Figure 3-40 Restore the RTDB
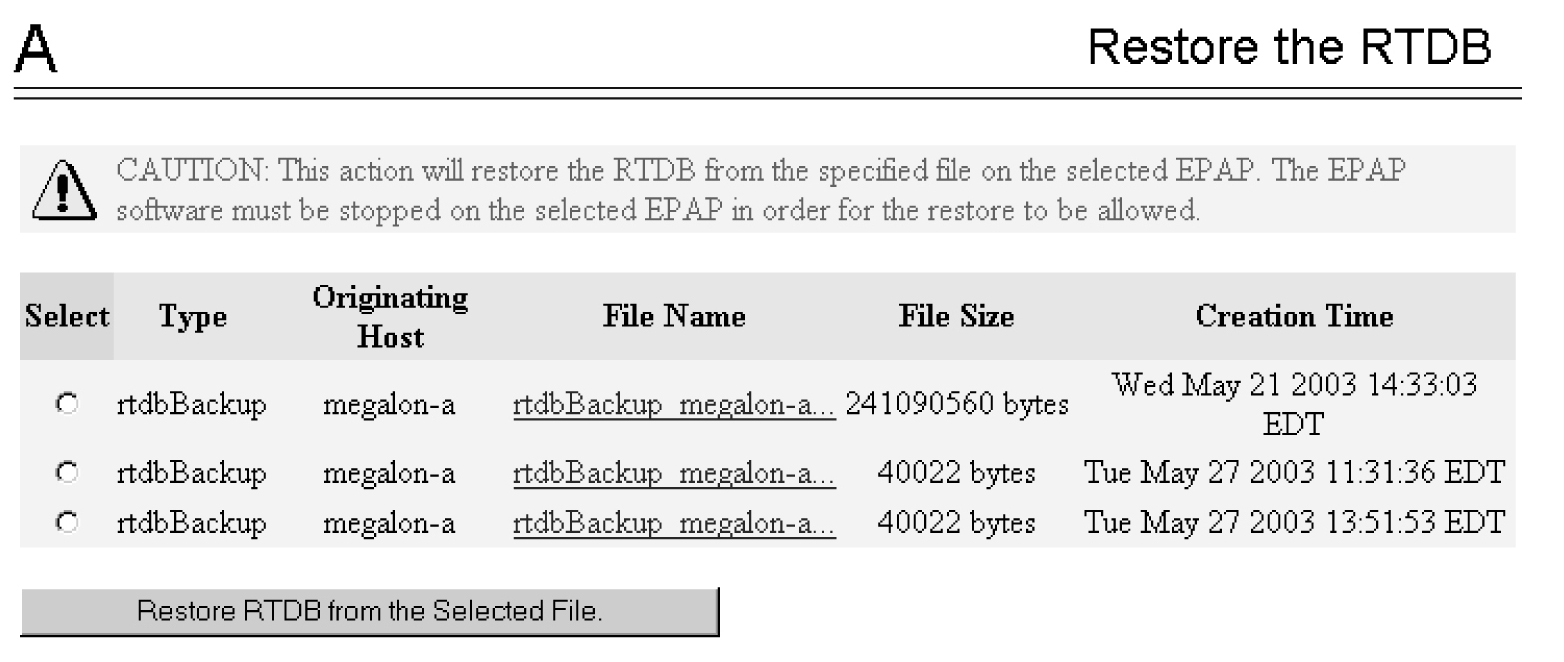
Table 3-13 Rules for Backup the RTDB Screen
|
Semantic Rules |
Error Code |
|
|
The device must exist. |
E1019 |
|
|
Other Messages |
||
|
Condition |
Message Text |
|
|
Backup started. |
Backup in progress. The backup requires approximately 35 minutes. You will be notified when the backup is complete |
|
|
Backup did not start. |
Backup failed. |
|
|
Backup complete. |
RTDB backup complete. |
|
To restore the RTDB contents from a specified file on the selected EPAP, stop the selected EPAP software. Select the proper file and click the Restore RTDB from the Selected File button.
3.2.4.2.5 Configure Record Delay
The RTDB / Maintenance / Configure Record Delay screen allows the user to specify the time in minutes for new PDB records to appear in the RTDB. If records take longer to arrive at the RTDB than this amount of time, the records are considered late, and the RTDB triggers an alarm:
Figure 3-41 Configure Record Delay Screen
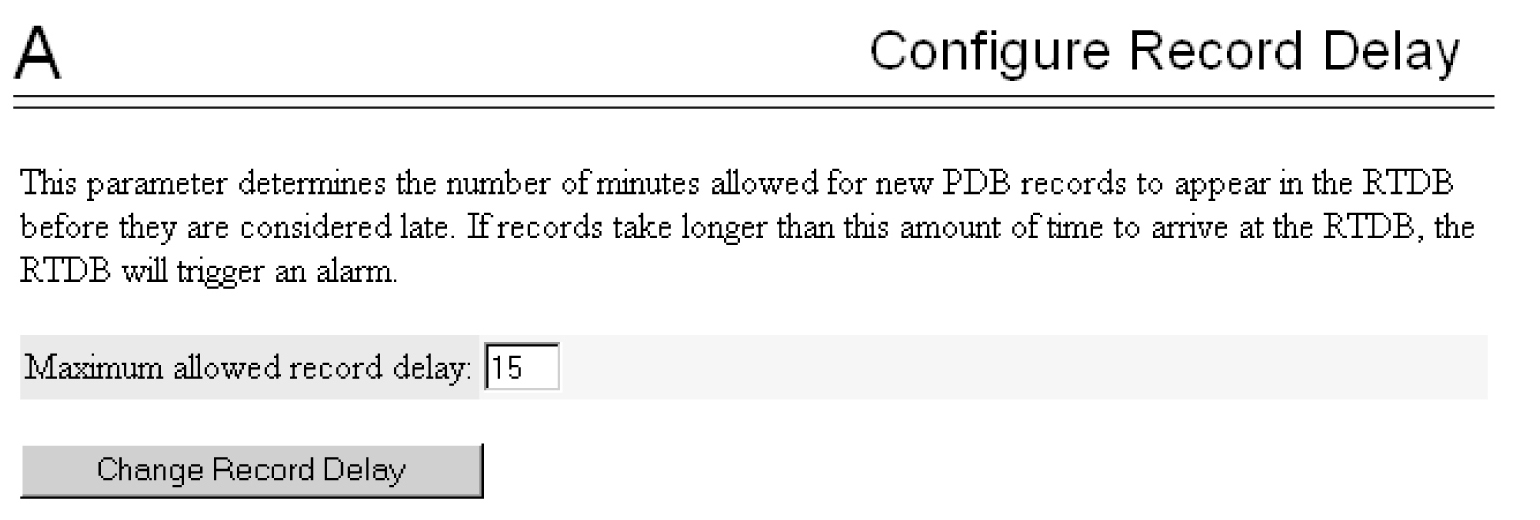
To update the time period for the new PDB records to arrive at the RTDB, enter the desired value in the entry field, and click the Change Record Delay button.
Table 3-14 Rules for Configure Record Delay
|
Semantic Rules |
Error Code |
|
|
Other Messages |
||
|
Condition |
Message Text |
|
Table 3-15 Rules for Backup the RTDB Screen
|
Semantic Rules |
Error Code |
|
|
The device must exist. |
E1019 |
|
|
Other Messages |
||
|
Condition |
Message Text |
|
|
Backup started. |
Backup in progress. The backup requires approximately 35 minutes. You will be notified when the backup is complete |
|
|
Backup did not start. |
Backup failed. |
|
|
Backup complete. |
RTDB backup complete. |
|
3.2.4.3 Retrieve Records
The RTDB / Retrieve Records menu allows the user to query (from the web GUI) data that resides in the RTDB (Real-Time Database). The user can compare data in the PDB (Provisioning Database) with data in the RTDB to verify that they are consistent:
The RTDB / Retrieve Records menu contains:
- Run another retrieval starting with the last entry in the last GUI retrieval.
- Run the PDBA export (see PDBA / Maintenance / Export PDB to File).
- Use the PDBA retrievals from the CLI PDBI Interface (see the "Simple Queries" section in Provisioning Database Interface User's Guide.
3.2.4.3.1 IMSI
The RTDB / Retrieve Records / IMSI screen allows the user to retrieve information about about an IMSI (International Mobile Subscriber Identity).
The output displays the following information about an IMSI:
-
IMSI ID
-
SP
- NE data for the Service Provider of the IMSI (see Network Entity)
-
IMEI data if the IMSI being retrieved is associated with an IMEI (see IMEI)
3.2.4.3.2 DN
The RTDB / Retrieve Records / DN screen allows the user to retrieve information about a single Dialed Number (DN).
The output displays the following information about single DNs:
- ID
- Portability type (PT)
- Associated SP or RN
- Network Entity (NE) data (if the DN being retrieved is associated with up to 2 NEs)
If a DN cannot be found in the single DN database, the DN Block database is searched.
The maximum number of 9digs for a DN is 65K entries, which includes two (2) default entries representing 5 digits and 6 digits of DN, regardless if they are provisioned or not. If all provisioned DNs have digits greater than or equal to 7, the max number of 9digs parsed from these provisioned DNs cannot exceed 65K - 2 entries.
3.2.4.3.3 DN Block
The RTDB / Retrieve Records / DN Block screen allows the user to retrieve information about about a DN block.
The output displays the following information about a block DN:
-
First DN
-
Last DN
-
PT
-
Associated SP or RN
-
NE data (if the DN Block being retrieved is associated with up to 2 NEs)
If a DN cannot be found in the single DN database, the DN Block database is searched.
3.2.4.3.4 Network Entity
The RTDB / Retrieve Records / Network Entity screen allows the user to retrieve information about a network entity:
The output displays the following information about a network entity:
-
ID
-
Type (RN, SP, VMS, GRN)
-
Point Code
-
Routing indicator (RI)
-
Subsystem Number (SSN)
-
Cancel Called Global Title (CCGT)
-
New Translation Type (NTT)
-
New Nature of Address Indicator (NNAI)
-
New Numbering Plan (NNP)
-
Digit Action (DA)
-
SRF IMSI (Signaling Relay Function International Mobile Subscriber Identity)
-
DN Reference Count
-
IMSI Reference Count
3.2.4.3.5 IMEI
The RTDB / Retrieve Records / IMEI screen allows the user to retrieve information about an IMEI.
The output information displays:
-
IMEI ID
-
Software Version (SVN)
-
Block list indicator
-
Gray list indicator
-
Allow list indicator
- An IMSI reference count to show the number of IMSIs that are associated with an IMEI.
The IMEI lookup is performed on the IMEI blocks database when an IMEI is not present in the individual IMEI database.
3.2.5 Debug Menu
The Debug Menu allows the user to view logs and list running processes.
The Debug menu actions are:
3.2.5.1 View Logs
The Debug / View Logs menu allows appuser to view such logs as the Maintenance, RTDB, Provisioning, RTDB audit, and UI logs.
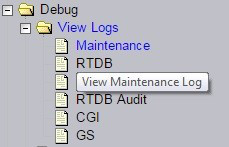
The View Logs submenu under the Debug menu has the following options:
- Maintenance Log
- RTDB Log
- Provisioning Log
- RTDB Audit Log
- CGI Log
- GS Log
When any of the Debug / View Logs files are chosen, the process is the same. Complete the following steps to view logs from the EPAP GUI menu:
- Log in to the EPAP GUI
- Expand the Debug Menu, then Select View Logs
- Select a log file. Figure 3-42 shows the selection of the Maintenance log file:
Figure 3-42 Maintenance Log Option
Opening any log in this window displays the requested log in the log viewer window. All log view screens require an authorized password for the user
appuser. All log files are viewed with the EPAP Log Viewer utility.Note:
The system may ask you to change theappuserpassword from the CLI. If you change the password from therootuser, the system will prompt you to change the password again. If the password is changed using theappuser, you will not be asked to change it an additional time. - Enter the password for the appuser and select the Submit button.
Figure 3-43 Log Viewer Password Prompt

When the user selects the Submit button without entering the password, the following error will display:
Figure 3-44 Log Viewer Password Missing

If the user enters an invalid password, the following error will display:
Figure 3-45 Log Viewer Invalid Password

When the GUI session expires before the user submits a valid password, the following screen will display:
Figure 3-46 Log Viewer Session Expired

On the successful submission of the appuser password, the log file contents will be visible in the work area. Figure 3-47 shows an example of the Maintenance Log:
Figure 3-47 Maintenance Log Viewer

EPAP Log Viewer
Use the vertical scroll bar to scroll through the log viewer content. The Prev button will appear if the content of log file is greater than 100K lines. Initially it will be disabled for first 100K lines, as shown in Figure 3-48.
Figure 3-48 Log Viewer First Page

The Next button will appear if the content of the log file is greater than 100K lines. The first page will display the first 100k lines. The user will be able to select "Next" to view the next 100k lines (or the whole content if there are fewer than 100k lines), as seen in Figure 3-49.
Figure 3-49 Log Viewer Intermediate Page

When finished, close the Log Viewer window by clicking the Close View Window button.
3.2.5.2 Capture Log Files
The Debug /Capture Log Files screen allows the user to make a copy of the logs for the current MPS. Optionally, you can capture files with the logs.
When you click the Capture Logs button, the copy of the log files occurs, and a successful completion message.
3.2.5.3 Manage Logs and Backups
The Debug / Manage Logs and Backups displays the captured log files and allows the user to delete the copies no longer wanted or copy the selected file to the mate. See Figure 3-50 with an example of one recorded log file on the Manage Log Files screen.
Figure 3-50 Manage Logs & Backups Screen
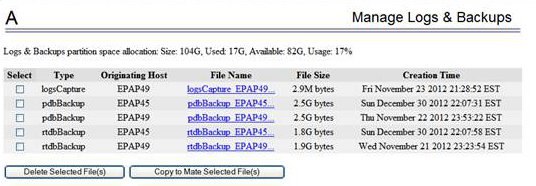
In the Manage Log Files screen, you can remove a log file by clicking the Delete? button and then the Delete Selected Capture File button. A successful removal message appears.
3.2.5.4 View Any File
appuser. Log files that cannot be viewed from this utility include:exinit.logslow-queries.logplatwrap.logbackupPdb.out
- Log in to the EPAP GUI.
- Expand the Debug menu.
- Select View Any File.
Figure 3-51 View Any File on the EPAP GUI Menu
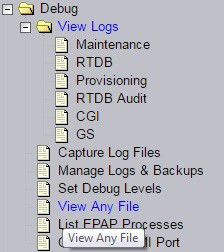
- On selecting View Any File, the user will be asked to enter the filename to be viewed. The default path for this utility is
/usr/TKLC/epap/logs. The filename field is mandatory (marked with * as displayed in Figure 3-52).Figure 3-52 View Any File Filename Prompt

When the View File button is selected without inputting the filename, the following error will be displayed:
Figure 3-53 View Any File With Missing Filename

If the user inputs a non-existing filename in the
/usr/TKLC/epap/logsdirectory, the following error will be displayed:Figure 3-54 View Any File Non-Existing Filename Error

- After entering a valid filename, the user will be prompted for the appuser password, as displayed in Figure 3-55:
Figure 3-55 View Any File Password Prompt

When the Submit button is selected without inputting the appuser password, the following error will be displayed:
Figure 3-56 Log Viewer Appuser Missing Password

When the user inputs an invalid appuser password, the following error will be displayed:
Figure 3-57 Log Viewer Invalid Password Error

If the user enters a password after the GUI expires and selects Submit, the following error will be displayed:
Figure 3-58 Expired Log Viewer

- After entering the valid appuser password, the log file contents will be visible in the work area, along with the log file name as its heading, as displayed in Figure 3-59:
Figure 3-59 Log Viewer

Opening any file in this window displays the requested file in the file viewer window. All files are viewed with the same file viewing utility. For details about this utility, see Platform Menu.
Table 3-16 Rules for Viewing Any File
|
Semantic Rules |
Error Code |
|
|
The file must exist and be readable. |
E1008 |
|
3.2.5.5 List EPAP Processes
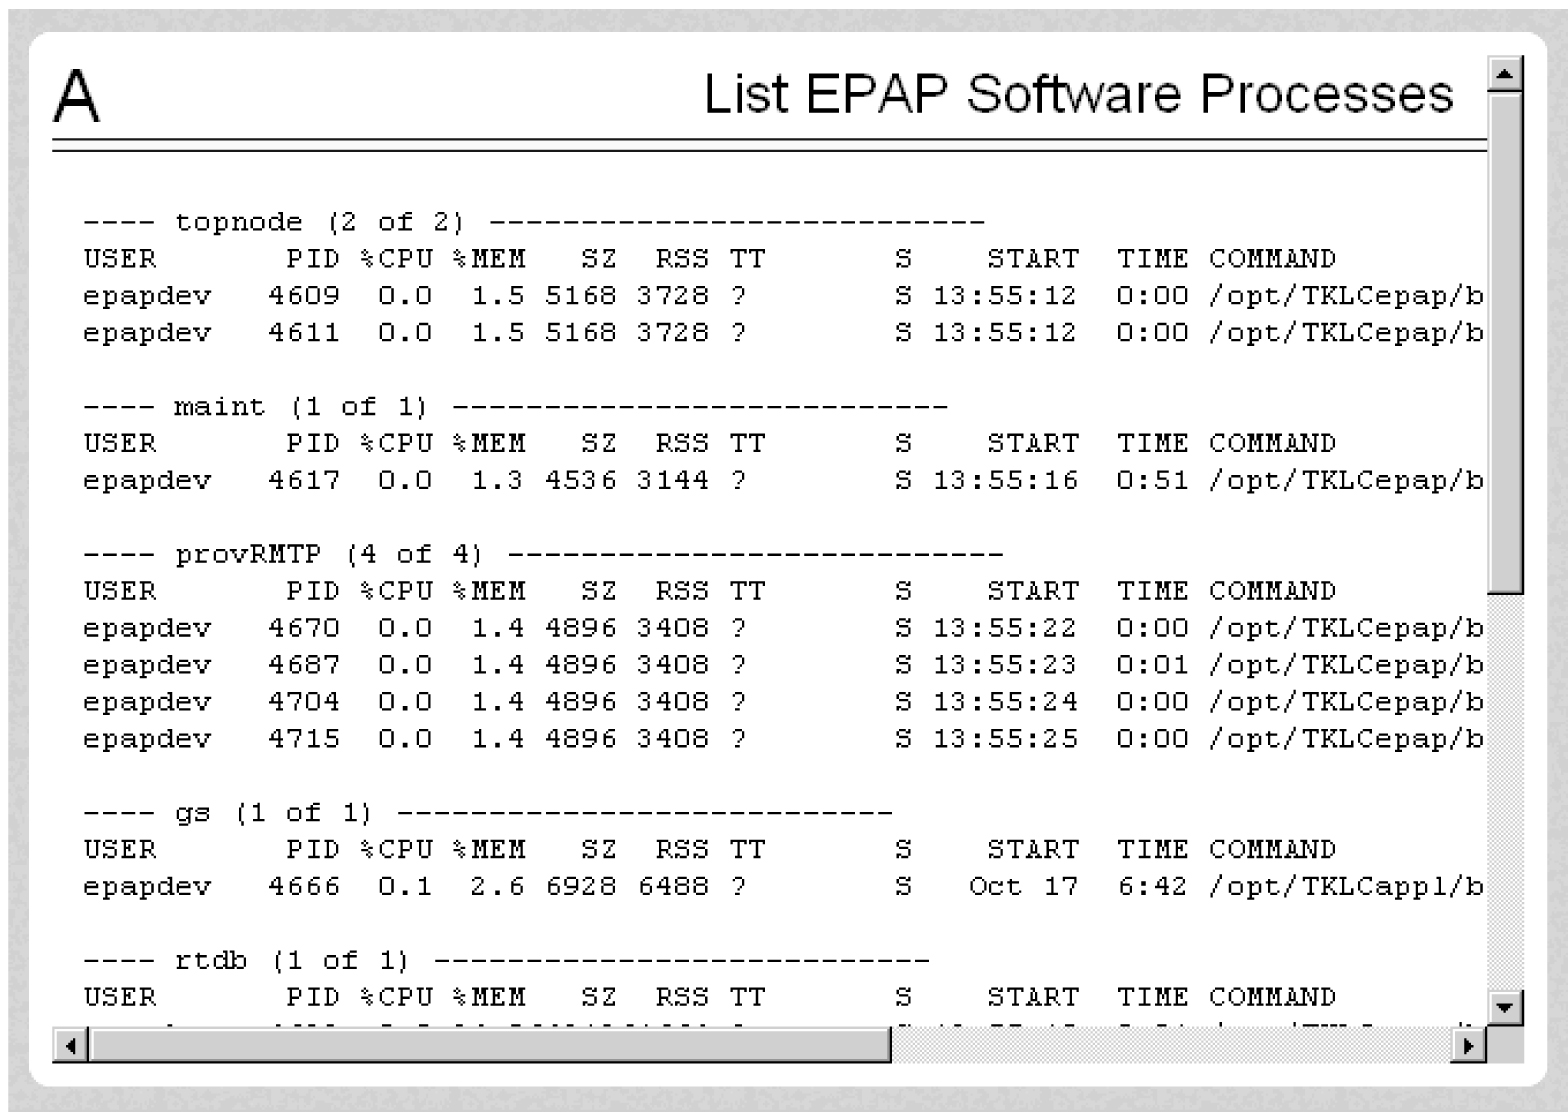
The Debug / List EPAP Processes screen shows the EPAP processes started when the EPAP boots or with the “Start EPAP software” prompt. The /usr/ucb/ps -auxw command generates this list. The operating system's manual page for the ps command thoroughly defines the output for this command. Figure 3-60 shows an example of the format of the process list.
Figure 3-60 Example of List EPAP Processes Output
3.2.6 Platform Menu
The Platform Menu allows the user to perform various platform-related functions. The Platform menu provides these actions:
3.2.6.1 Run Health Check
The Platform / Run Health Check screen allows the user to execute the health check routine on the selected EPAP. Alarms and Maintenance Guide describes the health check in detail.
The first screen presented in the workspace frame lets the user select the normal or verbose mode of output detail.
The EPAP system health check utility performs multiple tests of the server. For each test, check and balances verify the health of the MPS server and platform software. Refer to System Health Check in Alarms and Maintenance Guide for the functions performed and how to interpret the results of the normal outputs
3.2.6.2 List All Processes
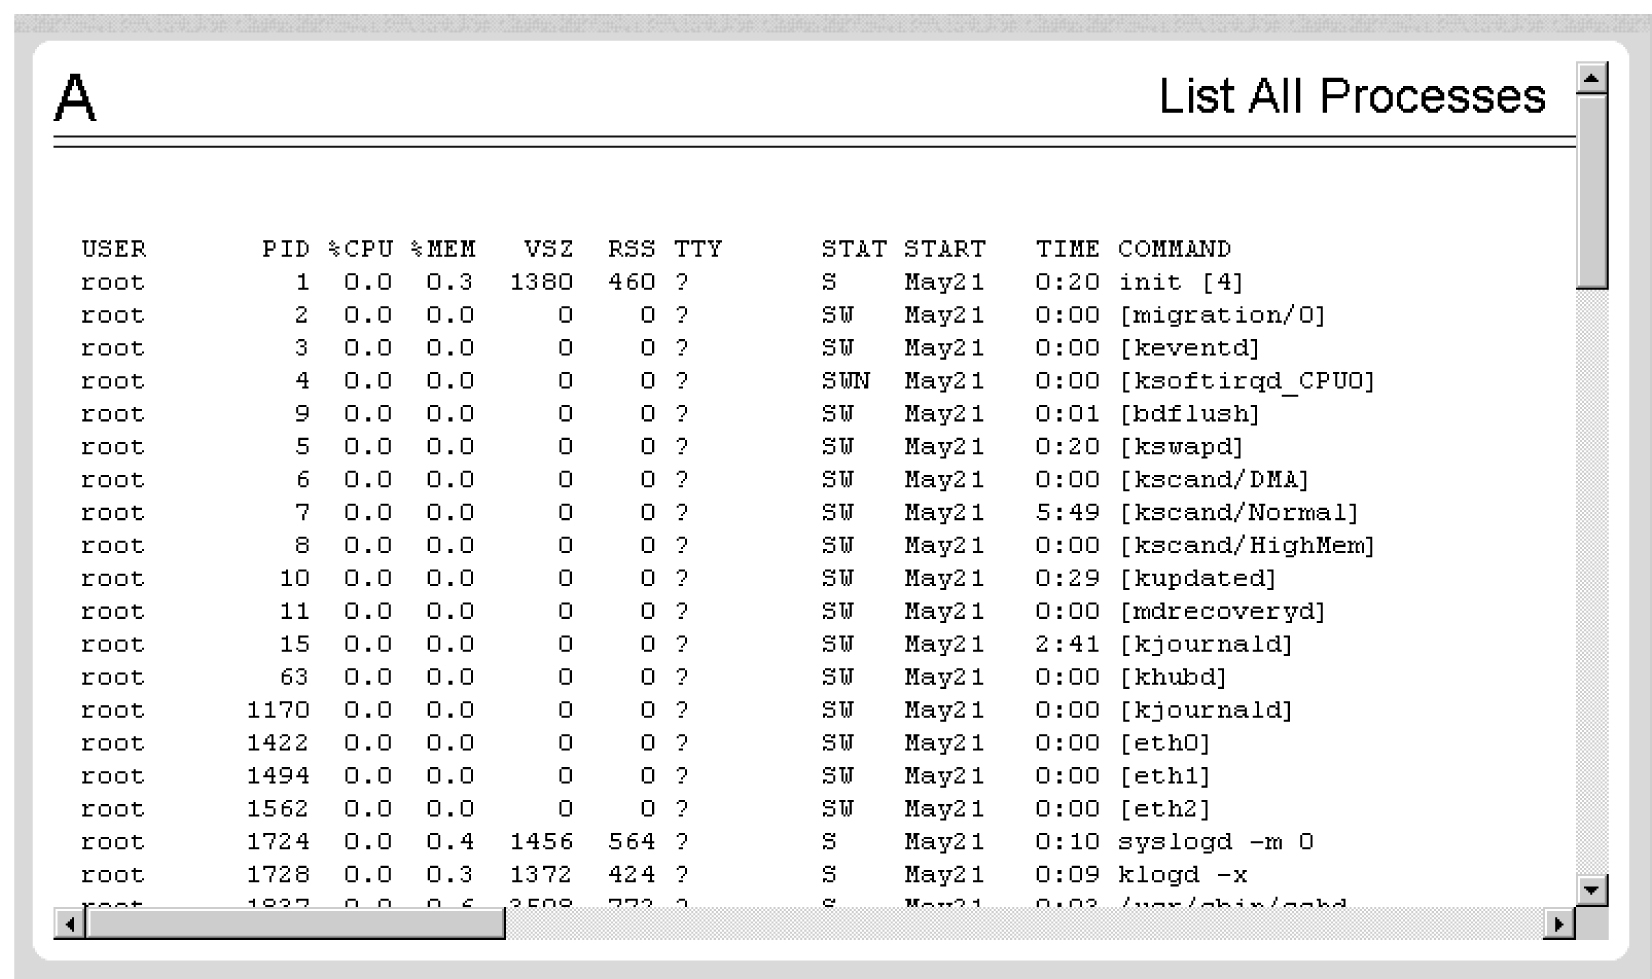
The Platform / List All Processes screen lists all processes running on the selected EPAP. The /usr/ucb/ps -auxw command generates this list. The operating system's manual page for the ps command thoroughly defines the output for this command. Figure 3-61 shows an example of the process list.
Figure 3-61 List All Processes Screen
Note:
The process list shown here will not be the same on your EPAP servers. The output from this command is unique for each EPAP, depending on the EPAP software processes, the number of active EPAP user interface processes, and other operational conditions.
3.2.6.3 View System Log
The Platform / View System Log screen allows the user to display the System Log. Each time a system maintenance activity occurs, an entry is made in the System Log. When the user chooses this menu selection, the View the System Log screen is displayed. The user is required to enter the authorized password for the user appuser.
When the user clicks the Open View Window button, the system shows the System Log in the Log Viewer window. The use of the Log Viewer is described Platform Menu.
The View System Logs - /var/log/messages is available under the Platform GUI menu.
3.2.6.4 Reboot the MPS
The Platform / Reboot the MPS screen allows the user to reboot the selected EPAP. All EPAP software processes running on the selected EPAP are shut down normally.
When you click the Reboot MPS button, a cautionary message appears, informing the user that this action instructs EPAP to stop all activity and to prevent the RTDB from being updated with new subscriber data.
Click the Continue button. Another screen informs you that MPS is being rebooted and that the User Interface will be reconnected when the reboot is completed.
3.2.6.5 SSH to MPS
The Platform / SSH to MPS screen allows the user to have an SSH window to the user interface user. This uses WebStart Java technology, which works independent of the web browser once it is launched. Complete the following steps to perform SSH to MPS:
- Log in to the EPAP.
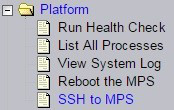
- Select , as displayed in Figure 3-62:
Figure 3-62 SSH to MPS on the EPAP GUI Menu
- Select Launch the JCTerm application:
Figure 3-63 JCTerm Application Launch Window

The following screen will appear:
Figure 3-64 Launching WebStart
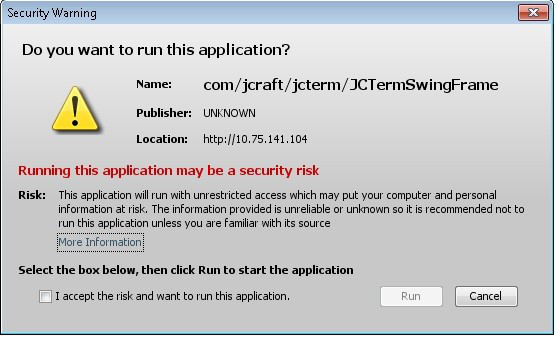
- The JCTerm jar, along with the
Jzlib jarandJsch jar, are self-signed. Accept the security check that follows and select Run to launch the JCTerm applet for the SSH to MPS interface:Figure 3-65 JCTerm Security Check Window
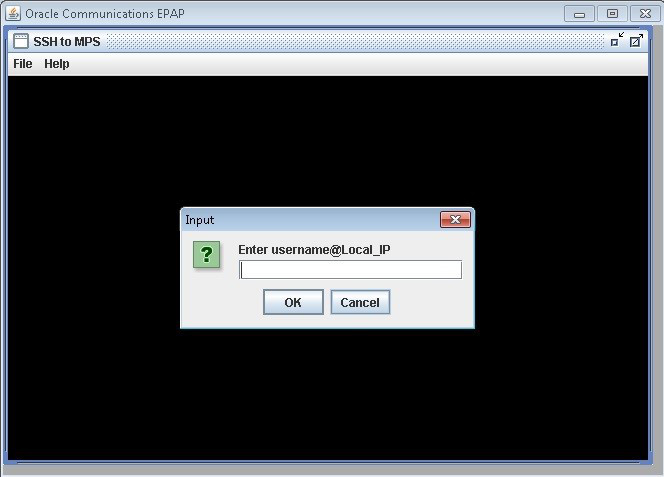
- The SSH to MPS window will be displayed. A user name and password is required. On the EPAP configured in the dual stack configuration, both the IPv4 and IPv6 addresses for Local EPAP are accepted for the SSH. The following formats are accepted:
- sshusername@<IPv4 IP>
- sshusername@<IPv4 IP>:<Port>
- sshusername@IPv6 IP>
- sshusername@[IPv6 IP>]
- sshusername@[IPv6 IP>]:<Port>
Figure 3-66 SSH to MPS Log in Window
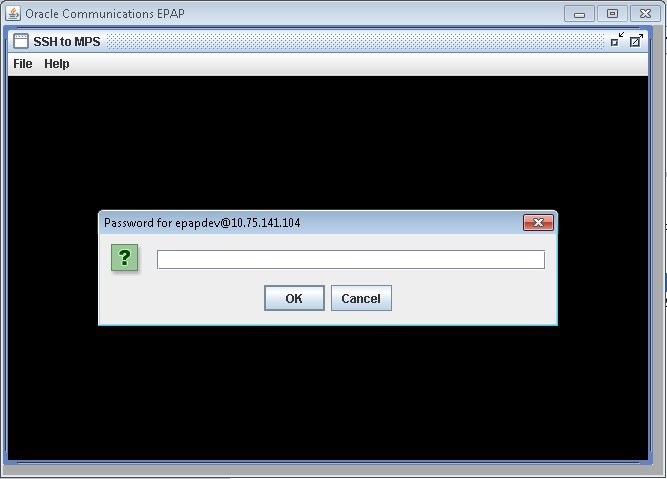
After inputting a user name and local EPAP IP, the password prompt window appears, as displayed in Figure 3-67:
Figure 3-67 SSH to MPS Password Prompt Window
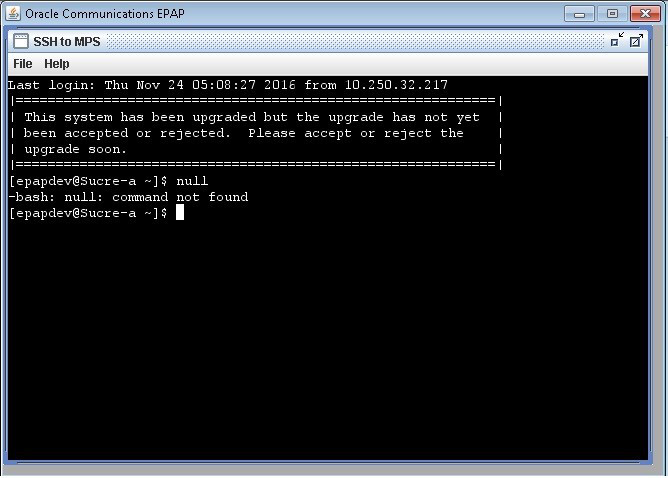
 After a successful log in, the SSH window opens and can be used to perform SSH communications, as displayed in Figure 3-68:
Note:
There is no limit to the maximum number of concurrent sessions opened using the SSH to MPS utility.Figure 3-68 SSH to MPS Interface
3.2.7 PDBA Menu
The PDBA (Provisioning Database Administration) menu allows the user to maintain and modify the PDBA. The user sees this menu only on EPAP A.
The PDBA menu provides the control, management, and maintenance of the Provisioning Database Administration facility. This menu provides:
To schedule an export to be run one day each month, select the Monthly radio button, select a numeric day of the month, select the time, and optionally enter a comment, as shown in Figure 3-190.
To schedule an export to be run one day each year, select the Yearly radio button, select a numeric day of the year, select the time, and optionally enter a comment, as shown in Figure 3-191.
3.2.7.1 Select Other PDBA
The PDBA / Select Other PDBA is an action performed from the PDBA menu screen. It provides access to the remote PDBA GUI.
Access the user interface on the remote PDBA. From this screen, you sign on and perform the PDBA actions that you want from the remote PDBA. When the EPAP is configured in the dual stack configuration, then the user has the option to configure the remote PDBA in either IPv4 or IPv6 configuration. See PDB Configuration Menu for remote PDBA configuration details.
See Table 3-17 for the rules for the Select Other PDBA screen:
Table 3-17 Rules for Select Other PDBA
|
Semantic Rules |
Error Code |
|
|
The other PDBA must be reachable. |
E1020 |
|
3.2.7.2 Switchover PDBA State
The PDBA / Switchover PDBA State screen lets you switch the active and standby PDBAs. This action toggles the states from one state to the other. When you choose the Select Other PDBA menu item, a screen requires you to confirm the switchover from the Active to the Standby PDBA, or the reverse.
Notice that if only one PDBA is available, you are warned that the action can cause synchronization problems.
3.2.7.3 Process Control
The PDBA / Process Control menu lets you to start and stop the PDBA application.
The PDBA / Process Control menu provides these actions:
Start PDBA Software
The PDBA / Process Control / Start PDBA Software screen begins the execution of the PDBA software. When you click the Start PDBA Software button, the EPAP attempts to start the software. Starting the PDBA software from this menu item also clears the indicator that keeps the software from being automatically started on a reboot.
Figure 3-69 Start PDBA Software Screen

When you choose the Start PDBA Software screen, another screen requires to confirm your choice to start the PDBA software. Click the Start PDBA Software button.
Stop PDBA Software
The PDBA / Process Control / Stop PDBA Software screen stops the PDBA software.
The screen also has a checkbox that lets users specify whether PDBA is to be automatically restarted when the machine boots. If this checkbox is selected, the software can only be restarted via the Start PDBA menu.
The Stop PDBA Software button launches the successful stopping of the PDBA.
3.2.7.4 View PDBA Status
The PDBA / View PDBA Status screen is used to display the current status of the selected PDBA. The PDBA Status refresh time can be viewed and changed with this screen.
When the EPAP is configured in the dual stack configuration, the PDBA will also have both IPs. On the "View PDBA Status" screen, the PDBA IP will be in the IP version format with which the EPAP GUI is accessed. If the EPAP GUI is accessed using the IPv6 IP, then the PDBA IP will be displayed in the IPv6 format. If the EPAP GUI is accessed using the IPv4 IP, then the PDBA IP will be displayed in the IPv4 format.
See the rules for screen in Table 3-18.
Figure 3-70 View PDBA Status With IPv6 PDBA IP
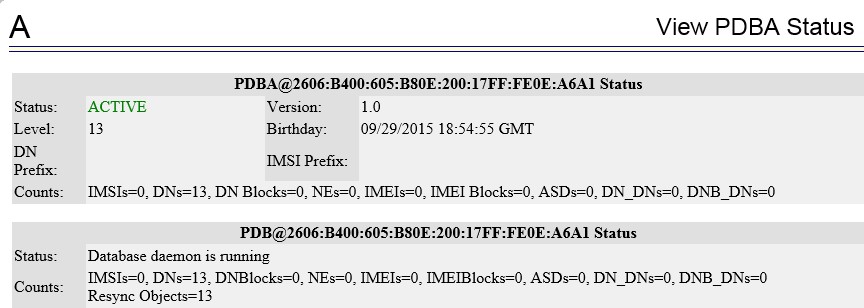
Figure 3-71 View PDBA Status With IPv4 PDBA IP
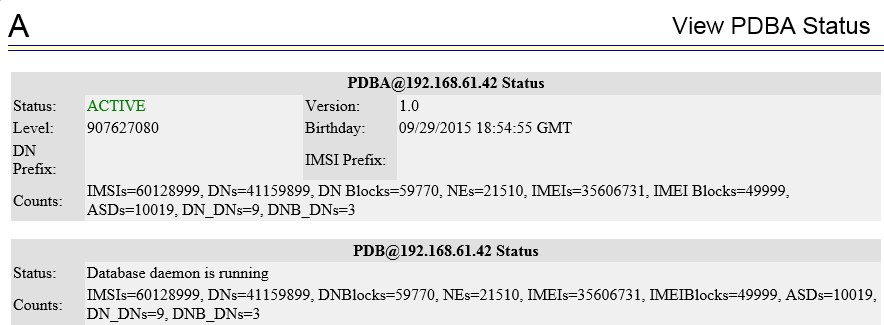
Table 3-18 Rules for Viewing PDBA Status
|
Semantic Rules |
Error Code |
|
|
PDBA must respond within 15 seconds. |
E1030 |
|
Note:
The IMSI count returned from the RTDB and the IMSI count returned from the PDB may not match when there is both G-Flex and EIR data. Any IMSI created for EIR that does not have a G-Flex IMSI association is not included in the IMSI counts of the PDB. The PDB reports only G-Flex IMSIs. The RTDB reports the total of G-Flex and EIR IMSIs as one count.3.2.7.5 Manage Data
The PDBA / Manage Data menu lets you add, update, delete, and view subscriptions in the Provisioning Database (PDB).
Note:
Use this menu only for the emergency provisioning of individual subscriptions. This menu is not intended for provisioning large numbers of subscriptions. For normal provisioning activities, the user must create a separate provisioning application that communicates with the PDBA program.
The PDBA / Manage Data menu provides these actions:
3.2.7.5.1 IMSI
The PDBA / Manage Data / menu is used to add, update, delete, and view subscriptions in the Provisioning Database (PDB).
The PDBA / Manage Data / IMSI menu provides these actions:
Add an IMSI
The PDBA / Manage Data / IMSI / Add an IMSI screen promptsthe user for the fields needed to add an IMSI to the Provisioning Database (PDB). If there is a conflicting subscription in the PDB, the user is prompted to confirm before overwriting the existing subscription.
There are limited numbers of digit combinations in the first 9 digits of DN/IMSI/IMEI. In DN/IMSI the first 9 digits consist of the Country Code, Area Code, Service Provider Code, and up to 2 digits of Subscriber number. The maximum number of 9digs is 65K entries, which includes two (2) default entries representing 5 digits and 6 digits, regardless if they are provisioned or not. If all provisioned DN/IMSIs have digits greater than or equal to 7, the max number of 9digs parsed from these provisioned DNs cannot exceed 65K - 2 entries.
Figure 3-72 Add an IMSI

Table 3-19 describes the rules that the EPAP user interface uses to perform the Add IMSI action. The table also describes other messages generated by the EPAP user interface while performing this action.
Table 3-19 Rules for Add IMSI Screen
|
Syntax Rules |
Error Code |
|
|
The user must enter a valid SP. |
E1002 |
|
|
The user must enter a valid IMSI. |
E1002 |
|
|
The user must enter a valid DN. |
E1002 |
|
|
Semantic Rules |
Error Code |
|
|
This menu option is valid only if the G-Flex feature is installed. |
None |
|
|
The SP must exist in the PDB. |
E1014 |
|
|
The user may enter up to 8 DNs |
None |
|
|
The user may elect to force the transaction to be entered into the PDB, even if there are conflicting subscriptions. |
None |
|
|
The PDBI must return a success status. |
E1017 |
|
PDBI command
ent-sub, on the creation of a single IMSI with
or without DNs, supports a response "PDBI_MAX_IMSI9DIG_LIMIT" if the to-be
provisioned IMSI causes the first 9 digits go above its max limit of 65,000.
|
E1066 | |
PDBI command
ent-sub, on the creation of one IMSI to 1-8
DNs, supports a response "PDBI_MAX_DN9DIG_LIMIT" if the to-be provisioned DN
causes the first 9 digits go above its max limit of 65,000.
|
E1068 | |
|
Other Messages |
||
|
Condition |
Message Text |
|
|
The new subscription already exists in the PDB. |
This subscription conflicts with an existing subscription. |
|
|
The new subscription was attempting to overwrite an existing IMSI. |
IMSI <imsi> already exists in the PDB. If you choose to overwrite the existing subscription, all data associated with the existing IMSI will be lost. All DNs associated with the existing IMSI will be deleted. |
|
|
The subscription was added. |
Subscription successfully added. |
|
|
The subscription was not added. |
Subscription not added. |
|
Update an IMSI
The PDBA / Manage Data / IMSI / Update IMSI screen prompts the user for the fields necessary to change the SP for an IMSI in the Provisioning Database (PDB).
Figure 3-73 Update an IMSI

Table 3-20 describes the rules that the EPAP user interface uses to perform the Update IMSI action. The table also describes other messages generated by the EPAP user interface while performing this action.
Table 3-20 Rules for Update IMSI Screen
|
Syntax Rules |
Error Code |
|
|
The user must enter a valid SP. |
E1002 |
|
|
The user must enter a valid IMSI. |
E1002 |
|
|
Semantic Rules |
Error Code |
|
|
This menu option is valid only if the G-Flex feature is installed. |
None |
|
|
The IMSI must exist in the PDB. |
E1015 |
|
|
The SP must exist in the PDB. |
E1014 |
|
|
The PDBI must return a success status. |
E1017 |
|
|
Other Messages |
||
|
Condition |
Message Text |
|
|
The subscription was modified. |
Subscription successfully modified. |
|
|
The subscription was not modified. |
Subscription not modified. |
|
Delete an IMSI
The PDBA / Manage Data / IMSI / Delete an IMSI screen prompts the user for the fields necessary to remove a subscription from the Provisioning Database (PDB).
Table 3-21 describes the rules that the EPAP user interface uses to perform the Delete IMSI action. The table also describes other messages generated by the EPAP user interface while performing this action.
Table 3-21 Rules for Delete IMSI Screen
|
Syntax Rules |
Error Code |
|
|
The user must enter a valid IMSI. |
E1002 |
|
|
Semantic Rules |
Error Code |
|
|
This menu option is valid only if the G-Flex feature is installed. |
None |
|
|
The subscription must exist in the PDB. |
E1012 |
|
|
The PDBI must return a success status. |
E1017 |
|
|
Other Messages |
||
|
Condition |
Message Text |
|
|
The subscription was deleted. |
Subscription successfully deleted. |
|
|
The subscription was not deleted. |
Subscription not deleted. |
|
Retrieve an IMSI
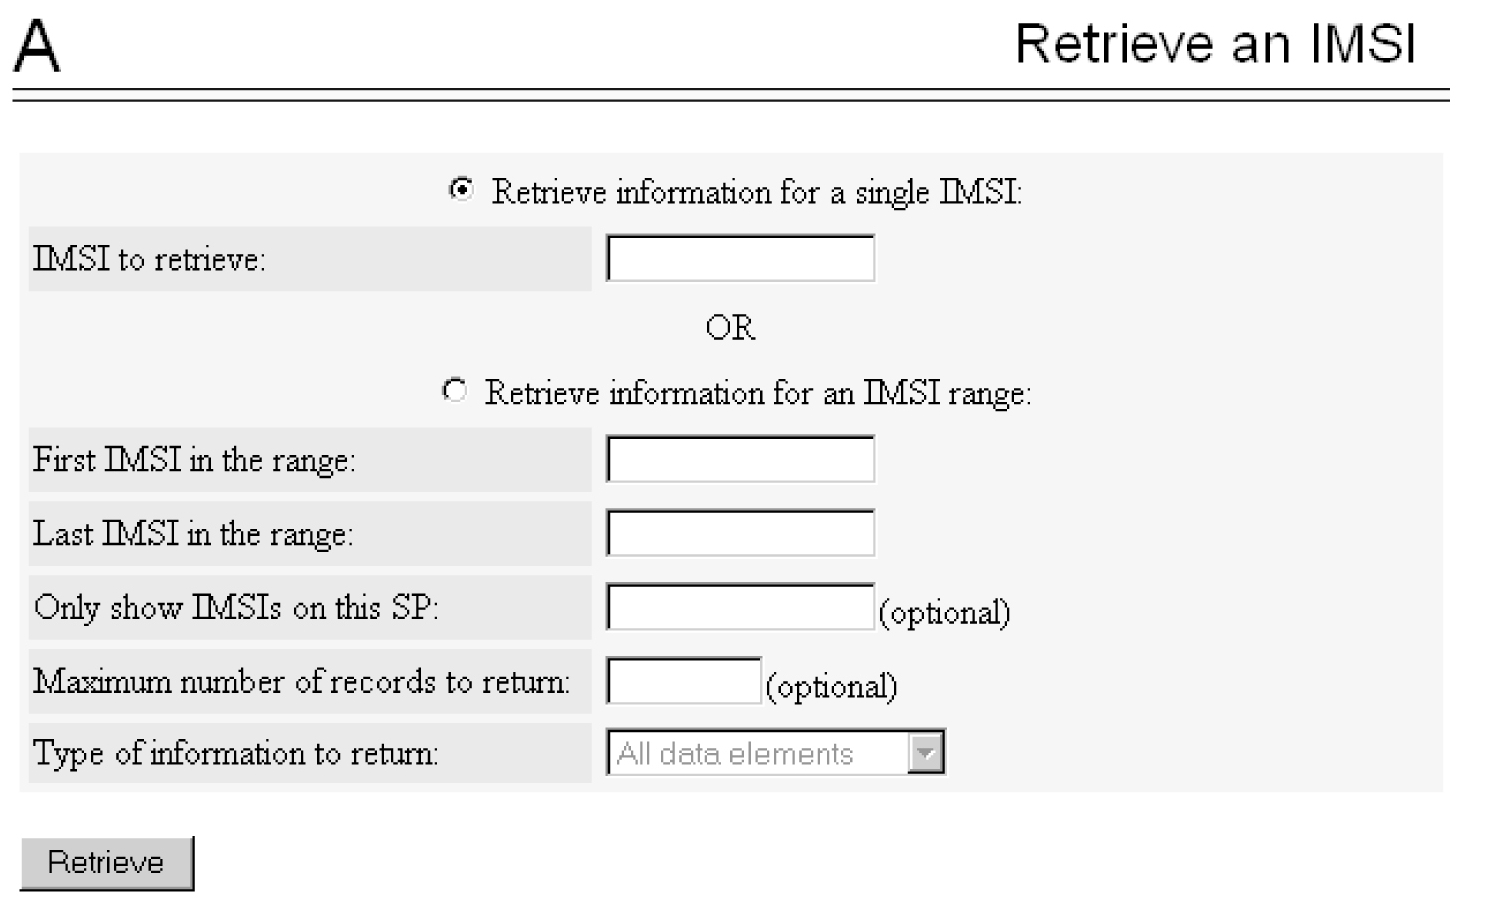
The PDBA / Manage Data / IMSI / Retrieve an IMSI screen prompts you for the fields necessary to retrieve subscriptions from the Provisioning Database (PDB). If you specify the ‘last IMSI’, all subscriptions from the ‘first IMSI’ and ‘last IMSI’ are shown.
Figure 3-74 shows a sample output form the Retrieve IMSI menu action. The choices for the drop down menu for the Display field are: All data elements, Network entries only, and Record counts only.
Figure 3-74 Retrieve IMSI Screen
3.2.7.5.2 IMSI Range
Note:
The screens available under the IMSI Range Menu are only operational to SOG customers.The PDBA / Manage Data /IMSI Range menu is used to add, update, delete, and view subscription in the Provisioning Database (PDB).
The PDBA / Manage Data / IMSI Range menu provides these actions:
Add an IMSI Range
The PDBA / Manage Data / IMSI Range / Add an IMSI Range screen prompts you for the fields needed to add an IMSI range to the Provisioning Database (PDB).
Note:
This screen is only operational to SOG customers.Table 3-22 describes the rules that the EPAP user interface uses to perform the Add IMSI action. The table also describes other messages generated by the EPAP user interface while performing this action.
Table 3-22 Rules for Add IMSI Range Screen
|
Syntax Rules |
Error Code |
|
|
The user must enter a valid SP. |
E1002 |
|
|
The user must enter a valid IMSI. |
E1002 |
|
|
The user must enter a valid DN. |
E1002 |
|
|
Semantic Rules |
Error Code |
|
|
This menu option is valid only if the G-Flex feature is installed. |
None |
|
|
The SP must exist in the PDB. |
E1014 |
|
|
The user may enter up to 8 DNs |
None |
|
|
The user may elect to force the transaction to be entered into the PDB, even if there are conflicting subscriptions. |
None |
|
|
The PDBI must return a success status. |
E1017 |
|
|
Other Messages |
||
|
Condition |
Message Text |
|
|
The new subscription already exists in the PDB. |
This subscription conflicts with an existing subscription. |
|
|
The new subscription was attempting to overwrite an existing IMSI. |
IMSI <imsi> already exists in the PDB. If you choose to overwrite the existing subscription, all data associated with the existing IMSI will be lost. All DNs associated with the existing IMSI will be deleted. |
|
|
The subscription was added. |
Subscription successfully added. |
|
|
The subscription was not added. |
Subscription not added. |
|
Update an IMSI Range
The PDBA / Manage Data / IMSI Range / Update an IMSI Range screen prompts the user for the fields necessary to change the SP for an IMSI Range in the Provisioning Database (PDB).
Note:
This screen is only operational to SOG customers.Table 3-23 describes the rules that the EPAP user interface uses to perform the Update IMSI action. The table also describes other messages generated by the EPAP user interface while performing this action.
Table 3-23 Rules for Update IMSI Range Screen
|
Syntax Rules |
Error Code |
|
|
The user must enter a valid SP. |
E1002 |
|
|
The user must enter a valid IMSI. |
E1002 |
|
|
Semantic Rules |
Error Code |
|
|
This menu option is valid only if the G-Flex feature is installed. |
None |
|
|
The IMSI must exist in the PDB. |
E1015 |
|
|
The SP must exist in the PDB. |
E1014 |
|
|
The PDBI must return a success status. |
E1017 |
|
|
Other Messages |
||
|
Condition |
Message Text |
|
|
The subscription was modified. |
Subscription successfully modified. |
|
|
The subscription was not modified. |
Subscription not modified. |
|
Delete an IMSI Range
The PDBA / Manage Data / IMSI Range / Delete an IMSI Range screen prompts the user for the fields necessary to remove a subscription range from the Provisioning Database (PDB).
Note:
This screen is only operational to SOG customers.Table 3-24 describes the rules that the EPAP user interface uses to perform the Delete IMSI action. The table also describes other messages generated by the EPAP user interface while performing this action.
Table 3-24 Rules for Delete IMSI Range Screen
|
Syntax Rules |
Error Code |
|
|
The user must enter a valid IMSI. |
E1002 |
|
|
Semantic Rules |
Error Code |
|
|
This menu option is valid only if the G-Flex feature is installed. |
None |
|
|
The subscription must exist in the PDB. |
E1012 |
|
|
The PDBI must return a success status. |
E1017 |
|
|
Other Messages |
||
|
Condition |
Message Text |
|
|
The subscription was deleted. |
Subscription successfully deleted. |
|
|
The subscription was not deleted. |
Subscription not deleted. |
|
Retrieve an IMSI Range
The PDBA / Manage Data / IMSI Range / Retrieve an IMSI Range screen prompts you for the fields necessary to retrieve subscriptions from the Provisioning Database (PDB). All subscriptions overlapping the Beginning IMSI to the Ending IMSI are shown. The Ending IMSI is not required.
Note:
This screen is only operational to SOG customers.Table 3-25 describes the rules that the EPAP user interface uses to perform the Retrieve IMSI action. The table also describes other messages generated by the EPAP user interface while performing this action.
Table 3-25 Rules for Retrieve IMSI Range Screen
|
Syntax Rules |
Error Code |
|
|
The user must enter a valid IMSI. |
E1002 |
|
|
The user must enter a valid SP. |
E1002 |
|
|
Semantic Rules |
Error Code |
|
|
This option is valid only if the G-Flex feature is installed. |
None |
|
|
The type of output data to return may only be entered if a range of IMSIs is requested. |
None |
|
|
The maximum number of records to return may only be entered if a range of IMSIs is requested. |
None |
|
|
The PDBI must return a success status. |
E1017 |
|
|
Other Messages |
||
|
Condition |
Message Text |
|
|
No records were found. |
Query returned no subscriptions. |
|
3.2.7.5.3 Dialed Numbers (DN)
The PDBA / Manage Data / DN menu lets you add, update, delete, and view dialed numbers (DNs) in the Provisioning Database (PDB). A ‘dialed number’ can refer to any mobile or wireline subscriber number and can include MSISDN, MDN, MIN, or the wireline Dialed Number.
The PDBA / Manage Data / DN menu provides these actions:
Add a DN
The PDBA / Manage Data / DN / Add a DN screen prompts you for the fields needed to add a DN to the Provisioning Database (PDB). If there is a conflicting subscription in the PDB, you are prompted to confirm before overwriting the existing subscription.
Note:
It is not recommended to provision more than 60 millions of Number Substitute of DN (NSDN). Higher NSDN data causes a failure in the RTDB reload from the PDB.See Figure 3-75 for an example of the Add a DN screen.
Figure 3-75 Add a DN Screen
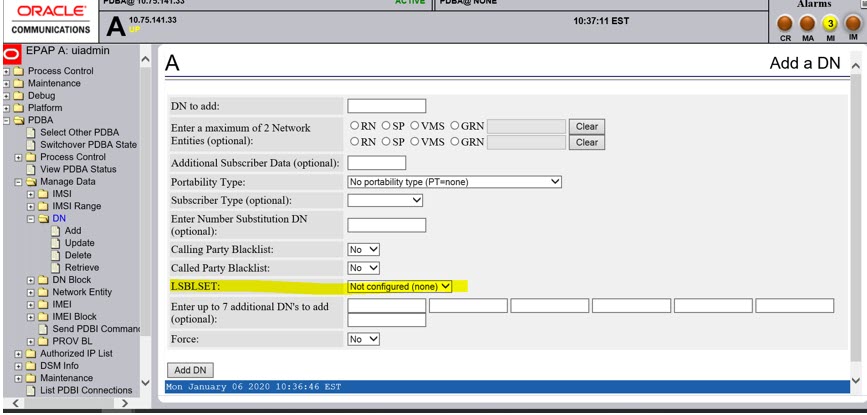
Table 3-26 describes the rules that the EPAP user interface uses to perform the Add DN action. The table also describes other messages generated by the EPAP user interface while performing this action.
Table 3-26 Rules for Add DN Screen
|
Syntax Rules |
Error Code |
|
|
The user must enter a valid SP. |
E1002 |
|
|
The user must enter a valid IMSI. |
E1002 |
|
|
The user must enter a valid DN. |
E1002 |
|
|
Semantic Rules |
Error Code |
|
|
The user may enter a portability type only if an SP was not specified. |
None |
|
|
The SP must exist in the PDB. |
E1014 |
|
|
The RN must exist in the PDB. |
E1014 |
|
|
The user may enter up to 8 DNs |
None |
|
|
The user may elect to force the transaction to be entered into the PDB, even if there are conflicting subscriptions. |
None |
|
|
The PDBI must return a success status. |
E1017 |
|
| E1068 | ||
PDBI command
ent-sub, on the creation of one or more DNs on
the same NE with no IMSI, supports a response "PDBI_MAX_IMSI9DIG_LIMIT" if the
to-be provisioned DN causes the first 9 digits go above its max limit of
65,000.
|
||
|
Other Messages |
||
|
Condition |
Message Text |
|
|
The new subscription already exists in the PDB. |
This subscription conflicts with an existing subscription. |
|
|
The new subscription was attempting to overwrite an existing DN. |
One of the DNs already exist in the PDB. If you choose to overwrite the existing subscription, all data associated with the existing DN will be lost. |
|
|
The subscription was added. |
Subscription successfully added. |
|
|
The subscription was not added. |
Subscription not added. |
|
Update a DN
The PDBA / Manage Data / DN / Update a DN screen prompts you for the fields necessary to change the SP or RN for an DN in the Provisioning Database (PDB). See Figure 3-76 for an example of the Update a DN menu.
Figure 3-76 Update a DN Screen
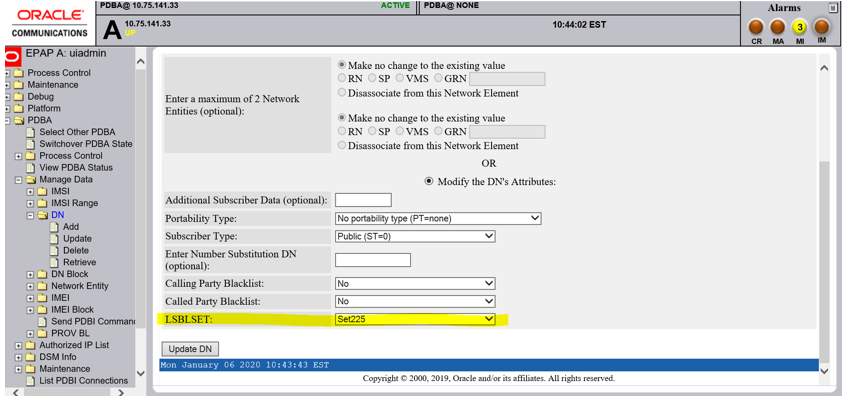
Table 3-27 describes the rules that the EPAP user interface uses to perform the Update DN action. The table also describes other messages generated by the EPAP user interface while performing this action.
Table 3-27 Rules for Update a DN Screen
|
Syntax Rules |
Error Code |
|
|
The user must enter a valid SP. |
E1002 |
|
|
The user must enter a valid RN. |
E1002 |
|
|
The user must enter a valid IMSI. |
E1002 |
|
|
The user must enter a valid DN. |
E1002 |
|
|
Semantic Rules |
Error Code |
|
|
This menu option is valid only if the G-Flex feature is installed. |
None |
|
|
The SP must exist in the PDB. |
E1014 |
|
|
The RN must exist in the PDB. |
E1022 |
|
|
The DN must exist in the PDB. |
E1016 |
|
|
The IMSI must exist in the PDB. |
E1015 |
|
|
The DN may not be already associated with an IMSI. |
E1018 |
|
|
The user my only enter a portability type if an RN is specified. |
None |
|
|
The PDBI must return a success status. |
E1017 |
|
PDBI command
ent-sub, on the creation of a single IMSI with
or without DNs, supports a response "PDBI_MAX_IMSI9DIG_LIMIT" if the to-be
provisioned IMSI causes the first 9 digits go above its max limit of 65,000.
|
E1066 | |
|
Other Messages |
||
|
Condition |
Message Text |
|
|
The subscription was modified. |
Subscription successfully modified. |
|
|
The subscription was not modified. |
Subscription not modified. |
|
Delete a DN
Figure 3-77 Delete a DN Screen
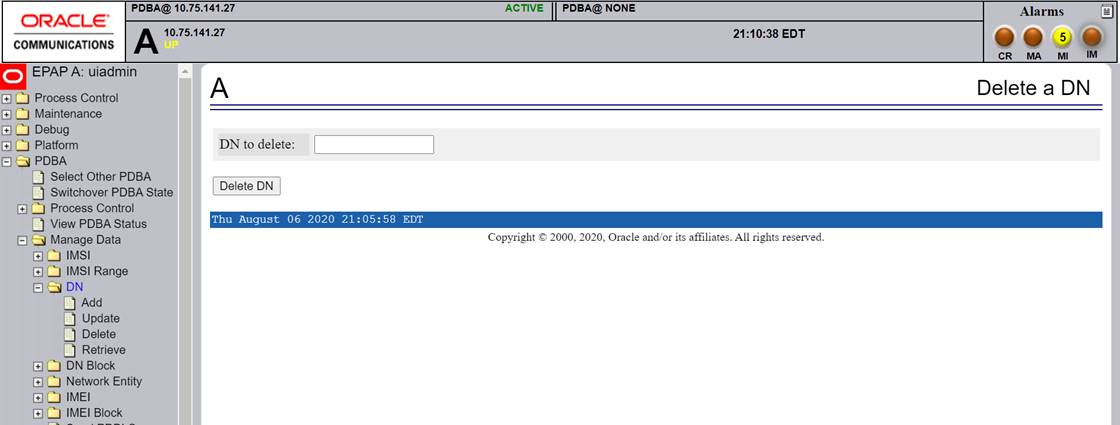
The PDBA / Manage Data / DN / Delete a DN screen prompts the user for the fields necessary to remove a DN from the Provisioning Database (PDB).
Table 3-28 describes the rules that the EPAP user interface uses to perform the Delete DN action. The table also describes other messages generated by the EPAP user interface while performing this action.
Table 3-28 Rules for Delete DN Screen
|
Syntax Rules |
Error Code |
|
|
The user must enter a valid DN. |
E1002 |
|
|
Semantic Rules |
Error Code |
|
|
The subscription must exist in the PDB. |
E1012 |
|
|
The PDBI must return a success status. |
E1017 |
|
|
Other Messages |
||
|
Condition |
Message Text |
|
|
The subscription was deleted. |
Subscription successfully deleted. |
|
|
The subscription was not deleted. |
Subscription not deleted. |
|
Retrieve a DN
The PDBA / Manage Data / DN / Retrieve a DN screen prompts you for the fields necessary to retrieve subscriptions from the Provisioning Database (PDB) by DN.
Figure 3-78 Retrieve a DN
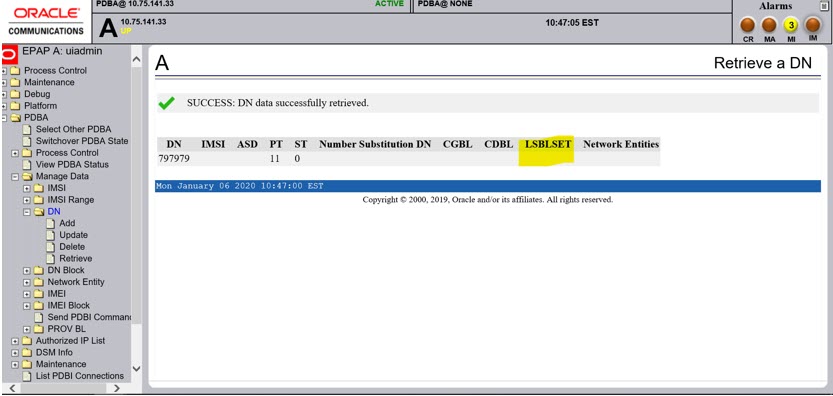
Table 3-29 describes the rules that the EPAP user interface uses to perform the Retrieve DN action. The table also describes other messages generated by the EPAP user interface while performing this action.
Table 3-29 Rules for Retrieve DN Screen
|
Syntax Rules |
Error Code |
|
|
The user must enter a valid DN. |
E1002 |
|
|
The user must enter a valid SP. |
E1002 |
|
|
The user must enter a valid RN. |
E1002 |
|
|
Semantic Rules |
Error Code |
|
|
The user may enter a range of DNs. |
None |
|
|
The user may only enter an SP if G-Flex or G-Port is installed. |
None |
|
|
The user may only enter an RN if G-Port or INP is installed. |
None |
|
|
The type of output data to return may only be entered if a DN range is requested. |
None |
|
|
The maximum number of records to return may only be entered if a DN range is entered. |
None |
|
|
The PDBI must return a success status. |
E1017 |
|
|
Other Messages |
||
|
Condition |
Message Text |
|
|
No records were found. |
Query returned no subscriptions. |
|
3.2.7.5.4 DN Block
The PDBA / Manage Data / DNBlock menu lets you add, update, delete, and view DN Blocks in the Provisioning Database (PDB). A ‘dialed number’ can refer to any mobile or wireline subscriber number, and can include MSISDN, MDN, MIN, or the wireline Dialed Number. A DN Block is a grouping of DN numbers that is treated as a continuous sequence of DNs.
The PDBA / Manage Data / DN Block menu provides these actions:
Add a DN Block
The PDBA / Manage Data / DNBlock / Add a DN Block screen prompts you for the fields needed to add a DN block to the Provisioning Database (PDB). If there is a conflicting subscription in the PDB, you are prompted to confirm before overwriting the existing subscription.
Figure 3-79 Add a DN Block
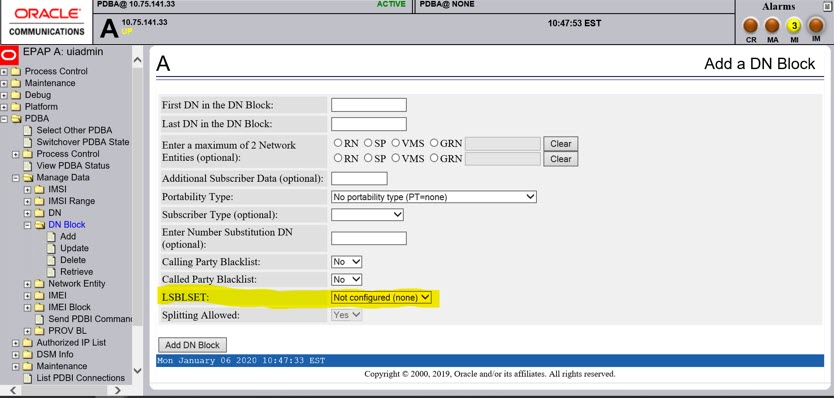
Table 3-30 describes the rules that the EPAP user interface uses to perform the Add DN Block action. The table also describes other messages generated by the EPAP user interface while performing this action.
Table 3-30 Rules for Add DN Block Screen
|
Syntax Rules |
Error Code |
|
|
The user must enter a valid SP. |
E1002 |
|
|
The user must enter a valid RN. |
E1002 |
|
|
The user must enter a valid DN. |
E1002 |
|
|
Semantic Rules |
Error Code |
|
|
This menu option is valid only if the G-Port or INP feature is installed. |
None |
|
|
The SP must exist in the PDB. |
E1014 |
|
|
The RN must exist in the PDB. |
E1014 |
|
|
The user may enter a portability type only if a SP was not specified. |
None |
|
|
The user may elect to force the transaction to be entered into the PDB, even if there are conflicting subscriptions. |
None |
|
|
The PDBI must return a success status. |
E1017 |
|
|
Other Messages |
||
|
Condition |
Message Text |
|
|
The new subscription already exists in the PDB. |
This subscription conflicts with an existing subscription. |
|
|
The new subscription was attempting to overwrite an existing IMSI. |
DN block <start DN-end DN> already exists in the PDB. If you choose to overwrite the existing subscription, all data associated with the existing DN block will be lost |
|
|
The new subscription was attempting to overwrite an existing DN block. |
DN block <start DN-end DN> already exists in the PDB. If you choose to overwrite the existing subscription, all data associated with the existing DN block will be lost |
|
|
The subscription was added. |
Subscription successfully added. |
|
|
The subscription was not added. |
Subscription not added. |
|
Update a DN Block
The PDBA / Manage Data / DNBlock / Update a DN Block screen prompts you for the fields necessary to change the SP or RN for an DN block in the Provisioning Database (PDB).
Figure 3-80 Update a DN Block Screen
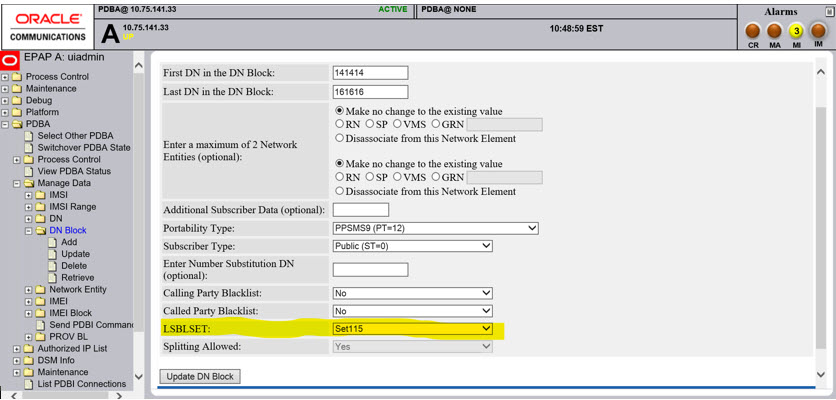
Table 3-31 describes the rules that the EPAP user interface uses to perform the Update DN Block action. The table also describes other messages generated by the EPAP user interface while performing this action.
Table 3-31 Rules for Update a DN Block Screen
|
Syntax Rules |
Error Code |
|
|
The user must enter a valid SP. |
E1002 |
|
|
The user must enter a valid RN. |
E1002 |
|
|
The user must enter a valid DN. |
E1002 |
|
|
Semantic Rules |
Error Code |
|
|
This menu option is valid only if the G-Port or INP feature is installed. |
None |
|
|
The SP must exist in the PDB. |
E1014 |
|
|
The RN must exist in the PDB. |
E1022 |
|
|
The DN block must exist in the PDB. |
E1016 |
|
|
The DN may not be already associated with an IMSI. |
E1018 |
|
|
The user my enter a portability type only if an RN is specified. |
None |
|
|
The PDBI must return a success status. |
E1017 |
|
|
Other Messages |
||
|
Condition |
Message Text |
|
|
The subscription was modified. |
Subscription successfully modified. |
|
|
The subscription was not modified. |
Subscription not modified. |
|
Delete a DN Block
Figure 3-81 Delete a DN Block Screen
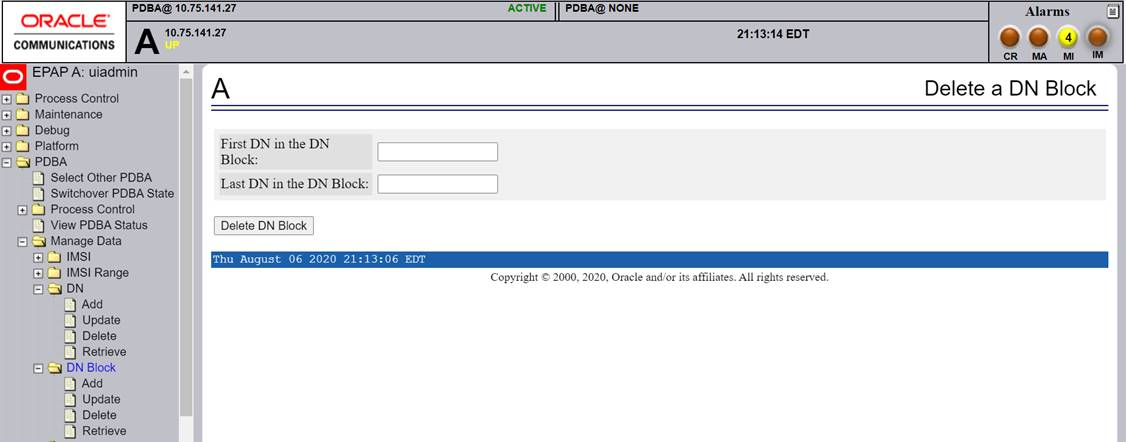
The PDBA / Manage Data / DNBlock / Delete a DN Block screen prompts the user for the fields necessary to remove a DN block from the Provisioning Database (PDB).
Table 3-32 describes the rules that the EPAP user interface uses to perform the Delete DN Block action. The table also describes other messages generated by the EPAP user interface while performing this action.
Table 3-32 Rules for Delete DN Block Screen
|
Syntax Rules |
Error Code |
|
|
The user must enter a valid DN. |
E1002 |
|
|
Semantic Rules |
Error Code |
|
|
The menu option is valid only if the G-Port or INP feature is installed. |
None |
|
|
The subscription must exist in the PDB. |
E1012 |
|
|
The PDBI must return a success status. |
E1017 |
|
|
Other Messages |
||
|
Condition |
Message Text |
|
|
The subscription was deleted. |
Subscription successfully deleted. |
|
|
The subscription was not deleted. |
Subscription not deleted. |
|
Retrieve DN Blocks
Figure 3-82 Retrieve a DN Block Screen
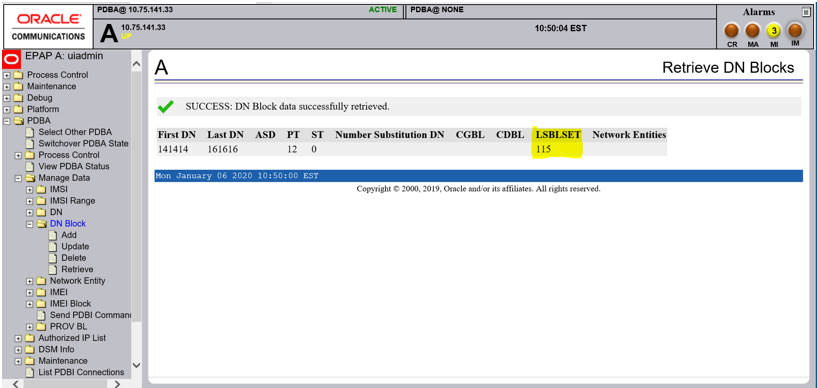
The PDBA / Manage Data / DNBlock / Retrieve DN Blocks screen prompts you for the fields necessary to retrieve subscriptions from the Provisioning Database (PDB) by DN. You must specify a block of DNs.
Table 3-33 describes the rules that the EPAP user interface uses to perform the Retrieve DN Block action. The table also describes other messages generated by the EPAP user interface while performing this action.
Table 3-33 Rules for Retrieve DN Block Screen
|
Syntax Rules |
Error Code |
|
|
The user must enter a valid DN. |
E1002 |
|
|
The user must enter a valid SP. |
E1002 |
|
|
The user must enter a valid RN. |
E1002 |
|
|
Semantic Rules |
Error Code |
|
|
The user may enter a range of DNs. |
None |
|
|
The user may only enter an SP if G-Flex or G-Port is installed. |
None |
|
|
The user may only enter an RN if G-Port or INP is installed. |
None |
|
|
The type of output data to return may be entered only if a DN range is requested. |
None |
|
|
The maximum number of records to return may be entered only if a DN range is entered. |
None |
|
|
The PDBI must return a success status. |
E1017 |
|
|
Other Messages |
||
|
Condition |
Message Text |
|
|
No records were found. |
Query returned no subscriptions. |
|
3.2.7.5.5 Network Entity
The PDBA / Manage Data / Network Entity menu lets you add, update, delete, and retrieve network entities in the Provisioning Database (PDB).
The PDBA / Manage Data / Network Entity menu provides these actions:
Add Network Entity
The PDBA / Manage Data / Network Entity / Add Network Entity menu selection prompts for the fields needed to add a network entity to the Provisioning Database (PDB).
Figure 3-83 Add an NE Example
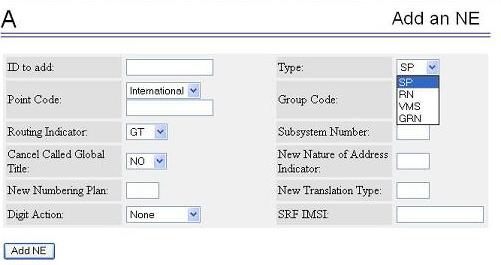
Table 3-34 describes the rules that the EPAP user interface uses to perform the Add Network Entity action. The table also describes other messages generated by the EPAP user interface while performing this action.
Table 3-34 Rules for Add Network Entity Screen
|
Syntax Rules |
Error Code |
|
|
The user must enter a valid entity ID. |
E1002 |
|
|
The user must enter a valid PC (point code). |
E1002 |
|
|
The user must enter a valid SSN. |
E1002 |
|
|
Semantic Rules |
Error Code |
|
|
For RNs, entering a point code is optional. |
None |
|
|
If no point code is entered, no optional parameters can be specified. |
None |
|
|
Only one of the 3 point code types may be entered. |
None |
|
|
If the routing indicator is GT, Cancel Called Global Title must be set to NO. |
None |
|
|
If the routing indicator is GT, a digit action may be specified. |
None |
|
|
The PDBI must return a success status. |
E1017 |
|
|
Other Messages |
||
|
Condition |
Message Text |
|
|
The Network Entity was added. |
Network Entity successfully added. |
|
|
The Network Entity was not added. |
Network Entity not added. |
|
Update Network Entity
The PDBA / Manage Data / Network Entity / Update Network Entity screen prompts for the fields necessary to change a Network Entity in the Provisioning Database (PDB).
Table 3-35 describes the rules that the EPAP user interface uses to perform the Modify Network Entity action. The table also describes other messages generated by the EPAP user interface while performing this action.
Table 3-35 Rules for Modify Network Entity Screen
|
Syntax Rules |
Error Code |
|
|
The user must enter a valid entity ID. |
E1002 |
|
|
The user must enter a valid point code. |
E1002 |
|
|
The user must enter a valid SSN. |
E1002 |
|
|
Semantic Rules |
Error Code |
|
|
For RNs, entering a point code is optional. |
None |
|
|
If no point code is entered, no optional parameters can be specified. |
None |
|
|
Only one of the 3 point code types may be entered. |
None |
|
|
If the routing indicator is GT, Cancel Called Global Title must be set to NO. |
None |
|
|
If the routing indicator is GT, a digit action may be specified. |
None |
|
|
The PDBI must return a success status. |
E1017 |
|
|
Other Messages |
||
|
Condition |
Message Text |
|
|
The Network Entity was modified. |
Network Entity successfully modified. |
|
|
The Network Entity was not modified. |
Network Entity not modified. |
|
Delete Network Entity
The PDBA / Manage Data / Network Entity / Delete Network Entity screen prompts the user for the fields necessary to remove a Network Entity from the Provisioning Database (PDB).
Table 3-36 describes the rules that the EPAP user interface uses to perform the Delete Network Entity action. The table also describes other messages generated by the EPAP user interface while performing this action.
Table 3-36 Rules for Delete Network Entity Screen
|
Syntax Rules |
Error Code |
|
|
The user must enter a valid entity ID. |
E1002 |
|
|
Semantic Rules |
Error Code |
|
|
The PDBI must return a success status. |
E1017 |
|
|
Other Messages |
||
|
Condition |
Message Text |
|
|
The Network Entity was deleted. |
Network entity successfully deleted. |
|
|
The Network Entity was not deleted. |
Network entity not deleted. |
|
Retrieve Network Entity
The PDBA / Manage Data / Network Entity / Retrieve Network Entity screen prompts you for the fields necessary to retrieve a Network Entity from the Provisioning Database (PDB).
Figure 3-84 Retrieve an NE Example
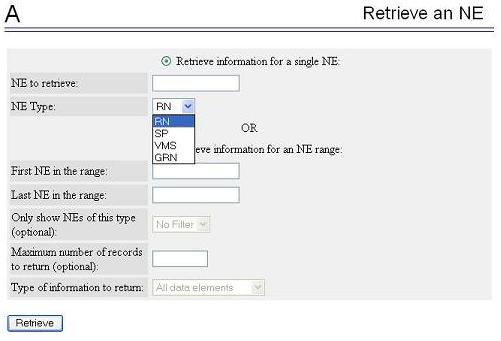
Table 3-37 describes the rules that the EPAP user interface uses to perform the Retrieve Network Entity action. The table also describes other messages generated by the EPAP user interface while performing this action.
Table 3-37 Rules for Retrieve Network Entity Screen
|
Syntax Rules |
Error Code |
|
|
The user must enter a valid entity ID. |
E1002 |
|
|
Semantic Rules |
Error Code |
|
|
The type of output data to return may be entered only if a range of Network Entities is requested. |
None |
|
|
The maximum number of records to return may be entered only if a range of Network Entities is requested. |
None |
|
|
The PDBI must return a success status. |
E1017 |
|
|
Other Messages |
||
|
Condition |
Message Text |
|
|
No records were found. |
Query returned no network entities. |
|
Table 3-38 describes the rules that the EPAP user interface uses to perform the Send Raw PDBI Commands action. The table also describes other messages generated by the EPAP user interface while performing this action.
Table 3-38 Rules for Enter Raw PDBI Commands Screen
|
Semantic Rules |
Error Code |
|
|
The user may enter 'quit' to return to the PDBA Manage Subscriptions Menu. |
None |
|
|
Other Messages |
||
|
Condition |
Message Text |
|
|
A transaction ID was returned. |
Transaction ID: <txid> |
|
|
A return code was returned. (It is displayed as a text mnemonic corresponding to an error number.) |
Return code: <return code> |
|
|
Response data was returned. (This response includes all text within the data() portion of the command response.) |
Response data: <response data> |
|
3.2.7.5.6 Individual IMEI
The PDBA / Manage Data / IMEI menu is used to add, update, delete, and view individual IMEI entries in the Provisioning Database (PDB).
The PDBA / Manage Data / IMEI menu provides these actions:
Add an IMEI
The PDBA / Manage Data / IMEI / Add an IMEI screen is used to create new IMEI entries in the Provisioning Database (PDB). The following functions are performed from this screen:
- Add a new IMEI, its associated List Types (WL,GL,BL), SVN, and 0 to 400 IMSIs. An IMEI and at least one List Type must be specified.
- Overwrite an existing IMEI. The IMEI and any other parameters and Force must be specified.
- Add a new IMSI to an existing IMEI. Existing IMEI and IMSI must be specified.
The SVN is an optional field. If no value is entered the default is 0. See Figure 3-85 for an example of the Add a IMEI screen.
Figure 3-85 Add an IMEI Screen
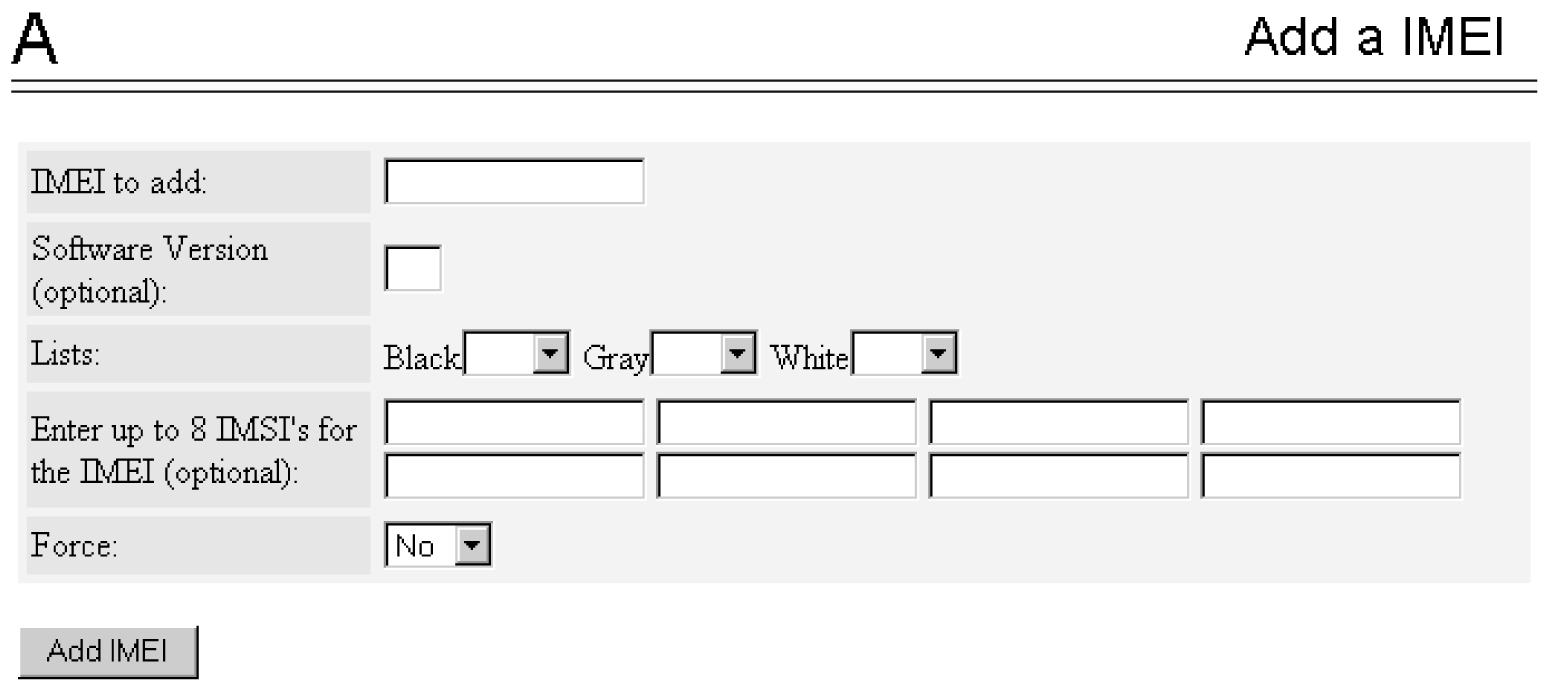
There are limited numbers of digit combinations in the first 9 digits of DN/IMSI/IMEI. In IMEI, the first 9 digits are Type Allocation Code (TAC), which must not exceed 250,000 combinations.
Table 3-39 describes the rules that the EPAP user interface uses to perform the Add IMSI action. The table also describes other messages generated by the EPAP user interface while performing this action.
Table 3-39 Rules for Add IMSI Screen
|
Syntax Rules |
Error Code |
|
|
The user must enter a valid SP. |
E1002 |
|
|
The user must enter a valid IMSI. |
E1002 |
|
|
The user must enter a valid DN. |
E1002 |
|
|
Semantic Rules |
Error Code |
|
|
This menu option is valid only if the G-Flex feature is installed. |
None |
|
|
The SP must exist in the PDB. |
E1014 |
|
|
The user may enter up to 8 DNs |
None |
|
|
The user may elect to force the transaction to be entered into the PDB, even if there are conflicting subscriptions. |
None |
|
|
The PDBI must return a success status. |
E1017 |
|
PDBI
command
ent-sub, on the creation of a single IMSI with
or without DNs, supports a response "PDBI_MAX_IMSI9DIG_LIMIT" if the to-be
provisioned IMSI causes the first 9 digits go above its max limit of 65,000.
|
E1066 | |
| "PDBI_MAX_IMEI9DIG_LIMIT" if to-be provisioned IMEI causes the first 9 digits to go above its max limit of 250,000. | E1067 | |
|
Other Messages |
||
|
Condition |
Message Text |
|
|
The new subscription already exists in the PDB. |
This subscription conflicts with an existing subscription. |
|
|
The new subscription was attempting to overwrite an existing IMSI. |
IMSI <imsi> already exists in the PDB. If you choose to overwrite the existing subscription, all data associated with the existing IMSI will be lost. All DNs associated with the existing IMSI will be deleted. |
|
|
The subscription was added. |
Subscription successfully added. |
|
|
The subscription was not added. |
Subscription not added. |
|
Update an IMEI
The PDBA / Manage Data / IMEI / Update IMEI screen is used to update/modify individual IMEI entries in the PDB. The following functions are performed from this screen:
- Update an IMEI with its associated List Types (WL,GL,BL). An IMEI and at least one List Type must be specified. At least one List Type must be set to yes. Unless specified, the List types will not change.
- Overwrite an existing SVN. An IMEI and SVN must be specified.
IMSIs cannot be updated with this screen. ENT_EIR and DLT_EIR are used to define IMSIs. To change the List Types, use the yes/no options for the various lists.
Table 3-40 describes the rules that the EPAP user interface uses to perform the Update IMSI action. The table also describes other messages generated by the EPAP user interface while performing this action.
Table 3-40 Rules for Update IMEI Screen
|
Syntax Rules |
Error Code |
|
|
The user must enter a valid SP. |
E1002 |
|
|
The user must enter a valid IMSI. |
E1002 |
|
|
Semantic Rules |
Error Code |
|
|
This menu option is valid only if the G-Flex feature is installed. |
None |
|
|
The IMEI must exist in the PDB. |
E1015 |
|
|
The SP must exist in the PDB. |
E1014 |
|
|
The PDBI must return a success status. |
E1017 |
|
|
Other Messages |
||
|
Condition |
Message Text |
|
|
The subscription was modified. |
Subscription successfully modified. |
|
|
The subscription was not modified. |
Subscription not modified. |
|
Delete an IMEI
The PDBA / Manage Data / IMEI / Delete an IMEI screen is used to remove IMEI entries from the Provisioning Database (PDB). The following functions are performed from this screen:
- Delete an IMEI and its associated list types, SVN, and any associated IMSIs. The IMEI must be specified.
- Delete an IMSI from a specific IMEI. The IMSI and IMEI must be specified.
- Delete an IMSI from all IMEIs. The IMSI must be specified.
Table 3-41 describes the rules that the EPAP user interface uses to perform the Delete IMSI action. The table also describes other messages generated by the EPAP user interface while performing this action.
Table 3-41 Rules for Delete IMSI Screen
|
Syntax Rules |
Error Code |
|
|
The user must enter a valid IMSI. |
E1002 |
|
|
Semantic Rules |
Error Code |
|
|
This menu option is valid only if the G-Flex feature is installed. |
None |
|
|
The subscription must exist in the PDB. |
E1012 |
|
|
The PDBI must return a success status. |
E1017 |
|
|
Other Messages |
||
|
Condition |
Message Text |
|
|
The subscription was deleted. |
Subscription successfully deleted. |
|
|
The subscription was not deleted. |
Subscription not deleted. |
|
Retrieve an IMEI
The PDBA / Manage Data / IMEI / Retrieve is used to retrieve IMEI data from the Provisioning Database (PDB). The following functions are performed from this screen:
- Retrieve an IMEI and its associated List Types (WL,GL,BL), SVN, and 0 to 400 IMSIs. The IMEI must be specified. Once IMSIs are added as part of the add IMEI option, the user will be allowed to add up to 400 IMSIs per IMEI using PDBI commands or import scripts, with no more than 8 IMSIs to be added per command.
- Retrieve a range (1 through 10,000) of IMEIs that
match either filter:
- Have a specific List Type set to YES.
- Have an IMSI that matches the requested IMSI.
- Retrieve the beginning and ending IMEI. At least one optional filter type must be specified.
See Figure 3-86 for an example of the Retrieve a IMEI screen.
Figure 3-86 Retrieve an IMEI Screen
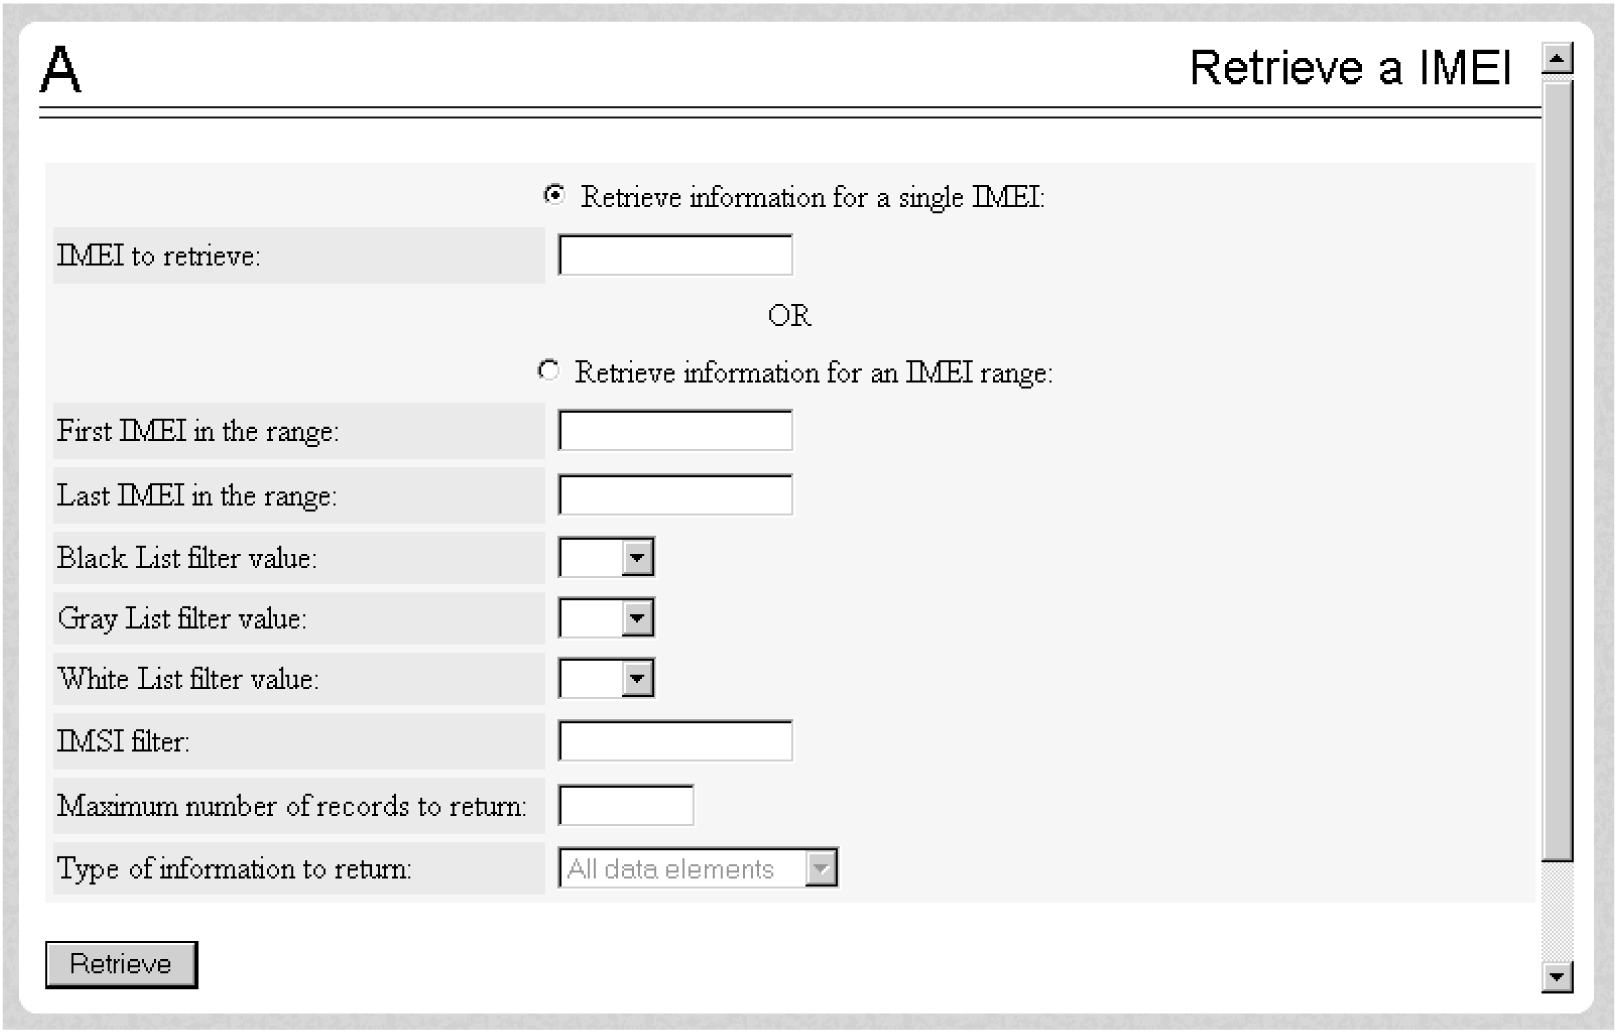
3.2.7.5.7 Block IMEI
The PDBA / Manage Data / IMEI Block menu is used to add, update, delete, and view individual IMEI entries in the Provisioning Database (PDB).
The PDBA / Manage Data / IMEI Block menu provides these actions:
Add an IMEI Block
The PDBA / Manage Data / IMEI / Add an IMEI Block screen is used to create new IMEI entries in the Provisioning Database (PDB). This screen is used to add a new IMEI block with its associated List Types (WL,GL,BL). The First IMEI, Last IMEI, and at least one List Type must be specified.
Table 3-42 describes the rules that the EPAP user interface uses to perform the Add IMSI action. The table also describes other messages generated by the EPAP user interface while performing this action.
Table 3-42 Rules for Add IMSI Screen
|
Syntax Rules |
Error Code |
|
|
The user must enter a valid SP. |
E1002 |
|
|
The user must enter a valid IMSI. |
E1002 |
|
|
The user must enter a valid DN. |
E1002 |
|
|
Semantic Rules |
Error Code |
|
|
This menu option is valid only if the G-Flex feature is installed. |
None |
|
|
The SP must exist in the PDB. |
E1014 |
|
|
The user may enter up to 8 DNs |
None |
|
|
The user may elect to force the transaction to be entered into the PDB, even if there are conflicting subscriptions. |
None |
|
|
The PDBI must return a success status. |
E1017 |
|
|
Other Messages |
||
|
Condition |
Message Text |
|
|
The new subscription already exists in the PDB. |
This subscription conflicts with an existing subscription. |
|
|
The new subscription was attempting to overwrite an existing IMSI. |
IMSI <imsi> already exists in the PDB. If you choose to overwrite the existing subscription, all data associated with the existing IMSI will be lost. All DNs associated with the existing IMSI will be deleted. |
|
|
The subscription was added. |
Subscription successfully added. |
|
|
The subscription was not added. |
Subscription not added. |
|
Update an IMEI Block
The PDBA / Manage Data / IMEI / Update IMEI Block screen is used to update/modify IMEI entries in the PDB. This screen is used to update an IMEI block with its associated List Types (WL,GL,BL). The First IMEI, Last IMEI, and at least one List Type must be specified. At least one List Type must be set to yes. Unless specified, the List types will not change.
Table 3-43 describes the rules that the EPAP user interface uses to perform the Update IMSI action. The table also describes other messages generated by the EPAP user interface while performing this action.
Table 3-43 Rules for Update IMSI Screen
|
Syntax Rules |
Error Code |
|
|
The user must enter a valid SP. |
E1002 |
|
|
The user must enter a valid IMSI. |
E1002 |
|
|
Semantic Rules |
Error Code |
|
|
This menu option is valid only if the G-Flex feature is installed. |
None |
|
|
The IMSI must exist in the PDB. |
E1015 |
|
|
The SP must exist in the PDB. |
E1014 |
|
|
The PDBI must return a success status. |
E1017 |
|
|
Other Messages |
||
|
Condition |
Message Text |
|
|
The subscription was modified. |
Subscription successfully modified. |
|
|
The subscription was not modified. |
Subscription not modified. |
|
Delete an IMEI Block
The PDBA / Manage Data / IMEI / Delete an IMEI Block screen is used to remove IMEI entries from the Provisioning Database (PDB). This screen is used to delete an IMEI block and its associated list types, SVN, and any associated IMSIs. The First IMEI in the block and Last IMEI in the block must be specified.
Table 3-44 describes the rules that the EPAP user interface uses to perform the Delete IMSI action. The table also describes other messages generated by the EPAP user interface while performing this action.
Table 3-44 Rules for Delete IMSI Screen
|
Syntax Rules |
Error Code |
|
|
The user must enter a valid IMSI. |
E1002 |
|
|
Semantic Rules |
Error Code |
|
|
This menu option is valid only if the G-Flex feature is installed. |
None |
|
|
The subscription must exist in the PDB. |
E1012 |
|
|
The PDBI must return a success status. |
E1017 |
|
|
Other Messages |
||
|
Condition |
Message Text |
|
|
The subscription was deleted. |
Subscription successfully deleted. |
|
|
The subscription was not deleted. |
Subscription not deleted. |
|
3.2.7.5.8 Send PDBI Command
The PDBA / Manage Data / Send PDBI Command screen allows only the epapdev user to type PDBI (Provisioning Database Interface) commands that are not explicitly covered by the menu set. This uses WebStart Java technology, which works independent of the web browser once it is launched. The dynamic JNLP files are used to launch the WebStart application. The Send PDBI Command screen appears under the PDBA / Manage Data menu.
A socket connection to the PDBI is available; however, all other functions, including creating and ending transactions, must be entered manually. For additional information about the PDBI commands, refer to Provisioning Database Interface User's Guide.
- Log in to the EPAP GUI.
- Select , as displayed in Figure 3-87:
Figure 3-87 Send PDBI Command on the EPAP GUI Menu
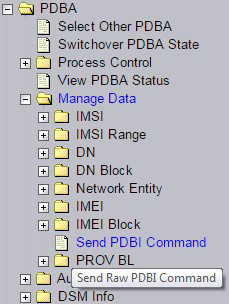
- Select Launch the JCTerm application:
Figure 3-88 JCTerm Application Launch Window

The following screen will appear:
Figure 3-89 Launching WebStart

- The JCTerm jar, along with the
Jzlib jarandJsch jar, are self-signed. Accept the security check that follows and select Run to launch the JCTerm applet for the SSH to MPS interface:Figure 3-90 JCTerm Security Check Window

- The Send PDBI Command window will be displayed, as show in the following figure:
Figure 3-91 Send PDBI Command Log in Window
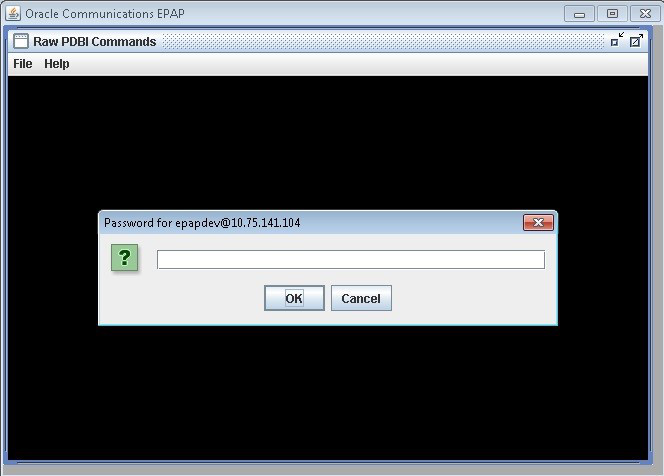
The epapdev password is required. Select OK to gain access to the Send PDBI Command interface. After a valid epapdev password is entered, the user will be directed to an interface, as shown in the following figure:
Figure 3-92 Send PDBI Command Interface
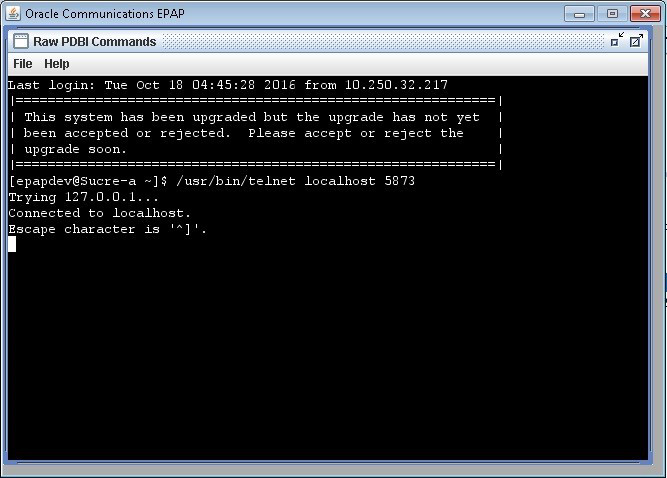
The session may be closed by:
- Closing the window under the File menu, or
- Clicking on the X icon in the upper right of the window, or
- Clicking the Close PDBI Connection button in the EPAP network window.
Refer to Provisioning Database Interface User's Guide for the rules about commands, syntax, and usages.
3.2.7.5.9 EPAP Provisioning Blocklist Menu
The PDBA / Manage Data / Prov BL menu is used to add, delete, and view blocklist entries in the Provisioning Database (PDB).
The PDBA / Manage Data / Prov BL menu provides these actions:
Add Provisioning Blocklist
The PDBA / Manage Data / Prov BL /Add Provisioning Blocklist screen is used to add Blocklist data to prevent certain address ranges from being used as DN, DN Block, and IMSI address strings. Specific criteria must be followed when entering the blocklist data:
-
The address strings are defined as two digit strings of 5-15 hexadecimal digits, where the ending address is greater than or equal to the beginning address.
-
The beginning blocklist value and ending blocklist value must be of the same length.
-
The address strings cannot conflict with DN, DN block, or IMSI values in the PDB.
Tekelec recommends adding Network Global Titles in the EPAP Provisioning Blocklist to prevent Network Global Titles from being provisioned in the MNP Database.
Delete Provisioning Blocklist
The PDBA / Manage Data / Prov BL / Delete Provisioning Blocklist screen is used to delete the EPAP Blocklist range from the Provisioning Database (PDB). The beginning address string is defined as a string of 5-15 hexadecimal digits.
Retrieve Provisioning Blocklist
The PDBA / Manage Data / Prov BL /Retrieve Provisioning Blocklist screen is used to retrieve blocklist data from the Provisioning Database (PDB). The address strings are defined as two digit strings of 5-15 hexadecimal digits of the same length, where the ending address is greater than or equal to the beginning address.
3.2.7.6 Authorized IP List
The PDBA / Authorized IP List menu allows you add, modify, remove, and list the IP addresses authorized to connect to the PDBA through the Provisioning Database (PDB). Beginning with EPAP 16.1, the user is able to configure both IPv4 and IPv6 for a list of authorized IPs:
- The user is allowed to configure IPv4 only remote system address
- The user is allowed to configure IPv6 only remote system address
- On dual stack - the user is allowed to configure IPv4 or IPv6 remote system address
This menu also allows you specify whether a secure shell (SSH) tunnel should be created between the that IP address and the EPAP, and if so, specify the username, password and port number to use on the machine represented by the IP address.For more information about SSH tunneling, refer to Provisioning Database Interface User's Guide. The PDBA / Authorized IP List menu provides these actions:
Add Authorized IP
The PDBA / Authorized IP List / Add Authorized PDBA Client IP screen allows you to:
- Add an IP address to the list of authorized IP addresses
- Specify a Permission Type of Read or Write for that IP address
- Decide if an SSH (secure shell) tunnel should be created between that IP address and the EPAP
- Specify a username, password, and port number to use on the machine represented by the IP address
Figure 3-93 Add Authorized PDBA Client IP

Table 3-45 describes the rules that the EPAP user interface uses to perform the Add Authorized PDBA Client IP action. The table also describes other messages generated by the EPAP user interface while performing this action.
Table 3-45 Rules for Add Authorized PDBA Client IP
|
Syntax Rules |
Error Code |
|
|
The user must enter a valid IP address. |
E1002 |
|
|
Other Messages |
||
|
Condition |
Message Text |
|
|
An address with read-only access was added. |
IP address xxx.xxx.xxx.xxx is authorized for READ access. |
|
|
An address with read-write access was added. |
IP address xxx.xxx.xxx.xxx is authorized for READ/WRITE access. |
|
Modify Authorized IP
The PDBA / Authorized IP List / Modify Authorized PDBA Client IP screen allows you to:
- Change the Permission Type of an authorized PDBA client IP address
- Decide to change SSH tunnel status
- Change username, password, and port number
Figure 3-94 Modify Authorized PDBA Client IP

Table 3-46 describes the rules that the EPAP user interface uses to perform the Add Authorized PDBA Client IP action. The table also describes other messages generated by the EPAP user interface while performing this action.
Table 3-46 Rules for Add Authorized PDBA Client IP
|
Syntax Rules |
Error Code |
|
|
The user must enter a valid IP address. |
E1002 |
|
|
Other Messages |
||
|
Condition |
Message Text |
|
|
An address with read-only access was added. |
IP address xxx.xxx.xxx.xxx is authorized for READ access. |
|
|
An address with read-write access was added. |
IP address xxx.xxx.xxx.xxx is authorized for READ/WRITE access. |
|
To modify an authorized PDBA client IP address:
- Enter an IP address in the IP to modify field
- Select a Permission Type
- Make a selection for the Client User Information checkbox
- Enter username, password, or port number
- Click the Modify IP button
When the modification of the IP address is accepted, you see the message indicating a successful acceptance of the altered permission type.
Table 3-47 describes the rules that the EPAP user interface uses to perform the Modify Authorized PDBA Client IP action. The table also describes other messages generated by the EPAP user interface while performing this action.
Table 3-47 Rules for Modify Authorized PDBA Client IP Screen
|
Syntax Rules |
Error Code |
|
|
The user must enter a valid IP address. |
E1002 |
|
|
Semantic Rules |
Error Code |
|
|
The IP address must be in the authorized IP address list. |
E1021 |
|
|
Other Messages |
||
|
Condition |
Message Text |
|
|
Permission downgraded to read-only. |
IP address xxx.xxx.xxx.xxx is authorized for READ access. |
|
|
Permission upgraded to read-write. |
IP address xxx.xxx.xxx.xxx is authorized for READ/WRITE access. |
|
Remove Authorized IP
The PDBA / Authorized IP List / Remove Authorized PDBA Client IP screen allows you remove an IP address from the list of authorized addresses. A CAUTION message informs you that removing an IP will stop any SSH tunnel that is currently connected with that IP.
Figure 3-95 Remove Authorized PDBA Client IP

Table 3-48 describes the rules that the EPAP user interface uses to perform the Add Authorized PDBA Client IP action. The table also describes other messages generated by the EPAP user interface while performing this action.
Table 3-48 Rules for Add Authorized PDBA Client IP
|
Syntax Rules |
Error Code |
|
|
The user must enter a valid IP address. |
E1002 |
|
|
Other Messages |
||
|
Condition |
Message Text |
|
|
An address with read-only access was added. |
IP address xxx.xxx.xxx.xxx is authorized for READ access. |
|
|
An address with read-write access was added. |
IP address xxx.xxx.xxx.xxx is authorized for READ/WRITE access. |
|
To remove an authorized PDBA client IP address, enter the desired IP address in the IP to remove: field, and click the Remove IP button.
When the removal of the IP address is accepted, a message appears indicating a successful completion of the action.
Table 3-49 describes the rules that the EPAP user interface uses to perform the Remove Authorized PDBA Client IP action. The table also describes other messages generated by the EPAP user interface while performing this action.
Table 3-49 Rules for Remove Authorized PDBA Client IP Screen
|
Syntax Rules |
Error Code |
|
|
The user must enter a valid IP address. |
E1002 |
|
|
Semantic Rules |
Error Code |
|
|
The IP address must be in the authorized IP address list. |
E1021 |
|
|
Other Messages |
||
|
Condition |
Message Text |
|
|
An address was removed. |
IP address xxx.xxx.xxx.xxx is removed from the authorized IP address list. |
|
List All Authorized IPs
The PDBA / Authorized IP List / List All Authorized PDBA Client IPs screen allows you display all authorized IP addresses.
Figure 3-96 List All Authorized PDBA Client IPs Screen

Table 3-50 describes the rules that the EPAP user interface uses to perform the List All Authorized PDBA Client IPs action. The table also describes other messages generated by the EPAP user interface while performing this action.
Table 3-50 Rules for List All Authorized PDBA Client IPs Screen
|
Other Messages |
||
|
Condition |
Message Text |
|
|
The authorized IP address list is empty. |
There are no authorized IP addresses. |
|
3.2.7.7 DSM Info
The PDBA / DSM Info menu is used to request information on the Service Module cards in the network.
The PDBA / DSM Info menu provides these actions:
PDBA DSM Report
The PDBA / DSM Info / PDBA DSM Report screen is used request the DSM Level complete report from the PDBA. This report can be requested in two ways. The user can ask for the highest provisioned level that has been received by some provided percentage of the Service Module cards. Or the user can provide a specific level to get the percentage of cards that have received that level. A list of the Service Module cards that were behind the level mentioned in the response can be provided in the report as well. See Figure 3-97 for the PDBA DSM Report screen.
Figure 3-97 PDBA DSM Report Screen
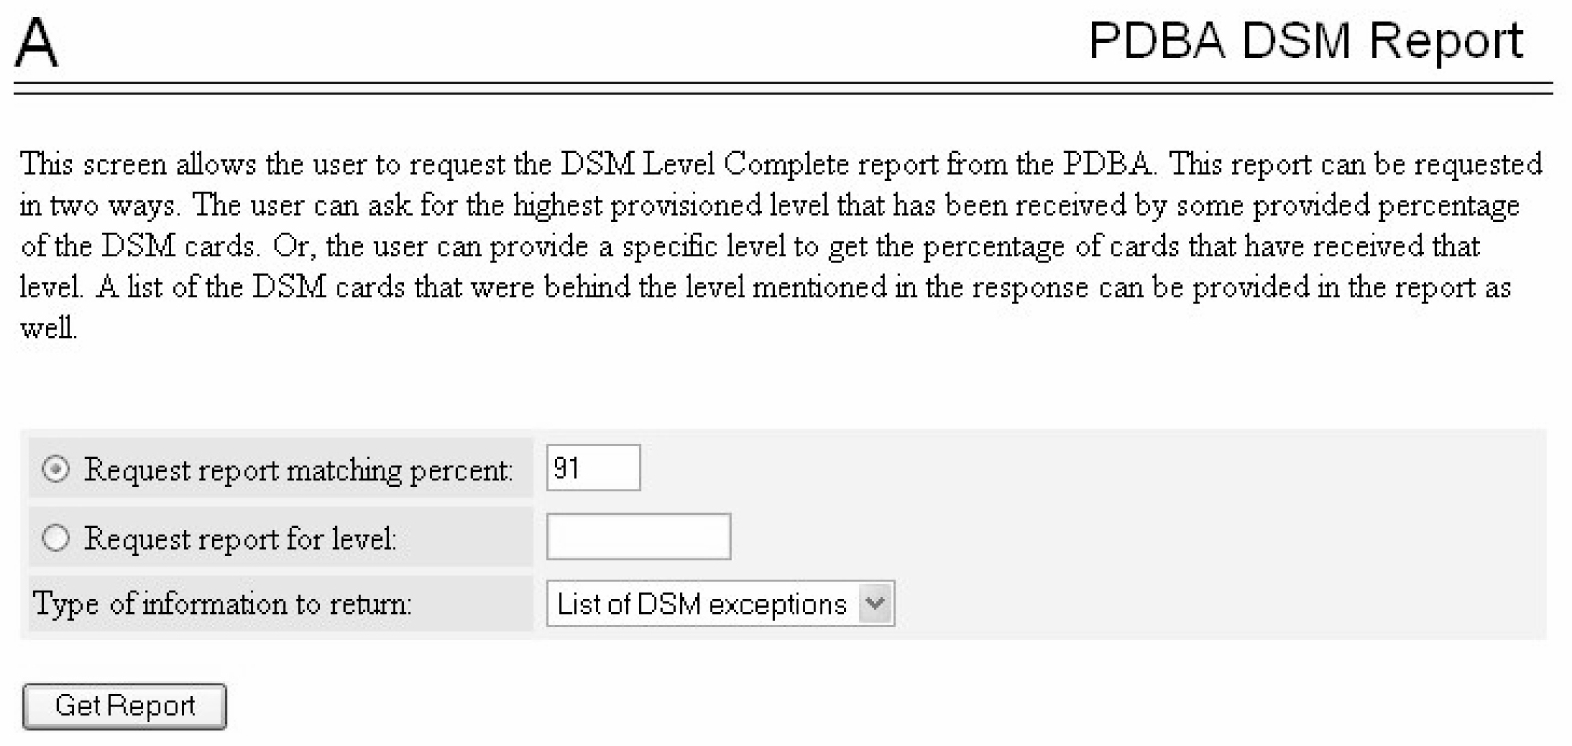
PDBA DSM List
Table 3-51 describes the rules that the EPAP user interface uses to perform the Add Authorized PDBA Client IP action. The table also describes other messages generated by the EPAP user interface while performing this action.
Table 3-51 Rules for Add Authorized PDBA Client IP
|
Syntax Rules |
Error Code |
|
|
The user must enter a valid IP address. |
E1002 |
|
|
Other Messages |
||
|
Condition |
Message Text |
|
|
An address with read-only access was added. |
IP address xxx.xxx.xxx.xxx is authorized for READ access. |
|
|
An address with read-write access was added. |
IP address xxx.xxx.xxx.xxx is authorized for READ/WRITE access. |
|
This screen retrieves all of the information that the PDBA has on all of the Service Module cards in the network. Two fields are provided to filter the list of Service Module cards returned. A third field is provided to limit the amount of information returned for each Service Module card. Refer to Figure 3-98 for an example of the PDBA DSM Info List.
Figure 3-98 PDBA DSM Info List Screen (with Status filter pulldown)
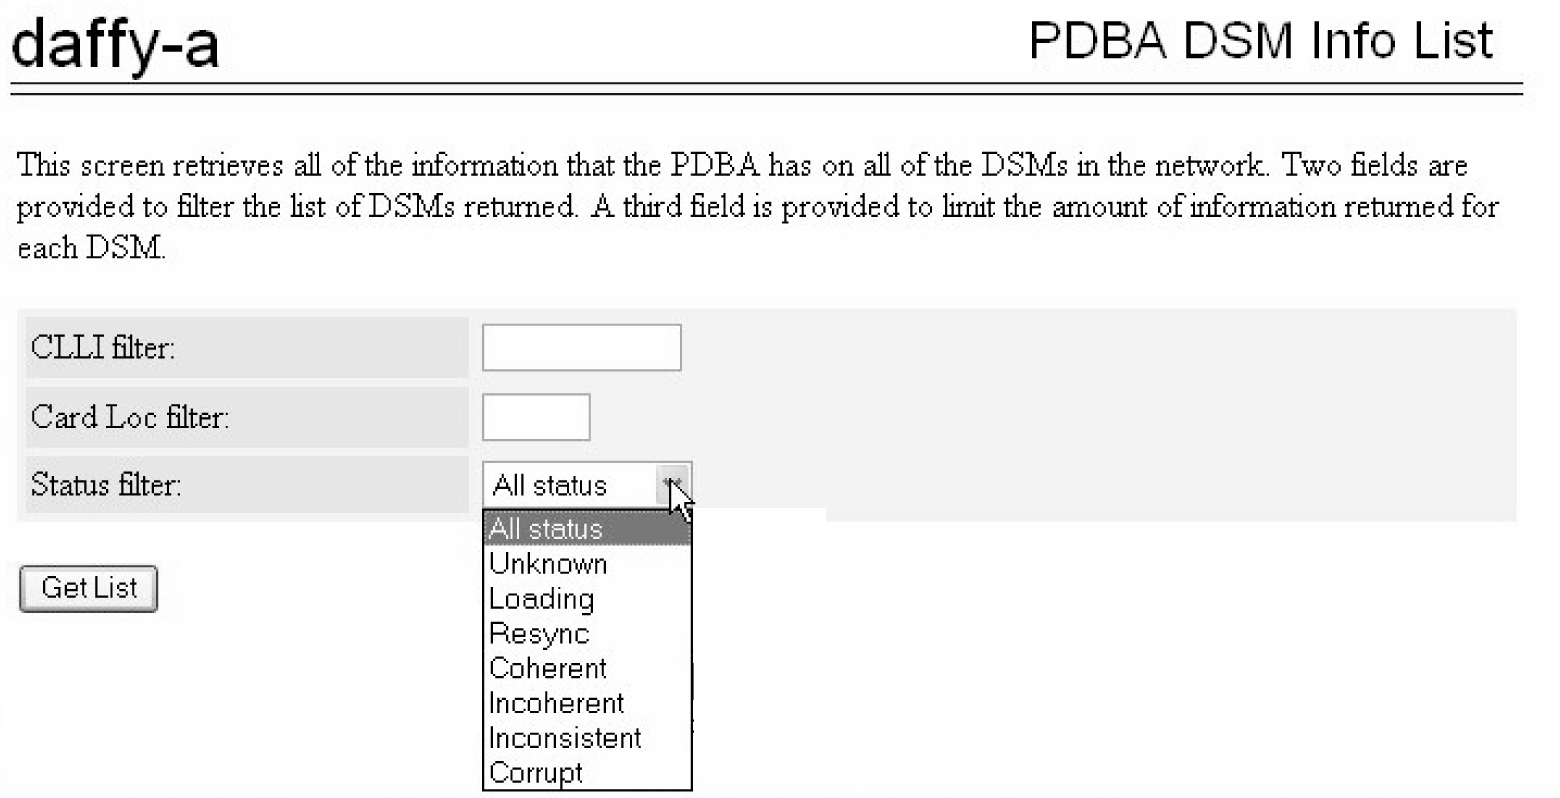
3.2.7.8 PDBA / Maintenance
The PDBA / Maintenance menu lets you perform various PDB maintenance operations for the Provisioning Database (PDB).
The PDBA / Maintenance menu provides these actions:
3.2.7.8.1 PDBA / Maintenance / Backup
The PDBA / Maintenance / Backup menu lets you perform backup actions, including listing backups and backup on device, backing up the PDB, and restoring the PDB.
The PDBA / Maintenance / Backup menu provides these actions:
List Backups
The PDBA / Maintenance / Backup / List PDB Backups screen lists the details of the backup. See Figure 3-99 for an example of the List PDB Backups screen.
Figure 3-99 List PDB Backups Screen
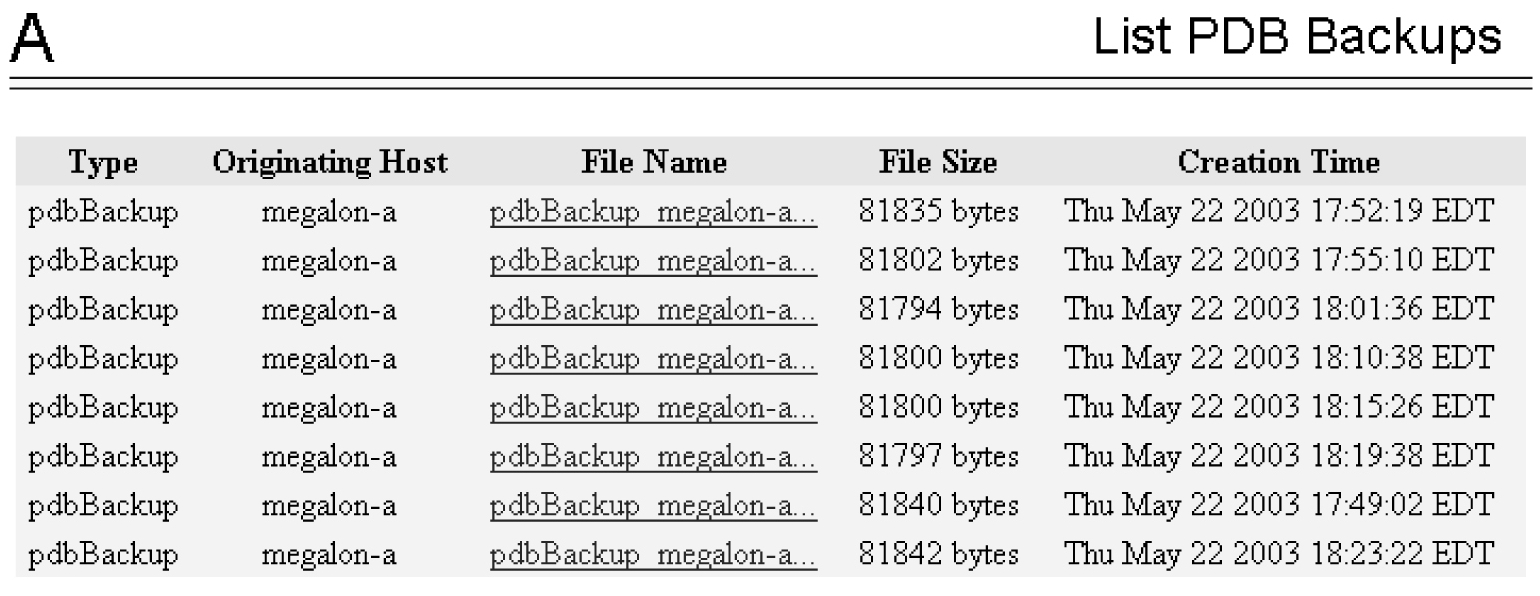
Backup the PDB
The PDBA / Maintenance / Backup / Backup the PDB screen makes a copy of the database, from which it can restore the PDB, in case of emergency.
The completed successful backup results in the Banner Message Window.
PDB Backup Successful Banner Message Table 3-52 gives the EPAP user interface rules for performing the Backup the PDB. The table also lists other messages generated by the EPAP user interface while performing this action.
Note:
PDB only maintains a single copy of backup file. If the backup file is already present, the PDB Backup already exists in free directory error message is displayed. Therefore it is required to transfer PDB backup file to remote server using Configure File Transfer as described in section Configure File Transfer or manually by using sftp.Table 3-52 Rules for Backup the PDB Screen
|
Semantic Rules |
Error Code |
|
|
The device must exist. |
E1019 |
|
|
Other Messages |
||
|
Condition |
Message Text |
|
|
Backup started. |
Backup in progress. The backup will take approximately 35 minutes. You will be notified when the backup is complete. |
|
|
Backup did not start. |
Backup failed. |
|
|
Backup complete. |
PDB backup complete. |
|
Restore the PDB
The PDBA / Maintenance / Backup / Restore the PDB screen lets you restore the PDB (Provisioning Database) from a previous backup.
This screen is used in the Restoring the PDB procedure in Alarms and Maintenance Guide.
Caution:
Do not attempt to use this operation until you have contacted My Oracle Support for assistance. Restoring the PDB is service affecting.When the Restore the PDB process has started, the in-process screen will be displayed. The status will be displayed in the Banner Message Window.
3.2.7.8.2 PDBA / Maintenance / Import File to PDB
The PDBA / Maintenance / Import File to PDB screen prompts you to import a file into the Provisioning Database (PDB). This action inserts new database records into the PDB by reading PDBI commands from the input file. Refer to Provisioning Database Interface User's Guide.
Note:
Do not use this action to restore a damaged Provisioning Database. This action does not delete the existing records in the database, and consequently does not repair any damaged records in the database. To repair a damaged database, contact My Oracle Support for information and assistance.Although the input file is normally generated by the customer's provisioning application, the PDBA / Maintenance / Export PDB to File action also generates a file suitable for importing with this command.
A caution screen will be displayed. Click Continue to access the Import File screen.
Specify the path and name of the file to import, and click the Import button.
Table 3-53 describes the rules that the EPAP user interface uses to perform the Import File to PDB action. The table also describes other messages generated by the EPAP user interface while performing this action.
Table 3-53 Rules for Import File to PDB Screen
|
Semantic Rules |
Error Code |
|
|
The import file must exist. |
E1008 |
|
|
Other Messages |
||
|
Condition |
Message Text |
|
|
User cancelled the import. |
Import aborted. |
|
|
Import started. |
Import in progress. The import will take approximately 5 minutes. You will be notified when the import is complete. |
|
|
Import did not start. |
Import failed |
|
|
Import complete. |
PDB import complete. |
|
For additional information on Importing Files to the Provisioning Database (PDB), refer to the Provisioning Database Interface User's Guide section about importing and exporting files.
3.2.7.8.3 PDBA / Maintenance / Export PDB to File
This screen is used to export data to a specified location. The PDBA / Maintenance / Export PDB to File screen menu prompts for a file to export the Provisioning Database (PDB). This action writes the commands required to re-create each IMSI, IMEI, DN, DN Block, SP and RN to the specified file in a PDBI or CSV format. For additional information about PDBI format, refer to the Provisioning Database Interface User's Guide section titled "PDBI Format."
Note:
Do not use this action as a substitute for the Backup the PDB action. Do not use a file generated by the Export PDB to File action to restore a damaged database. Use this action only as a starting point for creating a file suitable for PDBA / Maintenance / Import File to PDB.To export the PDB to a user file, enter a user filename of your choice. The EPAP automatically uses the default path /usr/external/logs/<user file name>.
To export a PDB to File, click the Continue button.
In the input field titled Full pathname of export file, specify the filename of your choice for the PDB you want to export to file; the example uses the name ‘userfile1’. Select an export format, either the PDBI or raw delimited ASCII format; if ASCII, select a delimiter from the drop-down menu. After making the selections, click the Export button.
The path to your copy of the exported file is the EPAP default path /usr/external/logs/<user file name>.
For more information about the PDBI and ASCII formats, refer to the Provisioning Database Interface User's Guide sections “PDBI Format” and “Raw Delimited ASCII Format.”
Table 3-54 describes the rules with which the EPAP user interface performs the Export File from PDB action. The table also describes other messages generated by the EPAP user interface while performing this action.
Table 3-54 Rules for Export File from PDB Screen
|
Semantic Rules |
Error Code |
|
|
The import file must exist and be writable. |
E1008 |
|
|
Other Messages |
||
|
Condition |
Message Text |
|
|
Export started. |
Export in progress. The export will take approximately 25 minutes. You will be notified when the export is complete. |
|
|
Export did not start. |
Export failed |
|
|
Export complete. |
PDB export complete. |
|
For additional information about Importing Files to the PDB, refer to the Provisioning Database Interface User's Guide section titled “Import/Export Files.”
3.2.7.8.4 PDBA / Maintenance / Transaction Log Params
The PDBA / Maintenance / Transaction Log Params menu lets you view and change the parameters of the transaction log for a file to which it can export the PDB.
The PDBA / Maintenance / Transaction Log Params menu provides these actions:
View Params
The PDBA / Maintenance / Transaction Log Params / View Params screen lets you display the current values of the PDBA Transaction Log parameters. These parameters control how frequently the PDBA transaction log is cleaned up.
Change Params
The PDBA / Maintenance / Transaction Log Params / Change Params screen lets you change the frequency that old transaction log records are removed.
Parameters that control when the PDBA removes old transaction log records can be customized. (Transaction log records are the records of PDBA responses to RTDB update requests.) Specify the maximum number of records to keep or the length of time (expressed in minutes) to keep records. When either limit is reached, the oldest records are automatically deleted.
When a transaction log record has been removed from the database, the RTDB can only retrieve that information through a complete reload. Therefore, change these values only if you are certain.
Enter the maximum number of transactions log record and the maximum number of minutes to keep record. The maximum number is ‘-1’.
When you change either the number of records or number of minutes to keep in the Transaction Log, click the Change Parameters button. A confirmation screen will be displayed.
3.2.7.8.5 PDBA / Maintenance / Number Prefixes
The PDBA / Maintenance / Number Prefixes menu lets you view and change the parameters of the PDBA prefixes.
The handling of number prefixes is a convention followed by EPAP, PDBI, and the G-Flex, G-Port, and INP systems. For more information about number prefixes, refer to Provisioning Database Interface User's Guide .
The PDBA / Maintenance / Number Prefixes menu provides these actions:
View Prefixes
The PDBA / Maintenance / Number Prefixes / View PDBA Number Prefixes screen lets you display the current values for the PDBA number prefixes. See the Change PDBA Number Prefixes screen.
Change Prefixes
The PDBA / Maintenance / Number Prefixes / Change PDBA Number Prefixes screen lets you set the two number prefixes used by the PDBA as default prefixes for DNs, DN blocks, and/or IMSIs. Turning on a number prefix allows PDBI clients to avoid sending an entire number on every transmission; instead, only the portion following the prefix is sent. For details about number prefixes, refer to Provisioning Database Interface User's Guide.
Enter either the DN or DN block prefix and/or the IMSI prefix. After entering the values, click the Change Prefixes button.
3.2.7.8.6 PDBA / Maintenance / Logs
The PDBA / Maintenance / Logs menu allows the user to view the PDB error, command, and debug logs, as well as set log threshold values. The user is required to enter the authorized password for the user appuser to view the system logs.
Note:
The contents of these logs are intended for the use by My Oracle Support in diagnosing system operation and problems. If assistance is required, contact My Oracle Support for more information.The PDBA / Maintenance / Logs menu provides these actions:
Logs under the Maintenance option include the following options:
- Command Log - pdba.cmd
- Debug Log - pdba.dbg
- Error Log - pdba.err
View Command Log
The PDBA / Maintenance / Logs / View Command Log menu selection lets you view the current PDBA Command Log. To view historic PDBA command logs, use the View Any File action. Refer to View Any File.
Table 3-55 describes the rules that the EPAP user interface uses to perform the View PDBA Command Log action.
Table 3-55 Rules for View PDBA Command Log
|
Semantic Rules |
Error Code |
|
|
The log file must exist. |
E1008 |
|
View Debug Log
The PDBA / Maintenance / Logs / View PDBA Debug Log menu selection lets you view the current PDBA Debug Log. To be able to see historic PDBA Debug logs, you must use the View Any File action. Refer to View Any File.
Table 3-56 describes the rules that the EPAP user interface uses to perform the View PDBA Debug Log action.
Table 3-56 Rules for View PDBA Debug Log
|
Semantic Rules |
Error Code |
|
|
The log file must exist. |
E1008 |
|
View Error Log
The PDBA / Maintenance / Logs / View PDBA Error Log menu selection lets you view the current PDBA Error Log. To be able to see historic PDBA Error logs, you must use the View Any File action. Refer to View Any File.
Table 3-57 describes the rules that the EPAP user interface uses to perform the View PDBA Error Log action.
Table 3-57 Rules for View PDBA Error Log
|
Semantic Rules |
Error Code |
|
|
The log file must exist. |
E1008 |
|
Set Log Levels
The PDBA / Maintenance / Logs / Set PDBA Log Info Levels screen prompts you for the level of detail to be written to the error, debug, and command logs. Setting a higher debug level results in logs being recorded with more detail, while a lower level contains less detail. Setting the debug level to a value of 0 turns logging off.
Note:
The levels for error, command and debug logs should be set only under the guidance of Technical Services. See My Oracle Support for more information.3.2.7.8.7 PDBA / Maintenance / Schedule PDB Export
This screen is used for the the Automatic/Schedule Export Mode. This screen is used to automatically export PDB data to a file that is then available to a client SFTP. This screen allows the user to export a single object type rather than the complete database. By default, all object types are exported. Through this screen the customer has a choice of what data to be exported as well as the day and time of day the data is exported.
The export can be scheduled at a specific time for each of the following repeat periods: every N number of days (N can be up to 365) on specific days of the week, on a specified day of the month, or on a specified day of the year. The schedule export screen is used to display any existing PDB support tasks and to create a task by specifying the data type, the export format (PDBI or CSV), the export mode (blocking, snapshot, or real-time) as well as the time and repeat period. In addition, a Comment field is available to describe the task.
Figure 3-100 Schedule PDB Export Example

Existing PDB Export Tasks
The Existing PDB Export Tasks portion at the top of the screen displays all currently scheduled exports in table format. Clicking on a column heading causes the entries in that column to be sorted, either alphabetically or numerically, depending on whether the column entries start with a letter or a number. Clicking the column again sorts the entries in the opposite order.
Clicking on a row causes the data contained in that task to be displayed in the data entry fields below the table, for viewing, modification, or deletion.
Export Format, Data Type, and Export Mode
For more information about the Export Format, Data Type, and Export Mode choices, refer to Provisioning Database Interface User's Guide.
Scheduling Options
The Scheduling Options section of the Schedule PDB Export screen allows the user to choose how often to repeat the scheduled export and to specify the exact day and time. The appearance of this section changes depending on which Repeat Period radio button is selected:
The following fields are the same among the various Repeat Period selections (for more information about fields that differ depending on the Repeat Period selected, see Variable Fields in Scheduling Options):
- Repeat period:
- Select the values for the hour and minute to start the scheduled export from the two drop-down boxes at the right of the Scheduling Options section. The hour drop-down uses a 24-hour clock. For example, if you want the export to start at 10:30 PM, select 22 from the left drop-down box and select 30 from the right drop-down box.
Variable Fields in Scheduling Options
The following sections describe how the Scheduling Options fields change depending on the Repeat Period that is selected.
Daily Repeat Period
To schedule an export to be run every N days, select the Daily radio button, specify a number (N) to indicate that the export should be run every N days, select the time, and optionally enter a comment.
Note:
Although the maximum value allowed in the day(s) field is 365, if an export is desired to run once a year, it is recommended to use the yearly repeat period so that leap years are properly treated (see Yearly Repeat Period).Weekly Repeat Period
To schedule an export to be run each week, select the Weekly radio button, select one or more days of the week, select the time, and optionally enter a comment.
Monthly Repeat Period
To schedule an export to be run one day each month, select the Monthly radio button, select a numeric day of the month, select the time, and optionally enter a comment.
Note:
For months that do not contain the number of days specified in the Day field, the export will run on the first day of the following month. (For example, if the Day field value is 29, the export will run on March 1 rather in February for any year that is not a leap year.)Yearly Repeat Period
To schedule an export to be run one day each year, select the Yearly radio button, select a numeric day of the year, select the time, and optionally enter a comment.
Add, Modify, and Delete Buttons
The Add, Modify, and Delete buttons are located at the bottom of the Schedule PDB Export screen.
- Add
- To add a scheduled PDB export, enter all the data to describe the export, and click the Add button.
If the task, as described by the current data in the data entry fields, does not exactly match an existing task, a new task is scheduled. If the task exactly matches an existing task, an error message is displayed.
- Modify
- To modify a scheduled PDB export, click that export task in the Existing PDB Export Tasks table, change any data that describes the export, and click the Modify button.
The Modify button is selectable only when an entry in the Existing PDB Export Tasks table at the top of the screen has been selected and one or more fields on the screen has been changed.
If the task, as described by the current data in the data entry fields, does not exactly match an existing task, a new task is scheduled. If the task exactly matches an existing task, an error message is displayed.
- Delete
- To delete a scheduled PDB export, click that export in the Existing PDB Export Tasks table, and click the Delete button.
The Delete button is selectable only when an entry in the Existing PDB Export Tasks table at the top of the screen has been selected.
3.2.7.8.8 PDBA / Maintenance / Configure PDBA Record Delay
This screen is used to configure the amount of time (in minutes) allowed for new PDB records to appear in the mate PDBA before they are considered late. If records take longer than this amount of time to arrive at the mate PDBA, the mate PDBA will trigger an alarm. This value can be set from 1 to 300. The default value is 15.
3.2.7.8.9 PDBA / Maintenance / View License Capacity
This screen displays information about the purchased Provisioning Database (PDB) capacity license supported on a specific EPAP. The total Purchased DB License Capacity and the percentage of PDB occupation are displayed. Licenses are applied in increments of 0.5 Million; a customer who purchases 20 licenses has a Provisioning Database capacity of 10 million subscribers.
The 80%, 90%, and 100% capacity alarms are based on the licensed capacity if configured. Before the 240M DN and 240M IMSIs via Split Database feature is turned on from the EAGLE side, these alarms are based on a total capacity of 240 million. After the 240M DN and 240M IMSIs via Split Database feature is turned on from the EAGLE side, these alarms are based on a total capacity of 480 million by default or based on the purchased capacity if configured.
Incremental Capacity Control
As of EPAP 16.1, a Feature Access Key (FAK) is no longer required to enable or use the EPAP Capacity Control feature. Operators are responsible for ensuring their system stays within the scope of the licenses they have purchased. Because the License Capacity is updated incrementally, whenever a new capacity is added, it will be added in addition to the previous capacity.
By default, the license capacity is set to 0 (not configured). A PDB percentage full alarm is raised when the capacity is not set.
manageLicenseInfo is used to check and set DB license capacity. To check and set the value of purchased license capacity, complete the following steps:
- Log on to the EPAP CLI as
epapdev. -
$ manageLicenseInfo -lNote:
The value of the purchased capacity is mentioned in "Current license capacity." $ manageLicenseInfo -a <License Capacity value>Note:
"License Capacity value" is the number of licenses required to set desired PDB capacity.
The utility is available on the EPAP Provisional server. The "License Capacity value" is stored in LicenseInfo table in PDB database.
3.2.7.9 List PDBI Connections
The PDBA / List PDBI Connections screen enables EPAP GUI users to view all provisioning connections to the PDBA. This menu option provides non-persistent data about PDBI and SOG connections along with some performance data based on the totals for the entire lifetime of each connection.
3.2.7.10 PDBI Statistics Report
The PDBA / PDBI Statistics Report screen enables EPAP GUI users to view available statistics reports. After clicking the PDBI Statistics Report menu item, a screen is displayed to select the Report Type and identify the time period for the report.
Available Report Types are:
- 5 minutes
- 1 hour
- 1 day
Click on the Generate Report button to display the report.
The reports are stated in commands per second (CPS). Reported statistics include information on provisioning patterns, degradation of performance, and performance impact due to various activities.Reports generted for a specified time period (Report Type) contain at least the following information:
- Average number of PDBI connections for the reported period
- Peak number of PDBI connections for the reported period
- Average system PDBI commands per second (CPS) for the reported period
- Peak system PDBI commands per second (CPS) for the reported period (calculated per second)
- Percentage of commands with a return code of zero that successfully updated the database for the reported period (
ent/upd/dltcommands only). - Total number of commands with a return code of zero that successfully updated the database for the reported period (
ent/upd/dltcommands only;rtrvcommands are not included).
Statistics related to numbers of PDBI connections are based on the number of PDBI connections at one time.
3.2.8 User Administration Menu
The User Administration menu allows the user to perform various platform tasks, including administering users and groups, terminating active sessions, and modifying system defaults. The user interface allows for many users with multiple and varied configurations of permissions. It is designed for convenience and ease of use while supporting complex user set-ups where required.
A successful log into the UI provides the user with an open session. These rules apply to session management and security.
-
Idle Port Logout: If no messages are exchanged with the UI client session for a configurable amount of time, the session is automatically closed on the server side. The default length of the timeout is a system-wide value, configurable by the administrator. The administrator can also set a different timeout length for an individual user, if desired.
-
MultipleSessions perUser: The administrator can turn off multiple sessions allowed per user on a global system wide basis.
-
Revoke/Restore User: The administrator can revoke a userid. A revoked userid remains in the database but can no longer log in. Likewise, the administrator can restore a userid that was previously revoked.
-
ManageUnusedUserIDs: The EPAP UI automatically revokes userids that are not accessed within a specified number of days. The number of days is a system-wide value that is definable by the administrator.
-
Login Tracking: When a user successfully logs in, the UI displays the time of the last successful login and the number of failed login attempts for that userid.
-
Intrusion Alert: When the number of successive failed login attempts from a specific IP address reaches 5 (five), the EPAP automatically writes a message to the UI security log and displays a message on the banner applet to inform any administrator logged in at that time.
-
RevokeFailed User: The UI automatically revokes any user who has N successive login failures within 24 hours. N is a system-wide configurable number, with a default of 3 (three). This restriction is turned off if N is set to 0 by the administrator.
The User Administration menu performs administration functions for users and groups, and handles terminating active sessions and modifying system defaults. See these topics discussed:
3.2.8.1 Users
The User Administration / Users menu allows the system administrator to administer users functions such as add, modify, delete, retrieve, and reset user password.
A user is someone who has been given permission with system administrator authority to log in to the user interface. The administrator creates these user accounts and associates them with the groups to which they belong. A user automatically has access to all actions allowed to the groups he is a member. In addition to the user's groups, the administrator can set other user-specific permissions or restrictions to any user’s set of individual permissions.
The EPAP user interface comes pre-defined with user interface users in order to provide a seamless transition to the graphical user interface. This is done by duplicating the Unix user logins and permissions that existed on the original (version 1.0) text-based UI. Refer to Table 3-58 for the current login names.
Table 3-58 EPAP UI Logins
|
Login Name |
Access Granted |
|
epapmaint |
Maintenance menu and all submenus |
|
epapdatabase |
Database menu and all submenus |
|
epapdebug |
Debug menu and all submenus |
|
epapplatform |
Platform menu and all submenus |
|
uiadmin |
User Administration menu |
|
epapall |
All of the above menus |
|
epapconfig |
Configuration menu and all submenus (text-based UI) |
The Users menu provides these capabilities:
Add User
The User Administration / Users / Add UI User screen is used to add a new user interface user name and a default password. A succesful entry will generate a confirmation screen.
Modify User
The User Administration / Users / Modify UI User screen is used to change a user permission profile. The administrator must first select a user name from the list of current users.
After selecting a User Name, the user permissions screen appears. In this screen, the permissions allowed to the user can viewed and specified.
You can directly specify the number of concurrent log-ins, an inactivity time limit, and a password age limit. In addition, you can modify group membership data and specific actions that the user is permitted.
After modifying any entries, click the Submit Profile Changes button. The Modify Group Membership screen appears, allowing the user to customize individual access to groups. Click Sumbit Group Membership Changes when finished. A confirmation screen will appear.
Clicking the Modify Specific Actions button displays Action Privileges to specify for the user being modified. See Figure 3-101.
Figure 3-101 Modify UI User’s Specific Actions
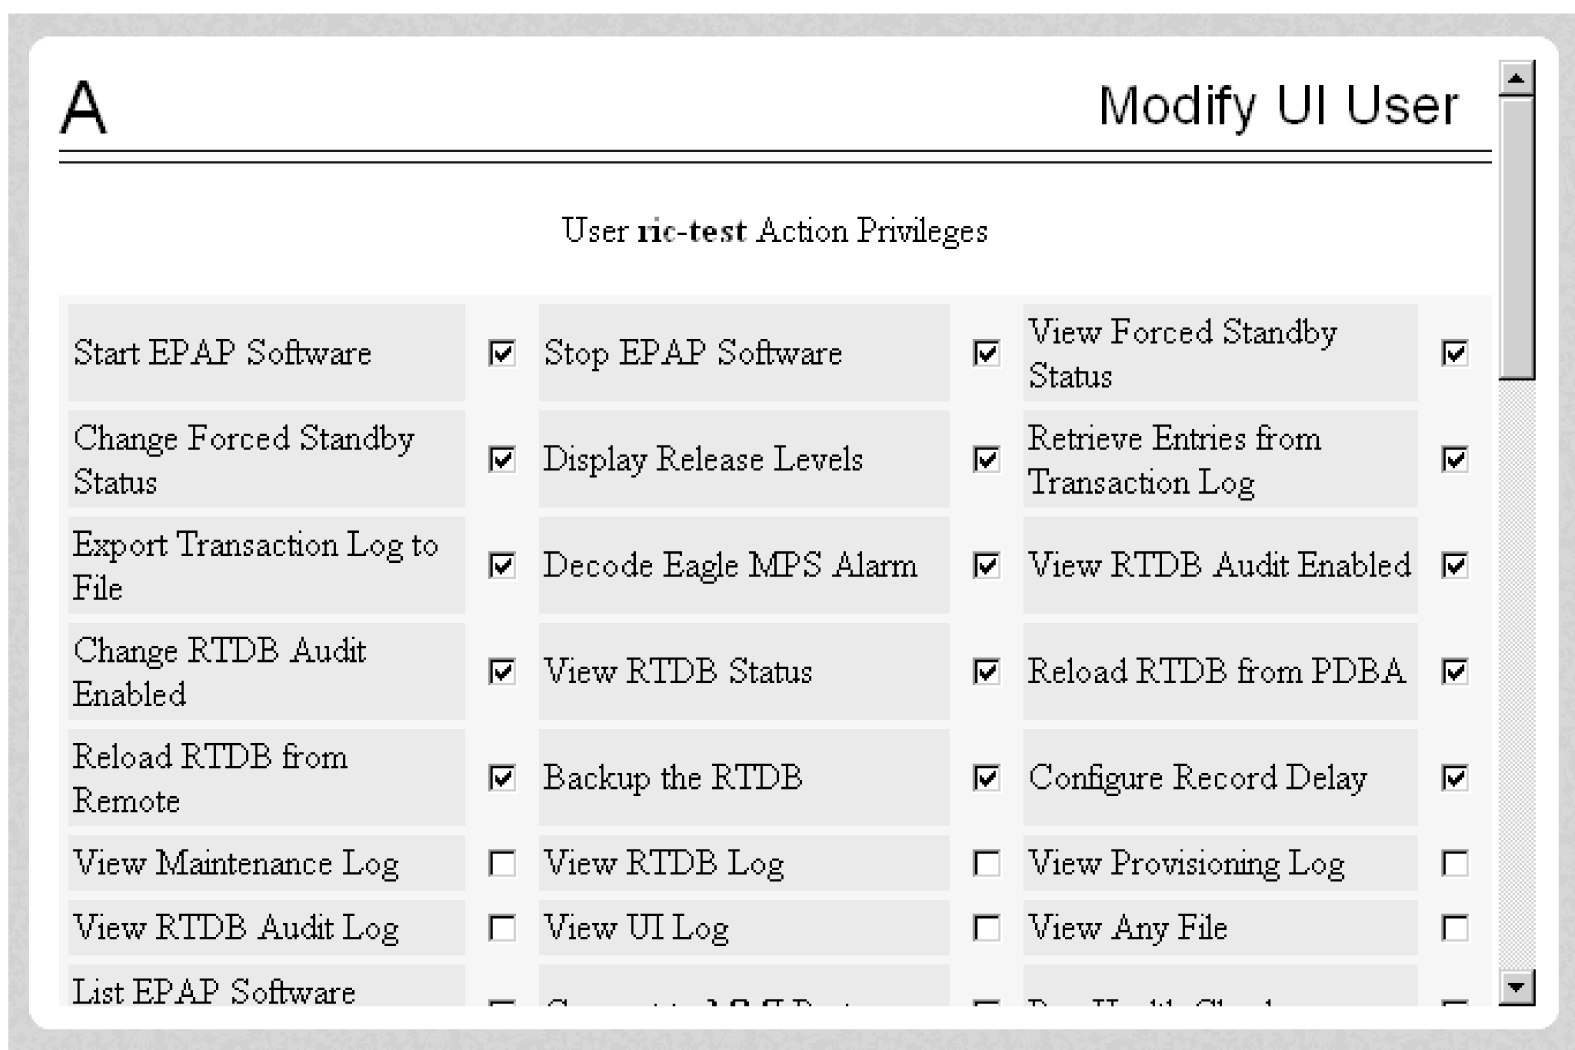
This screen contains many selections from which to choose. After customizing the settings, click the Submit Specific Action Changes at the bottom of the screen.
The bottom of the Modify UI User’s Special Actions screen contains these explanatory notes:
- A - Permission for this action has been explicitly added for this user.
- R - Permission for this action has been explicitly removed for this user.
These notes indicate the privileges specifically added or removed for an individual user from the groups to which he/she is a member. This allows discrete refinement of user privileges even though he/she may be a member of groups.The system will generate a confirmation of the change for the user.
Delete User
The User Administration / Users / Delete UI User screen lets an administrator remove a user name from the list of user interface names. The screen is similar to Modifying UI User. First you select the user name to be deleted and click the Delete User button. A confirmation screen will appear, requesting approval of the change.
After confirmation, a success screen is generated.
Retrieve User
The User Administration / Users / Retrieve UI User screen displays the user name permission profiles from the user interface information.
The screen to view the user permissions appears, only displays the permissions allowed to that user.
You can directly see certain information such as the maximum allowed number of concurrent log-ins and the inactivity time limit. In addition, you can go on to view the user’s group membership data and specific actions (privileges).
Additional information can be viewed by clicking the View Group Membership button.
Clicking the View Specific Actions in the Retrieve UI User screen displays the user privileges. This screen contains many privileges to display.
The bottom of the User Privileges screen may also can have explanatory notes:
- A - Permission for this action has been explicitly added for this user.
- R - Permission for this action has been explicitly removed for this user.
These notes indicate the privileges specifically added or removed for an individual user from the group to which he/she is a member. These permissions allow individual variations to user privileges even though the user is a member of a group.
3.2.8.2 Groups
The User Administration / Groups menu allows the user to administer group functions such as add, modify, delete, and retrieve.
For your convenience, actions can be grouped together. These groups can be used when assigning permissions to users. The groups can consist of whatever combinations of actions that system administrators deem reasonable. Group permissions allow any given action to be employed by more than one group.
Groups can be added, modified, deleted, and viewed through the menu items in the User Administration menu.
Note:
The EPAP User Interface concept of groups should not be confused with the Unix concept of groups. The two are not related.The EPAP user interface comes with six groups pre-defined with the same names and action permissions used in the text-based (EPAP version 1.0) user interface:
-
maint -
database -
platform -
debug -
pdba -
admin
One additional pre-defined group used is introduced to EPAP (at version 2.0). This group is called readonly. The readonly group contains only actions that view status and information. The readonly group is the default group for new users.
The Groups menu allows:
Add Group
The User Administration / Groups / Add UI Group screen lets you enter a new group and assign action privileges with the new group.
After a successful group added message, designate the Action Privileges for the new group.
Modify Group
The User Administration / Group / Modify UI Group screen lets you administer group permission profiles. Select the Group Name, and click the Select Group button.
When the group is selected, the Modify Group Permission Profiles screen shows the current action privileges assigned to the group.
Specify the Action Privileges to assign to this group and click the Submit Specific Action Changes. A confirmation screen will be generated.
Delete Group
The User Administration / Group / Delete UI Group Profile screen lets you remove a group from the user interface information. The administrator must first select the group name for deletion. If a group is part of the New User Default Groups (Modify Defaults) , then the group cannot be deleted unless it is removed from the New User Default Groups list.
Clicking the Select Group button causes a confirmation banner and button appear. Click the Confirm Delete Group button to delete the group name and its permissions.
Retrieve Group
The User Administration / Users / Retrieve UI Group screen lets you display the permission profiles for groups from the user interface information. First select a group name to be retrieved, and click the Select Group button.
After you select a Group Name in the screen above, the screen to view the group permissions appears. There you can view the permissions allowed to this group.
3.2.8.3 Authorized IPs
The User Administration / Authorized IP menu lets you add, remove, and list all authorized IP addresses and also change the IP address authorization status. The IP addresses are authorized for both GUI and server access. Beginning with EPAP 16.1, the user is able to add/remove both IPv4 and IPv6 addresses.
The User Administration / Authorized IP List menu provides these actions:
Add Authorized IP
The User Administration / Authorized IP / Add Authorized IP screen lets you add a new individual IP address or CIDR format to the list of authorized IP addresses. Note that a pop-up syntax box appears when the cursor is positioned over the input field.
Figure 3-102 Add Authorized IP

Enter the IP address you want authorized and press the Allow IP button.
An error notification screen appears when a duplicate IP address is entered (the address already exists), when an attempt to add more than the maximum allowable number of addresses (more than 1000) or when any internal failure is detected.
Remove Authorized IP
The User Administration / Authorized IP / Remove Authorized IP screen lets you remove an IP address from the list of authorized IP addresses. You must enter the individual IP address or CIDR IP format in the IP to Remove input field. A pop-up syntax box appears when the cursor is positioned over that input field.
When the authorized IP address is deleted, a message confirming the removal of the specified address is displayed.
List All Authorized IPs
The User Administration / Authorized IP / List All Authorized IPs screen retrieves and displays all authorized IP addresses. The screen also shows whether the authorization list is Enabled or Disabled.
For information about enabling and disabling the authorization list, see Change UI IP Authorization Status.
Change UI IP Authorization Status
The User Administration / Authorized IP / Change UI IP Authorization Status screen permits toggling (that is, alternating) the state of authorization list between ‘enabled’ and ‘not enabled.’
When this menu option is chosen, the current authorization state is displayed in the INFO field.
To toggle the state from not Enabled to Enabled, click the Enable IP Checking button.
The enforcement of the checking for authorization status is immediate. The IP address of every message of every IP device using the GUI is checked as soon as the authorization status is enabled. The checking for authorized IPs does not occur only when devices log in.
3.2.8.4 Terminate UI Sessions
The User Administration / Terminate Active UI Sessions screen allows the administrator to selectively close individual active sessions. The Terminate UI Sessions menu option displays the active sessions with the client IP format same as the IP format used as URL to access the EPAP GUI.
The following figure shows the EPAP is configured in dual stack configuration and two EPAP GUI sessions have been opened, one using the IPv4 prov IP and other using the IPv6 prov IP. The client IP address is IPv4 for the IPv4 prov EPAP GUI session and IPv6 for the IPv6 prov EPAP GUI session.
Figure 3-103 Terminate Active UI Sessions

3.2.8.5 Modify Defaults
The User Administration / Modify System Defaults screen allows the administrator to manage the systems defaults. The System Defaults which can be modified are:
-
Maximum Failed User Logins: This field specifies the number of consecutive failed logins allowed for a specific user before that user's account is revoked.
-
Password Reuse Limit: This field requires a specified number of unique passwords that a user must use before accepting a previous password. The range is from 3 to 99. The default is 5.
-
Maximum Account Inactivity: This field specifies the maximum number of days that a user account can be idle before the account is automatically revoked.
-
Session Idle Timeout: This field limits the number of minutes that an open session can remain idle before the server automatically closes the session.
-
Maximum Password Age: This field limits the number of days that a user can have the same password before requiring the user to change the password. The range is from 1 to 180 days. The default value is 180.
-
Minimum Password Length: This field represents the minimum password length for all users.
-
Password Expiry Warning Days: This field represents the number of days that a user will be warned before the user's password expires. The range is from 0 to 6 days. A value of 0 disables the Password Expiry Warning. The default value is 7. The warning is displayed on the EPAP work area after a user successfully logs in to the EPAP GUI.
-
Maximum Concurrent User Logins: This field limits the number of concurrent login sessions that each user can have. This limitation does not apply to users with Administrative privileges.
-
Maximum Concurrent Logins: This field limits the number of concurrent login sessions that can exist on the EPAP pair. Users with Administrative privileges are excluded from this total session count.
-
Login Message Text: This field contains the text message displayed in the initial work area at login. The field is limited to 255 characters. The default text is:
NOTICE: This is a private computer system. Unauthorized access or use may lead to prosecution. -
New User Default Groups: This field contains a list of group names (comma-delimited) with which newly created users are automatically assigned. The default group name is
readonly. -
Unauthorized IP Access Message: This field contains the text message that will be displayed to the user when a connection is attempted from an IP address that does not have permission to use the UI. The default text is:
NOTICE: This workstation is not authorized to access the GUI. -
Status Refresh Time: This field contains the system default for the refresh time used for the View RTDB Status and View PDBA Status screens. Time must be either 5-600 seconds or 0 (no refreshing). The refresh time is set to 5 if a value of 1 through 4 is entered.
When you complete the changes to the Modify System Defaults, click the Submit Defaults button.
3.2.9 Change Password
The Change Password screen provides EPAP users the capability to change their password. This basic action is available to all users and is accessible from the main menu (Figure 3-25).
To change the password, the current password must be entered, then the new password is entered. The new password is confirmed by retyping the new password and clicking the Set Password button.
With the ability to support many users comes the need for tighter security. The user interface addresses security concerns with various restrictions and controls. In many cases, the frequency or severity of these checks is configurable by the administrator at both a user-specific and system-wide level. A password is required to log in to the user interface.
Note:
Unix account passwords cannot contain the @ or # characters.These rules govern EPAP passwords.
-
Complexity: Passwords complexity rules are defined as follows.
- The user password must be at least eight characters in length.
- The user password must not exceed 100 characters in length.
- The user password must include at least one alpha character.
- The user password must include at least one numeric character.
- The user password must include at least one special punctuation character: question mark (?), period (.), exclamation point (!), comma (,), or semicolon (;).
- The user password must not contain three or more of the same alphanumeric or special punctuation character in a row.
- The user password must not contain three or more consecutive ascending alphanumeric characters in a row.
- The user password must not contain three or more consecutive descending alphanumeric characters in a row.
- The user password must not contain the user account name (login name).
- The user password must not contain the user account name in reverse character order.
- The user password must not be blank or null.
- The user password must not be a default password.
- Aging: Users can be forced to change their passwords after a certain number of days. The administrator can set a maximum password age of up to 180 days as a default for the system. The administrator can also specify a different maximum password age for any individual user.
- Force Change on Initial Login: Users can be forced to change their password the first time that they log in. The administrator can assign a password to a user, either when the user is first created or when the password of an existing user is reset; the user must change the password the first time that the user logs in.
- Inactivity: Users can be forced to change their password if it is not used within the Maximum Account Inactivity time. The administrator can set a Maximum Account Inactivity time as a default for the system.
- Password Reuse: Users cannot reuse their last N passwords. N is a system-wide configurable number from 3 to 99, with a default value of 5.
3.2.10 Logout
The Logout menu selection confirms logging out of the current session. This basic action is available to all users and is accessible from the main menu (Figure 3-25).
On logout, you are notified by the screen notifies that this terminates your current session and ofers the opportunity to continue or not. Click the Logout button to complete the logout.
After logout, the screen returns to the screen showing the Tekelec EPAP User Interface login.
