Build Shared Members at Different Generations
Using an Essbase dimension build rule, you can build shared members at different generations. You can accomplish this using a build method most appropriate to your source data: either level references or parent-child references.
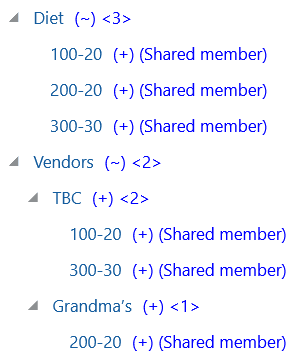
Sometimes you want shared members to roll up into parents that are at different generations in the outline. For example, in Figure 14-14, the shared members roll up into parents at generation 2 (Diet) and at generation 3 (TBC and Grandma’s). This outline assumes that TBC (The Beverage Company) buys some beverages from outside vendors: it buys 200-20 (Diet Root Beer) from a vendor named Grandma’s.
Figure 14-14 Sample Outline: Members Shared at Different Generations

Use Parent-Child References to Create Different Generation Shared Members
In an Essbase dimension build rule, to create shared members of different generations using the parent-child references build method, define the Parent and Child field types. As long as sharing is enabled, Essbase automatically creates duplicate members under a new parent as shared members.
Figure 14-15 Sample Rule: Members Shared at Different Generations Using Parent-Child References
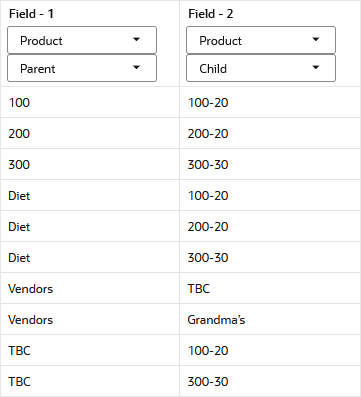
To recreate this example,
-
Import/build the Sample Basic cube, using the application workbook available from the gallery in the file catalog on the Essbase Server.
-
Create a tab-delimited data file like the following, name it
shdiffgenparchild.txt, and upload it to the Sample Basic cube directory.100 100-20 200 200-20 300 300-30 Diet 100-20 Diet 200-20 Diet 300-30 Vendors TBC Vendors Grandma’s TBC 100-20 TBC 300-30 Grandma’s 200-20 -
On the Home page, open the application and then open the database (cube).
-
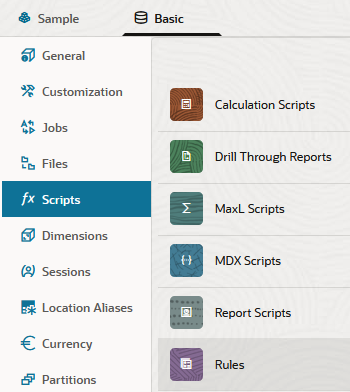
Select the Scripts tab, and then click Rules.
-
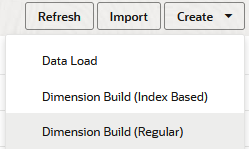
Click Create and choose Dimension Build (Regular).
-
In the New Rule dialog,
-
Enter a rule name; for example, shdiffgenparchild.
-
For Source Type select File, click Catalog and navigate to
shdiffgenparchild.txt.When you click Catalog, the file is expected to be located in the cube directory on the Essbase Server by default, so you must have already uploaded it using the Files section of the Essbase web interface. If the file is on your client machine, click File Browser to locate the file.
-
Leave the Header Record Number and Dimension Build Record Number fields as 0. Header records are not useful for dimension builds.
-
Change the Delimiter value from Comma to Tab.
-
Increment the Preview Data Count to 11.
-
Click Proceed.
-
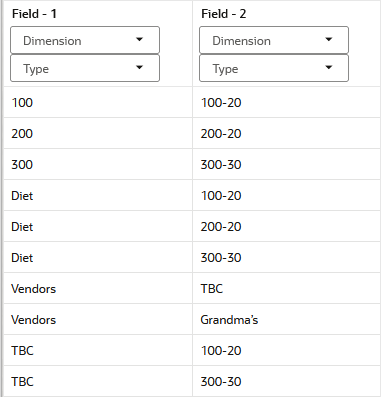
The dimension build rule opens with undefined fields, and preview data (from the text file) populating the grid below the fields.
-
-
As this is a new rule, there are no dimensions associated yet.
- Click Dimensions.

- Select or type the dimension name Product, and click Add.
- Click Dimensions.
-
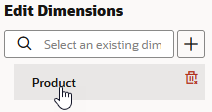
Now you need to define the build method and check other dimension build operational instructions. Click Product to edit the properties.
-
Ensure that Build Method is Parent Child.
-
Click Share, and click OK.
-
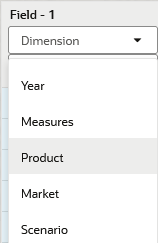
Click the Dimension selector in Field 1, and select Product.
-
Change the Type selector of Field 1 to Parent.
-
For Field 2, change the Type selector to to Child.
-
Verify the rule, then save and close. If there are any errors, see Requirements for Valid Dimension Build Rule Files.

-
Run the dimension build job.
-
View the outline, and inspect the Product dimension to confirm that it has new members Vendor, TBC, and Grandma's, with shared members that are also used in Diet.
Use Level References to Create Different Generation Shared Members
In an Essbase dimension build rule, to create shared members of different generations using the level references build method, ensure that primary and secondary roll-ups are specified in one record. You can specify as many secondary roll-ups as you want, as long as they are all in one record.
Define the field type for the shared member as Level, then enter the level number. While processing the data source, Essbase creates a parent at the specified level and inserts the shared members under it.
For example, to share the products 100-20, 200-20, and 300-30 with a parent called Diet and two parents called TBC and Grandma’s, use the sample data and rule shown below:
Figure 14-16 Sample Rule: Members Shared at Different Generations Using Level References

To recreate this example,
-
Import/build the Sample Basic cube, using the application workbook available from the gallery in the file catalog on the Essbase Server.
-
Create a tab-delimited data file like the following, name it
shdifflevref.txt, and upload it to the Sample Basic cube directory.100-20 100 Diet TBC Vendors 200-20 200 Diet Grandma’s Vendors 300-30 300 Diet TBC Vendors -
On the Home page, open the application and then open the database (cube).
-
Select the Scripts tab, and then click Rules.

-
Click Create and choose Dimension Build (Regular).

-
In the New Rule dialog,
-
Enter a rule name; for example, shdifflevref.
-
For Source Type select File, click Catalog and navigate to
shdifflevref.txt.When you click Catalog, the file is expected to be located in the cube directory on the Essbase Server by default, so you must have already uploaded it using the Files section of the Essbase web interface. If the file is on your client machine, click File Browser to locate the file.
-
Leave the Header Record Number and Dimension Build Record Number fields as 0. Header records are not useful for dimension builds.
-
Change the Delimiter value from Comma to Tab.
-
Click Proceed.
-
The dimension build rule opens with undefined fields, and preview data (from the text file) populating the grid below the fields.

-
-
As this is a new rule, there are no dimensions associated yet.
- Click Dimensions.

- Select or type the dimension name Product, and click Add.
- Click Dimensions.
-
Now you need to define the build method and check other dimension build operational instructions. Click Product to edit the properties.

-
Ensure that Build Method is Level, and click OK.
-
Click the Dimension selector in Field 1, and select Product.

-
Change the Type selector of Field 1 to Level, and enter the level number below it as 0.
-
For Fields 2-4, change the Type selector to to Level, and enter the level numbers as 1.
-
For Field 5, change the Type selector to Level, and enter the level number as 2.
-
Verify the rule, then save and close. If there are any errors, see Requirements for Valid Dimension Build Rule Files.

-
Run the dimension build job.
-
View the outline, and inspect the Product dimension to confirm that it has new members Vendor, TBC, and Grandma's, with shared members that are also used in Diet.
