Setting Up Your SuiteScript Environment
Before working with SuiteScript, you must configure both your NetSuite account and SuiteScript development environment. To do so, see the following topics.
Enabling SuiteScript
Before you can use SuiteScript, a user with the Administrator role must enable the SuiteScript features that you plan to use.
To enable SuiteScript:
-
Go to Setup > Company > Enable Features.
-
Click the SuiteCloud subtab.
-
Under SuiteScript, check the Client SuiteScript or Server SuiteScript box (or both, depending on the scripts you want to run).
-
Click Save.
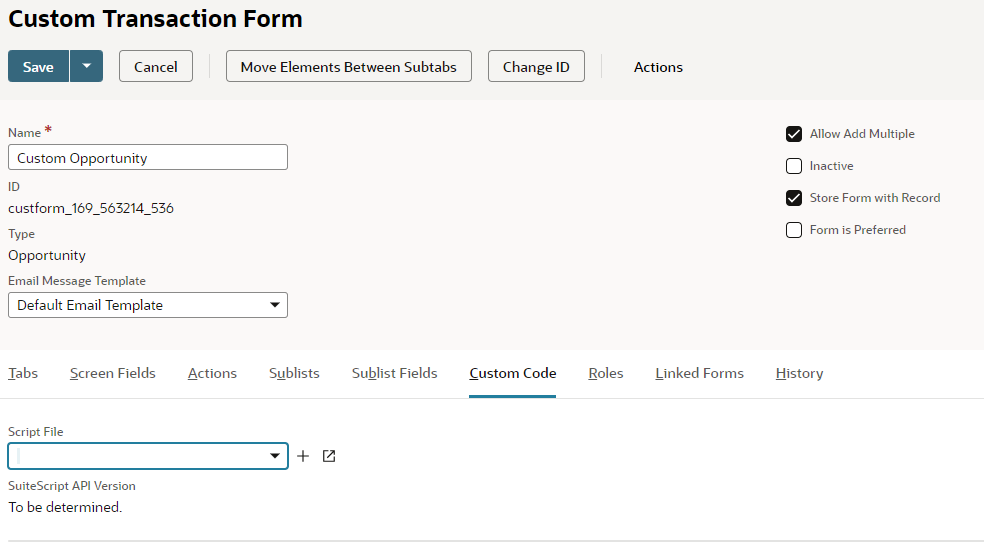
If the Client SuiteScript feature is enabled, the Custom Code subtab becomes available on entry and transaction forms (see the following screenshot). On this subtab, you select the client script that you want to associate with the current form. For information about attaching client scripts to NetSuite forms, see Associating Custom Code (Client SuiteScript) Files With Custom Forms.
After enabling SuiteScript, continue configuring your NetSuite account:
-
Set up roles and permissions for SuiteScript - Roles and permissions determine a user's level of access to specific areas in NetSuite. For information about SuiteScript permissions, see Setting Roles and Permissions for SuiteScript.
-
Set the preference to show internal IDs - Internal record and field IDs are used as parameters in SuiteScript code. For information about the preference and how to view internal IDs, see Showing Record and Field IDs in Your Account,
-
Set up your development environment - NetSuite provides a SuiteCloud plug-in or extension for specific IDEs. You can also use other development tools to create SuiteScript files. For more information, see Setting Up Your SuiteScript Development Environment
After setting up your SuiteScript environment, see the tutorial in SuiteScript 2.1 Hello World for a sample SuiteScript implementation.