Create or Import a Project
You can create a project in which to design, manage, and monitor integrations. You can also import user-developed, accelerator, or recipe projects into an instance from your local host or from a GitHub repository.
- Create or Import a Project
- Understand an Imported Oracle Accelerator Project
- Add a Newer (Extended) Version of an Accelerator Project
- Understand an Imported Recipe Project
See Learn About Recipes and Accelerators in Using Recipes and Accelerators in Oracle Integration 3.
Create or Import a Project
- In the navigation pane, click Projects.
- Click Add.
- Select an option:
- Create a new project.
- Import a project from your local host.
- Import a project from your GitHub repository.
- To create a new project, perform the following steps.
- Click Create.
- On the Start a new project page, you can specify the project detail (of the project you want to create) using natural language, and create a project by selecting an accelerator or recipe that matches your natural language text. Or, if you want to create your own project and build exactly what you need, perform the following steps.
- In the New project option, click Choose.
- Enter the following information.
Field Description Name
Provide a meaningful name so that others can understand the project. You can include English alphabetic characters, numbers, underscores, and dashes in the identifier.
Note: You cannot create a project name containing
-BA-or_BA_. These conventions are reserved for accelerator projects.Identifier
Accept the default identifier value. The identifier is the same as the project name you provided, but in upper case.
Keywords Enter keywords (tags) to identify the project. You can search for projects on the Projects page using keywords. Keywords are useful for filtering and discovery. Description
Provide a meaningful description so that others can understand the project.
Anyone can edit, view, and monitor
- Select this option to allow anyone to edit, view, and monitor resources in the project.
You can always restrict access at a later time.
- Don't select this option if you want to restrict access to editing, viewing, and monitoring resources in this project. After project creation, you can select the specific groups and users to which to provide access. See Control Who Can Edit, View, and Monitor in a Project.
- Select this option to allow anyone to edit, view, and monitor resources in the project.
- Click Create.
Your new project page is displayed. You can now add integrations, connections, lookups, and JavaScript libraries to the project.
- To import a project (
.CARfile) from your local host, perform the following steps. This enables you to import a project with all assets and metadata from one system to another. You can import user-developed, accelerator, or recipe projects.Ensure that you understand connection behavior when importing a project. See Export a Project.
- Click Import.
- Click the field to browse for a project or drag and drop a project into the field.
- With the Anyone can edit, view, and
monitor check box, select the level of access you want
to provide to other users:
- Select this option to allow anyone to edit, view,
and monitor resources in the project.
You can always restrict access at a later time.
- Don't select this option if you want to restrict access to editing, viewing, and monitoring resources in this project. After import, you can select the specific groups and users to which to provide access. See Control Who Can Edit, View, and Monitor in a Project.
- Select this option to allow anyone to edit, view,
and monitor resources in the project.
- Click Import.
The project connections contain information that is specific to the processing environment. Connections in the imported project omit this potentially sensitive data. You must reconfigure connections before they can operate properly.
- To import a project or a project deployment from your GitHub repository, perform
the following steps. To use this option, you must first configure access to your
GitHub repository. See Integrate Projects and Project Deployments with a GitHub Repository.
- Click Download.
- Click the tab for the type of resource to import:
- Projects
- Deployments
- Select the file, then click Import.
Watch a video to learn more:
Understand an Imported Oracle Accelerator Project
If you import an Oracle accelerator project into your project, the project includes the labels Accelerator and Oracle on the Projects page. The Type column also includes the Accelerator label.

- You cannot edit the details that were specified when the project was created, such as name, project identifier, description, and keyword selections. These details are in read-only mode.
- The Edit, Clone,
and Delete tasks are not visible under the
Actions
 menu on the Deploy tab. The only task
visible under this menu is View.
- You can extend (customize) an integration in the accelerator
project by selecting Actions
 , then Extend. See Extend an Integration in an Accelerator Project.
Note the following restrictions for individual assets in accelerator projects
| Integrations | Connections | Lookups | JavaScript Libraries | Deployments | Certificates |
|---|---|---|---|---|---|
|
Allowed:
Restricted:
Allowed in extended accelerator:
Restricted in extended accelerator:
|
Allowed:
Restricted:
|
Allowed:
Restricted:
|
Allowed:
Restricted:
|
Allowed:
Restricted:
|
No restrictions. |
** Export as an accelerator or extended accelerator only.
Add a Newer (Extended) Version of an Accelerator Project
Assume a newer version of an accelerator project becomes available for you to import.
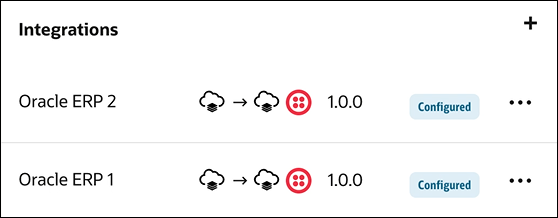
For this example, assume the first version of the accelerator project
included integrations Oracle ERP 1 and Oracle ERP 2, each with versions of 1.0.0.

The two integrations and their versions are included in a project deployment named
1.0.0 that you previously imported into your instance.
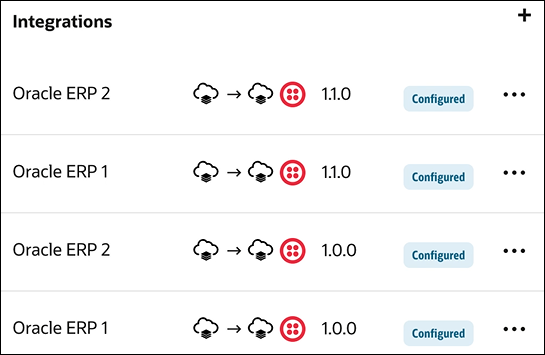
A newer version of the accelerator project then becomes available. This
version now includes two versions of the two integrations: Oracle ERP 1 versions
1.1.0 and 1.0.0 and Oracle ERP 2 versions 1.1.0 and 1.0.0.
All four integrations and versions are included in a project deployment
named 1.1.0. 
- In the navigation pane, click Projects.
- Click Add.
- Click Import and upload the latest
accelerator project.
The following message is displayed:
Project has been successfully imported.
- Click the project name or click
 .
.
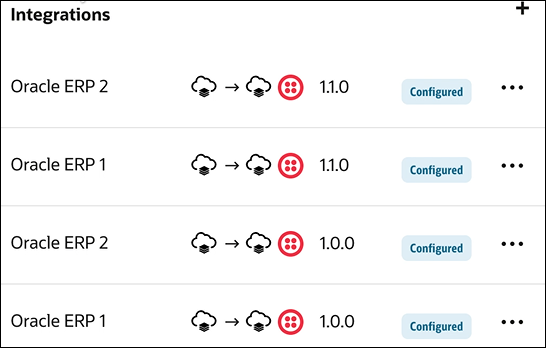
Note that the latest accelerator project includes Oracle ERP 1 versions 1.1.0 and 1.0.0 and Oracle ERP 2 versions 1.1.0 and 1.0.0.

Understand an Imported Recipe Project
When you import a recipe project, it is displayed as Developed in the Type column on the Projects page.
