6 Working with Assets
Topics
6.1 About the Functions You Can Perform on Assets
As a content contributor, you can create, edit, and copy assets, share assets with other sites, and delete assets. If your administrator has enabled locales on your site, you can also create localized assets and multilingual asset sets. Once you have created assets, you can use the search feature in the Contributor interface to find the assets you want to work with. If you are going to be working with the same assets throughout your session, WebCenter Sites provides a variety of ways for you to easily access those assets. These ways include bookmarking assets, accessing assets from the History node, tagging assets containing similar content, and saving search criteria.
WebCenter Sites also offers a preview function which enables you to preview assets as they will be displayed on the website when they are published. Since websites change from moment to moment and day to day, WebCenter Sites also offers the Future Preview feature which enables you to view site assets as they will be displayed on the website at any particular moment in the future.
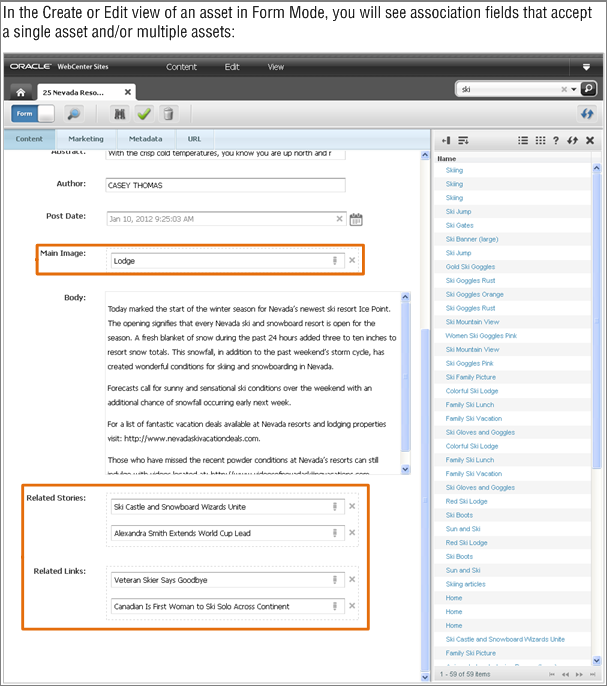
Once you have created your assets, you can associate them with one another and with Page assets by using association fields (configured by your developers). You can also assign child assets to parent assets to further categorize your assets. Additionally, if your assets contain CKEditor enabled fields, you can use the WebCenter Sites-specific icons on the CKEditor toolbar to link assets in a variety of ways within the CKEditor enabled field.
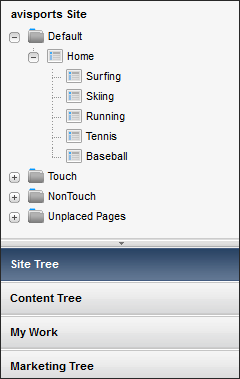
When you have created the Pages for your website, you can then define your website's navigation by placing and unplacing those Pages under a site navigation node in the Site Tree.
6.2 Creating Assets
You can create assets in the following ways:
-
Create assets from scratch
-
Copy existing assets and then work with the copied asset
The types of assets you can create are determined by how the administrator has personalized the New menu (from the Content menu, select New) for your role. The purpose of personalizing the contents of the New menu is to make your job easier. For example, you see only the asset types for which you can create assets.
For information about creating assets, see these topics:
6.2.3 Working with Editable Areas of an Asset's Create View
Different editable areas are available when populating an asset.
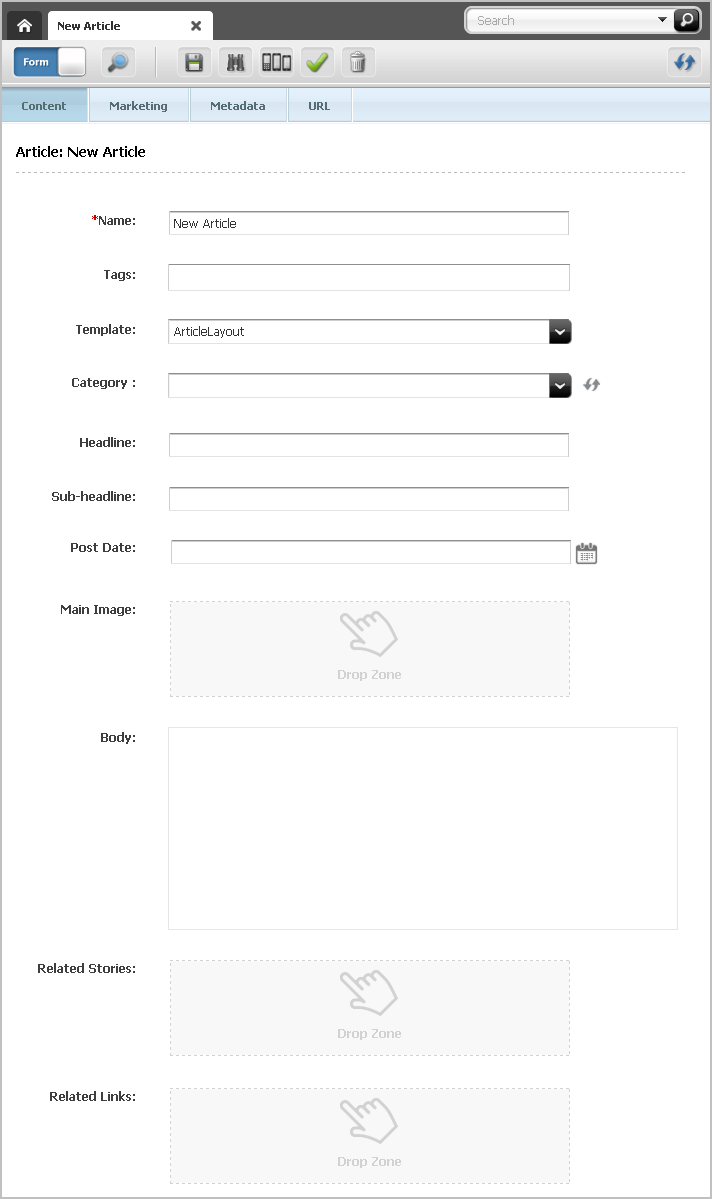
Text Areas. You may see one or more areas that allow you to enter text. These areas may display predefined sample text describing the type of content that should be entered. When you point to a text area, it becomes highlighted in grey and your cursor becomes a text-selecting I-beam.
Click the text area to enter your content. When you click the text area, you see one of the following:
Simple Text field. You can enter text into a simple text field, but you cannot format the appearance of that text.
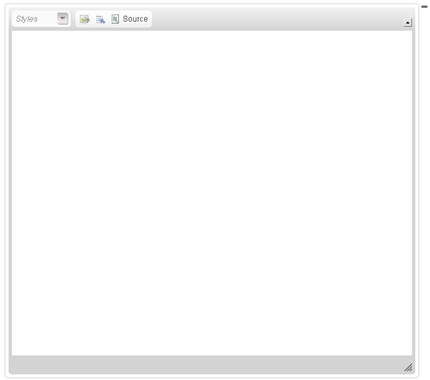
WYSIWYG text field. If the text area supports an embedded WYSYWYG editor (such as CKEditor), the WYSYWYG editor opens. These text fields allow you to enter and format your content using controls similar to Microsoft Word.
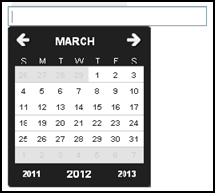
Clicking in a date area loads the Date Picker attribute editor.
Date area. You may see one or more areas that allow you to select a date.
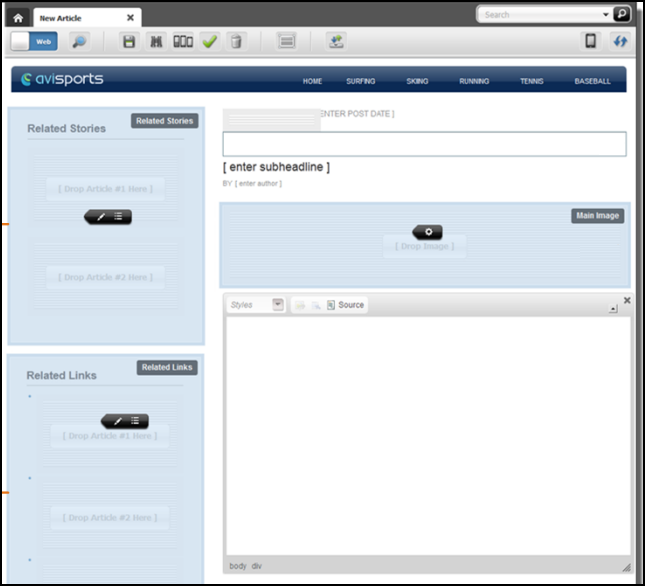
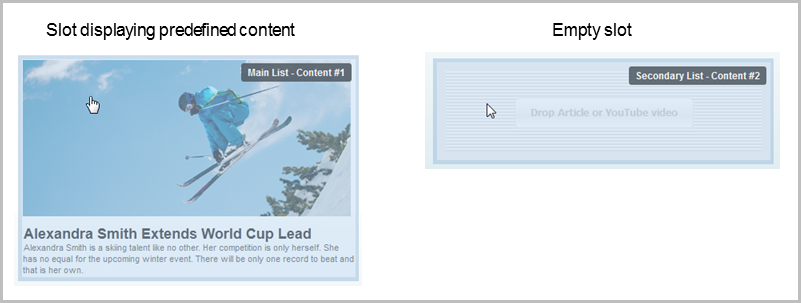
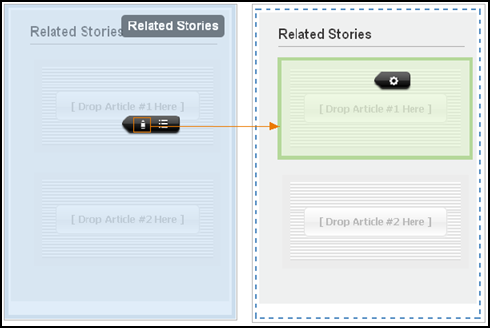
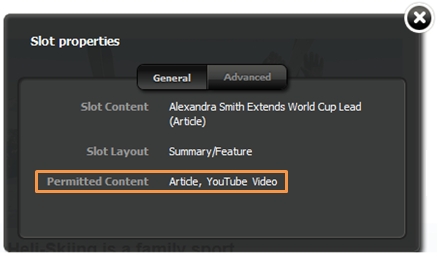
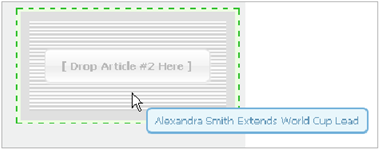
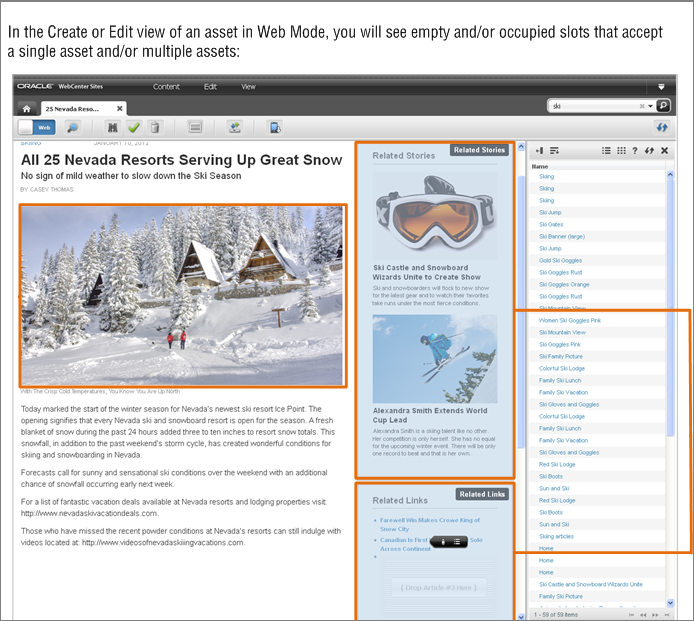
Slots. You may see one or more areas that display either predefined content or an empty slot. These areas are highlighted with a blue overlay when you point to them.
To work with a slot:
6.2.4 Creating Assets by Copying Existing Assets
You can create new assets by copying existing assets. You can then work on the copies, making changes to the content where necessary. You can copy assets even if they are checked out by another user. You can copy assets displayed in both Form View and Web View.
For information about creating assets by copying existing assets, see these topics:
6.2.4.1 Creating an Asset by Copying an Existing Asset
To create an asset by copying an Existing Asset:
6.2.5 Sharing Assets with Other Sites
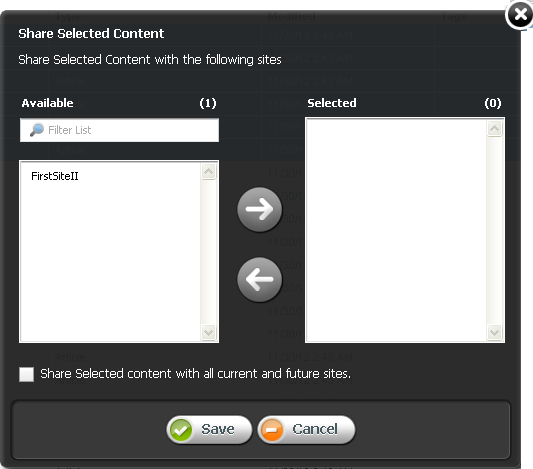
If you want to use an asset in multiple sites, you can share it so that you do not have to create it multiple times and maintain it across multiple sites.
Note:
To share an asset with another site, ensure that the asset's type is enabled on the site with which you want to share it.
For information about sharing assets with other sites, see these topics:
6.2.5.1 Which assets can you share?
Before you share an asset, keep in mind the following:
-
You must have the permissions to share an asset.
-
You can share an asset only to sites that you have access to. If you have access to only one site, the Share option in the Content menu is not available to you.
-
You cannot share Page assets.
-
Share an asset only if the content it contains does not have to be unique to the target site. For example, you can share an asset containing your company's logo, because the same image can probably be used on all of the company's sites.
If the nature of the content requires a separate, unique version for each site, do not share the asset –instead, create a new asset for each site that requires a unique version of the content.
-
Because of the nature of asset sharing, deleting a shared asset automatically removes it from all sites to which it was shared.
-
If the asset is in a workflow, you and others can change its workflow status only when you are working in the asset's native site.
-
Share the asset only when you are ready to publish it; that is, wait to share the asset until it has been approved.
-
To share a localized asset to another site, the asset's locale must be enabled on the target site.
-
If you share an asset that has dependencies, (for example, the shared asset is associated with an Article asset), you have to share all of the asset's dependent assets to the target site in order for the primary shared asset to be successfully approved for publishing on the site to which you shared it.
If you want to share an asset with another site, but you do not have the appropriate permissions, contact your WebCenter Sites administrator.
6.3 Editing Assets
Editing assets is permission based. Your site administrator determines which users can work with which assets. If you have the right permissions, you can edit assets in the Contributor interface. For more information about the permissions you must have to edit assets, see your administrator.
Note:
If you have to edit a shared asset, you must edit the asset in its native site (the site on which the asset was originally created).
For information about editing assets, see these topics:
6.3.1 Editing Assets in Form View
If the asset type is configured such that all assets of that type open in Form View, a tab opens displaying the content entry form of the asset. In Form View, you can edit an asset's content by modifying or replacing the information displayed in the fields of the asset's content entry form.
6.3.2 Editing Assets in Web View
This section covers the following topics:
6.3.2.1 Editing the Content of an Asset in Web View
Web View offers in-context editing, which means you can edit the content of an asset directly in its web page view. How the asset's web page layout (template) code is written determines the areas you can edit in Web View. Certain fields (such as Date and Locale fields) may only be accessible when working with an asset in Form View. Therefore, to edit the content of these fields you must switch to Form View.
To edit the content of an asset in Web View:
6.3.2.2 Changing Web Page Layout
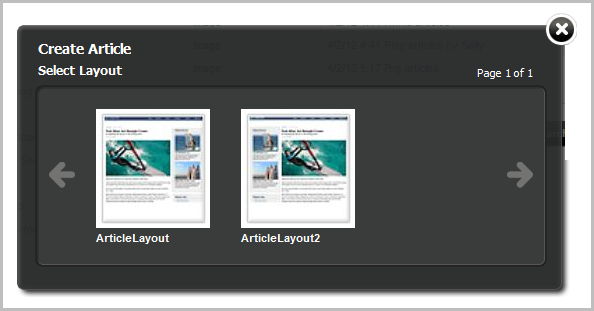
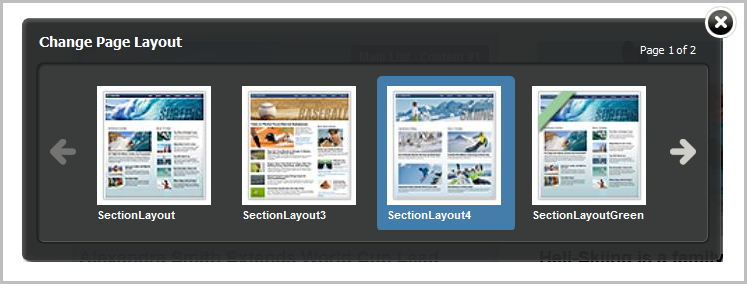
The web page layout (template) assigned to an asset determines the position of the slots and other editable areas displayed on the web page view of the asset. If you select a different layout for the asset, the slots and other editable areas are rendered in a different position, depending on how the web page layout (template) code is written. This section provides instruction on selecting a different web page layout (template) for an asset when working in Web View.
To change the web page layout of an asset:
6.3.2.3 Changing Content Layout
Each slot is assigned a content layout (template). The content layout of a slot determines the appearance of the asset contained within the slot. When you change the content layout of a slot, a Slot asset is created and stored in the WebCenter Sites database. When you approve the asset, you must also approve the Slot assets associated with that asset. This section provides instructions for changing the content layout (template) of a slot.
To change the content layout of a slot:
6.3.2.4 Editing Associations
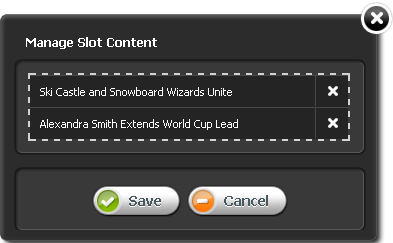
When working with an asset in Web View, you can edit its associations by adding an asset to an empty slot, replacing an asset currently displayed in a slot with a different asset, repositioning the assets displayed in a multi-valued slot, and removing an asset from a slot.
This section covers the following topics:
6.3.2.4.1 Adding or Replacing an Association
This section shows you how to create or replace an association between two assets by dragging and dropping the asset you want to associate into the slot of the asset you are working with in Web View.
6.3.2.4.2 Editing the Content of an Associated Asset
When working with an asset in Web View, you can edit the content of its associated assets either directly in the slot which displays the associated asset or in a new tab. If you edit the content of an associated asset in a new tab, when you save that asset, the changes you made are reflected in the slot that displays the asset.
6.3.2.4.3 Removing Associations
When you are working with an asset in Web View and you remove an asset from a slot, you are also removing the association between the asset you are working with and the asset you removed from the slot.
6.4 Working with Attribute Editors
This section contains information about the attribute editor enabled fields you may see when creating or editing an asset.
This section covers the following topics:
6.4.1 Working with the CKEditor
CKEditor is a popular third-party WYSIWYG editor that is used as the default editor for WYSIWYG-enabled text fields. CKEditor allows you to apply a wide range of MS Word-style formatting to your content. CKEditor also provides advanced features, such as access to your content's underlying HTML code, and the ability to accept pre-formatted content from MS Word documents. Most features made available to you in the toolbar are native to CKEditor. To learn more about CKEditor and its capabilities, consult the editor's documentation, available at http://docs.ckeditor.com.
Several features on the CKEditor toolbar are specific to WebCenter Sites:
-
Add asset link: Enables you to create a link from one asset to another asset. See About Linking Two Assets Directly.
-
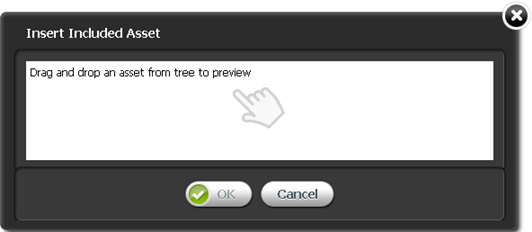
Include asset: Enables you to render an asset's previewable content in another asset. See Linking Two Assets by Inclusion.
Note:
If the included asset is an image, then you can link the image to another asset. See About Linking Two Assets Through an Image Asset.
6.4.2 Working with the Image Picker
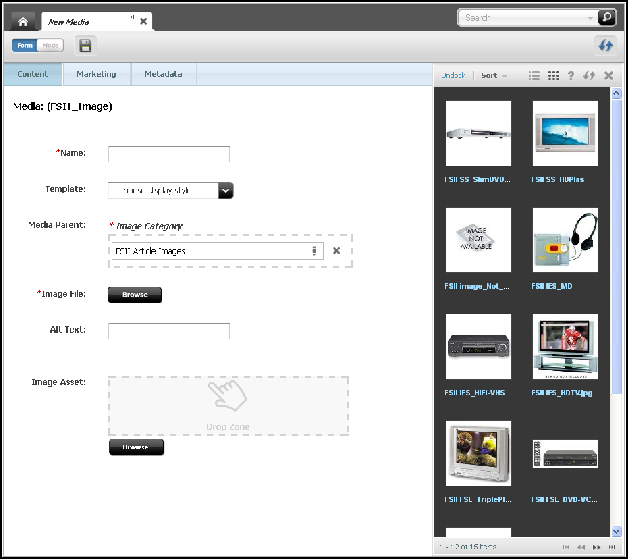
When working with assets that can be associated with one or more image assets, you may see fields that support the Image Picker attribute editor. The Image Picker enables you to visually choose an image asset to associate with the asset you are creating or editing.
Note:
When configuring the asset type of the parent asset, your developers decide the following:
-
The fields for which Image Picker is enabled
-
The type of image assets displayed by Image Picker
To associate an image asset with another asset using the Image Picker:
6.4.3 Working with the Clarkii Online Image Editor
The Clarkii Online Image Editor (Clarkii OIE) allows you to edit an image directly in an asset's New or Edit view in Form View. For example, you can use Clarkii OIE to crop and rotate an image. You can also use Clarkii OIE to enhance an image by adding graphics and text to it.
Note:
When working with Clarkii OIE, keep in mind the following:
-
Clarkii OIE is supported only in Form View.
-
Your site developers enable Clarkii OIE on a per-field basis when configuring asset types.
-
Clarkii OIE requires you to have Flash installed. If you do not have Flash installed, instead of Clarkii OIE you see a link to download Flash.
For full instructions about using the toolbar and menu options provided by Clarkii OIE, visit the following web site:
http://www.online-image-editor-clarkii.com/
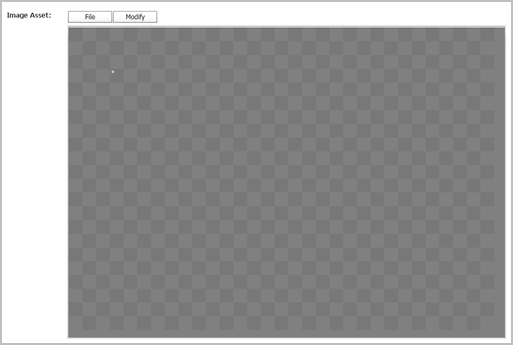
Figure 6-28 shows an example view of the Clarkii OIE field rendered in an asset's Edit view in Form View.
Figure 6-28 Clarkii Online Image Editor Rendered in an Asset's Field
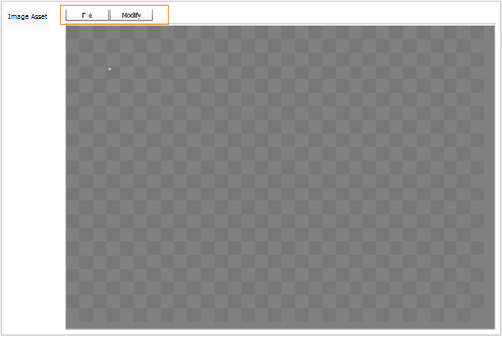
Description of "Figure 6-28 Clarkii Online Image Editor Rendered in an Asset's Field"
When you work with an asset field using Clarkii OIE, you can do one or more of the following depending on how your developers configured Clarkii OIE:
-
Select an image to place on the Clarkii OIE canvas, or select an image to replace the image currently on the canvas. Your developers determine which images are available to you.
-
Use the toolbar and menu options available in the Clarkii OIE field to make other edits to the image on the canvas as necessary.
6.4.4 Working with the Date Picker
When working with assets whose forms include a date field (such as a post date, release date, start/end date, and so on), you can visually select a date using the Date Picker attribute editor, in addition to the standard text box.
The Date Picker is a calendar-like interface similar to date selectors found in many personal information management applications (for example, Microsoft Outlook).
To enter a date using the Date Picker:
6.5 Deleting Assets
This section contains the following:
6.5.1 About Deleting Assets
Use the WebCenter Sites delete function to delete assets from the WebCenter Sites database. This function allows the deletion of multiple assets at one time.
When you use the Delete function, the asset is not entirely removed from the database. The contents of the asset are emptied; however, the ID remains in the database as a record of the asset's existence. This simple record is called a voided asset.
When a previously published asset is voided in the content management system, the voided asset is automatically approved for publishing to any destination the asset has ever been published to. The voided asset is placed in the publish queue, and published during the next publishing session. The voided asset then overwrites the previously published asset.
Voided assets are not returned in search results.
6.5.2 Asset Deletion Rules
The following restrictions are enforced when you delete assets:
-
You can delete an asset only if you have the permissions to do so.
-
If an asset is in a workflow and is assigned to someone other than you, you cannot delete that asset even if you have the permissions to delete assets.
-
You cannot delete a placed Page asset.
-
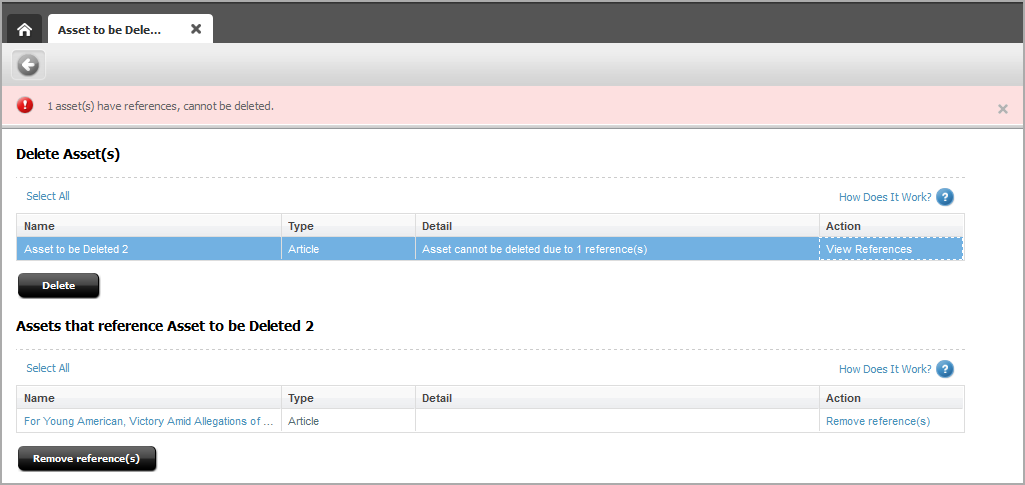
If an asset is associated with other assets, WebCenter Sites displays a list of the references preventing deletion. To continue with the deletion, you must first remove the references.
6.6 Finding and Organizing Assets
WebCenter Sites provides an easy and effective way to find assets matching the criteria you specify. When you find them, you can both save the search criteria you used to find the assets and organize the assets into a personalized list for easy future access.
Note:
Search results include only assets with which you have permissions to work. (Permissions are set by your administrator.)
This section includes the following topics:
6.6.1 Search Guidelines
Table 6-1lists the guidelines to formulate your search queries while performing searches. Customizing your search queries allows you to perform more precise searches.
Note that searching is not case-sensitive. For example, searching for Jack returns assets that contain Jack and assets that contain jack.
Table 6-1 Search Guidelines
| To find... | ...do the following | Example |
|---|---|---|
|
Assets that contain a phrase. |
Enclose the phrase in quotes. |
To find assets that contain the phrase blue flowers, enter blue flowers as your search query. |
|
Assets that contain variations of a term and match the character length of the term. |
Use the ? (question mark) symbol to indicate a single-character wildcard. A search term cannot begin with a wildcard. |
To find assets that contain test or text, enter te?t as your search query. To find assets that contain either book or back, enter b??k as your search query. |
|
Assets that contain variations of a term, but may not match the character length of the term. |
Use the *symbol to indicate a multi-character wildcard. A search term cannot begin with a wildcard. |
To find assets that contain test, tester, or testing, enter test* as your search query. To find assets that contain jeanne or jeanine, enter jea*e as your search query. |
|
Assets that contain all of the specified terms. |
Join the terms with the AND operator. |
To find assets that contain both jack and jill, enter jack AND jill as your search query. |
|
Assets that contain a specific term but do not contain another term you specify. |
Exclude the unwanted terms using the NOT operator. |
To find assets that contain jack but do not contain jill, enter jack NOT jill as your search query. |
|
Assets that must contain a specific term and may contain another term you specify. |
Indicate a required term by preceding it with the +(required) operator. |
To find assets that must contain jack and may contain jill, enter +jack jill as your search query. |
|
Assets that contain a specific term, excluding assets that also contain another term you specify. |
Precede a term with the - (prohibited) operator to indicate the exclusion. |
To find assets that contain jack but exclude those that also contain jill, enter jack -jill as your search query. |
|
Assets that contain terms similar in spelling to the term you specify. |
Append the ~ (tilde) operator to a term to perform a fuzzy search on that term. |
To find assets that contain jack, including occurrences that are misspelled, enter jack~ as your search query. |
|
Assets that contain special characters (! $ & * _ - =). |
Precede each special character with a backslash (\). |
To find assets that contain a hyphen or dash, as in jack - jill enter jack \- jill as your search query. |
6.6.2 Performing a Simple Search
Note:
The asset types for which you can search are determined by your permissions and the asset types available from the Contributor interface.
To search for an asset:
6.6.3 Performing an Advanced Search
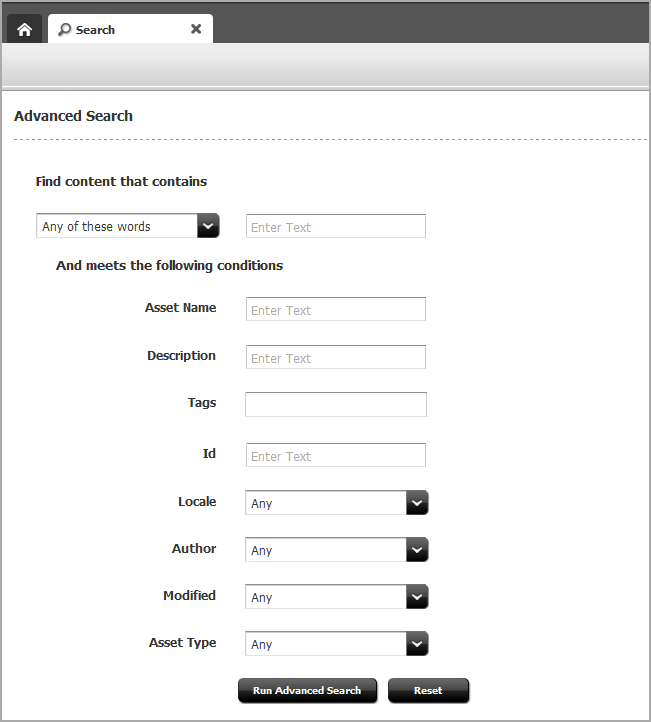
Advanced searches enable you to search for assets by creation date, start and end date, locale, unique identifier, name, description, author, type, and tags – or any combination of these items.
To perform an advanced search for an asset:
6.6.4 Working with the Search Results List
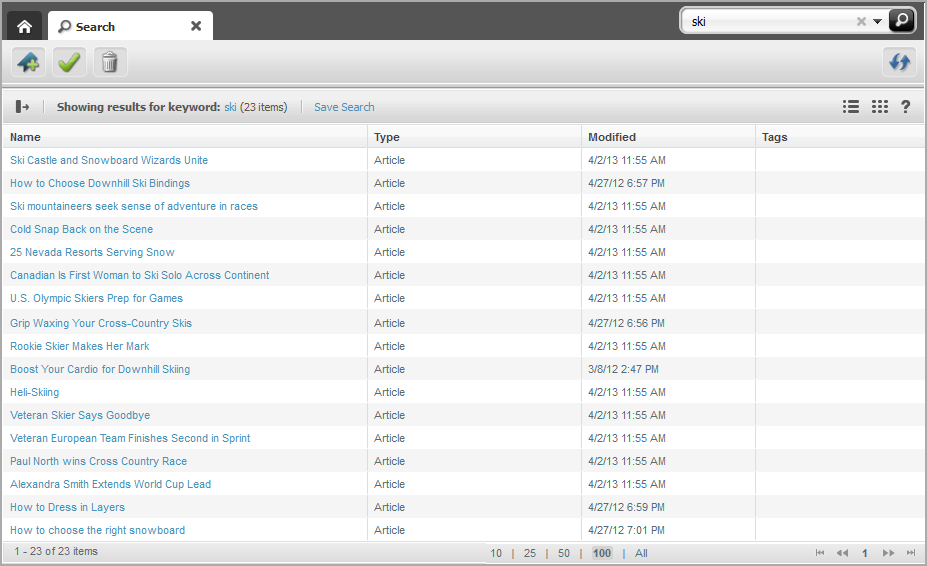
After you run a search, the results of your search are displayed as a list in either a Search tab or docked to the right of your workspace. To more easily find specific assets within the search results list, you can limit the number of results that are shown at the same time, sort the results of your search, dock or undock the search results list, and display each asset listed in the search results as thumbnail images.
This section covers the following topics:
6.6.4.1 Docking or Undocking the Search Results List
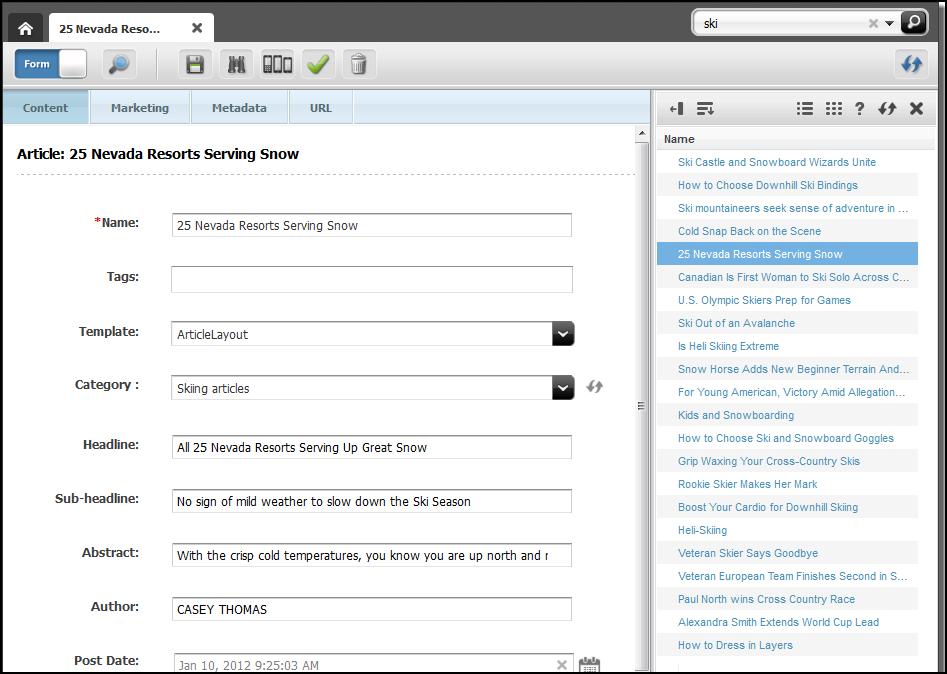
If you are working with an asset while performing a search, your search results are automatically docked to the right of your workspace. If you are not currently working on an asset when you perform a search, the results of your search are displayed in a Search tab.
- To display the results of your search to the right of your workspace, in the toolbar displayed at the top of the search results, click Dock.
- To view the search results list in the Search tab, in the toolbar displayed at the top of the search results, click Undock.
6.6.4.2 Switching Between List View and Thumbnail View
Select whether you want to view your search results in List View or Thumbnail View.
Figure 6-33 Docked Search Results List Toolbar
Description of "Figure 6-33 Docked Search Results List Toolbar"
- To display your search results as a list, click the List View option at the top of the search results list.
- To display each asset in your search results as a thumbnail image, click the Thumbnail View option at the top of the search results list.
6.6.4.3 Sorting Your Search Results
To sort your search results:
Your search results are listed in the order you specify.
6.6.4.4 About Navigating Through Your Search Results
The search results list displays 100 assets per page of results. To easily navigate through the results of your search, you can use the toolbar to limit the number of search results, skip to the next page of results, go back to the previous page of results, skip to the last or first page of results, or go to a specific page of results.
6.6.5 Saving Your Search Criteria
WebCenter Sites allows you to save your search criteria either as a Saved Search or as a ContentQuery asset. This section provides instructions for saving your search criteria both ways.
For information about saving your search criteria, see the following topics:
6.6.5.1 Saving Your Search Criteria to Your Saved Searches Widget
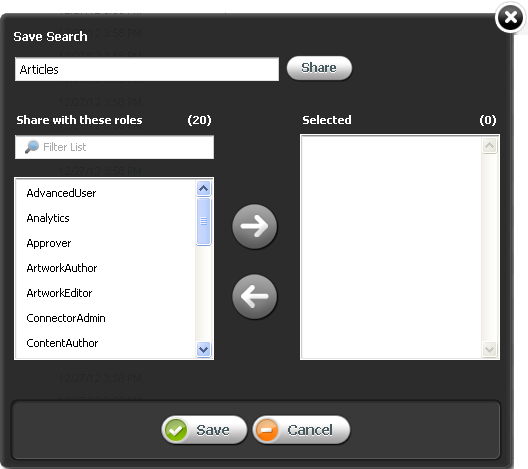
WebCenter Sites provides the Saved Search feature which allows you to save the search criteria you used to perform a search. The search criteria you save is accessible from the Saved Searches widget on your dashboard (Home tab). A Saved Search can either be made public (shared with users assigned certain roles) or kept private (accessible only to the user who saved the search criteria) depending on how the search criteria is saved.
To save your search criteria as a Saved Search:
6.6.5.2 Saving Search Criteria as an Asset (of Type ContentQuery)
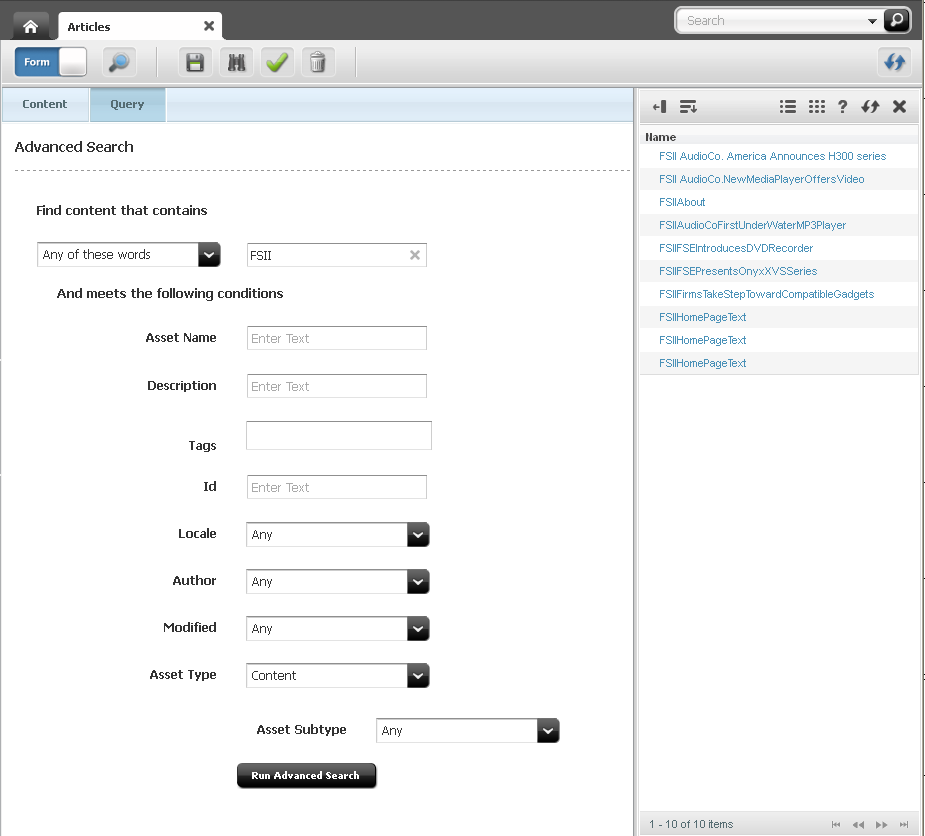
WebCenter Sites provides a ContentQuery asset type, which combines the Advanced Search feature with the ability to save search criteria, thus enabling you to save your search criteria as an asset of type ContentQuery. A ContentQuery asset differs from other types of assets. It does not contain any content or a list of other assets. Instead, a ContentQuery asset contains only a query. When a ContentQuery asset is placed on a page and that page is published, the query executes and renders the results to site visitors.
To create a ContentQuery asset:
6.6.6 Finding Bookmarked Assets
Bookmarked assets can be accessed in the following ways:
-
From the Bookmarks widget on the dashboard (in the Home tab).
-
From the My Work tree under the Bookmarks node.
For information about finding bookmarked assets, see the following topics:
6.6.7 Bookmarking Assets
Bookmarking allows you to add select assets to the Bookmarks node in the My Work tree and to the Bookmarks widget on your dashboard (located in the Home tab). This makes those assets easy to retrieve at a later time.
For information about bookmarking assets, see the following topics:
6.6.7.1 Bookmarking a Single Asset
The following procedure provides instructions for bookmarking an asset that is open in your workspace.
6.6.7.2 Bookmarking Multiple Assets
The following procedure provides instructions for bookmarking multiple assets from a search results list.
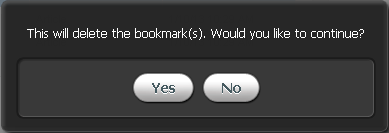
6.6.7.3 Unbookmarking an asset from the Bookmarks node
To unbookmark an asset from the Bookmarks node:
6.6.8 Tagging Assets
WebCenter Sites allows you to organize assets by applying tags to them.
For information about tagging assets, see these topics:
6.6.8.1 About Tagging Assets
A Tag is a single word or short phrase (label) that you apply to assets that share one or more common factors (for example, a theme or topic).
-
A tag must be between 1 and 32 alphanumeric characters. The only other characters allowed are underscore (_) and hyphen (-).
-
Tags can be applied to basic assets, flex assets, and page assets. You can apply a tag to an asset either from the asset's content entry form or from a search results list.
-
You can create tags at the same time as you apply them, or you can create them in advance in the My Tags folder of the My Work tree.
-
You can add existing tags to the My Tags folder, and from there you can open a list of assets that have been given a tag.
-
After an asset is tagged, you can perform an advanced search to find the tagged asset and all other assets that have been given the same tag.
Note:
The My Tags folder is not enabled by default. For you to access My Tags, your administrator has to enable it for your site and also assign required roles for you. If you cannot see the My Tags folder, contact your WebCenter Sites administrator.6.6.8.2 Creating Tags in the My Work Tree
You can create tags in the My Tags folder of the My Work tree and later apply them to assets.
Note:
For you to access My Tags in the Contributor interface, your administrator must enable My Tags for your site and assign the required roles.To create tags in the My Work tree:
- In the Tags section of the My Work tree, right-click the My Tags folder and select Add Tag.
- In the Add Tag dialog, enter a name for the tag, then click Save.
6.6.8.3 Adding Existing Tags to the My Work Tree
You can add tags that you have created elsewhere to the My Tags folder of the My Work tree.
- In the Tags section of the My Work tree, right-click the My Tags folder and select Add Tag.
- In the Add Tag dialog, click anywhere within the field, then enter the first few characters of the tag's name to display a list of existing tags.
- Select a tag from the drop-down list, then click Save.
6.6.8.4 Finding Assets from the My Work Tree
You can use the My Tags folder of the My Work tree to find assets that have been given a tag.
- In the My Tags folder, double-click a tag name to open a list of assets that have been given that tag.
6.6.8.5 Tagging Assets in the Content Entry Form
You can add tags to an asset directly in the asset’s content entry form.
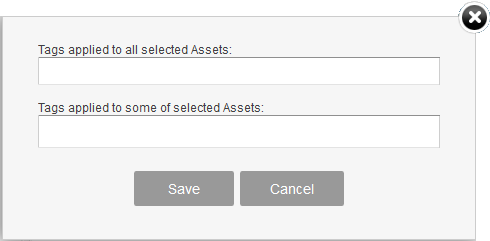
6.6.8.6 Tagging Assets from a Search Results List
You can add tags to assets in a search results list.
6.7 Previewing Assets
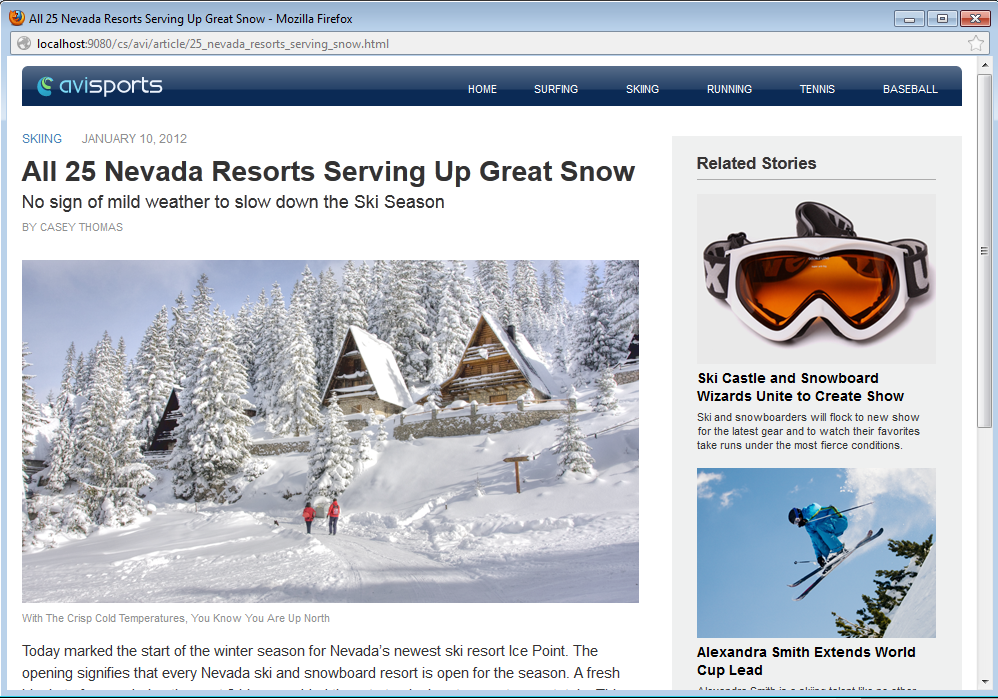
The Contributor interface allows you to preview how an asset will look on the website when published. When you preview an asset, you cannot modify its content. However, you can choose to preview how the asset would look if it were rendered by a different template or wrapper.
Figure 6-38 Preview of the Avisports Sample Site's Home Page Asset
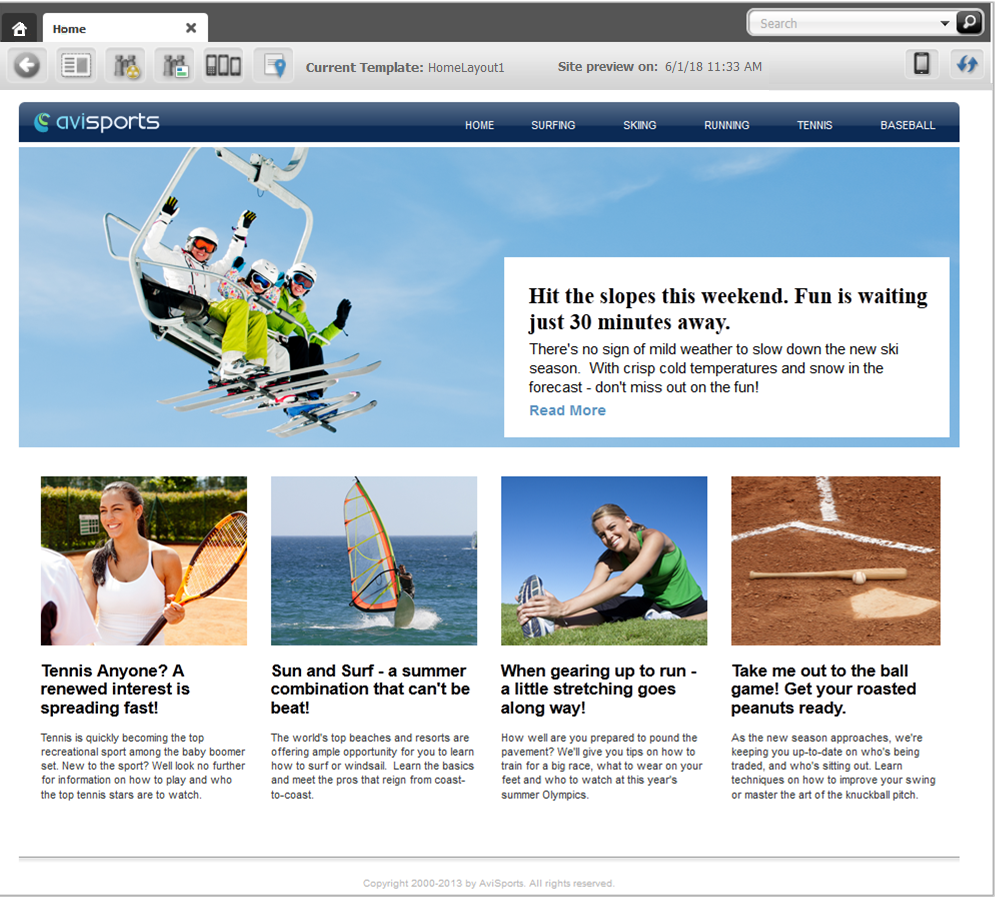
Description of "Figure 6-38 Preview of the Avisports Sample Site's Home Page Asset"
While previewing an asset, you can choose to preview how the asset will look on the website at a future date. This feature is called Future Preview and is discussed later in this chapter. Future preview combines the use of start and end dates (also discussed later in this chapter) with the preview feature to show how an asset will be displayed on the website at a given time and date in the future.
Timeline ![]() allows you to go back in time and, access and view an asset from a past date. See Using Timeline.
allows you to go back in time and, access and view an asset from a past date. See Using Timeline.
6.7.1 How do I preview assets?
Previewing an asset renders the asset as it would be displayed on the website if it were published. To preview an asset, the following conditions must be satisfied:
-
You must have the appropriate permissions.
-
The asset must have a template assigned to it.
You can preview an asset in several ways. For example:
-
Use the Search field in the Contributor interface to find the asset you want to preview. You can either open the asset and then preview it or preview the asset directly from the search results list.
-
Drill down the Site Tree or My Work tree in the navigation pane. You can either right-click the asset and preview it directly from the tree or open the asset in its Inspect or Edit view and then preview it.
-
Drill down the Content Tree and double-click the parent asset associated with the asset you want to preview. In the Browse tab that lists the assets associated with the parent asset, navigate to and preview the desired asset.
-
Preview an asset you are currently working with.
Note:
This chapter shows you how to preview an asset by using the Search field in the Contributor interface.
To preview an asset:
6.7.2 Previewing Future Sites
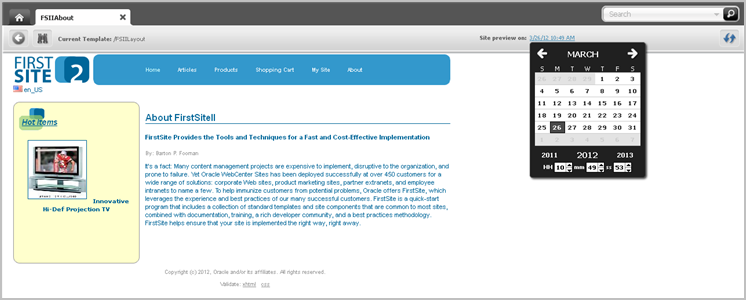
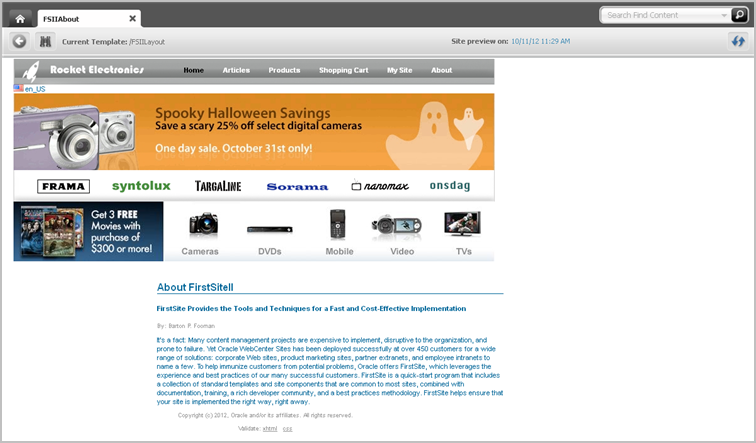
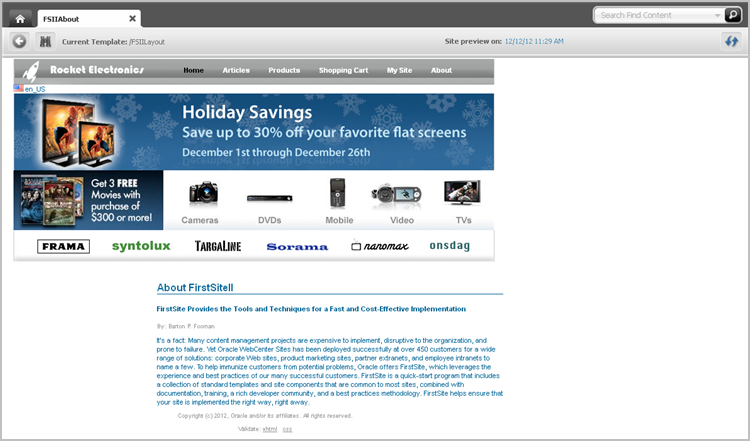
Future Preview is a tool for visualizing your website as you strategize upcoming content changes. With Future Preview, you can preview an asset's web page as it will appear at any selected moment in the future. By generating possible versions of a web page, you can more easily decide what to publish and when.
With Future Preview, you can select any particular date in the future and see what all the changes you and other content contributors are making will look like on the website at that time. WebCenter Sites uses the assigned start and end dates to determine whether to display the preview of the asset. If the selected date falls within the asset's start/end date range, then the asset's preview opens.
Note:
To preview an asset as it will appear at future dates:
-
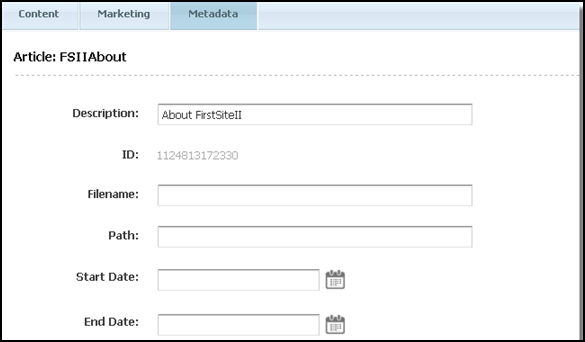
Start and end dates must be assigned in the Metadata section of an asset's content entry form (in Form View).
-
The template for the page associated with the asset must be coded to support future preview. For more information, see your site administrator.
For information about previewing future sites, see the following topics:
6.7.2.1 About Start and End Dates
Start and end dates are optional field values you can assign to assets. This date range indicates when assets will appear on a website, should they be published. Fill in these dates when you are working with an asset in Form View (located on the Metadata section of the form).
Start and end dates affect the function of Future Preview, as discussed in this section.
Start and end dates also appear in the Advanced Search options, giving you the ability to search for assets based on the date range in which they will appear on the website.
6.7.2.2 Impact of Start and End Dates on Future Preview
Consider the following factors when assigning start and end dates:
-
The start and end date range are the times you expect the asset to be displayed on the website.
When you set a start and end date range, you can use Future Preview to compare how the asset will look on dates before, during, and after the date range.
When you first preview an asset, you see its web page as it would appear on the asset's start date. If no start date is assigned, the current date is used for preview.
Choose a future date from the date picker in the asset's toolbar to view how the page will appear at the selected time. When you select a date that falls during the asset's start and end date range, the preview shows how the asset's web page will look during the period the asset is visible on the website. Conversely, if you choose a date that falls outside that date range, you see the asset's web page as it appears before the item is published or after the item is no longer visible on the page.
Note:
The publication date of the asset does not affect when and how long the asset's web page is accessible from the website; this is controlled by the start and end dates.
-
Neither the start nor end date is a required field:
-
An asset without both start and end dates can always be previewed, regardless of the date with which you choose to preview it.
-
An asset with an explicitly set start and end date can be previewed conditionally; that is:
-
If the asset has both a start and an end date, the asset can be previewed only when the specific date range is selected.
-
If the asset has only a start date, the asset can be previewed on all dates including and after the start date. (It never expires.)
-
If the asset has only an end date, the asset can be previewed on all dates up to and including the end date.
-
-
6.7.2.4 Previewing a Site as It Will Appear at a Future Time
When assets have been assigned a start date, or end date, or both, you can preview assets and the pages on which those assets are displayed as they will appear at future times of your choice.
6.7.2.5 Approval for Publishing
Before an asset is published to a website, you must approve the asset and all of its dependents for publishing. This process ensures that all assets published at the same time are up to date before publishing.
The start date that you set does not necessarily have to be the date on which the item gets published. However, the asset is not available on the website until its start date. This is true for all the dependent assets that you are approving as well.
If you publish an asset after its end date, the asset is published to its destination; however, the asset does not appear on the website (the asset has expired).
6.7.3 Using Timeline
Timeline available in the Preview window gives you the ability to go back in time, retrieve an asset from a publish destination and, view it in the present.
Figure 6-45 Timeline Icon in the Toolbar of the Avisports Homepage Asset’s Preview Window
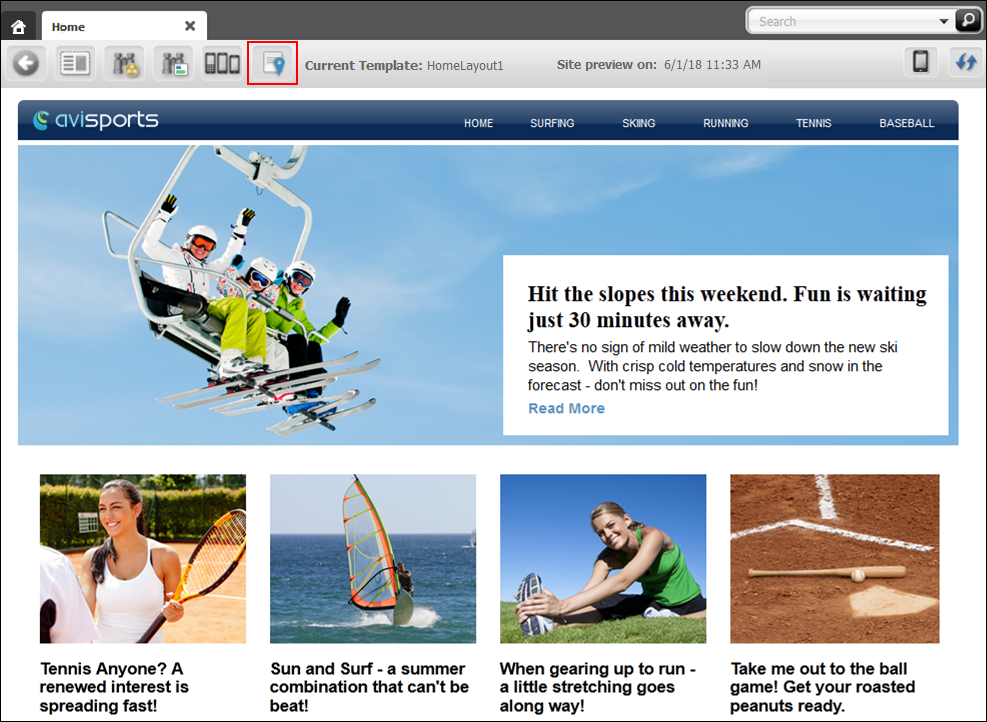
Description of "Figure 6-45 Timeline Icon in the Toolbar of the Avisports Homepage Asset’s Preview Window"
Note:
To work with Timeline, you’ve to enable and configure Timeline. For details, see Configuring Timeline in Administering Oracle WebCenter Sites.Let us explore how you can use Timeline. Assume a scenario where your auditors want to view some old data in your homepage from six months back. The problem is that you’ve changed your homepage a couple of times during this span of time. So how do you access your homepage with the old data as it was six months back? You can do this by using Timeline.
Before using Timeline, you’ve to ensure that the asset was published and revision tracking was enabled for all corresponding asset types. Otherwise, you’ll get an error message.
Click Timeline ![]() and a drop-down list appears. The options in the drop-down list are Standard Preview, Local and all other publish destinations.
and a drop-down list appears. The options in the drop-down list are Standard Preview, Local and all other publish destinations.
-
Select a publish destination from the drop-down list to see all the versions of the asset published to it. Filtering of revisions is based on the date and time that the revisions were published to the selected publish destination.
-
Local lets you access changes in the management system, even the ones that are not published. Filtering of revisions is based on the revision creation date.
-
Use Standard Preview to go back to the normal preview mode.
To use Timeline:
6.8 Associating Assets
This procedure uses the avisports sample site to show you how to associate one or more assets with another asset using either Form View or Web View. In Form View, an association field is represented by a drag and drop field in a content entry form. In Web View, association fields are represented by slots that are displayed on the web page view of the asset with which you are working. This procedure covers both single and multi-valued associations.
To associate an asset with another asset:
6.8.2 Assigning a Parent Asset to a Child Asset
To assign a parent asset to a child asset:
6.8.3 Working with Grouped Assets
When working with assets, you can organize them in groups and place them in a specific order. If you are a marketer and the Collection asset type is enabled for the site with which you are working, you can create lists of assets related to other assets in some way based on context, or lists of asset that change based on some variable, such as the current date, or time of day. You might also want to deliver different groups of assets depending on the demographic data of your visitors. In such cases, you would use Collection and Recommendation assets.
For information about working with grouped assets, see the following topics:
6.8.3.1 Working with Collections
Suppose you want to choose, rank in order, and deliver sets of content that your visitors will most likely want to see when viewing your site. For example, you can place five top political news stories, organized in the order of importance, on the home page of your site every morning. In a case like this, you can build your Top Five list of articles using a Collection asset.
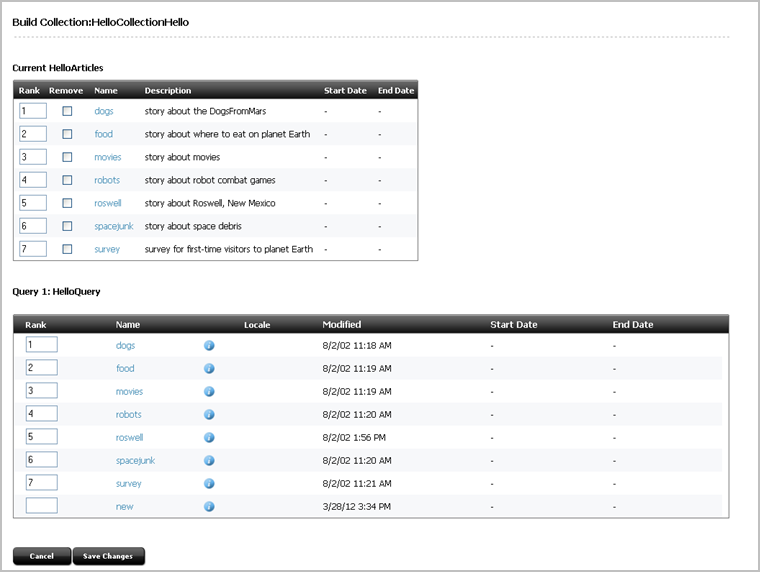
A Collection asset stores a list of basic assets of a single asset type, organized in a specific order. The assets you can include in a collection come from the results returned by one or more queries. You choose the assets you want to include in the collection by ranking them in the order of your choice in the list of query results. This ranked, ordered list of assets is the collection.
Typically, site designers or administrators create Collection assets and assign the appropriate queries and templates to them. Your job is to choose the most suitable content to be included in the collection.
Keep in mind that when you build your collection, other users with the appropriate permissions can access the Collection assets you worked with and change your asset rankings within them.
Note:
Collection assets can only store lists of basic assets. For flex assets, functionality similar to that of Collection assets (and much more) is provided by Recommendation assets (described later in this section).
6.8.3.2 Building a Collection
A Collection asset must exist in the site you are working with for you to build a collection. Your site designer or administrator is usually the person responsible for creating new Collection assets and editing existing ones.
To build a collection:
6.8.3.3 Working with Recommendations
Recommendation assets allow you to personalize product placements and promotional offerings that are displayed for each site visitor. Recommendations determine which assets (products, for example) should be featured or recommended on a page, based on available information about your site visitors (such as age, or last viewed product).
You can personalize the content your visitors view in the following ways:
-
Create Static List recommendations. These are lists of assets that are displayed according to demographic criteria such as age, income, or other information in the site visitor's profile. (This criteria is defined in a segment and associated with a given static list recommendation.) For example, you can create a list of top dance clubs and show it only to visitors who specify their age range to be between 18 and 24. For visitors whose age falls outside this range, you can display another static list recommendation, for example, a list of top ten beach resorts.
-
Create Related Items recommendations. Related Items recommendations allow you to link to each other assets that bear some sort of relation to one another. This way, whenever a visitor views an asset that is linked to another asset through a Related Items recommendation, he/she sees the related asset. You can thus create a path or a link trail for your visitors to follow by consecutively linking assets to one another using a Related Items recommendation.
The goal is to persuade your visitors to view additional content related to the content they are viewing at a given moment by showing them a teaser for the related content alongside the main content. Related Items recommendations are thus excellent for business tactics such as up-selling or cross-selling merchandise.
For example, you can link movies that share a common theme or genre to one another, such as the Godfather trilogy. You link part I of the trilogy to part II, and part II to part III using a Related Items recommendation. This way, when a visitor looks at part I of the trilogy, WebCenter Sites also shows part II. When the visitor then looks at part II, WebCenter Sites also shows part III. Additionally, you could link parts II and III to part I so your visitors know they should watch part I first when they view part II or III.
-
Create Dynamic List recommendations. Unlike Static List and Related Items recommendations, the functionality of Dynamic List recommendations is defined by customized code written by your developers. Because of that, Dynamic List recommendations are the most flexible out of the three types of Recommendation assets in terms of fulfilling specific business needs. For example, your developers can code a Dynamic List recommendation to behave like a Related Items recommendation, but instead of requiring the related assets be linked manually, the recommendation can track the movies a visitor has bought in the past and recommend movies that most closely match his or her past purchases in terms of theme or genre. In such case, you would simply assign the recommendation to the assets you want to be included in the recommendation.
The choice regarding the type of recommendations used depends largely on how you or your site designers want your site to behave. For information about creating Recommendation assets, see Creating and Configuring Recommendations with Engage.
6.9 Linking Assets and URLs
This section contains the following topics:
6.9.1 About Linking Two Assets Directly
This section contains prerequisite steps and instructions for linking two assets, as follows:
-
Creating a link to another asset
You may have two assets—article assets, for example—with related content you want to join by a link. Working in the main article, you would use the Add asset link icon on the CKEditor toolbar to insert a link to the related article. When site visitors access the main article's content, they can click the inserted link to render the related article's content.
-
Linking two assets by inclusion
A commonly performed CM operation is to insert previewable content from one asset into another asset, but without manually copying the content. Instead, the content is inserted by reference, so that it can be dynamically updated at the insertion point when the target asset (the source of content) is modified.
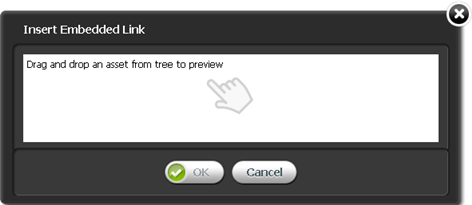
In this scenario, you would use the Include Asset icon in the CKEditor toolbar to insert the asset, whose previewable content is then rendered dynamically at the insertion point.
When using Include Asset, you are actually inserting a link to the target asset, but rendering the link in the form of the target asset's previewable content. The link persists after the target asset is included. As a result, the content is not editable at the insertion point, but is refreshed when the target asset (the source of content) is modified. To view refreshed content, you must refresh the referring asset by clicking the Refresh icon in the referring asset's toolbar.
The extent to which these capabilities are available to you depends on how your site designers have implemented them as part of the custom asset design. For example, the Article asset type that ships with the avisports sample site is configured with a CKEditor in its Body field. Therefore, the Body field supports the types of links described above.
6.9.2 Prerequisites for Linking Assets
Before linking assets, you must verify that they can be linked. Use this section as a checklist.
Two assets are involved in this procedure (both must be on the same site):
-
The referring asset (in which you create the link to the target asset)
-
The target asset (which is rendered when the link is clicked)
The prerequisites for the referring asset area s follows:
-
The referring asset must display the CKEditor in the field where you will place the link. By default, CKEditor is not displayed automatically when the asset's Edit view opens. To display the CKEditor, click the field. If the CKEditor does not appear, then the field is not CKEditor enabled and the assets cannot be linked. Contact your system administrator to have the field enabled.
-
If you intend to publish the referring asset, the asset must be previewable, including the field where you will place the link. (Ensure that the referring asset can be rendered by a template listed in the asset's Template field. For instructions about previewing assets, see Previewing Assets.)
This is the prerequisite for the target asset:
-
The target asset must be previewable and readily available for linking (ensure that the target asset can be rendered by a template listed in the asset's Template field).
Optionally, the target asset should be readily available for linking. One way to ensure this is to place the target asset in the Bookmarks node, located in the My Work tree in the navigation pane. See Bookmarking Assets and Finding Bookmarked Assets.
-
The image asset must be previewable. Ensure that at least one template listed in the asset's Template field renders only the image.
Note:
Rendering additional content (such as text) can interfere with and corrupt the linking process. -
If you are including an image from the Bookmarks node, the image asset must be readily available for inclusion. Place the image asset into the Bookmarks node, located in the My Work tree of the navigation pane, for easy retrieval during the linking process. See Bookmarking Assets and Finding Bookmarked Assets.
6.9.3 Creating a Link to Another Asset
Ensure that all prerequisites in Prerequisites for Linking Assets are met.
6.9.4 Linking Two Assets by Inclusion
Ensure that all prerequisites in Prerequisites for Linking Assets are met.
6.9.5 About Linking Two Assets Through an Image Asset
Company logos (and other images) are often used as links to various types of content: news about the company, products and services offered by the company, and so on. WebCenter Sites enables you to include an image asset in an asset's CKEditor-enabled field, and then link the image to another (target) asset. Clicking the image renders the target asset's previewable content.
Note:
If you are using an image to link two assets, the image must be part of an image asset.
This section contains prerequisite steps and instructions for linking two assets through an image asset. Before continuing with the rest of this section, determine whether you will be including the image from the Bookmarks node (located in the navigation pane, in the My Work tree).
You can perform linking through an image from the Bookmarks node using CKEditor. In the CKEditor enabled field of the asset you are working with, you may want to include an image asset that you have bookmarked. From the CKEditor toolbar, you can use the Include asset icon to include the image in the field. Use the Add asset link icon to link the included image to another asset.
6.9.6 Linking Through an Image from the Bookmarks Node
When you have met all prerequisites in Prerequisites for Linking Assets, continue as described in the following sections:
6.9.6.1 Including the Image Asset in the Referring Asset
To include the image asset in the referring asset, use the steps mentioned in Linking Two Assets by Inclusion.
6.9.6.2 Linking the Image Asset to the Target Asset
Now that the image is rendered in the referring asset's field, create a link from the image to the target asset by using the steps mentioned in Creating a Link to Another Asset.
6.9.7 Linking Assets to URLs
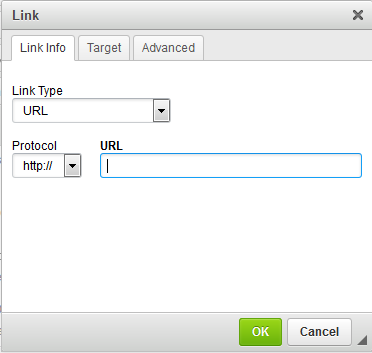
Using CKEditor, you can link WebCenter Sites assets to the URL of a website. A link to a URL is not stored in its own field in the WebCenter Sites database. The link can be created directly within any CKEditor-enabled field of a WebCenter Sites asset, but it cannot be managed as an asset. As a result, the user who creates a link to a URL must manually validate the URL.
The extent to which this capability is available to you depends on whether CKEditor is configured for your custom asset types. For example, the Article asset type that ships with the avisports sample site is configured with a CKEditor in its Body field. Therefore, the Body field supports the creation of a link to a URL as described above. The rest of this section describes how to link assets to URLs.
To create a link to a URL:
6.10 Defining Website Navigation
This section describes how to create the navigation for your website by using the Site Tree in the Contributor interface to place and unplace pages.
Note:
WebCenter Sites offers multiple ways to create a website's navigation. Your site design determines the way in which your website's navigation is created. This chapter is for users whose site design is configured to allow them to create their website's navigation using the Site Tree in the Contributor interface. For information about how the navigation for your website is created, see your site developers.
6.10.1 Placing and Unplacing Pages
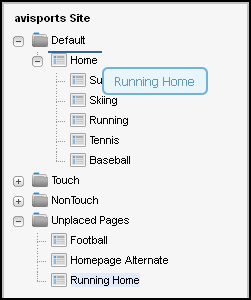
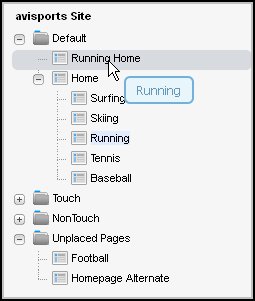
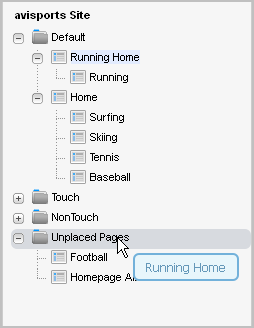
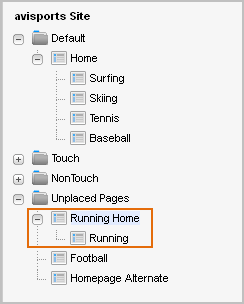
If you are assigned the appropriate role (configured by your administrator), you can use the Site Tree to place Pages under a site plan and unplace Pages (remove Pages from a site plan). Placing and unplacing Pages enables you to organize a website's navigation. When the site plans are published, the changes you make through the tree are applied to the websites represented by the site plans. For more information about Page assets, consult your developers.
Note:
The Site Tree requires you to place pages in an ordered hierarchy. Before you perform the procedures in this section, consult your developers to familiarize yourself with the structure of your website so that you know where each page belongs in the site hierarchy.
For information about placing and unplacing pages, see the following topics:
6.10.1.1 Placing a Page
This section shows you how to place a Page asset under a site plan in the Site Tree. You can place Pages under a site plan in the following ways:
-
Directly under a top-level Page as the Page's highest-ordered sub-level.
-
At the same level in the hierarchy as another Page. The selected Page is placed before or after the other Page (depending on the location you choose).
After you place a Page under a site navigation, it must be approved and published to be shown on the website.
To place a Page under a site plan:
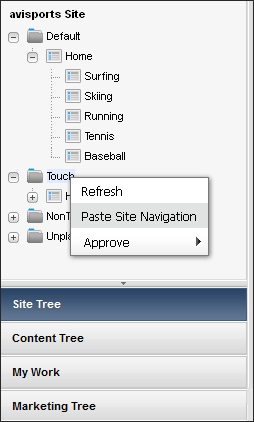
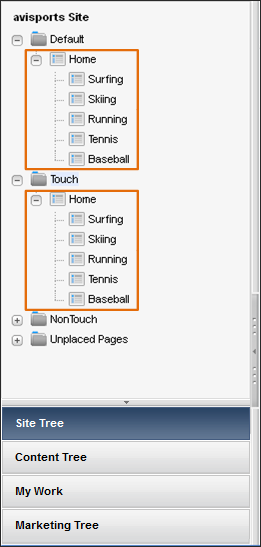
6.10.2 Creating a Website's Navigation by Copying a Navigation
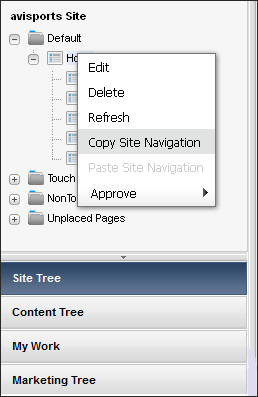
If the Site Tree contains multiple site plans, instead of creating brand new content to place under a site plan, you can copy the navigation (placed Pages) under one site plan and paste the navigation under another site plan. You can either copy a site plan's entire navigation or a sub-set of its navigation. When you paste the navigation under the site plan, both site plans display the same placed Pages. However, each site plan's content is managed individually. When you make changes to the content of one site plan, those changes do not apply to any other site plan's content.
To create a website's navigation by copying a navigation:
6.11 Working with Multilingual Assets
This section includes the following topics:
6.11.1 About Working with Multilingual Assets
Each asset can have only one translation in each available language. For example, When a Canadian French translation of an asset exists, you cannot create another Canadian French translation within the same multilingual set.
To create a translation of an asset, you must do the following:
-
Select the target language of the translation. WebCenter Sites does the following:
-
Creates a copy of the source asset.
-
Sets the target language of the copy according to your selection.
-
Links the copy to the master asset and marks the copy as a translation of the master. If this is the first translation of the asset, a multilingual set is created and the source asset is designated as the master.
-
-
Translate the source content and store the translated content in the translation asset.
-
(Optional) Translate the assets associated with the source asset and associate the translated versions with the translation of the source asset. Table 6-2 provides on how asset relationships are handled when you create translations of assets.
Table 6-2 Types of Asset Relationships
Relationship Type Behavior Asset Associations
When you create a translation of an asset that contains associations, all assets associated with the source asset are automatically associated with the translation. You then have the choice to translate the associated assets and associate the translated versions with the translated parent asset.
Static Lists Recommendations
When you create a Static Lists recommendation in a new locale, the new Recommendation asset retains the member assets of the source asset. You then have the choice to translate the member assets and place the translated versions in the new Recommendation asset, replacing the member assets carried over from the old collection.
Asset-Type Attributes
When an asset containing associations through asset-type attributes is translated, all assets associated with the source asset are automatically associated with the translation. You then have the choice to translate the associated assets and associate the translated versions with the translated parent asset.
Embedded Links
Embedded links are not affected. When an asset containing embedded links is translated, you must manually update the links to point to the corresponding translations of the linked content (if they exist).
See Associating Assets.
Note:
Before performing the procedures in this section, note the following:
-
The Contributor interface contains locale-related functionality only if the administrator has set up your site to support multiple languages.
-
If you plan to work with content in a language that uses non-English characters, your computer must be configured for input and display of such characters.
-
To share a localized asset to another site, the locale assigned to the asset must be enabled on the target site. If you have questions about locales, contact your WebCenter Sites administrator.
6.11.2 Setting or Changing an Asset's Locale Designation
Before you can create a translation of an asset, the asset must have a locale designation assigned to it. (Typically, you assign the locale designation when you create an asset.)
To create a translation of an asset that has no locale designation, follow the steps below, then continue on to Creating a Translation of an Asset.
You can also change the locale designation of an asset that has one assigned to it, if necessary. For example, if the administrator decides to further divide the asset's locale (such as dividing French into Canadian French and Belgian French) you can update your assets to use the new locale designations.
Note:
You can only assign locales that have been enabled on your site by the WebCenter Sites administrator.
To set or change an asset's locale designation:
6.11.3 Creating a Translation of an Asset
Note:
Keep in mind the following:
-
Before you can create a translation of an asset, the asset must have a locale designation assigned to it. (The asset's locale is listed in the Metadata section of the form and is typically assigned by the user who creates the asset.) If the asset does not have a locale designation, follow the steps in Setting or Changing an Asset's Locale Designation.
-
If you are creating the first translation of an asset, you are automatically creating a multilingual set consisting of the source asset and the translation. The source asset is automatically designated as the master asset of the multilingual set.
To create a translation of an asset:
6.11.4 Examining the Available Translations of an Asset
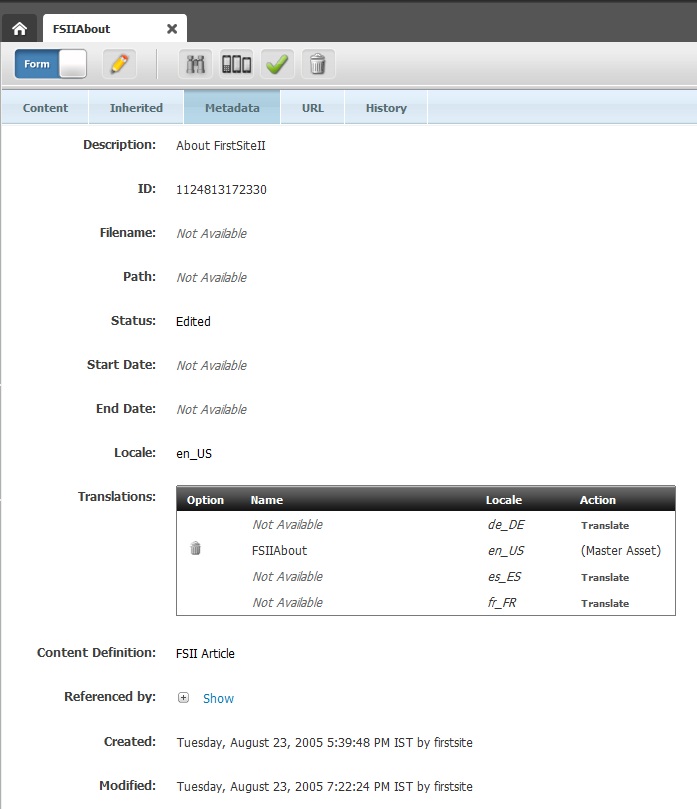
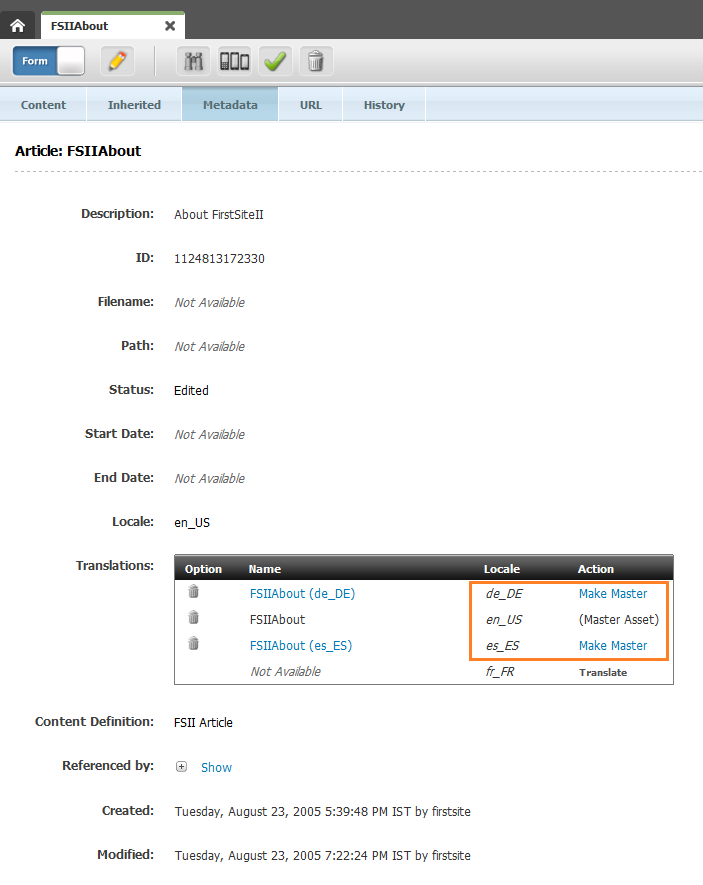
To check whether a translation of an asset exists in a specific language, open the asset and examine the Translations field in the Metadata section of the form. If the translation exists for a given language, you can open it by clicking its name in the Translations field.
To check whether a specific translation of an asset exists:
6.11.5 Changing the Master Asset of a Multilingual Set
When you create the first translation of an asset, the source asset becomes the master asset of a multilingual asset set consisting of the asset itself and its translation. As more translations of the source asset are created, the multilingual set grows.
To designate another member of the set as the master (for example, when the multilingual set is copied to a site in another language), you can do so from the Inspect view of any member of the set.
The following procedure shows you how to set a new master asset from the Inspect view of the set's current master asset.
To change the master asset of a multilingual set:
Note:
Note the following:
-
The master asset of a multilingual set is indicated in the Translations field in the Metadata section of the asset when the asset is opened in Form View.
-
If a multilingual set is being revision-tracked, you must manually check out all members of the set before you can change the set's master asset. See Checking Out Assets.
6.12 Working with Vanity URLs
Vanity URLs are short, readable, easy to control URLs that usually contain either the name of, or other descriptive content about the web page to which it points. WebCenter Sites supports two types of Vanity URLs –Asset URLs and Blob (File) URLs.
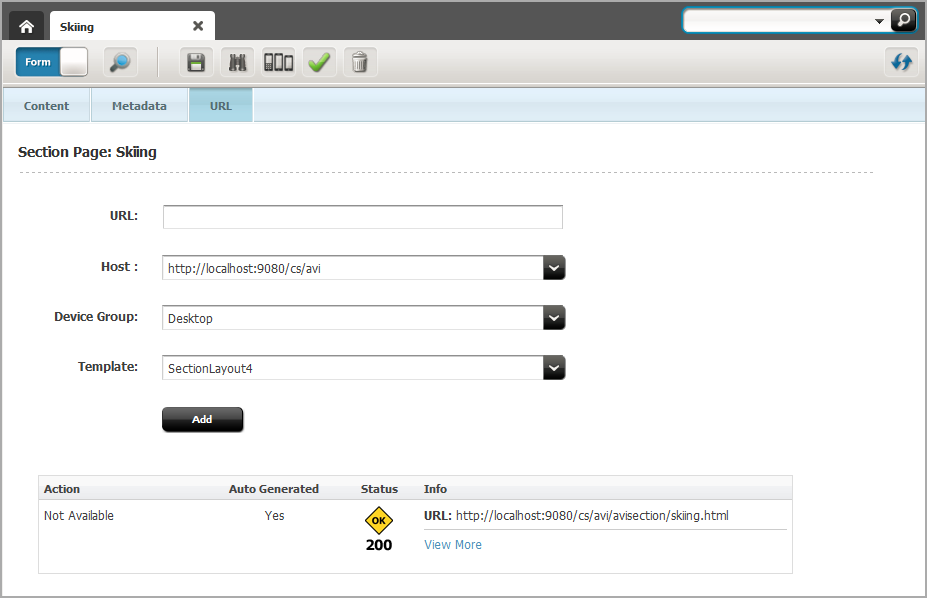
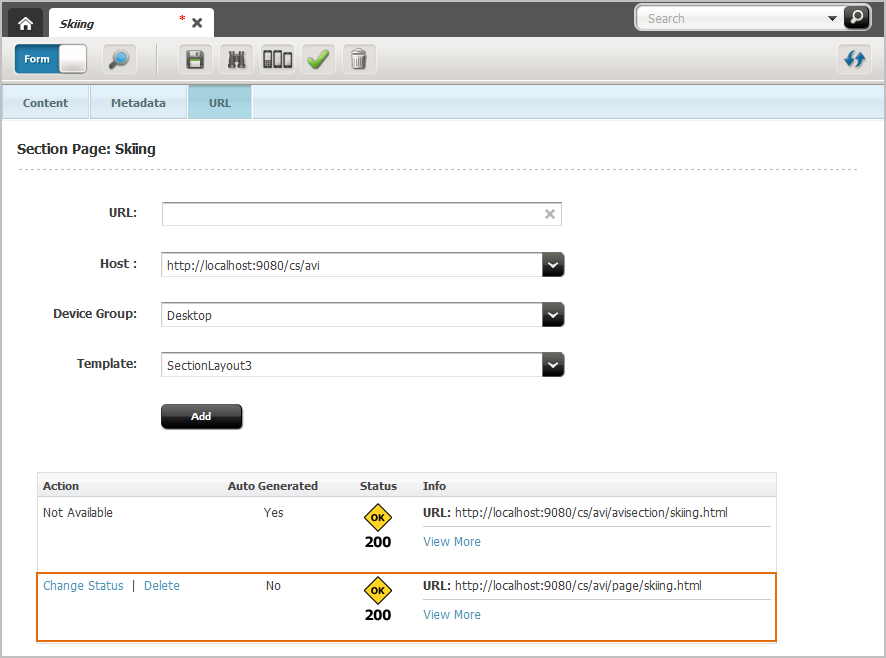
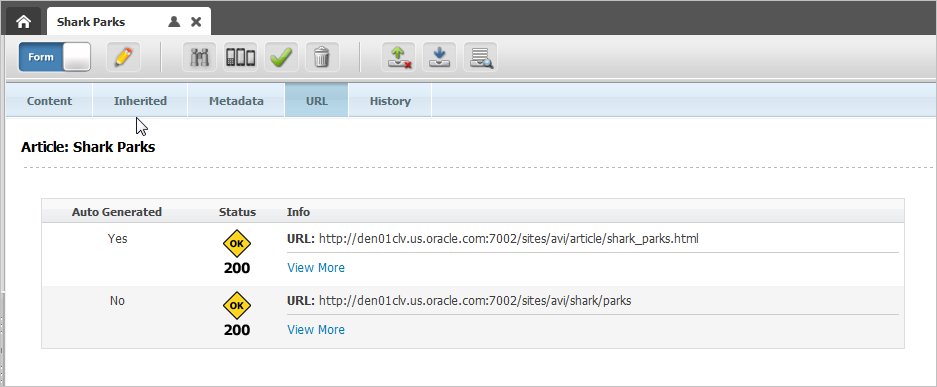
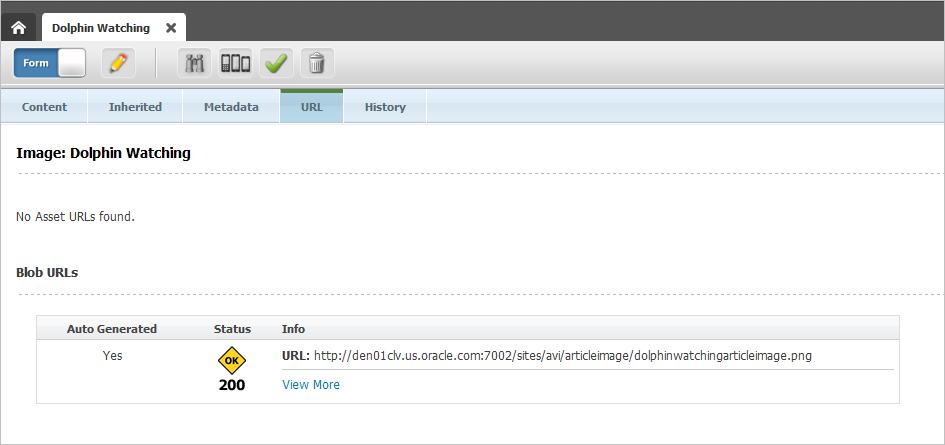
You, as a content contributors can create vanity Asset URLs for any type of asset. An Asset URL can be either auto-generated (based on a pattern defined by the administrator in the Admin interface) or created in the Contributor interface. A Blob (File) URL is created by your administrator in the Admin interface for an asset's associated file (for example, a Blob URL is created for an Image asset's associated Image file). In the Contributor interface, you can view a Blob (File) URL from an asset's content entry form. However, the administrator creates the Blob (File) URL in the Admin interface.
When a vanity URL is defined for an asset (or its associated file), and that asset is published to the website, the vanity URL points to the web page that renders the content of the asset. This section contains instructions for creating and managing Asset URLs.
For information about working with vanity URLs, see the following topics:
6.12.1 Creating Vanity URLs for Assets
The URL section of an asset's form contains the URL field, which you use to define one or more vanity URLs for the asset.
To create a vanity URL for an asset:
6.12.2 Viewing Vanity URLs
This section provides instructions for viewing vanity URLs.
Note:
If your administrator has configured an auto-generated Asset URL or created a Blob (File) URL for an asset's associated file, you only have permissions to view that vanity URL.
To view a vanity URL:
6.12.3 Managing Vanity URLs
This section provides instructions for managing vanity URLs.
Note:
If your administrator has configured an auto-generated Asset URL or created a Blob (File) URL for an asset's associated file, you only have permissions to view that vanity URL.
To manage an asset's vanity URL:
6.13 About Access Permissions
For information about access permissions, see these topics:
6.13.1 About Access Permissions
WebCenter Sites provides a system by which you can set access permissions to assets that are not part of a workflow process. For such assets, you can create policies and, within them, define which roles have permissions to perform which functions on assets. For example, a policy for the Copy function can specify which roles are allowed to copy an asset. A different policy for the Copy function can specify which roles are denied the ability to copy an asset. For flex assets, inheritable policies can be set on parents, meaning that the policies are inherited by the children.
Functions that can be performed on assets, by default, are the following: checkout, copy, edit, delete, rollback, share, approve, and build. (For definitions of the functions, see Determining Function Privileges in Administering Oracle WebCenter Sites.)
All of the above-listed functions are defined in the wcs_properties.json file, as values of the property xcelerate.authorizefunction.
Access permissions serve a three-fold purpose:
-
Extend the workflow function privileges system, making it possible to set permissions for assets when they are not in workflow.
-
Introduce functions (authorize, inspect, and preview) for viewing the contents of assets that are not in workflow.
-
Introduce a hierarchical permission inheritance model for assets that are not in workflow.
6.13.2 Ways to Set Access Permissions
Setting access permissions means creating a policy for an asset by specifying which roles can perform which functions on the asset.
There are several ways to set access permissions on assets:
-
Using the Contributor interface to set permissions on individual assets. See Setting Access Permissions from the Contributor Interface.
-
Using the Admin interface to set permissions on individual assets. See Setting Access Permissions from the Abmin Interface in Administering Oracle WebCenter Sites.
-
Using the Property Management Tool, in the Admin interface, to set permissions on all assets at one time in the wcs_properties.json file. See Setting Access Permissions from Property Files in Administering Oracle WebCenter Sites.
6.14 About History Tab
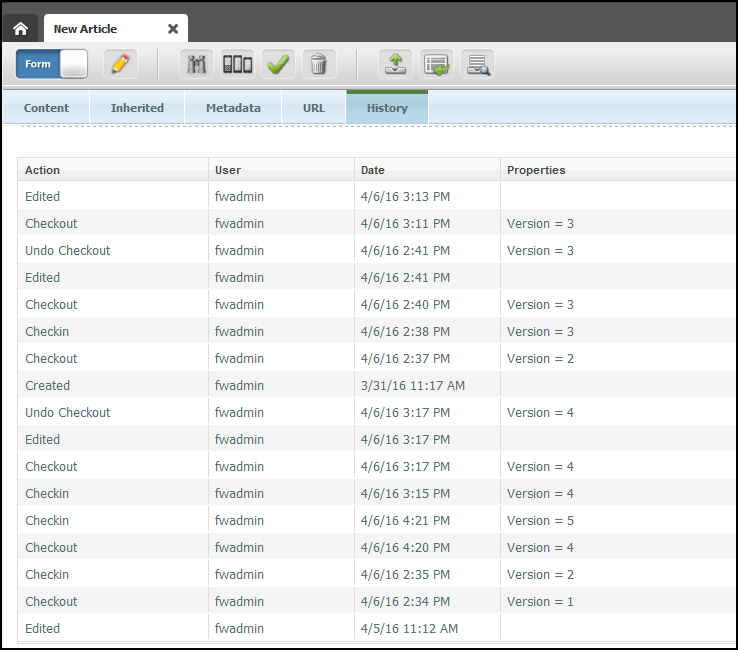
You can use the History tab to view the different actions performed on an asset such as - created, edited, approved, published, revision tracking and work flow related tasks like check out, check-in, undo checkout, rollback and so on. You can find the History tab when you open an asset in the Form View. The History tab can be seen in the Inspect view of the Form View.
Figure 6-70 History Tab table displaying actions performed on an asset
Description of "Figure 6-70 History Tab table displaying actions performed on an asset"
Table 6-3 Information displayed in History Tab table
| Column | Description |
|---|---|
|
Action |
The actions done on the asset. For example, create, edit, delete, approve, publish, workflow and revision tracking related tasks. |
|
User |
The users who have done the corresponding actions. |
|
Date |
The dates when the actions were done on the asset. By default, the date of the latest action is sorted at the top. |
|
Properties |
Properties of the corresponding actions, such as Version=2 of a checkout. |
Content Audit Report provides you information on all the assets in the system as opposed to the History tab which gives details about an individual asset. Use the Content Audit Report to get detail report on the managed and published content, the content workflow and the authors working on the content of your site. See Working with the Content Audit Report.
