1.1 Create SLA
This topic provides the information to the user to create a SLA. In the subsequent steps, let’s look at the steps of creating a SLA:

Description of the illustration loginscreen.png
- On Home screen, click Core Maintenance. Under Core Maintenance, click SLA Maintenance.
- Under SLA Maintenance, click Create
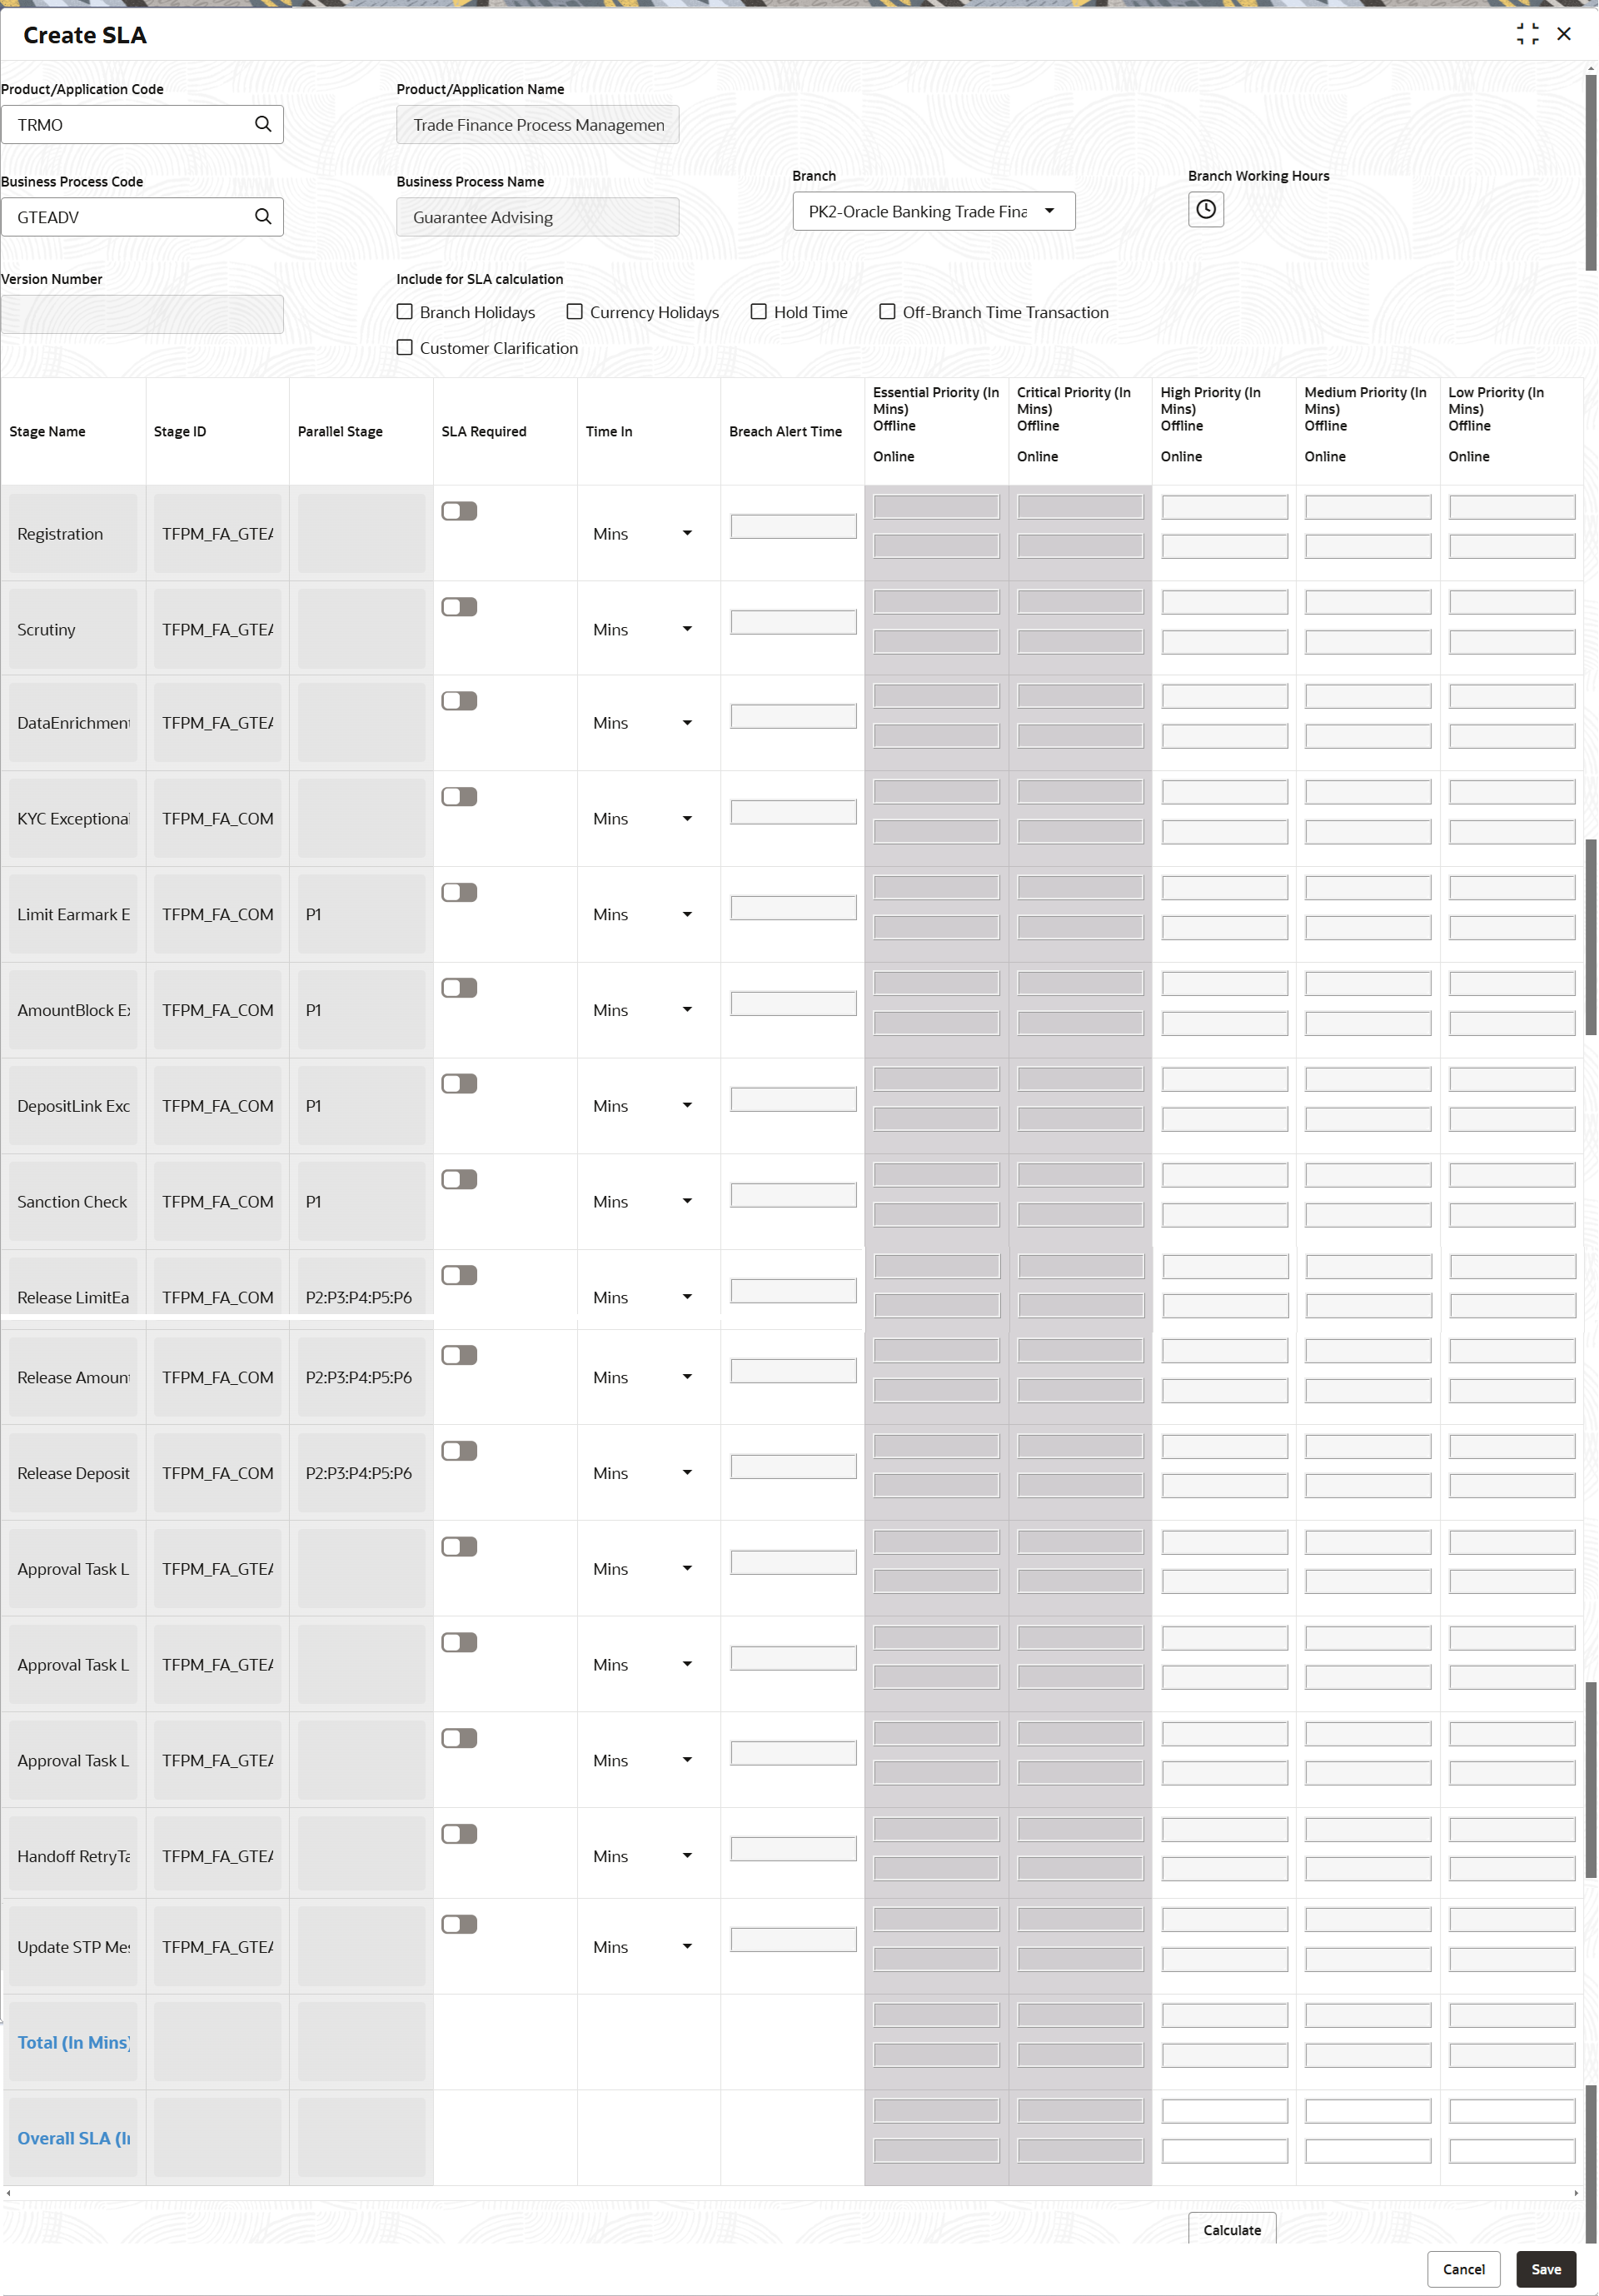
SLA.The Create SLA screen is displayed.
- On Create SLA screen, specify the fields.
Note:
The fields which are marked as Required are mandatory.For more information on fields, refer to the field description table below.
Table 1-1 Create SLA - Field Description
Field Description Product/Application Code Sselect the Product or Application Code. Product/Application Name System displays the name of the Product/Application (Example Oracle Banking Trade Finance Process Management Cloud Service). Business Process Code Select the Business Process Code for which the SLA maintenance has to be made. Business Process Name The Business Process name pertaining to the Business Process code selected is defaulted. Branch Select the branch code for which SLA maintenance has to be done. There is also an option to select All as a value which will enable the SLA to be applicable for all branches in the bank.
Branch Working Hours System populates the branch working hours. Version Number System defaults the version number on creating/updating the screen. Include for SLA calculation For calculation of SLA the user can include: - Branch Holidays: User can select this check box, if branch holidays is to be considered for SLA calculation
- Currency Holidays: User can select this check box, if currency holidays is to be considered for SLA calculation
- Hold Time: User can select this check box, if hold time is to be considered for SLA calculation.
- Customer Clarification: User can select this check box, if Customer Clarification items is to be considered for SLA calculation
- Off Branch Time Transactions: User can select this check box, if SLA should be calculated after branch hours.
Below fields appear on tab out after entering the above information.
Stage Name On selection of the process code, the various stages available for the process should be defaulted. Stage ID System defaults the stage ID based on the stage name. Parallel Stage System defaults the various stages available for the process, on selection of the process code. SLA Required This toggle indicates whether SLA calculation is required for this stage. User can change the value to No. If the toggle is changed to No, user input should be disabled and the SLA values for the stage should be blank.
By Default, the toggle should be set to Yes.
Time In Select the drop-down and system displays a pop-up UI for input of the Stage SLA in Days/Hours/Minutes combination. System converts this into minutes and display in the respective fields. Alternatively, user can directly input the SLA in Minutes Breach Alert Time Specify the SLA Breach Alert time in minutes for the Stage. This will indicate the minutes before which a user needs to be alerted for likely SLA breach for the stage. This is the same for all the different priority combinations for a stage irrespective of the individual SLA times. Low Priority (In Mins) Offline Specify the SLA time in minutes. Low Priority (In Mins) Online Specify the SLA time in minutes. System validates that the time in minutes is not more than value input for offline.
Medium Priority (In Mins) Offline Specify the SLA time in minutes. System validates that the time in minutes is not more than value input for offline.
Medium Priority (In Mins) Online Specify the SLA time in minutes. System validates that the time in minutes is not more than value input for offline.
System validates the time in minutes is not more than value for Low Priority.
High Priority (In Mins) Offline Specify the SLA time in minutes. System validates that the time in minutes is not more than value input for offline.
System validates the time in minutes is not more than value for Low Priority
High Priority (In Mins) Online Specify can input the SLA time in minutes. System validates that the time in minutes is not more than value input for offline.
System validates the time in minutes is not more than value for Low Priority.
- Click Calculate to calculate the SLA.
- Click Save to save the record.The new SLA is displayed as tile in the View SLA.
For more information on action buttons, refer to the field description table below.
Table 1-2 SLA Maintenance - Action Buttons - Field Description
Field Description Save Click the Save button to save the record. Cancel Click the Cancel the SLA Maintenance window and return to dashboard. The data input will not be saved.
Parent topic: SLA Maintenance
