7 Auto Layout to Flexbox Mapping
This topic provides information on Auto Layout to Flexbox Mapping
The core principle:
An Auto Layout frame in Figma directly maps to a Flex container (display: flex) in CSS. The layout properties you set on the Auto Layout frame and its children determine how the plugin translates them into Flexbox properties.
Prerequisites
To use these features, the parent frame must have Auto Layout enabled.
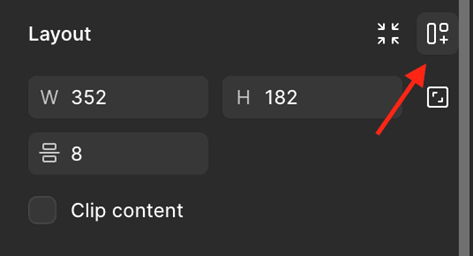
How to Enable Auto Layout:
- Select the frame and click the Add Auto Layout button next to Layout
in the right-hand panel
OR
Use the shortcut Shift + A (after selecting the required frame)
Note:
This document only explains how the plugin maps Figma’s Auto Layout properties to their corresponding CSS Flexbox properties. It does not cover other Figma layout features or general CSS flex concepts outside this mapping context.
- Direction (flex-direction)
This topic provides information on Direction (flex-direction). - Wrap (flex-wrap)
This topic provides information on Wrap (flex-wrap). - Align Items (align-items)
This topic provides information on Align Items (align-items). - Justify Content (justify-content)
This topic provides information on Justify Content (justify-content). - Gap (gap, row-gap, column-gap)
This topic provides information on Gap (gap, row-gap, column-gap). - Padding (padding)
This topic provides information on Padding (padding) - Flex Sizing (Child Behavior)
This topic provides information on Flex Sizing (Child Behavior).
