- Corporate Accounts User Guide
- Corporate Account Services
- Check Book
- Check Book Request
4.8.1 Check Book Request
This topic describes the systematic instructions to request a check book.
- Click Corporate Account Services, and under Corporate Account Services, click Check Book.
- Under Check Book, click
Request.The Request page displays.
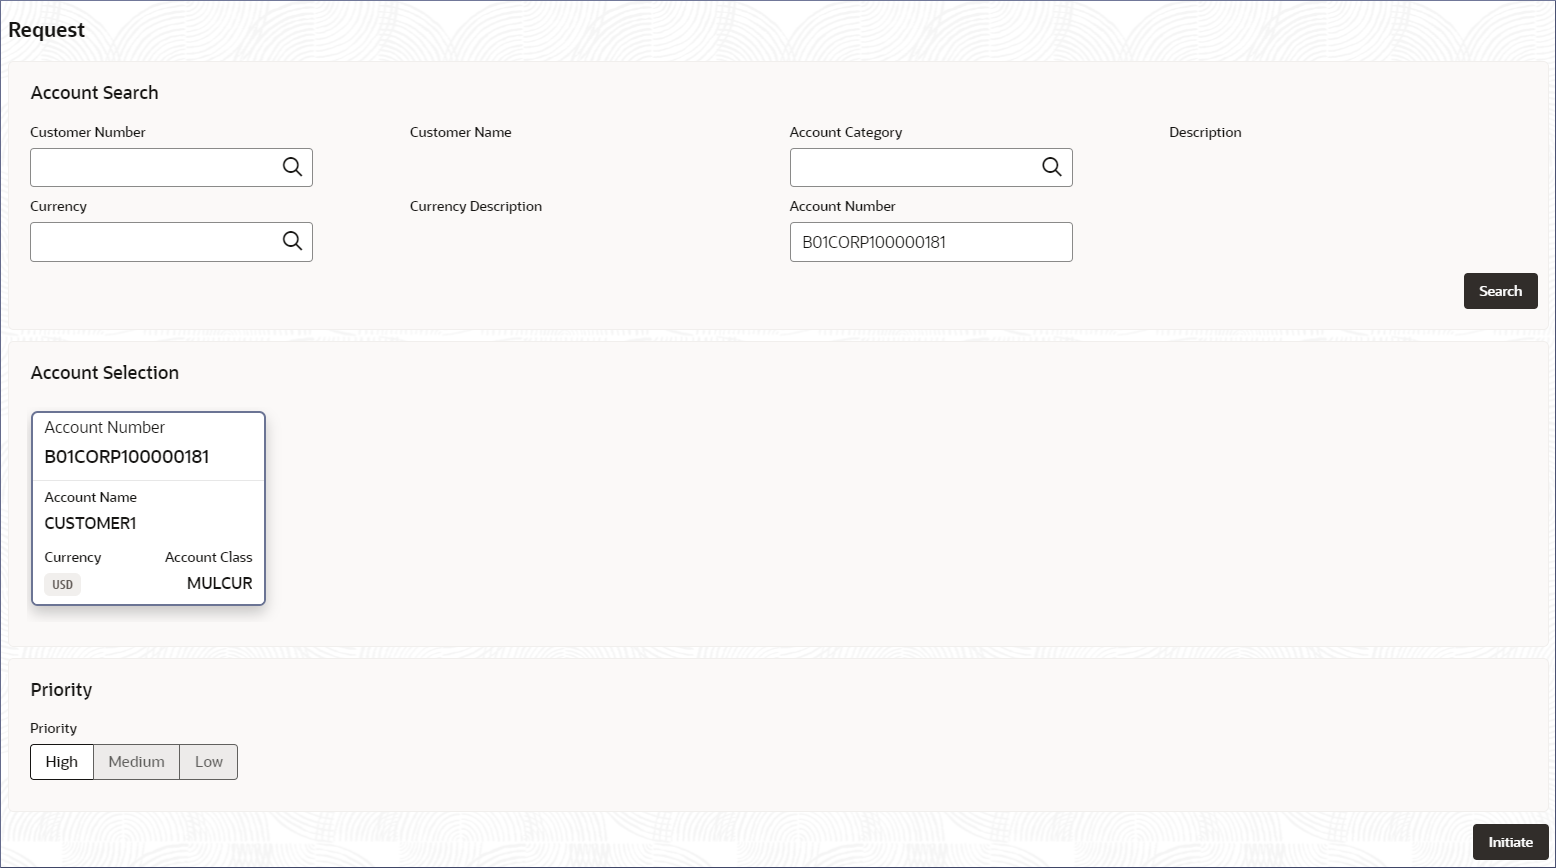
- Specify one or more fields in the Account Search
section.
Table 4-23 Account Search - Field Description
Field Description Customer Number Specify the CIF number of the customer owning the account. Customer Name The name of the selected customer is auto-populated. Account Category Specify the account category to which the account belongs. Description The description of the selected account category is auto-populated. Currency Specify the operating currency of the account. Currency Description The description of the operating currency is auto-populated. Account Number Specify the required account number. - Click Search.The Account Selection section displays the accounts matching the search filters.
- Click to select the required account tile, then click
Initiate.The Check Book Request Entry - <Application Number> page displays the Account Basic Details screen.
Tip:
Make a note of the Application Number. This is needed to identify the tasks on the Free Tasks page. - Verify that the Account Basic Details are for the required account you want to request a check book and click Next.The Check Book screen displays.
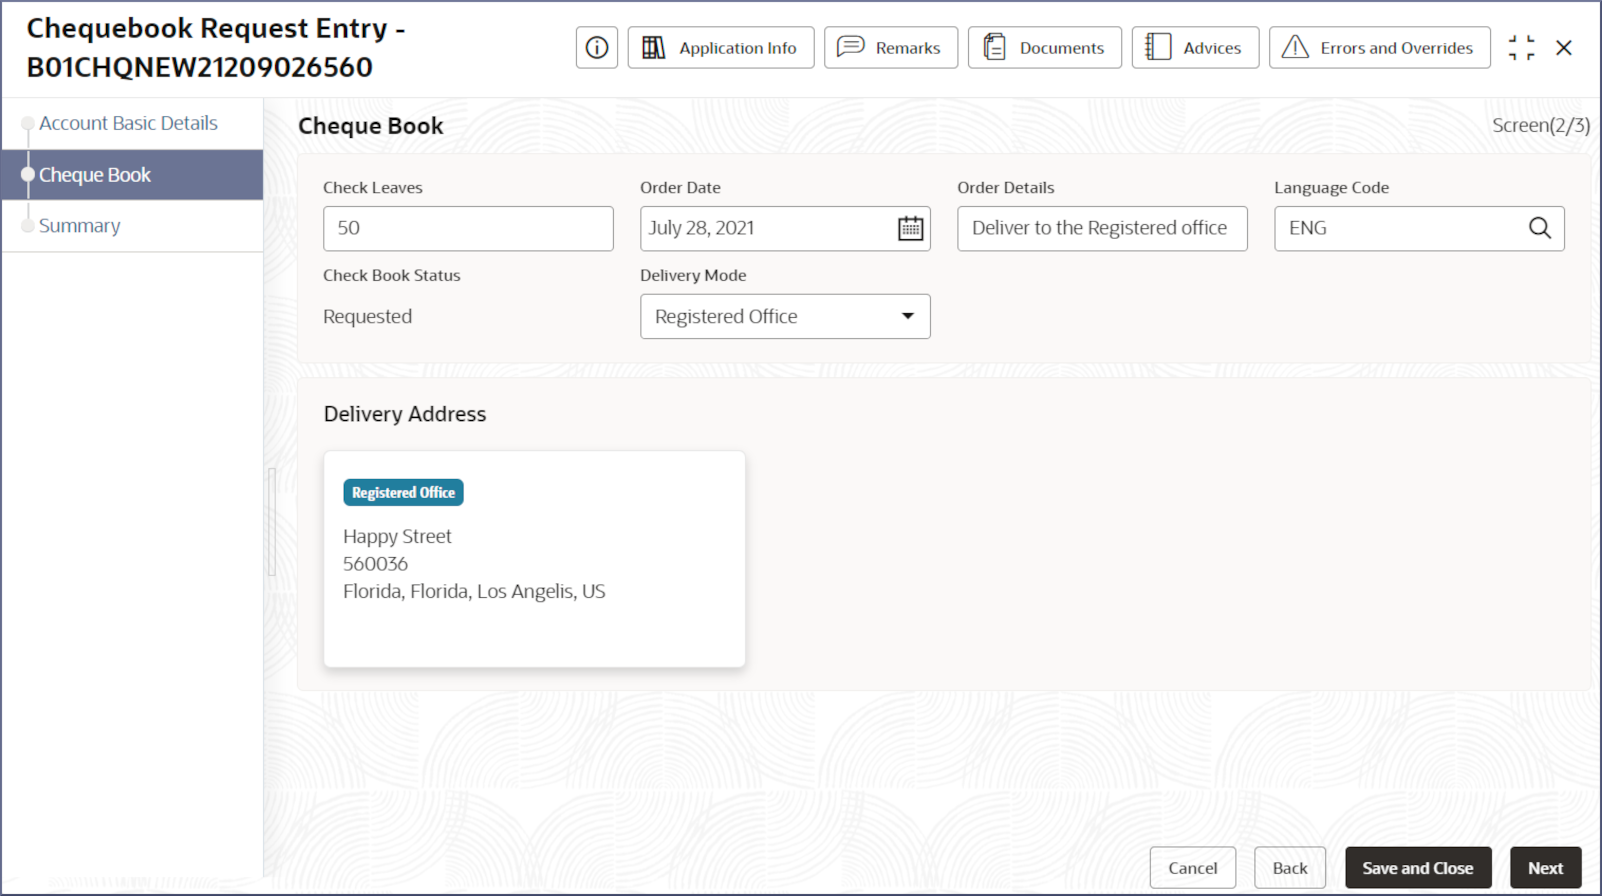
- Specify the check book details.For more information on the editing process and the field descriptions, see the Check Book data entry step in the Account Creation topic.
- If required, specify a custom delivery address.
- Select Post/Courier in the Delivery Mode drop-down field.
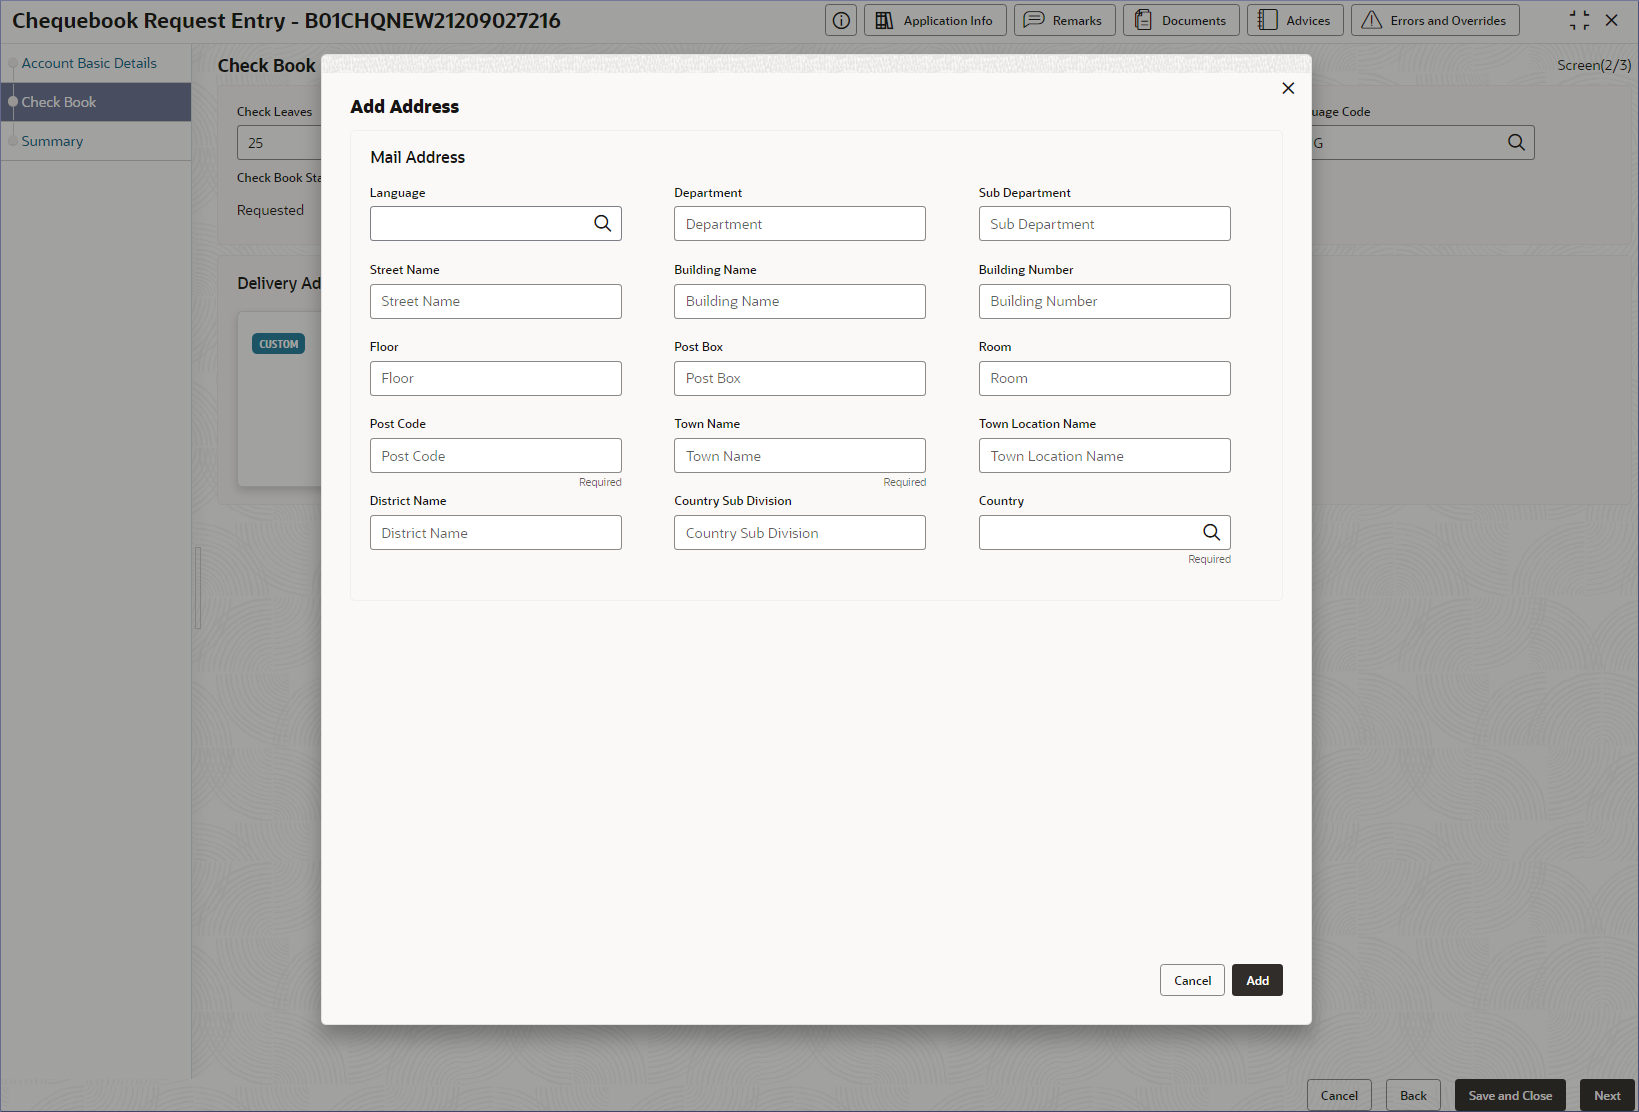
- Select Custom in the Address Type drop-down field.The Add Address dialog displays the Mail Address fields.
Figure 4-36 Check Book Request - Add Custom Delivery Address
- Specify the Mailing Address details described in the table below.
Table 4-24 Field Description
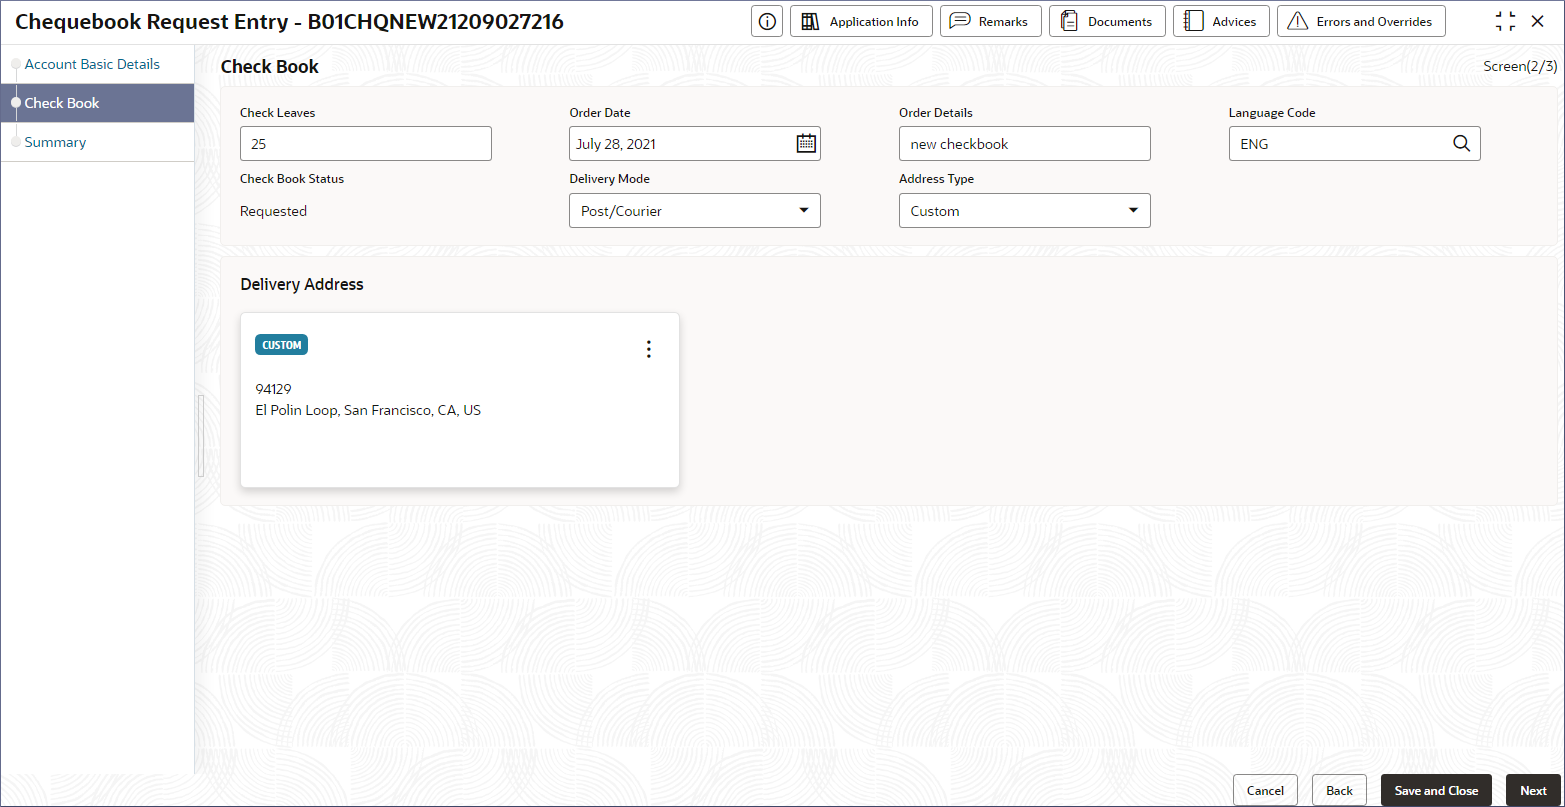
Field Description Language Specify the language of the address details. Department Specify the department which identifies a division of a large organization or building. Sub Department Specify the sub-division of a large organization or building. Street Name Specify the street or thoroughfare name. Building Name Specify the building name. Building Number Specify the building number. Floor Specify the floor or story within a building. Post Box Specify the numbered box in a post office assigned to a person or organization. Room Specify the room number in the building. Post Code Specify a code of letters or numbers. The Post Code ensures proper sorting of the mail. Town Name Specify the name of the town. A town is a built-up area with defined boundaries and a local government. Town Location Name Specify the specific Location name within the town. District Name Specify a subdivision within a country sub-division. Country Sub Division Specify a subdivision of a country such as a state, region, or county. Country Specify the nation with a government. - Click Add.The CUSTOM address displays in the Delivery Address section.
Figure 4-37 Check Book Request Entry - Custom Delivery Address
- Click Next.The Summary screen displays the Account Basic Details tile and the updated Check Book tile.
- Click Submit.The Stage Movement Submission dialog displays the Overrides stage.
- Complete the Stage Movement Submission process.
- Accept any Overrides generated and click Proceed
Next.The Checklist stage fetches and displays checklists mapped to this stage.
- Confirm the checklist items and then click Proceed
Next.The Outcome stage displays.
- Select PROCEED from the drop-down list and click
Submit.The Stage Movement Submission process creates an Approve Checkbook Request task.
- Accept any Overrides generated and click Proceed
Next.
- Complete the Approve Checkbook Request task.
- From the left navigation menu, select Tasks.
Under Tasks click Free
Tasks. The Free Tasks page displays.
- Search the listed tasks with these column values. The Process Name column contains Checkbook Request, the Stage column contains Approve Check book Request, and the Application Number column contains the number noted in Step 4.
- Click Acquire and Edit.The Approve Check book Request - <Application Number> page displays.
- Review the check book request details and click
Submit from the Summary page.The check book request is approved.
- From the left navigation menu, select Tasks.
Under Tasks click Free
Tasks.
- Confirm that all stages of the Check Book Request process are complete.
- Click Tasks, and under Tasks, click Completed Tasks.
- The Completed Tasks page should display the Entry and Approve stages of the Check Book Request process.
To view the checkbook request details, see Check Details.
Parent topic: Check Book


