A General Procedures

This chapter documents the miscellaneous general procedures that are referred to within this manual.

A.1 Accessing the EPAP GUI

EPAP supports a web-based Graphical User Interface (GUI) based on the client-server paradigm. The front end appears on an Internet browser, and the back end operates on the platform. For details about the EPAP GUI setup and login, see EAGLE Application Processor Administration Guide. Microsoft Internet Explorer® version 11 is supported and certified for use with the EPAP Graphical User Interface (GUI). Other browsers may be partially compatible with the EPAP GUI. When using these browsers, the following message may be displayed when logging in to the EPAP GUI:

CAUTION: The User Interface may not function correctly with the browser you are using.

Use the following procedure to access the main screen of the EPAP GUI:

  1. Enter the IP address of the EPAP application in the browser URL field.

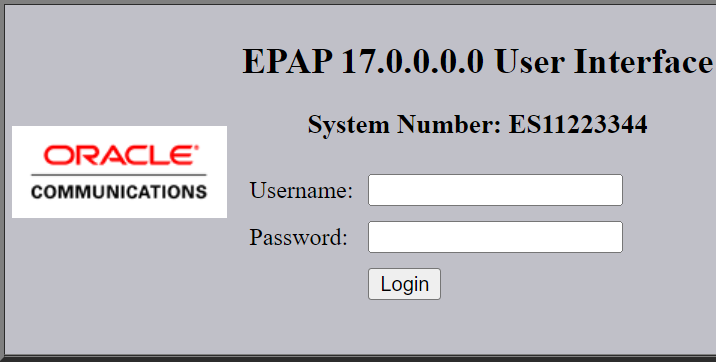
    The login screen shown in Figure A-1 appears.

    Figure A-1 EPAP User Interface Screen


    EPAP User Interface Screen

  2. Enter the appropriate username and password.
    Specify a username that has permission to access the menu items indicated in the procedure to be performed. Table A-1 shows the default usernames. Additional usernames can be defined by selecting the User Administration menu item. For more information about assigning usernames, refer to EAGLE Application Processor Administration Guide.

    Table A-1 Usernames

    EPAP GUI Login Name Access Granted
    epapmaint Maintenance menu and all sub menus
    epappdba Database menu and all sub menus
    epapdebug Debug menu and all sub menus
    epapplatform Platform menu and all sub menus
    uiadmin User Administration menu
    epapall All of the menus in this Table
  3. Continue with the procedure that invoked this procedure.

A.2 Accessing the EPAP Text Interface

The EPAP text-based user interface is accessed through the Local Access Terminal. The text-based user interface is used for initial configuration of the EPAP application. Some errors described in this manual result from errors in the initial configuration, and recovery from them requires that you access the text interface.

For information about the initial configuration of the EPAP application, refer to Administration Guide.

A.3 Restarting the EPAP and PDBA

Caution:

Perform this procedure only when directed to by one of the procedures in Alarms. This is not a standalone procedure.

The PDBA items that appear in the screens in this procedure apply only to the EPAP application. These items will not appear for the ELAP application.

  1. Log in to the User Interface screen of the EPAP GUI (see Accessing the EPAP GUI).
  2. Check the banner information above the menu to verify that you are logged into the problem EPAP indicated in the UAM.
    If it is necessary to switch to the problem EPAP, select Select Mate.
  3. From the epapmaint screen, select Process Control > Stop Software.
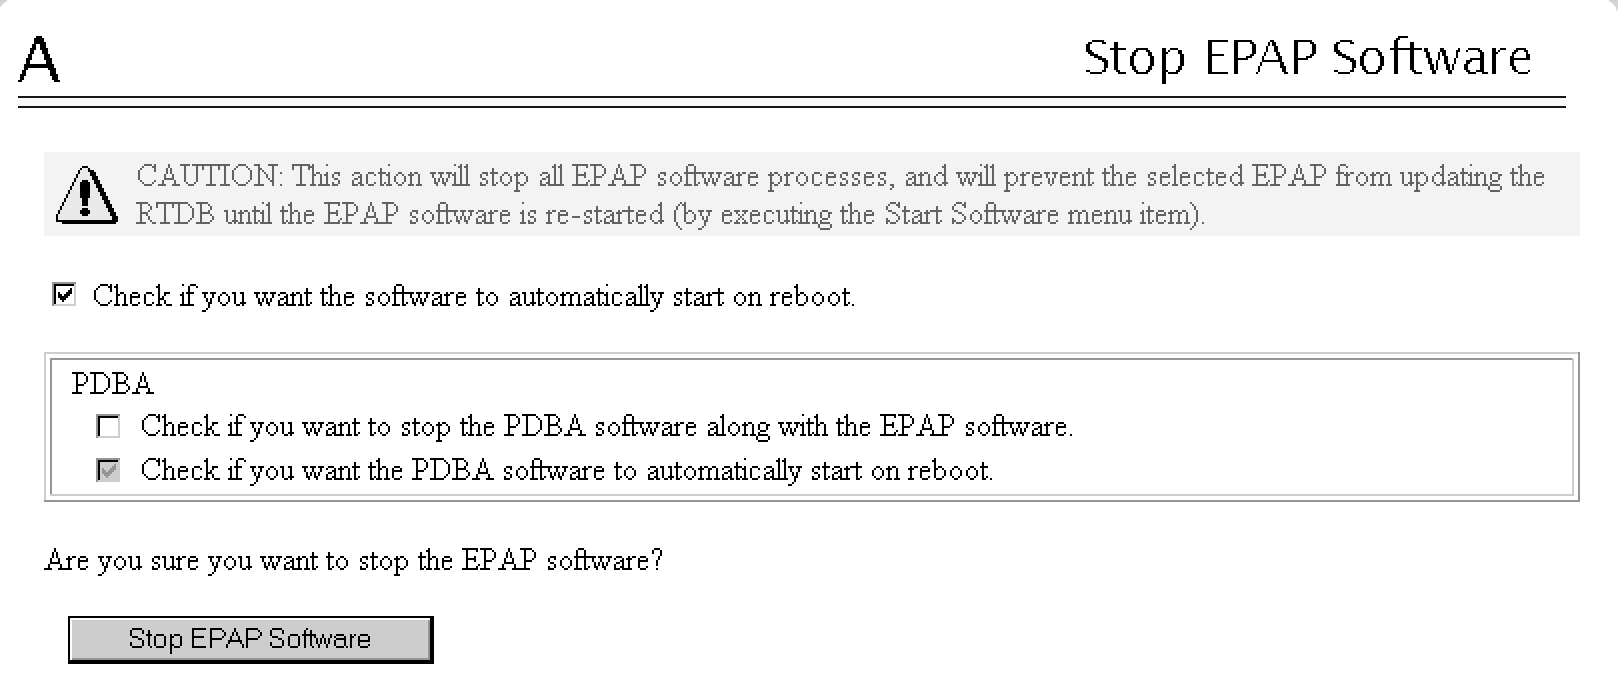
    The screen shown in Figure A-2 appears:

    Figure A-2 Stop Software Confirmation

    Stop Software Confirmation
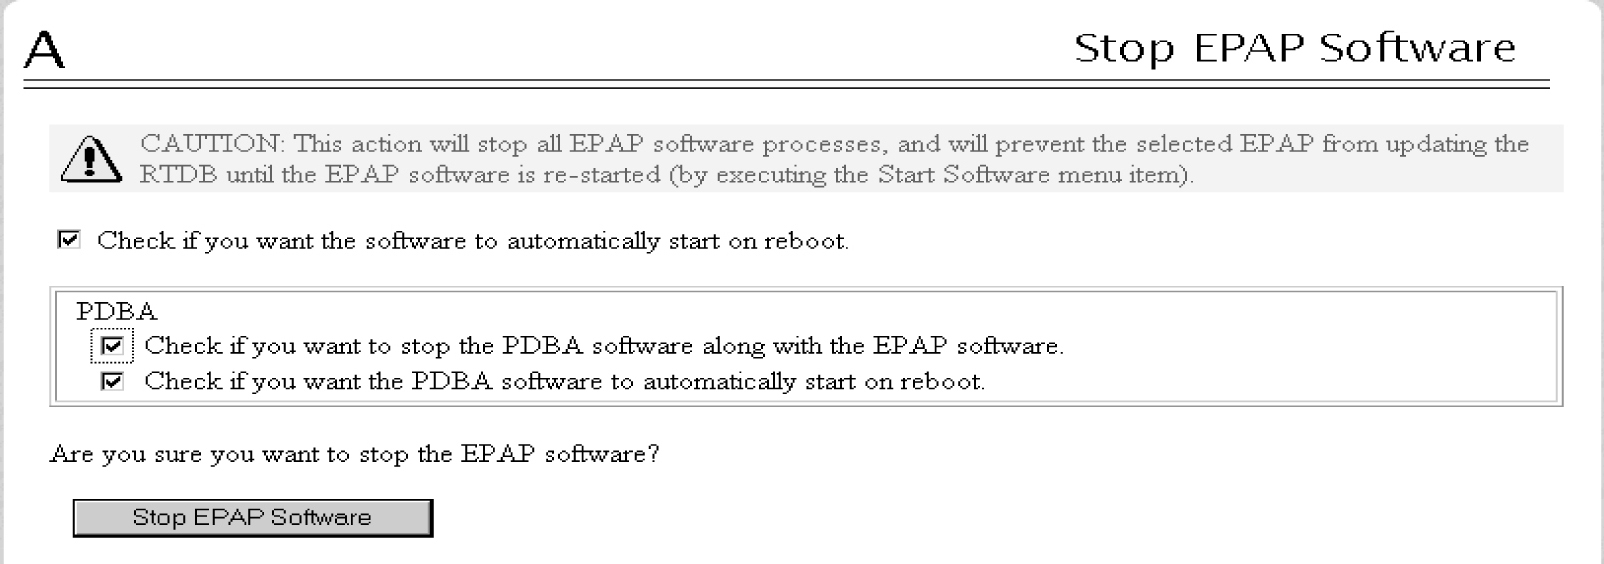
  4. On the Stop EPAP Software screen, make sure the following checkboxes are all checked, so that the PDBA software is stopped along with the EPAP software and so that both the PDBA and EPAP software are automatically restarted on reboot (see Figure A-2 for an example):
    1. Check to cause the software to automatically start on reboot
      This checkbox causes the EPAP software to automatically reboot.
    2. Check to stop the PDBA software along with the EPAP software
    3. Check to cause the PDBA software to automatically start on reboot

      Figure A-3 Stop Software

      Stop Software
  5. Click the Stop EPAP Software button to stop the software.
    The screen shown in Figure A-3 appears (the PDBA item appears only if performing this procedure on Side A).

    Figure A-4 Stop Software Completion Screen

    Stop Software Completion Screen
  6. Select Process Control > Start Software.
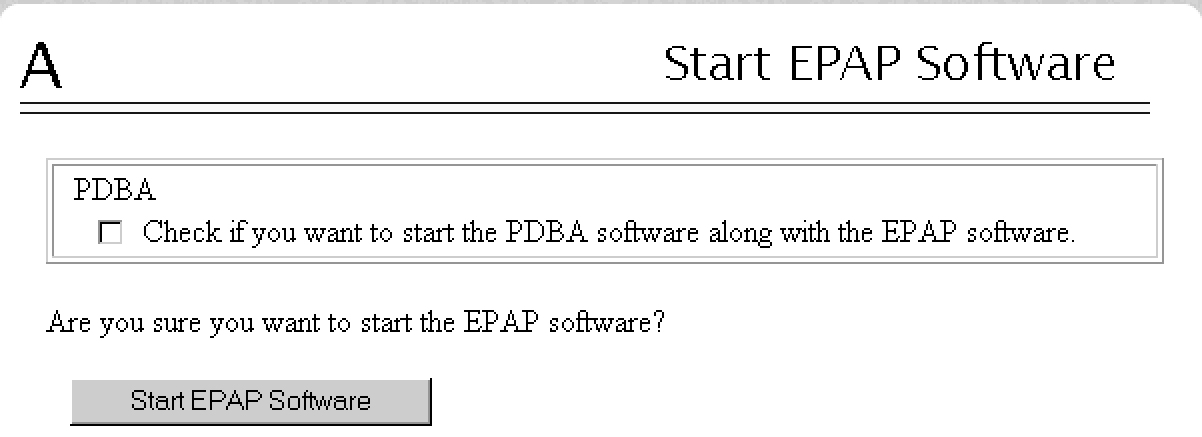
  7. From the Start EPAP Software screen, make sure the checkboxes are checked as shown in Figure A-5 (this item applies only if performing this procedure on Side A):

    Figure A-5 Start EPAP Software

    Start EPAP Software
  8. Click the Start EPAP Software button to start the software.
    The screen shown in Figure A-6 confirms that the software has started (the PDBA item appears only if performing this procedure on Side A):

    Figure A-6 Start Software Completion Screen

    Start Software Completion Screen

A.4 Restarting the EPAP Software

This procedure is used when referenced by one of the procedures in Alarms.

Caution:

Perform this procedure only when directed to by one of the procedures in Alarms. This is not a standalone procedure.

The PDBA items that appear in the screens in this procedure apply only to the EPAP application.

  1. Log in to the User Interface screen of the EPAPGUI (see Accessing the EPAP GUI).
  2. Check the banner information above the menu to verify that you are logged into the problem EPAP indicated in the UAM.
    If it is necessary to switch to the problem EPAP, select Select Mate.
  3. From the epapmaint screen, select Process Control>Stop Software.
    The screen shown in Figure A-7 appears:

    Figure A-7 Stop Software Confirmation

    Stop Software Confirmation
  4. On the Stop EPAP Software screen, make sure that appropriate check boxes are checked as shown in Figure A-7.
  5. Click the Stop EPAP Software button to stop the software.
    The screen shown in Figure A-8 appears.

    Figure A-8 Stop Software Completion Screen

    Stop Software Completion Screen
  6. Select Process Control > Start Software.
  7. From the Start EPAP Software screen, make sure that the check boxes are checked as shown in Figure A-9:

    Figure A-9 Start EPAP Software

    Start EPAP Software
  8. Click the Start EPAP Software button to start the software.
    The screen shown in Figure A-10 confirms that the software has started:

    Figure A-10 Start Software Completion Screen

    Start Software Completion Screen

A.5 Saving Logs Using the EPAP GUI

During some corrective procedures, it may be necessary to provide Oracle with information about the EPAP for help in clearing an alarm. These log files are used to aid My Oracle Support when troubleshooting the EPAP.

Use the following procedure to save logs using menu selections from the EPAP GUI.

  1. Log in to the User Interface screen of the EPAP GUI (see Accessing the EPAP GUI).
  2. Check the banner information above the menu to verify that you are logged into the problem EPAP indicated in the UAM.

    If it is necessary to switch to the problem EPAP, click the Select Mate menu item.

  3. From the menu, select Debug > Capture Log Files.
  4. Deselect (if necessary) the box labeled Check if you want to capture core files with the Logs.

    Note:

    Contact My Oracle Support for assistance before capturing core files with the log files.

    Figure A-11 Capture Logs File Screen


    Capture Logs File Screen

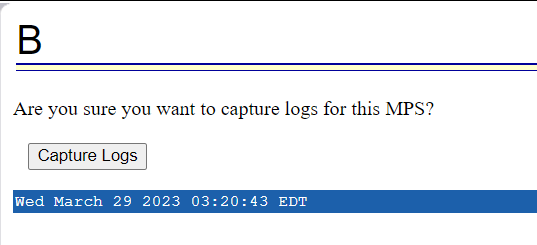
  5. Click the Capture Logs button to capture the log files.
    After completion, verify the following response:

    Figure A-12 Capture Logs Success


    Capture Logs Success

  6. Contact My Oracle Support to analyze and check the log files.
  7. When My Oracle Support has finished analyzing the logs files, delete them from the server by selecting Debug > Manage Logs Files and Backups to open the Manage Logs and Backups Screen.
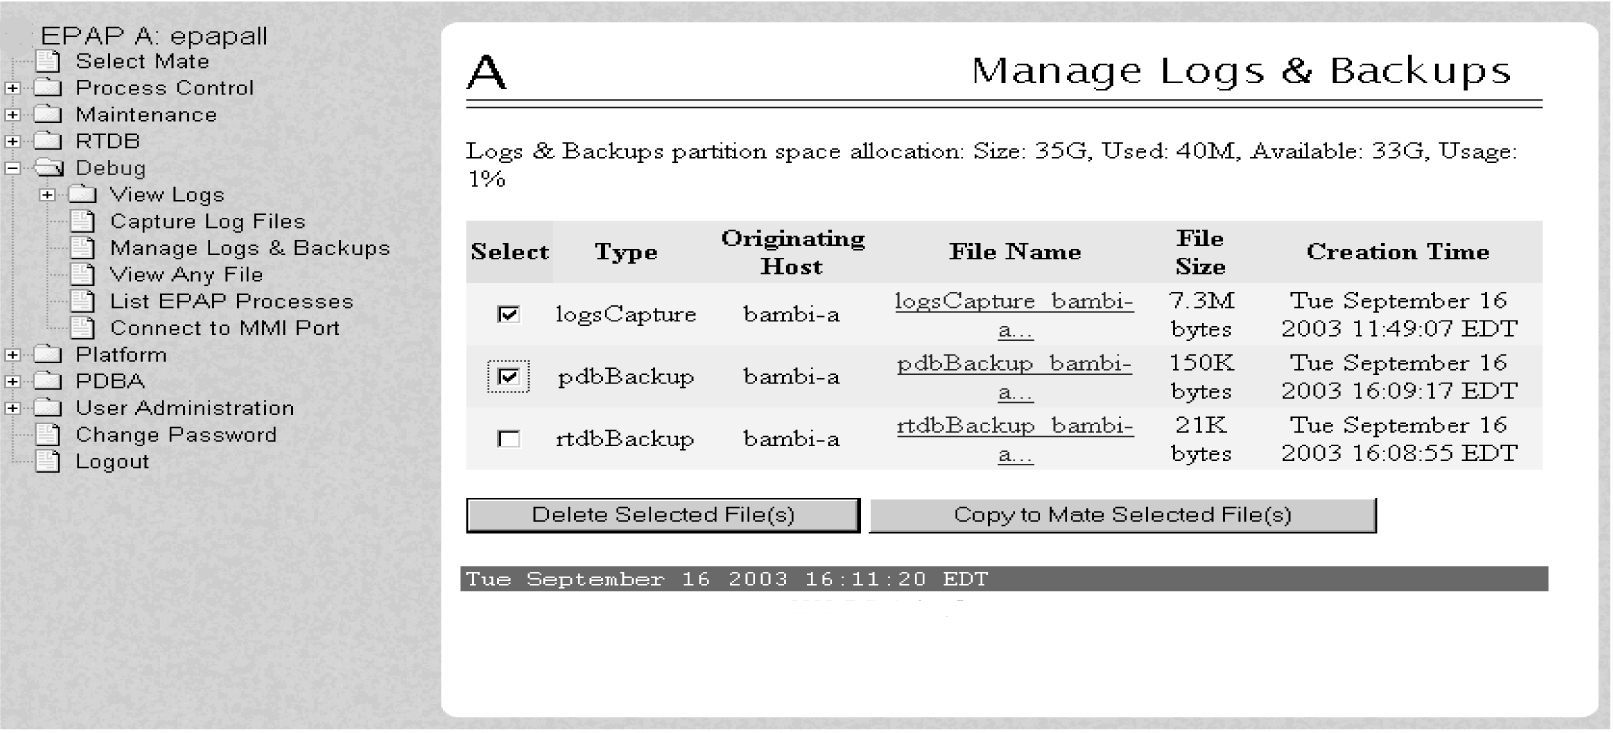
  8. Click the check boxes for the files you want to delete and then click the Delete Selected File(s) button.
    An example is shown in Figure A-13.

    Figure A-13 Deleting Captured Log Files

    Deleting Captured Log Files
    .
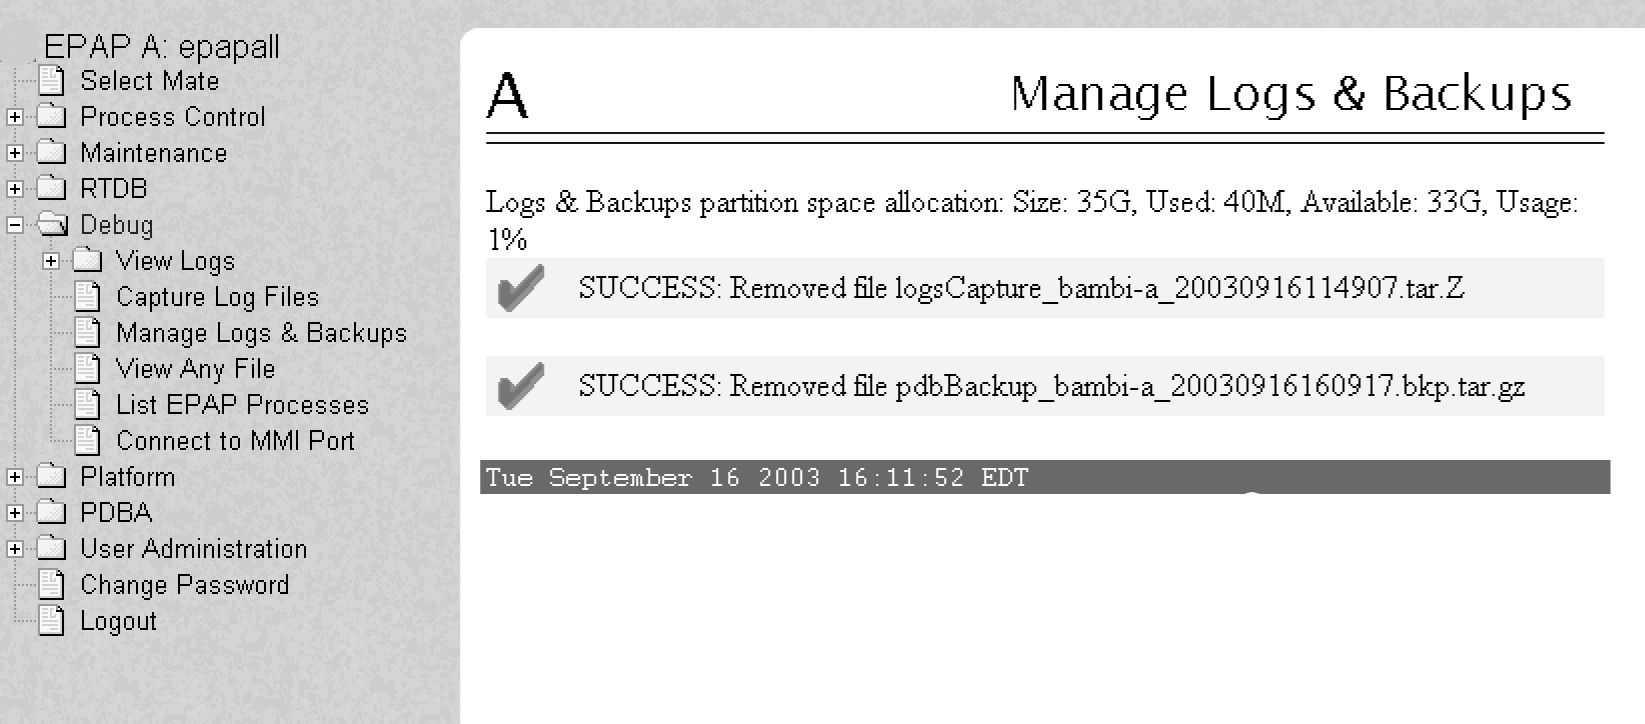
    When the log files have been deleted, the GUI displays confirmation, as shown in Figure A-14.

    Figure A-14 Delete Log Files Success

    Delete Log Files Success

A.6 Resolution Of Known Issues

  1. Platform Data Collection Error

    Issue: TKSPLATMI39 – Platform Data Collection Error (5000004000000000) is observed on Eagle

    Description: The Platform Data Collector is a TPD tool that periodically collects various software and hardware information about the server. It helps the customer to collect hardware and software information of all the servers in a 'Discovery Domain'.

    For E5-APP-B, one of the collection modules attempts to get the PSoC version and fails.
    
    rept-stat-mps                       
                  VERSION       PST           SST        AST    
       EPAP B             016-003-000   IS-ANR         Fault      Active 
             MINOR    PLATFORM    ALARM DATA = H'5000004000000000    
              ALARM STATUS        =  *0374 Minor Platform Failure(s)

    Solution:

    Run the following command to clear the alarm. Use sudo if running as admusr.

    $ /usr/TKLC/plat/bin/pdcAdm

  2. Issue: MySQL Lock Wait Timeout Exceeded alarm in EPAP (Bug# 28486392)

    Description: When large-scale data provisioning happens in a short span of time, sometimes MySQL lock wait times out and an alarm (MySQL Lock Wait Timeout Exceeded) is raised in EPAP. The provisioning is not disturbed.

    Solution:

    Restart the PDBA software.

    On the menu, click PDBA, select Process Control and click Start PDBA software.

  3. Issue: GUI does not open in Backup PROV network in https mode after disaster recovery procedure (Bug# 26173039)

    Description: After disaster recovery, GUI does not open in backup PROV network in https mode.

    Solution:

    Reconfigure the backup prov IPs from epapconfig menu.

    On the epapconfig menu, configure Network Interfaces Menu, Provisioning Network, and then Backup Provisioning Network.

  4. Issue: There is discrepancy in the mysqld@pdb service status on Non-Prov Servers (A and B) (Bug# 35026943)

    Description: mysqld@pdb service status is displayed as failed on Non-Prov server A and mysqld@pdb service status is displayed as Active on Non-Prov server B.

    Solution: This is legacy behaviour. It has no effects on EPAP operations and should be neglected.

  5. Issue: RN entry present in PDB but not present in RTDB (Bug# 36552163)

    Description: When RN is provisioned with DN/DNBlock, RN gets into the PDB, but the entry is not present in RTDB.

    Solution: RTDB reload from PDB will resolve the issue. In case of Dual PDBA setup, perform RTDB reload from PDBA on the StandBy side, and Active side PDBA will continue provisioning data.

  6. Issue: Standby PDBA Falling Behind (Bug# 36186109)

    Description: When there is no difference in the DB level of Active and StandBy PDB, "Standby PDBA Falling Behind" alarm is showing.

    Solution: When Standby PDB falls behind Active PDB by a predefined margin, the alarm "Standby PDBA Falling Behind" is raised. It gets cleared automatically when the Standby PDB catches up with the Active PDB. In this scenario, StandBy side and Active side PDBA will continue provisioning data. If the alarm is not cleared even after Standby PDBA catches up the db level of Active PDBA, use the command $ eagle_alarm_util 6000000000000020 OFF to clear the alarm manually.