Enrolling the Protected Database with Recovery Appliance
Enrolling protected databases with a Recovery Appliance includes the following high-level steps:
To enroll a protected database on the a Recovery Appliance with Cloud Control:
-
Add the protected database to the Recovery Appliance.
This step must be performed by the Recovery Appliance administrator and is described in Zero Data Loss Recovery Appliance Administrator's Guide.
When adding a protected database, the Recovery Appliance administrator defines the following: protection policy associated with the protected database, minimum amount of disk space reserved for the protected database on the Recovery Appliance, and the Recovery Appliance user who has the privileges required to back up the protected database.
-
Access the home page of the protected database as described in "Accessing the Protected Database Home Page Using Cloud Control".
-
From the Availability menu, select Backup & Recovery, and then Backup Settings.
The Backup Settings page is displayed.
-
In the Recovery Appliance Settings section, specify the following settings:
-
Recovery Appliance: Select the name of the Recovery Appliance with which the protected database is being enrolled. Protected database backups will be stored on this Recovery Appliance.
-
Virtual Private Catalog User: Select the virtual private catalog user (Recovery Appliance user) on the Recovery Appliance that has the privileges required to send backups for this protected database. This user must have already been created by the Recovery Appliance administrator as described in Zero Data Loss Recovery Appliance Administrator's Guide.
Note:
You can asynchronously transport the protected database redo data directly to the Recovery Appliance by selecting Enable Real-Time Redo Transport. However, you can also enable real-time redo transport while configuring recovery settings for protected databases as described in "Configuring Recovery Settings for Protected Databases Using Cloud Control".
-
-
Click Apply to save the settings.
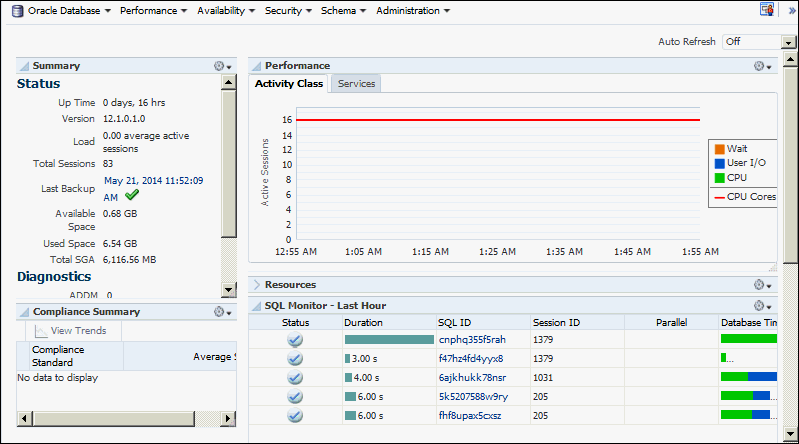
After the protected database is enrolled with a Recovery Appliance, you can use the home page for the protected database (shown in Figure 3-1) to perform configuration, backup, and recovery operations for the protected database.
To enroll a protected database on a Recovery Appliance with RMAN:
The enrollment steps on the Recovery Appliance are performed using procedures in the DBMS_RA package. The steps performed on the protected databases use RMAN or operating system commands.
-
Add the protected database to the Recovery Appliance.
The Recovery Appliance administrator, who has
SYSprivileges on the Recovery Appliance metadata database, is responsible for adding protected databases. You must provide the following information to enable the Recovery Appliance administrator to decide which protection policy must be assigned to the protected database:-
recovery window goal for the protected database
-
estimated space required to store backups for this protected database
-
-
Grant the privileges required for performing backup and recovery operations to the Recovery Appliance user that the protected database will use for authentication. This Recovery Appliance user owns the virtual private catalog that stores metadata for the protected database.
-
Install the Recovery Appliance backup module.
This creates the Oracle wallet that stores the credentials required to access the Recovery Appliance and installs the shared library that transfers backup data to the Recovery Appliance.
See Also:
" Installing the Recovery Appliance Backup Module " -
Register the protected database with the Recovery Appliance catalog.
- Obtain the name and password of the Recovery Appliance catalog owner that will store backup metadata for this protected database. Contact the Recovery Appliance administrator for these credentials.
- Connect to the protected database as
TARGETand to the Recovery Appliance catalog asCATALOGas described in "Connecting to the Protected Database and Recovery Appliance Using CLI". - Register the protected database using the
REGISTER DATABASEcommand.REGISTER DATABASE; database registered in recovery catalog starting full resync of recover catalog full resync complete
-
After the registration process is complete, execute a test backup to ensure that the configuration is correct.
" Running a Test Backup Using the Command Line " describes this task.
Making Cloud Control Aware of externally Configured Databases
This section is an exception case when Enterprise Manager Cloud Control did not perform the initial configuration of the protected database, but you want Cloud Control to manage it going forward. If you attempt to use Cloud Control's Backup Settings page to finish the configuration for these particular databases to send backups to the Recovery Appliance, you may run into a common error. The error is of the nature "this database has been figured outside of Backup Settings" or "virtual private catalog user settings cannot be determined".
The reasons for the error are:
- Cloud Control is not aware of configurations performed outside of Cloud Control, such as on the command line.
- Cloud Control is not aware of configurations performed inside of Cloud Control but by different Cloud Control users. Cloud Control maintains separate backup settings for each individual Cloud Control user. A configuration performed by one user cannot be accessed by another user.
To Make Cloud Control aware of database configurations made outside of Cloud Control:
Cloud Control becomes aware of Recovery Appliance VPCs when the Recovery Appliance administrator runs the Cloud Control Add Protected Database workflow. If that operation is performed outside of Cloud Control, Cloud Control is not be aware of the VPC and cannot perform the database-side configuration to send backups to the Recovery Appliance or schedule backups to the Recovery Appliance.
The problem will be apparent in the database Backup Settings page, if after selecting a Recovery Appliance, the desired VPC is not listed in the Virtual Private Catalog User choice list.
