- Exadata Server X11M Service Manual
- Servicing PCIe Cards
- Remove a PCIe Riser
Remove a PCIe Riser
This task applies only to the back panel Riser configuration.
- Prepare the server for service.
- Power off the server.
- Disconnect the power cords from the power supplies.
- Remove rear panel cables. See Full Height PCIe Configuration in Back Panel Components.
- Using a Torx (6 lobe) T25 screwdriver, loosen the rear panel Riser(s) attaching screw [2].
- Extend the server into the maintenance position.
- Attach an antistatic wrist strap to your wrist, and then to a metal area on the chassis.
- Remove the server top cover.
- Identify the proper back panel PCIe slot (Riser 2 or Riser 6) for the Riser you are replacing.See Full Height PCIe Configuration in Back Panel Components.
- Disconnect the data and power cables from the adjacent PCIe card in PCIe slot 1 or 5. Then remove the adjacent PCIe card.
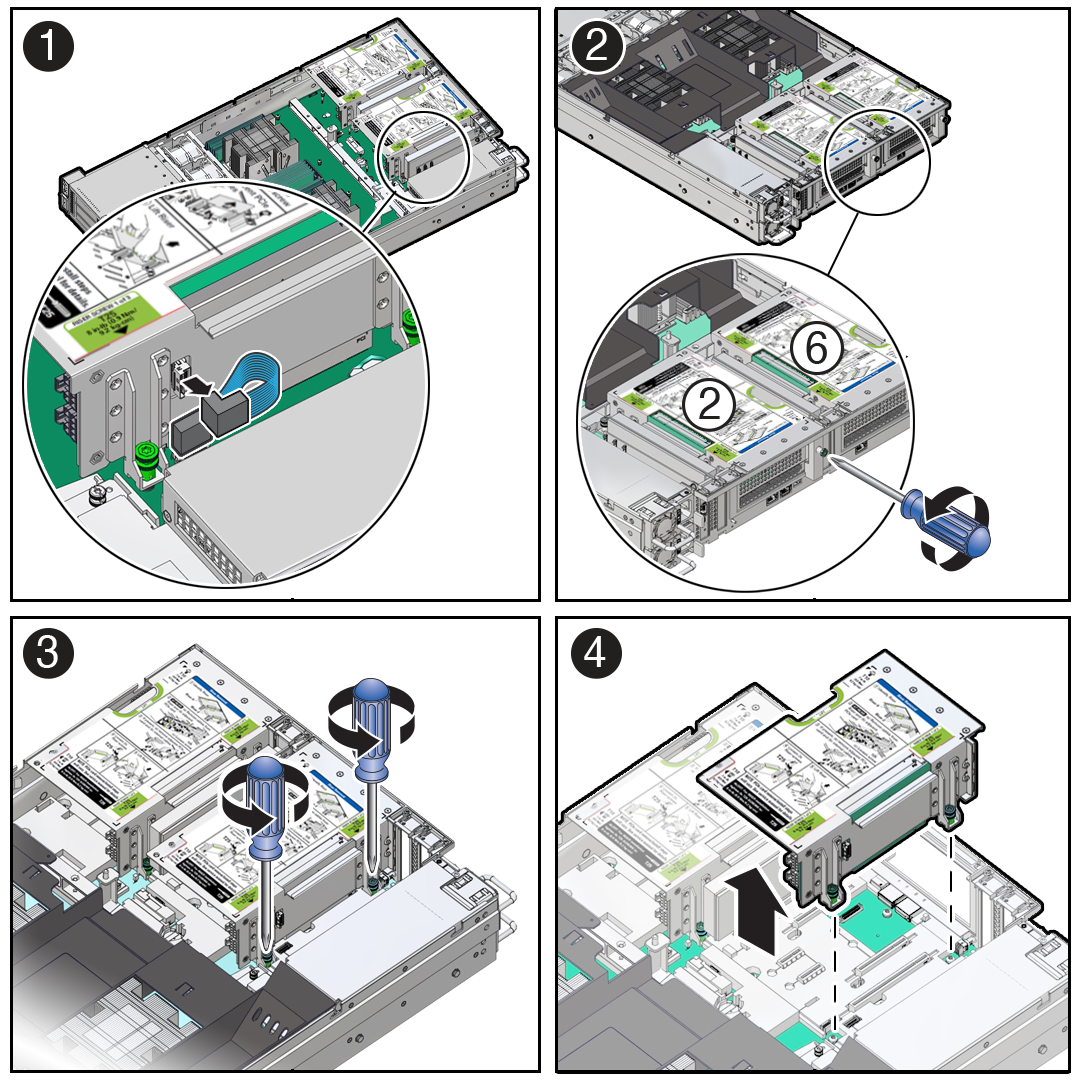
- Disconnect the PCIe Riser signal cable from the side of the riser you are replacing [1].
- Using a Torx (6 lobe) T25 screwdriver, loosen one screw that secures the PCIe riser to the back panel [2].
- Using a Torx (6 lobe) T25 screwdriver, loosen the two screws that secure the PCIe riser to the motherboard [3].
- Lift the PCIe riser from the slot and place it on an antistatic mat [4].

- If required, remove the installed PCIe card from the Riser PCIe slot.Hold the Riser in one hand and use your other hand to carefully pull the PCIe card connector out of the PCIe riser slot.
Leave the PCIe data and power cables attached to the PCIe card and place the PCIe card on an antistatic mat. You will need to install the PCIe card in the replacement PCIe riser.
See also Remove a Full Height PCIe Card and Remove a Half Height PCIe Card.