- Exadata Server X11M Service Manual
- Servicing PCIe Cards
- Remove a Half Height PCIe Card
Remove a Half Height PCIe Card
Before replacing or installing a PCIe card, refer to the card documentation for
specific installation and cabling instructions.
-
Prepare the server for service.
- Power off the server.
- Disconnect the power cords from the power supplies.
- Extend the server to the maintenance position.
- Attach an antistatic wrist strap.
- Remove the server top cover.
-
Locate the PCIe card that you want to remove.
PCIe slots 1 through 4 are nonfunctional in single-processor systems.
- If necessary, record where the PCIe cards are installed.
-
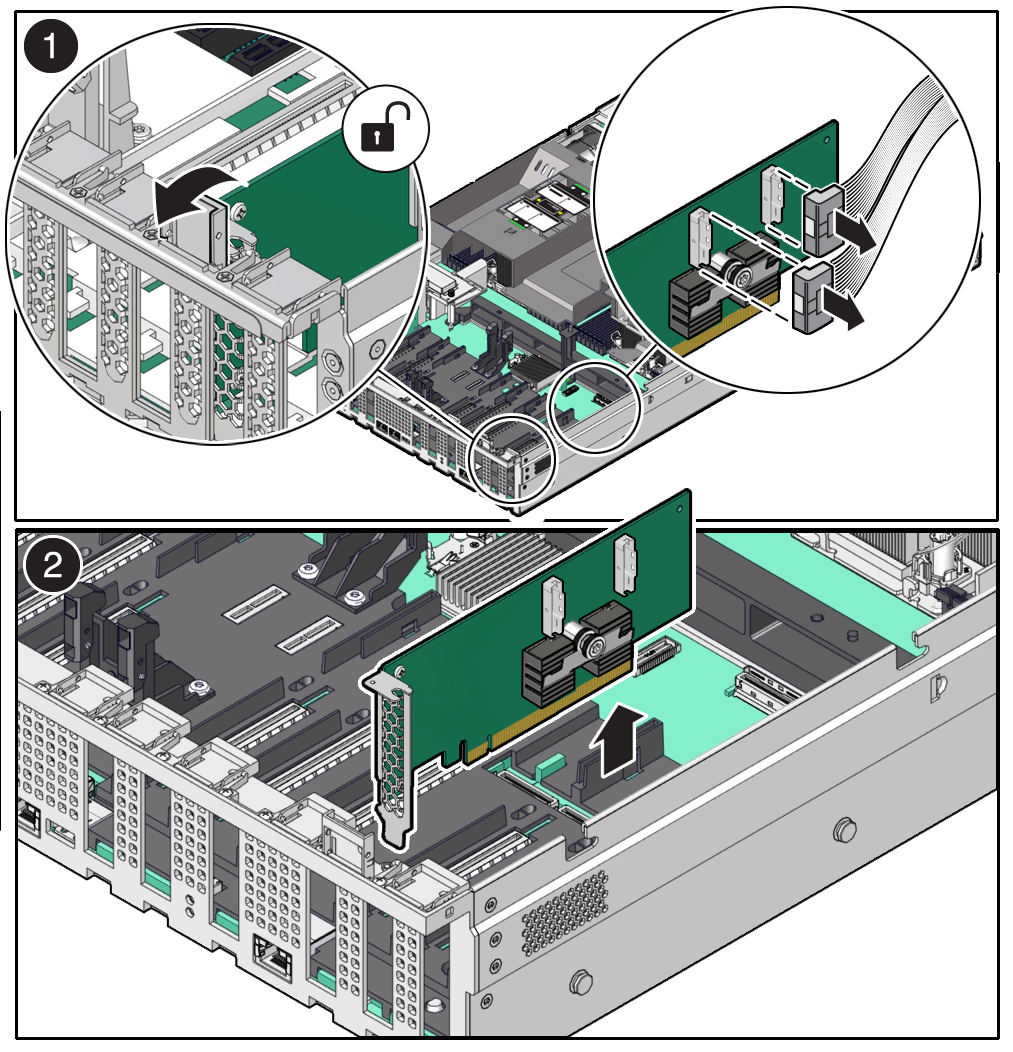
Unplug all data cables from the PCIe card [1].
Note the cable connections so that it's easier to properly reconnect the cables.
If it is difficult to disconnect the cables from the PCIe card when the card is inserted into the PCIe slot, consider performing the procedure in Step 5 before completing this step.
-
Rotate the PCIe card locking mechanism in to an upright position [1], and then lift up on the PCIe card to disengage it from the motherboard connectors [2].

-
Place the PCIe card on an antistatic mat.
Caution:
If you are not immediately inserting a replacement PCIe card into the empty slot, insert a PCIe filler panel in the slot to reduce the possibility of radiated electromagnetic interference (EMI). See Remove and Install Filler Panels.