Add a Checkbox Action
The checkbox action interacts with a checkbox, such as by selecting it, deselecting it, or determining whether it's selected.
Use Case
This action has specific requirements for the page's underlying HTML
code. You can use the checkbox action only for a UI element with a tag name of
INPUT and a type attribute of checkbox.
Add a Checkbox Action
Note:
You must use the low-code capabilities to add this action to a robot. Keep reading for step-by-step instructions.- Open the robot for editing.
See Open a Robot.
- Add the action
to the robot.
- On the canvas,
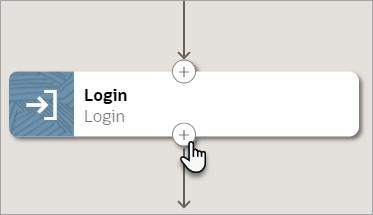
point to an action, and click
+.

A menu of available actions appears.
- Select Checkbox.
A Checkbox action appears on the canvas, and the Checkbox panel appears.
- On the canvas,
point to an action, and click
+.
- In the panel, enter a Name and
Description for the
action.
The Name appears on the action in the canvas and should help you and others understand the goal of the action.
- From Operations, specify how the robot interacts with
the checkbox.
- Select Checkbox: The robot selects a checkbox.
- Unselect Checkbox: The robot clears a checkbox selection.
-
Is Checkbox Selected: The robot determines whether a checkbox is selected. This option is useful if the next action depends on whether a checkbox is selected.
- In another browser window or tab, open the application where the robot works.
- On the Input tab, specify
input details for the action.
Field Description Locator -
In the robot, click within the Locator field, and select Target a page element
 .
.The Target a page element panel appears.
-
In the panel, from the Select browser tab to target drop-down, select the application where the robot works, and select Go. You might need to scroll down to find the application.
The application opens.
-
In the application where the robot works, point to the checkbox that the robot needs to interact with, but don't select it yet.
For example, if the field is shaded purple and the magnifying lens icon appears, don't click yet. The recorder is still collecting information.

-
Wait for the shading to turn green and the mouse icon to change to a hand, and then select the UI element.

For more tips, see Quick Start for Building Robots.
The recorder enters a value in the Locator field in the robot.
Tip:
Your settings determine whether Oracle Integration reuses targets for previously selected UI controls. You can override these settings, if needed. Reusing a target offers benefits. For example, you can update a target one time, and all actions that use the target get the update.
Screenshots Specify whether to capture any screenshots as part of the action. See Capture Screenshots in Robots.
-
- If you selected the Is Checkbox Selected operation,
specify where to save the answer.
-
Assign the value to a variable.
-
Select the Output tab.
-
Click within the Save to field, and select Variables
 .
.The Variables panel appears.
-
Determine whether the variable that you need appears in the list. If not, create it. See Create a Variable.
-
Select the variable to assign the value to, and drag it to the Save to field.
-
-
Assign the value to a property of the output.
-
Select the Output tab.
-
Click within the Save to field, select More options, and then select
 Output.
The Output panel appears.
-
Determine whether the output that you need appears in the list. If not, create it. See Create a Trigger's Input or Output.
-
Select the output to assign the value to, and drag it to the Save to field.
-
-
- On the Pre Validate and Post Validate tabs, specify whether to complete any validation before and after the action.
- Click OK.
- Above the canvas, select Save.