Capture Screenshots in Robots
When you add an action to a robot, you have several options for capturing screenshots, including capturing a robot's view before and after completing an action.
Why Capture Screenshots?
Screenshots are typically most helpful when you are debugging and troubleshooting a new robot that is failing.
For example, if a robot's credentials don't have the appropriate access, a robot might not be able to see the field it needs to update. A screenshot of the missing field can help you quickly troubleshoot any issues that the robot encounters.
Keep in mind that a robot that captures screenshots sometimes runs a little slower and captures more data than a robot that doesn't capture screenshots.
Screenshot Options
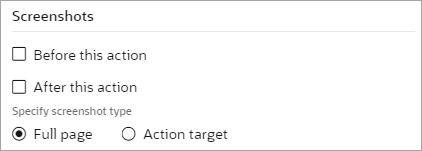
Most robot actions include the following options for capturing screenshots:

| Option | Description | When the screenshot appears in the activity stream |
|---|---|---|
|
Before this action |
Take a screenshot of the application before the action occurs. |
To include the screenshot in the activity stream, you must also select Log screenshots to activity stream when activating the robot. |
|
After this action |
Take a screenshot of the application after the action occurs. |
To include the screenshot in the activity stream, you must also select Log screenshots to activity stream when activating the robot. |
|
Specify screenshot type |
Select the scope of the screenshot:
|
N/A |
A Screenshot Action Is Also Available
You capture screenshots for robot action to use in troubleshooting. If you need to use a screenshot as part of a robot's or integration's other activities, use the screenshot action. See Add a Screenshot Action.
If you add this action to a robot, a screenshot always appears in the activity stream, regardless of whether you select Log screenshots to activity stream when you activate a robot.