Create a Project By Selecting an Accelerator or Recipe that the AI Suggests
You can create a project using natural language by selecting an accelerator or recipe from the accelerators or recipes that the AI suggests. The AI provides these suggestions based on the natural language text that you specify.
Note:
AI features are available in select regions. See AI Feature Availability in Provisioning and Administering Oracle Integration 3.- Decide where to start:
- Home page:
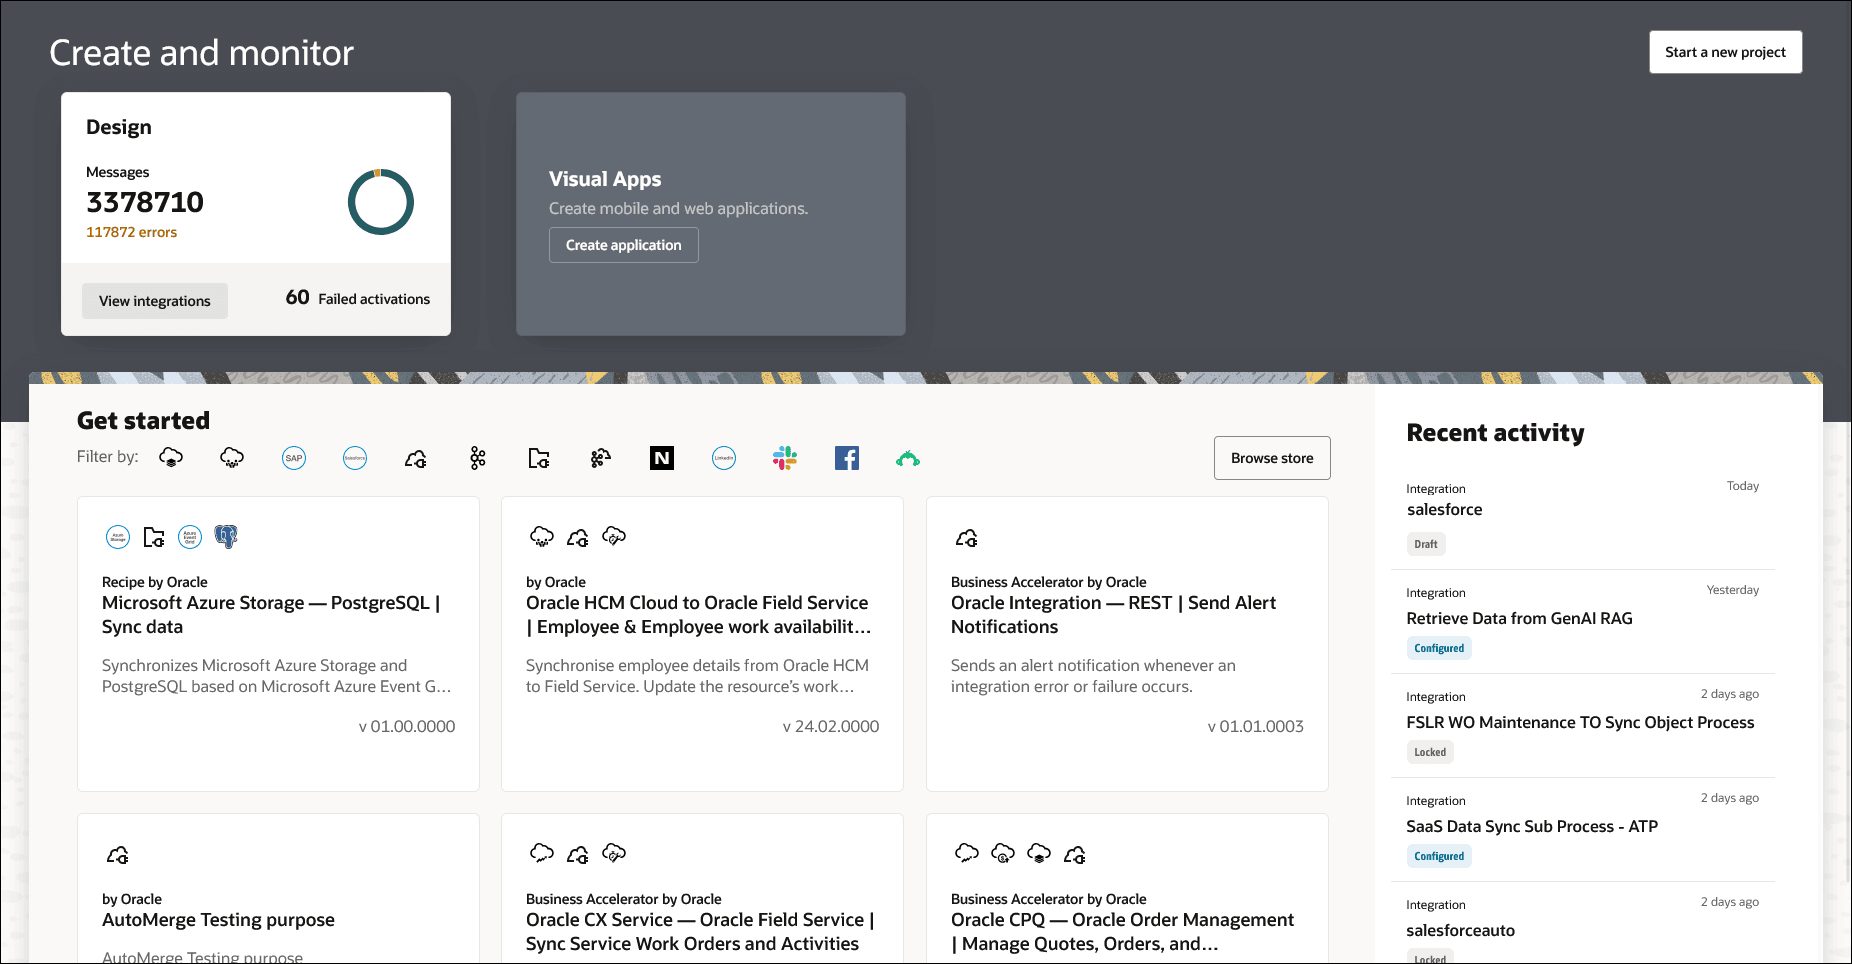
- On the Oracle Integration Home page, click Start a new project in the upper right corner.
The Start a new project panel appears.
- On the Oracle Integration Home page, click Start a new project in the upper right corner.
- Projects page:
- In the navigation pane, click Projects.
- Click Add.
The Start a new project panel appears.
- Home page:
- In the Start a new project panel, click Create.
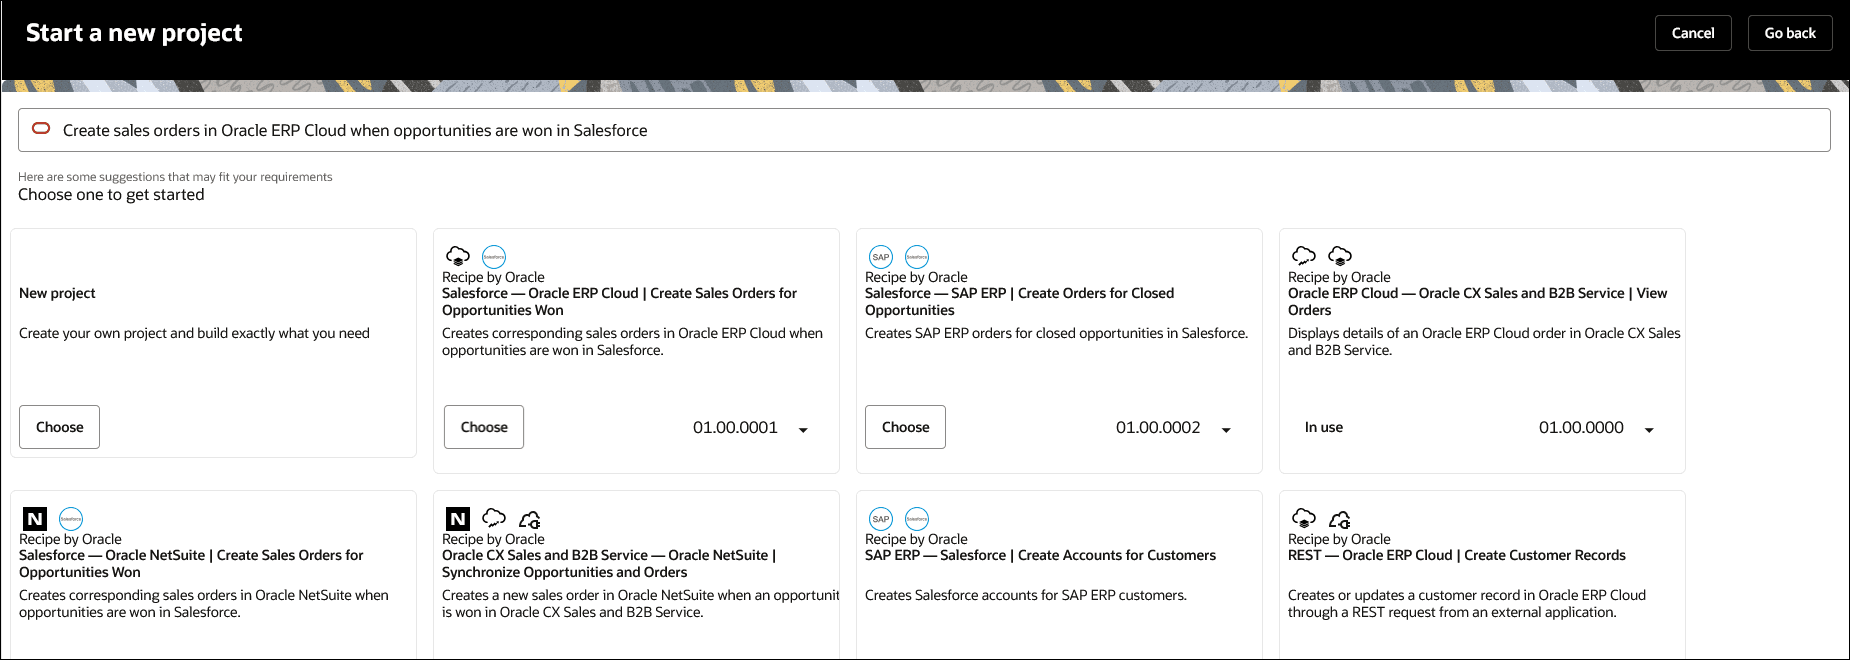
- On the Start a new project page, enter the project detail using natural language and press Enter. For example: Create sales orders in Oracle ERP Cloud. You can also enter keywords. For example: salesforce.
Based on the project detail or keyword that you entered, the AI shows accelerators and recipes that match your project detail/keyword.
- Click Choose to select the accelerator or recipe you want to install.
The accelerator or recipe you selected starts installing. Once the installation is complete, the Configuration Editor page appears.
- On the Configuration Editor page, perform the following steps.
- On the Connections subpage, you can edit or replace connections to configure them. Hover over the connection you want to edit or replace and perform one of the following.
- Click Edit
 to configure the connection as needed.
- Click Actions
 , then select Replace to select a configuration from the list of shared connections across your projects. After selecting a shared connection, click Save. If you don't want to select a connection from the list of shared connections, click Cancel.
- Click Edit
- Click the Lookups tab in the upper right corner to configure lookups (if available) on the Lookups subpage. If you don't have any lookups, you can proceed to the next step.
- Click the Deployments tab in the upper right corner to deploy the integration on the Deployments subpage:
- Hover over the row you want to activate, then click Activate
 .
.
The Activate integration panel opens.
- Select the level of tracing as needed, and click Activate.
You can also deploy the integration using the following steps instead:- Click Back
 to go to the Design tab.
- In the Integrations section, hover over the specific integration to activate.
- Click Actions
 , then select Activate.
The Activate integration panel opens.
- Select the level of tracing as needed, and click Activate.
Note:
If you have multiple integrations, then you can deploy them from the Deploy tab. See Create a Deployment.
- Hover over the row you want to activate, then click Activate
- On the Connections subpage, you can edit or replace connections to configure them. Hover over the connection you want to edit or replace and perform one of the following.
Example
Let's create a project to create sales orders in Oracle ERP Cloud when opportunities are won in Salesforce. To create this project, specify the project detail or purpose using natural language on the Start a new project page and select an accelerator or recipe to install from the list of accelerators or recipes that the AI recommends.
- On the Oracle Integration Home page, click Start a new project in the upper right corner.

- In the Start a new project panel, click Create.
- On the Start a new project page, enter Create sales orders in Oracle ERP Cloud when opportunities are won in Salesforce and press Enter.
The AI shows accelerators and recipes that match the above project detail.

- Click Choose to select the accelerator or recipe that closes or exactly matches the project you want to create. In this example, select Create Sales Order for Opportunities Won recipe.
The recipe starts installing. Once the installation is complete, the Configuration Editor page appears.

- On the Configuration Editor page, perform the following steps.
- On the Connections subpage, the following connections are shown:
- Oracle ERP Cloud Connection
- Oracle Salesforce Connection
Configure each of the connections by performing the following steps.
- Hover over the connection you want to configure, click Actions
 , and then select Replace to select a configuration from the list of shared connections across your projects.
- After selecting a shared connection, click Save.
Note:
If you don't want to configure the connections using shared connections, click Edit to configure the connections as needed.

- As this project does not have any lookup data, you don't need to configure any lookups on the Lookups subpage. You can proceed to the next step.
- Click the Deployments tab in the upper right corner to deploy the integration on the Deployments subpage:
- Hover over the row to activate, then click Activate
 .
.
The Activate integration panel opens.
- Select the level of tracing as needed, and click Activate.
- Hover over the row to activate, then click Activate
- On the Connections subpage, the following connections are shown: