
| Download Docs | Site Map | Glossary | |
|
|
|||
| bea.com | products | dev2dev | support | askBEA |
 |
 |
|
|||||||
| e-docs > WebLogic Platform > WebLogic Portal > Administration Guide > Tutorial - Administering a Portal |
|
Administration Guide
|
Tutorial - Administering a Portal
In the previous tutorial, you created a portal administrator. In this tutorial, you use the new portal administrator to modify the content and look and feel of an existing portal. When you finish, you can view the portal to see the changes you made.
This tutorial is part of a larger tutorial that begins with "Creating a New Portal in a New Domain" in the WebLogic Portal Development Guide at http://download.oracle.com/docs/cd/E13218_01/wlp/docs70/dev/newdom.htm. That tutorial has you create the new domain, new portal, and new portlets that are used in this tutorial.
This tutorial includes the following steps:
Step 1: View the Existing Portal
View the portal you created as it is now so you can compare it to the modified version you will create.
In a browser, go to http://<hostname>:<port>/<portalwebappname>/index.jsp. If you are running the server on your local machine and using the example data in these procedures, the URL will probably be http://localhost:7501/NewPWApp/index.jsp.
Log in with username administrator and password password.
Figure 3-1 shows the existing portal's look and feel with a single "Home" page, indicated by the page tab.
Figure 3-1 The Portal and Portlet You Created in the First Tutorial
Step 2: Make Skins and Layouts Available in the Portal
Skins and layouts are existing resources that affect the appearance of portals and portlets. In this step you will make these resources available for use in your portal.
Note: If you are continuing from previous procedures and the E-Business Control Center is still running with your portal project file open, you can skip the first two steps.
Figure 3-2 Opening a Project File
Figure 3-4 Making Skins Available
Figure 3-5 Make Sure All Portlets Are In Selected Portlets List
Keep the portal file open.
Step 3: Create a Portal Page and Add a Portlet
A new portal page is like a blank slate that you add things to. In this step, you will create a new portal page, add layouts that you made available in the previous step, and select a portlet to use on the page.
Figure 3-6 Click the Pages Bar
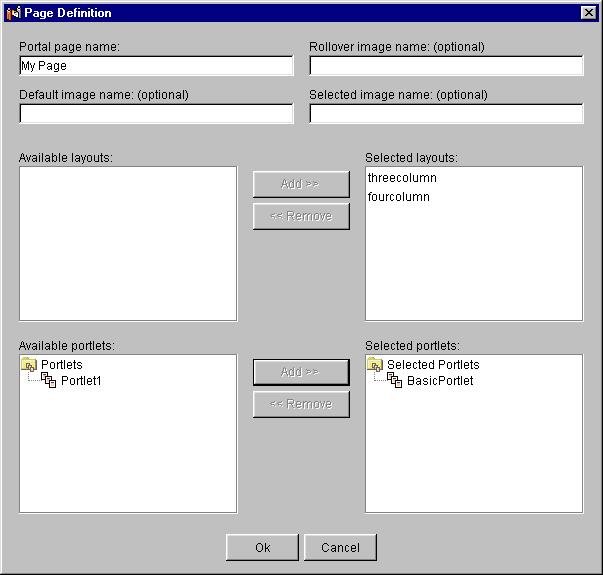
Figure 3-7 Setting the Page Definition
Figure 3-8 Page Definition Page After Making Changes
Figure 3-9 Save Icon
Step 4: Synchronize the Modified Portal
To use the new portal configuration, you must synchronize the E-Business Control Center data stored on your hard drive to the server.
Figure 3-10 Verifying Project Settings
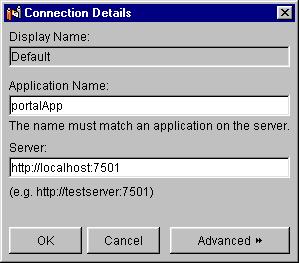
Figure 3-11 Verifying Connection Details

Figure 3-12 Synchronization in Progress
Figure 3-13 Synchronization Complete
Step 5: Use the New Skins, Layouts, and Portlets
Now that you have modified the portal to include new skins, layouts, and a portal page with a portlet, you will use these resources to make live modifications to the portal with the WebLogic Portal Administration Tools. To make these modifications, you log in as the portal administrator you created in the previous procedure (portaladmin in this example).
Figure 3-15 Portal Management Home Page
Figure 3-16 Clicking Select Skins
Figure 3-17 Setting the Default Skin
Your portal modifications are complete. You have:
Now you can view the modified portal.
Step 6: View the Modified Portal
In a browser, go to http://<hostname>:<port>/<webappname>/index.jsp. If you are running the server on your local machine, the URL is probably http://localhost:7501/NewPWApp/index.jsp.
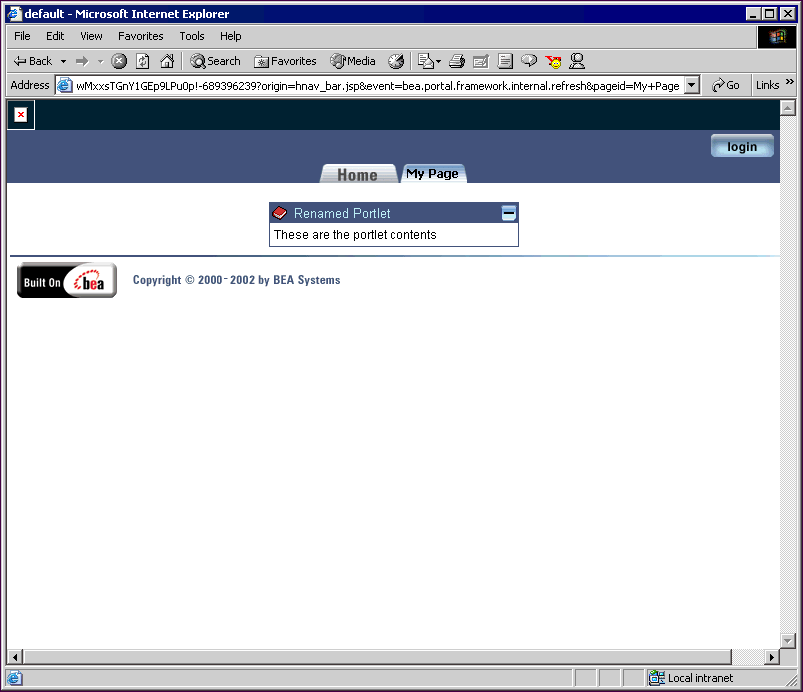
Figure 3-20 shows the modified portal. Notice the new look and feel, the new "My Page" tab, and the renamed portlet. Compare this to the original portal in Figure 3-1.
Figure 3-20 Viewing the Modified Portal
You have successfully completed this tutorial, which has shown you a few ways that administrators can manage portals. There are many more tasks administrators can perform, including creating Group Portals and Group Portal administrators, developing campaigns, targeting visitors with personalized content, and performing other traditional system administration tasks. For procedures on these additional tasks, see Administering Portals.

|

|

|