

|
|
|
|
|
|
Using the Tester
The Information Integrator Tester utility allows you to parse and reformat messages as a validation test. Using the Tester utility, you can make sure the message formats you built using the Formatter or MsgDefAdmin tool produce the expected results. For more information on the Formatter tool, refer to Building Format Definitions. For more information on the MsgDefAdmin tool, refer to Using MsgDefAdmin.
This chapter discusses the following topics:
Starting the Tester
You can launch Tester using the steps described in the following procedure.
Note: If you do not have an assigned user ID and password, ask your system administrator to create them for you.
Figure 5-1 Tester Logon
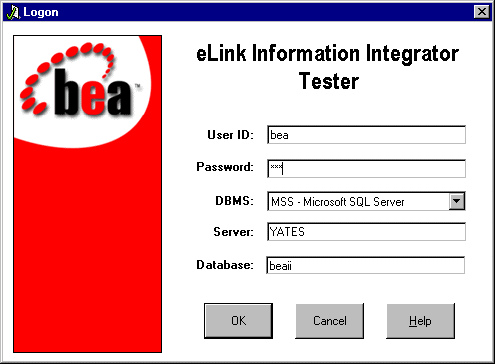
Figure 5-2 Tester Main Window
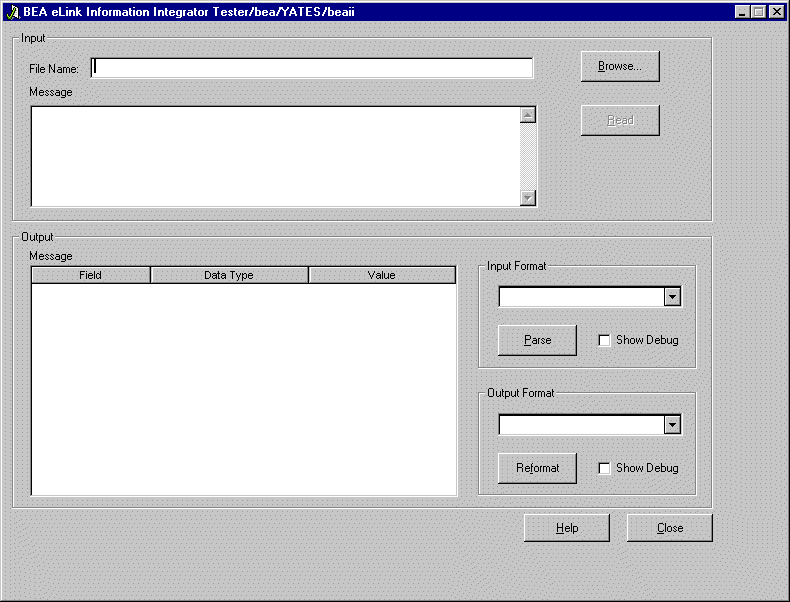
This dialog contains the parameters for parsing Formatter messages. The parameters are described in Table 5-1 below:
Table 5-1 Tester Dialog Parameters
|
Parameter |
Description |
|---|---|
|
Filename |
The name of the file that contains the messages to test. You can enter the file name directly into the field or click Browse to select from a list of files. |
|
Browse |
Displays the Open dialog, where you can select the file that contains the messages to test. The file name you select is copied to the File Name field when the Open dialog is closed. |
|
Message |
The message to test. You can enter the message directly into the Message text area or click Read to extract the message from the file specified in the File Name field. |
|
Read |
Extracts the message from the file name specified in the File Name field and displays the extracted message in the Message text area. This button is disabled until you enter a file name in the File Name field. |
|
Input Format |
Specifies the input format to use for parsing the message. The available values depend on the formats specified in the Formatter database. |
|
Output Format |
Specifies the output format to use for reformatting the message. The available values depend on the formats specified in the Formatter database. |
|
Parse |
Parses the message displayed in the input Message text area and displays the parsed message in the output Message text area. The output is divided into three columns: Field, Data Type, and Value. |
|
Reformat |
Parses and reformats the input message. The reformatted message is displayed in the output Message text area. |
|
Show Debug |
Displays details of the parsing or reformatting in the output Message text area. |
|
Close |
Closes this dialog. |
Parsing and Reformatting Messages Using the Tester
You can parse and reformat messages using the Tester by following the steps below.
If you click Browse, select the file that contains the message you want to parse in the Select File dialog. The file name is automatically copied to the File Name field when the Select File dialog is closed.
Once a file is specified in the File Name field, the Read button is enabled. Click Read to extract the message from the file specified in the File Name field. The message appears in the Message field.
Example
This section outlines the procedure required to complete Step 5 in Using Information Integrator. In Step 5, you use the Tester utility to test the message formats you built in Step 3 (Step 3. Create the Message Format Descriptions) and Step 4 (Step 4. Create Output Operations). By testing message formats using the Tester utility, you can identify and correct errors in your formats before using them to parse you actual data.
In the steps that follow, we will load the input data in the Tester utility and test the formats.
Figure 5-3 Tester window showing input data
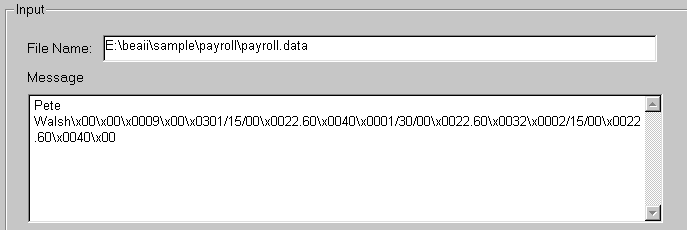
Figure 5-4 Parsed message
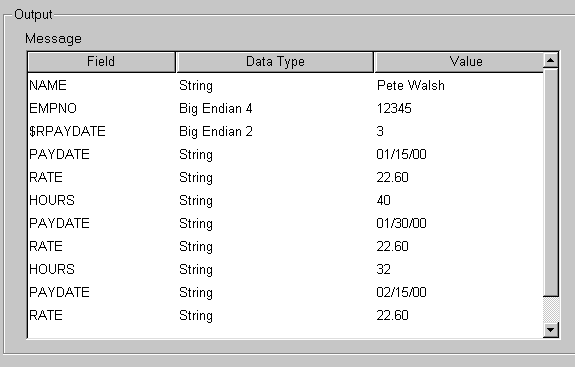
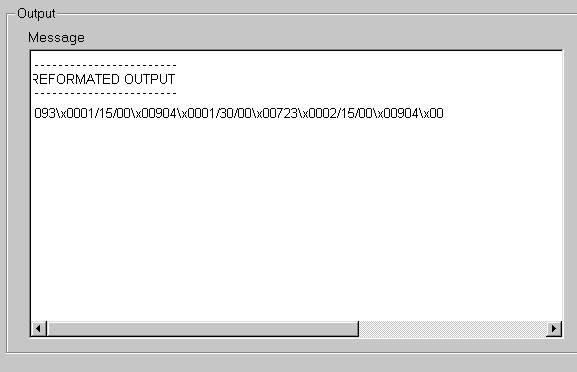
Figure 5-5 Reformatted message

|

|

|
|
|
|
Copyright © 2000 BEA Systems, Inc. All rights reserved.
|