Install the Server Into the Slide-Rail Assemblies
Use this procedure to install the server chassis with mounting brackets into the slide-rail assemblies that are mounted to the rack.
 | Caution - Personal Injury or Equipment Damage: This procedure requires a minimum of two people because of the weight of the server. Attempting this procedure alone could result in equipment damage or personal injury. |
 | Caution - Personal Injury or Equipment Damage: Always load equipment into a rack from the bottom up so that the rack does not become top-heavy and tip over. Extend the rack anti-tilt bar to prevent the rack from tipping during equipment installation. |
- Push the slide-rails as far as possible into the slide-rail assemblies in the rack.
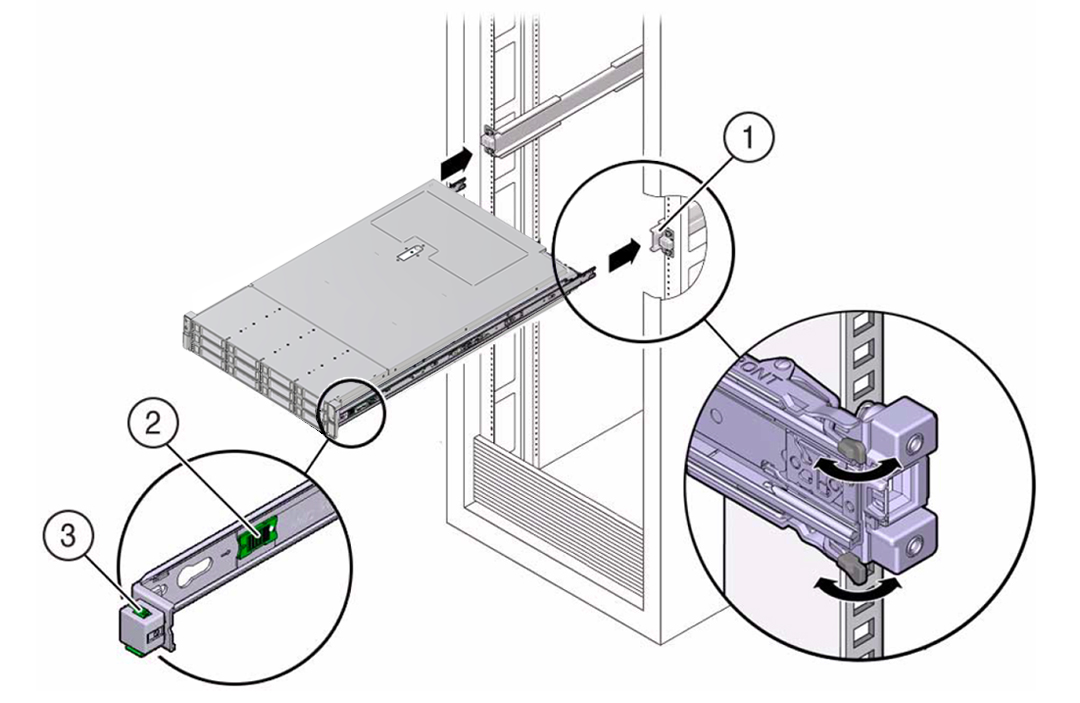
- Position the server so that the back ends of the mounting brackets are aligned with the slide-rail assemblies that are mounted in the rack.
-
Insert the mounting brackets into the slide-rails, and then push the
server into the rack until the mounting brackets are flush with the
slide-rail stops (approximately 30 cm, or 12 inches).
 Call OutDescription1Inserting mounting bracket into slide-rail2Slide-rail release button3Slide-rail lock
 -
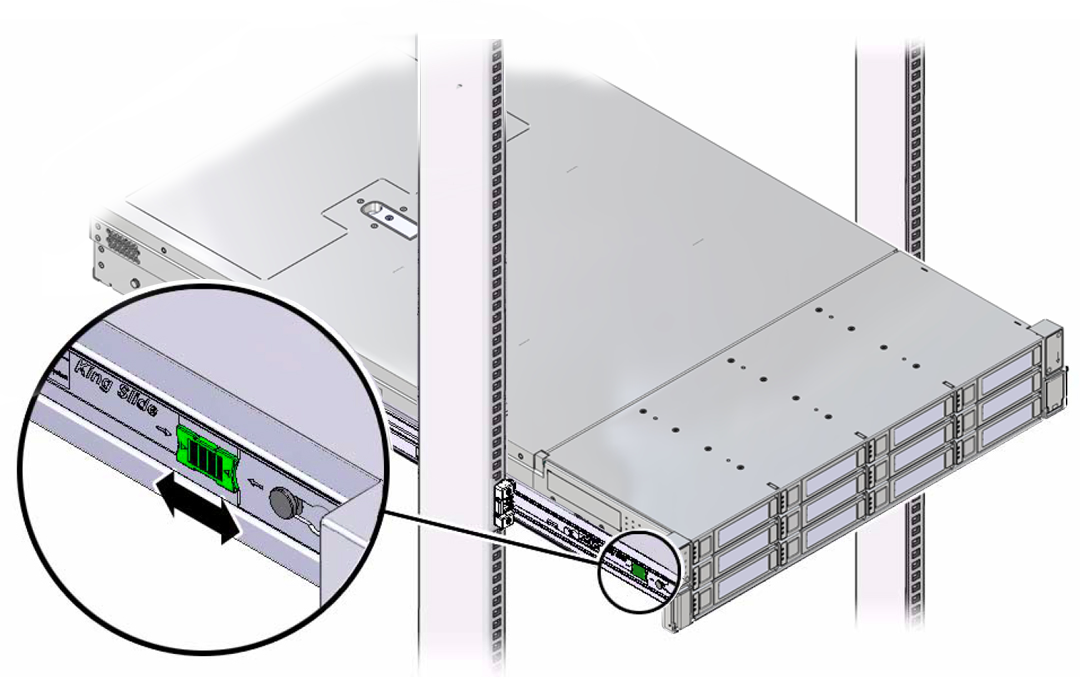
Simultaneously push and hold the green slide-rail release buttons on each
mounting bracket while you push the server into the rack. Continue pushing
the server into the rack until the slide-rail locks (on the front of the
mounting brackets) engage the slide-rail assemblies with an audible
click.


Caution - Before you install the optional cable management arm verify that the server is securely mounted in the rack and that the slide-rail locks are engaged with the mounting brackets.