Identify and Remove a DIMM
-
Prepare the server for service. If you are replacing DDR4 DIMMs only, go to
Step 1.b.
-
(Optional - DCPMM DIMM only) Determine if the faulty DCPMM DIMM(s) can
be removed.

Caution - Do not attempt to remove a faulty DCPMM DIMM when the Do Not Service LED indicator is illuminated, otherwise server performance might be adversely affected. You can remove faulty DCPMM DIMMs only when the Do Not Service LED indicator is extinguished and the Service LED indicator is illuminated.
After the Do Not Service LED indicator is extinguished and the Service LED indicator is illuminated, continue with Step 1.b.
Identify and note the following errors that might appear:
-
Fatal error – DCPMM DIMM is offline and the Service LED indicator illuminates
-
Non-fatal error – Exadata software evacuates the DCPMM DIMM data before you replace the DIMM. The Do Not Service LED indicator is illuminated during this process. After data evacuation completes, the Do Not Service LED indicator is extinguished and the Service LED indicator illuminates.
You also can identify a faulty DCPMM DIMM by running the cellcli -e "list diskmap" command from the console to view the status of the DCPMM DIMM. If the status of the physical memory (PMEM) is critical, you can replace the DIMM immediately. If the status is predictive failure, run the cellcli -e "list alerthistory where metricObjectName='PMEM_n_n' detail" command to verify the alert history. When alertMessage: PMEM can be replaced now appears, continue with Step 1.b.
-
- Extend the server to the maintenance position.
- Attach an antistatic wrist strap to your wrist, and then to a metal area on the chassis.
- Remove the server top cover.
- Remove the air baffle.
-
(Optional - DCPMM DIMM only) Determine if the faulty DCPMM DIMM(s) can
be removed.
-
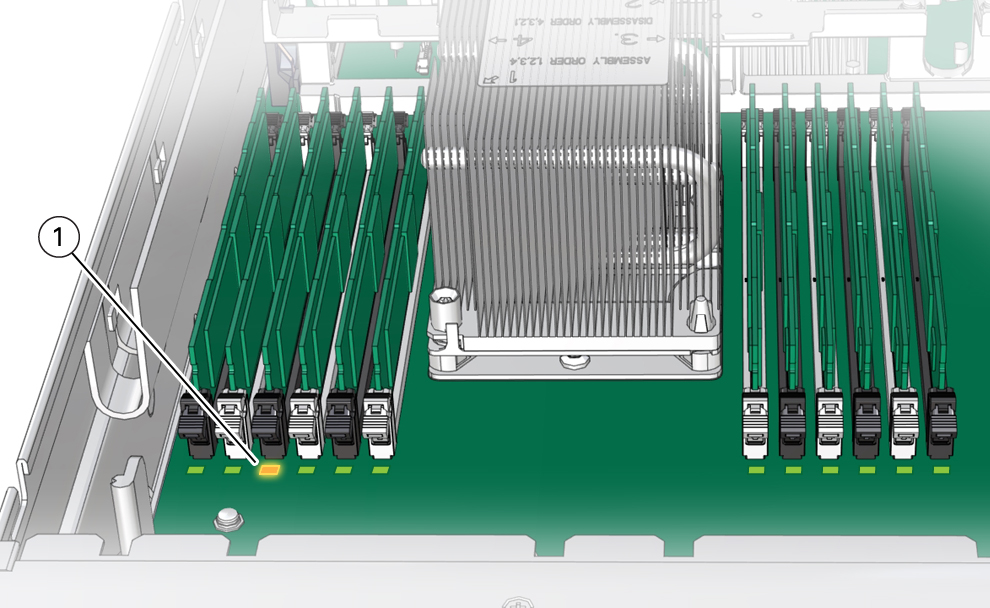
Identify and note the location of the faulty DIMM by pressing the Fault Remind
button on the motherboard.
See Using the Server Fault Remind Button.
Faulty DIMMs are identified with a corresponding amber LED on the motherboard.
-
If the DIMM Fault LED is off, then the DIMM is operating properly.
-
If the DIMM Fault LED is on (amber), then the DIMM is faulty and must be replaced [1].

-
-
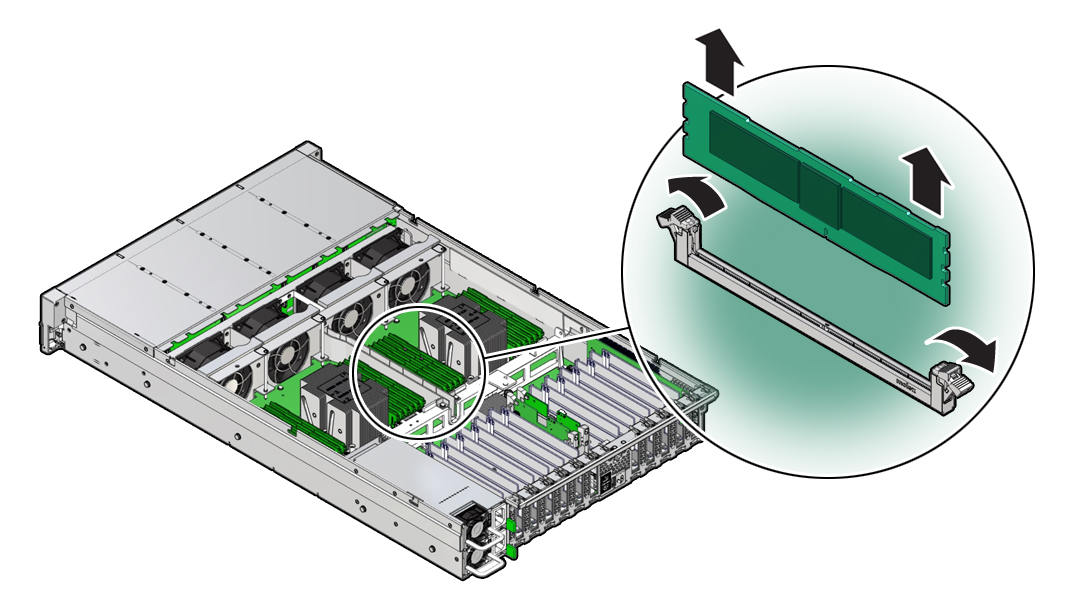
To remove the faulty DIMM, do the following:
-
Rotate both DIMM slot ejectors outward as far as they go.
The DIMM is partially ejected from the slot.
-
Carefully lift the DIMM straight up to remove it from the slot.

-
Rotate both DIMM slot ejectors outward as far as they go.
-
Replace each faulty DIMM with another DIMM of the same size and type.
For DIMM replacement instructions, see Install a DIMM.