How to Deploy and Run a Test Suite from Oracle JDeveloper
You can run a test suite from Oracle JDeveloper. After test suites are created, you can select multiple test suites to run, an individual test suite to run, or an individual test in a test suite to run.
To deploy and run a test suite from Oracle JDeveloper:
-
Perform the appropriate task shown in Table 51-15.
Table 51-15 Test Suite Execution Options
To... In the Applications Window... Run the test suite currently open in test mode in the SOA Composite Editor.
-
Click the Run Test icon above the SOA Composite Editor.

Run all test suites.
-
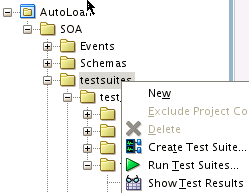
Right-click the testsuites folder, and select Run Test Suites.
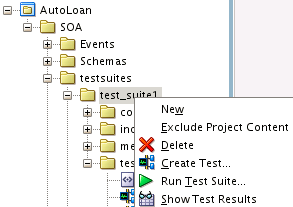
Run an individual test suite.
-
Right-click the test suite name, and select Run Test Suite.
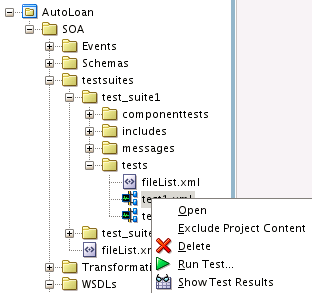
Run an individual test in a test suite.
-
Right-click the individual test in the tests folder, and select Run Test.
If you have not configured the test server to use, the Specify Test Server dialog is displayed.
-
-
Enter the test server host name and optionally select the Do not ask again, save it in Tools-> Preferences-> SOA check box. This prevents this dialog from being displayed again until you go to Tools > Preferences > SOA and change the configuration.
-
Click OK.
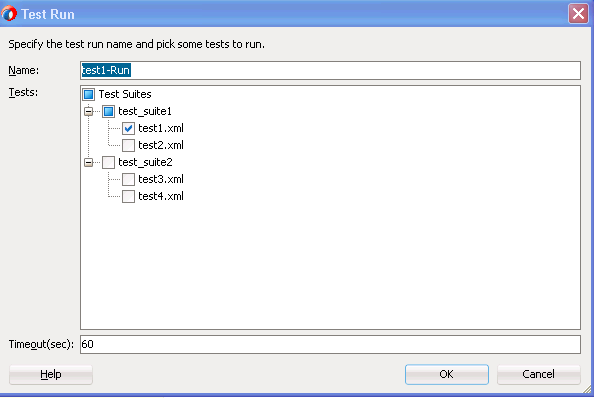
The Test Run dialog is displayed.
-
Perform the following steps:
-
Specify the test run name.
-
Select or deselect tests to run.
-
Specify the timeout value in seconds for running tests on the test server.
-
Click OK.
Figure 51-29 provides details.
A check is made to see if the SOA composite application (including the tests) has ever been deployed on the test server. You must first deploy the composite before you can run tests on the test server.
-
-
Perform the steps shown in Table 51-16 based on the deployment status of the SOA composite application.
Table 51-16 Check to Determine if the SOA Composite Application is Deployed
If the SOA Composite Application ... Then ... Is deployed.
Go to Step 6.
-
Has never been deployed on the test server.
-
Has been deployed on the test server, but the composite (including the tests) has been changed since the last deployment.
The Confirm to Deploy Composite dialog is displayed.
-
Click OK to deploy the SOA composite application.
The Deployment Action page of the Deploy Project_Name wizard is displayed.
-
Select Deploy to Application Server.
-
Follow the pages of the wizard to deploy the SOA composite application to an application server.
For information about deploying SOA composite applications, see Deploying the Profile.
-
When deployment is complete, go to Step 6.
After deployment has completed, the tests run on the test server.
-
-
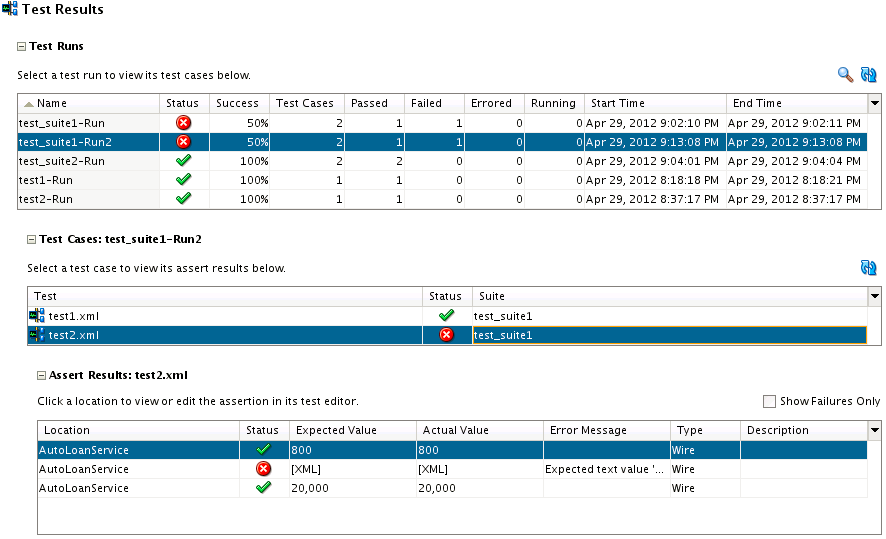
View the test results. Figure 51-30 provides details. The Test Results dialog is per test server and composite DN. The test server URL (the SOA server host name and port number) and composite DN are displayed in the top right corner to indicate the context. You can run tests as many times as you want, and can select different test combinations to run on the same test server or different test servers.
Test results are displayed in three collapsible tables, from master to details. Table 51-17 provides details.
Table 51-17 Test Results Tables
Test Runs Test Cases Assert Results Shows the current test run and its status summary if you just submitted a test run. If you just queried the test server for test runs, the table shows all test runs matching your query criteria.
-
Name of the test run that you entered in the Test Run dialog.
-
Status of the test run: either passed or failed. The status is passed if all test cases in the test run passed. Otherwise, the status is failed, which means at least one test case failed.
-
Success percentage of the test run.
-
Total number of test cases.
-
Number of passed, failed, in error, and running test cases.
-
Start and end times for a test run.
Shows all test cases and the statuses of the selected test run from the Test Runs table. Click the Refresh button to refresh the test case statuses.
-
Test file name of the test case. Click to access its test editor.
-
Status of the test case, either passed or failed. The status is passed if all assertions in the test case passed. Otherwise, the status is failed, which means at least one assertion failed.
-
Test suite of the test case.
Shows all assertion results of the selected test case from the Test Cases table.
-
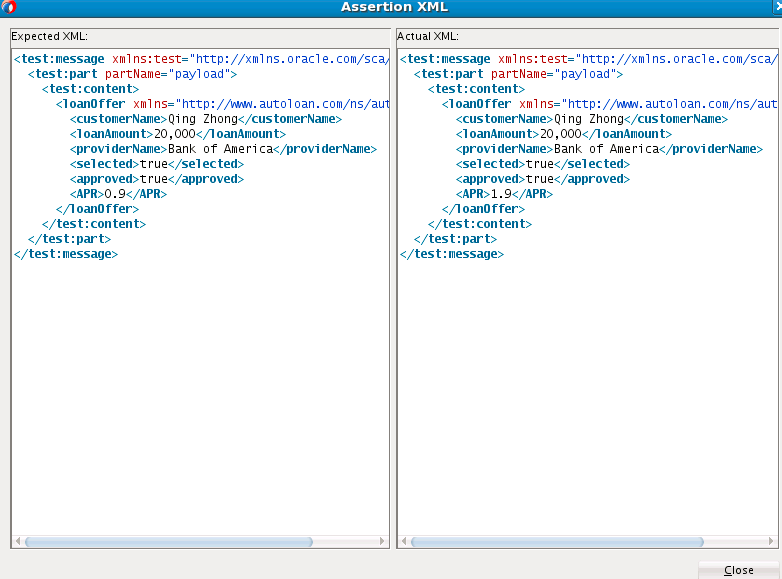
Assertion location. This is the wire source (service or reference) for a wire assert and the component (BPEL process) activity name for a component assert. This is a hyperlink to the location of the assert in its test editor. Figure 51-31 provides details.
-
Assertion status: Passed or failed. The status is passed if the actual value matches the expected value.
-
Expected and actual values of the assert. This is a simple value if it is a simple value assert and a hyperlink to a popup to show the XML value if it is an XML value assert.
-
Error message if the status is failed.
-
Assertion type: either wire or component. Wire means to assert on a composite wire. Component means to assert within a component (BPEL process).
-
Assertion description that you entered for the assertion when created.
-
-
Perform the following additional tasks in the Test Runs table in Figure 51-30:
-
Click the Search icon above the Test Runs table to query test runs from the test server by specifying search criteria.
-
Click the Refresh icon above the Test Runs table to refresh the status of test runs.
-
-
Perform the following additional tasks in the Test Cases table in Figure 51-30:
-
Click the Refresh icon above the Test Cases table to refresh the test case statuses.
-
-
Perform the following additional tasks in the Asserts Results table in Figure 51-30:
-
Select the Show Failures Only check box above the Asserts Results table to show failed asserts only.
-
