How To Add the Payload to the Task Form

In addition to adding the payload, you can create task form regions. See Step 1 in How To Create Task Form Regions Using Individual Drop Handlers.

To add the payload to the task form:

  1. From the Components window, select ADF Faces.
  2. Expand Layout.
  3. Drag Panel Group Layout between the Header and Comment sections.
  4. In the Data Controls panel, expand Task, and then Payload.
  5. Drag the payload data collection to the left of the Panel Group Layout area.

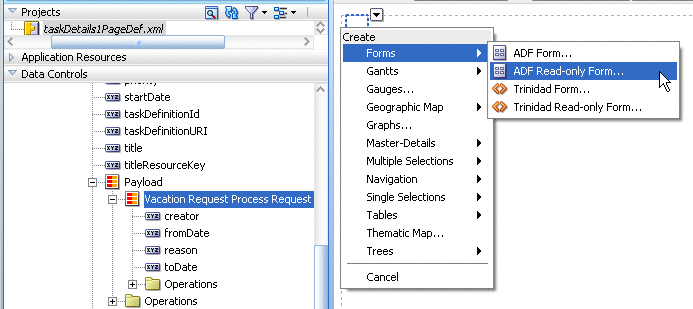
    An alternative to dropping the payload node onto the form is to expand the payload node and drop the necessary child elements onto the form. For example, to create a read-only form for the VacationRequest payload, expand the payload node, drag the Vacation Request Process Request node onto the form, and select Forms > ADF Read-only Form.

  6. From the context menu, select Forms, then ADF Read-only Form, as shown in Figure 30-28.

    Figure 30-28 Adding ADF Read-Only Fields to the Task Form Payload Region

    Description of Figure 30-28 follows
    Description of "Figure 30-28 Adding ADF Read-Only Fields to the Task Form Payload Region"
  7. In the Edit Form Fields dialog, accept the defaults and click OK.

    This creates read-only fields in the payload region, between the Details and History sections.

    The payload regions appear, as shown in Figure 30-29.

    Figure 30-29 The Payload Region of the Task Form

    Description of Figure 30-29 follows
    Description of "Figure 30-29 The Payload Region of the Task Form"

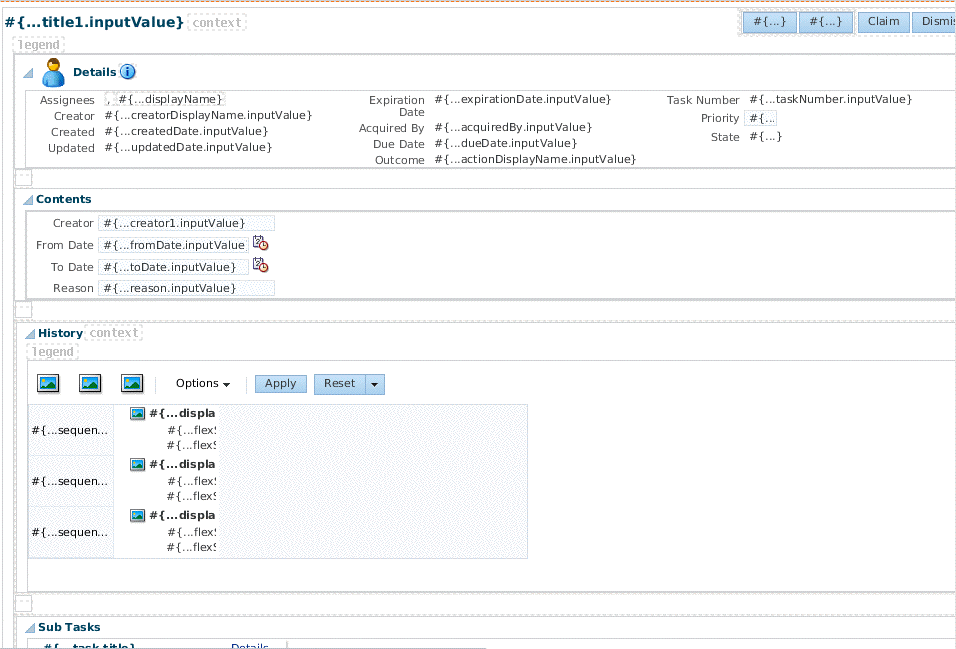
The task form, shown in Figure 30-30, is complete and ready to be deployed.

Figure 30-30 The Task Form (taskDetails.jspx)
Description of Figure 30-30 follows
Description of "Figure 30-30 The Task Form (taskDetails.jspx)"