Creating a Task Flow with a Router

The control flow case with a router enables you to direct the request to a specific page based on certain parameters. For an ADF task flow based on a human task, you need a special page for email notifications. This section describes how to create a special page for email notifications.

To create a task flow with a router:

  1. In the Applications window, expand the task flow project and double-click project_name _TaskFlow.xml.

    The XML file opens in the designer. In the diagram view, you see the taskDetails1.jspx icon.

  2. From the Components window, select ADF Task Flow, and drag the View icon into the designer.
  3. Click view1 below the icon and enter a name for the email notification page.

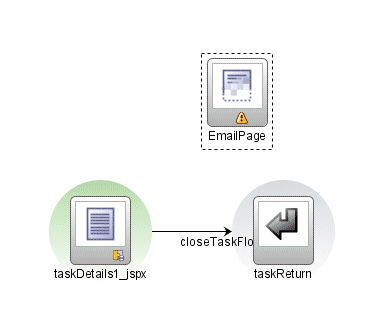
    Figure 30-33 shows an example using the name EmailPage.

    Figure 30-33 Creating the Email Page

    Description of Figure 30-33 follows
    Description of "Figure 30-33 Creating the Email Page"
  4. From the Components window, drag Router into the designer.
  5. Click router1 below the icon and enter a router name.

    Figure 30-35 shows an example using the name PageRouter.

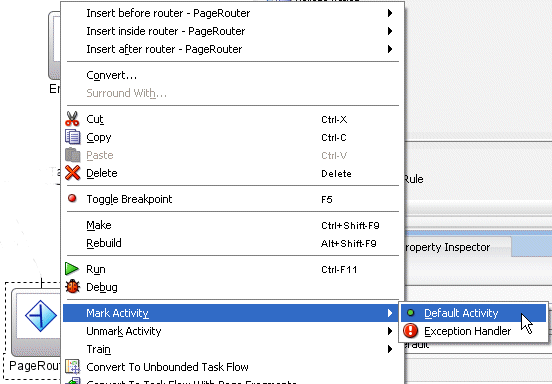
  6. To ensure that the router is called, right-click the router icon and click Mark Activity > Default Activity, as shown in Figure 30-34.

    Figure 30-34 Marking the Router as the Default Activity

    Description of Figure 30-34 follows
    Description of "Figure 30-34 Marking the Router as the Default Activity"
  7. Click the router - router_name - Property Inspector tab.
  8. In the default-outcome field, enter default.
  9. Click Add, and in the Outcome field, enter the name of the email notification page.
  10. Use the Expression Builder to enter the following in the expression field: #{pageFlowScope.bpmClientType=="notificationClient"}
  11. In the Components window, click Control Flow Case.
  12. In the designer, drag from the router page icon to taskDetails1.jspx.

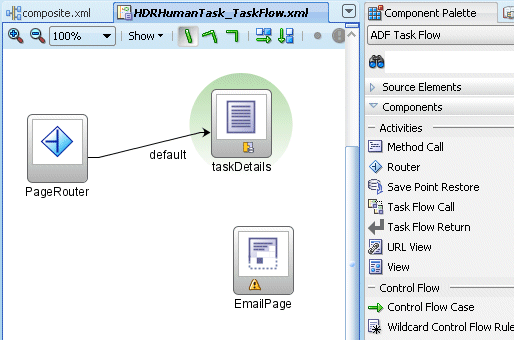
    The control flow is automatically labeled default, as shown in Figure 30-35.

    Figure 30-35 Connecting the Control Flow

    Description of Figure 30-35 follows
    Description of "Figure 30-35 Connecting the Control Flow"
  13. In the Components window, click Control Flow Case.
  14. In the designer, drag from the router page icon to the email notification page icon.
  15. Click the control-flow-case - email_page_name - Property Inspector tab.
  16. From the from-outcome list, select the name of the email notification page.

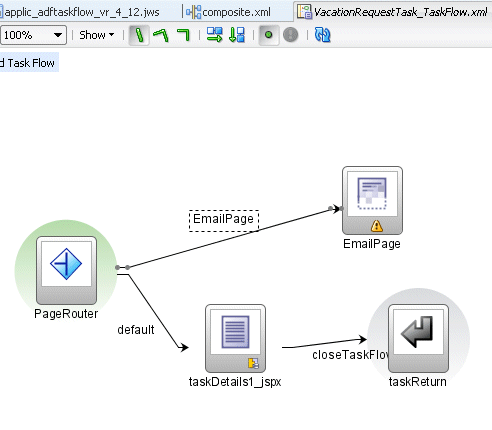
    Figure 30-36 shows the completed control flow.

    Figure 30-36 Completed Control Flow for an Email Notification

    Description of Figure 30-36 follows
    Description of "Figure 30-36 Completed Control Flow for an Email Notification"

To continue creating the email notification page, see Step 1 in Creating an Email Notification Page.