Post installation Configuration
This section describes specific post installation steps.
These steps are required to perform depending on the choices made in Setup Process.
The following sections are included:
Configuring Forms J2EE application with Oracle Internet Directory
The topics describes how to configure a Forms application to work with Oracle Internet Directory.
To access the Associate/Disassociate page:
-
Start Fusion Middleware Control.
-
Navigate to the Forms Home page.
-
From the Forms menu, select Forms Runtime LDAP Associations.
The Forms Runtime LDAP Associations page is displayed.
Figure -33 Forms Runtime LDAP Associations
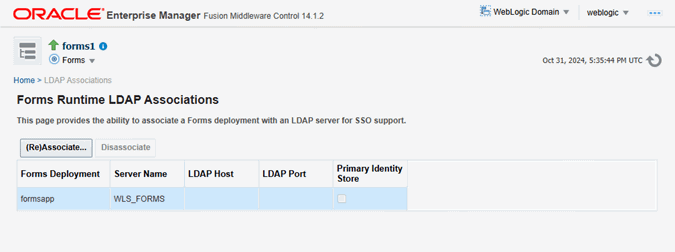
Description of "Figure -33 Forms Runtime LDAP Associations"
To associate OID Host with a Forms Application:
-
To associate an Oracle Internet Directory host with a Forms application for the first time, from the Associate/Disassociate OID page, select the Forms application. Click Associate.
The Associate dialog appears.
-
Enter the Oracle Internet Directory Host details as described in the following table.
-
Click Associate.
The Associate/Disassociate OID page reappears.
Table -29 Oracle Internet Directory Host Details
Parameter Description OID Host
Select the Oracle Internet Directory Host from the list or select New Oracle Internet Directory (OID) host to add new host details.
New OID host
Host name of the Oracle Internet Directory server. This field is enabled if you have selected to add new Oracle Internet Directory (OID) Host.
New OID Port
Port number on which Oracle Internet Directory is listening. This field is enabled if you have selected to add new Oracle Internet Directory Host.
Username
Oracle Internet Directory Administrator username
Password
Oracle Internet Directory Administrator password
Use SSL Port
Select this box if the connection to the Oracle Internet Directory Host should use SSL (in which case the port number provided should be the SSL port).
To Disassociate OID Host from a Forms Application:
-
From the Associate/Disassociate OID page, select the Forms application. Click Disassociate.
A confirmation box appears.
-
Click Yes.
The Oracle Internet Directory host is disassociated from the Forms application.
-
Restart the Oracle WebLogic Managed Server and the front-end OHS for the changes to take effect.
To prevent users from being inadvertently disconnected from active forms sessions, ensure you choose to restart Oracle WebLogic Managed Server and the front-end OHS at a convenient time when users are not running any forms sessions.
To re-associate an OID Host with a Forms Application:
Selecting Oracle Internet Directory or Oracle Platform Security as the Forms Identity Store
Oracle Platform Security Services (OPSS) is the set default Forms Identity Store. If the administrator performs the Forms OID association, it will set Oracle Internet Directory as the Forms Identity Store. Users can switch back to Oracle Platform Security Services (OPSS) as Forms Identity Store by un-checking the check box in the Primary Identity Store column for each deployment on Forms Runtime LDAP Associations page.
Registering web-tier instance as OAM partner application and OAM policy configuration
Users have two choices for registering the web-tier instance as the Oracle Access Manager (OAM) partner application and configure the resulting OAM policy.
-
frmconfighelper script
-
OAM console
Note:
The Web-tier and its managing Weblogic Admin Server must be restarted after either of the configuration options.
Using frmconfighelper Script for the Web-tier Partner Application Registration and Configuring Policy
Run the frmconfighelper script to perform partner application registration and subsequently configure the policy on the Oracle Access Manager.
The frmconfighelper script uses the Oracle Access Manager's RREG tool to perform these tasks. All the policy configuration details are included in the Forms OAM policy configuration file, $FMW_HOME/forms/provision/FormsOAMRegRequest.xml.
Users need to:
- Download
RREG.tarlocated on the Oracle Access Manager Server and untar under the Oracle Forms and Reports Home directory (for example, "Oracle_Home"). - Run the
frmconfighelperscript and pass itenable_ssooption.
Using Oracle Access Manager (OAM) console for doing the web-tier partner application registration and configuring policy
Users need to perform these steps:
-
Configure Webgate on the web-tier instance.
Webgate is installed with Oracle HTTP Server, but not configured in the OHS instance. Users can follow the instructions in the Oracle HTTP Server Webgate documentation or run the
frmconfighelperscript and pass theenable_Webgateoption. -
Creating Webgates on the OAM console and configure the resulting policy.
Use OAM console to create a Webgate agent, pass in the OHS host and port information and add the following to the Protected Resource List:
/forms/frmservlet?*oamMode=true*Edit resources in the generated policy using the OAM console and all the following the Excluded List.
/* and /.../* - Copy ObAccessClient.xml and cwallet.sso from the OAM server to the relevant OHS under the directory
DOMAIN_HOME/config/fmwconfig/components/OHS/<ohs instance>/Webgate/config.
Unsupported Client Configurations
For information on the frmconfighelper script, see Oracle Forms Configuration Helper Script.
If you try to use an unsupported client configuration like an "embedded applet" or "embedded jnlp", you may see a Java exception error the first time you attempt to access an SSO-enabled Oracle Forms application . To avoid this, have the administrator disable the HTTPOnly parameter, which is set in OAM.
Note:
Understand that this change, as well as the use of an embedded applet, is not recommended. DisablingHTTPOnly may create a security issue. Also, the use of Microsoft Internet Explorer or Microsoft Edge with IE-mode is no longer supported. This information has been included for backward compatibility reference only.
To achieve this, perform these steps:
- Log in to the OAM Administration Console.
- Select Authentication Schemes and navigate to LDAPScheme.
- Set the
ssoCookieparameter value to disablehttponly. - Click Apply.
Administering Resource Access Descriptors
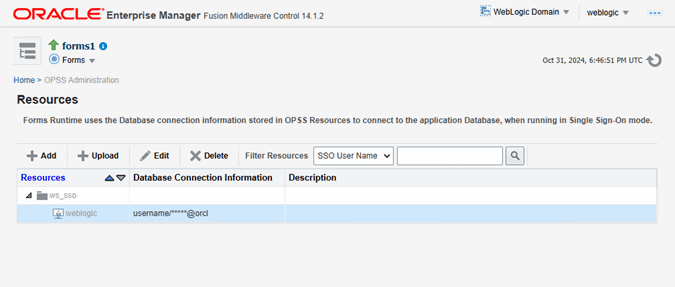
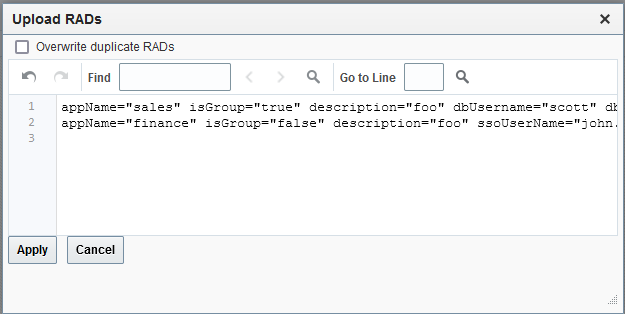
Resource Access Descriptors or RADs are used by Oracle Forms to allow its runtime to connect to an Oracle Database when applications are SSO-enabled. They are managed from the Resource Administration pages of Fusion Middleware Control.
To manage RADs:
Resource Migration Assistant
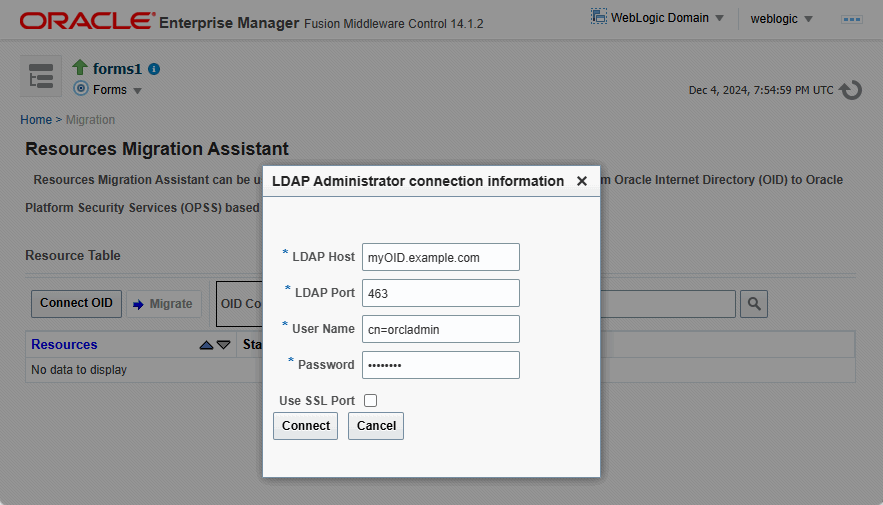
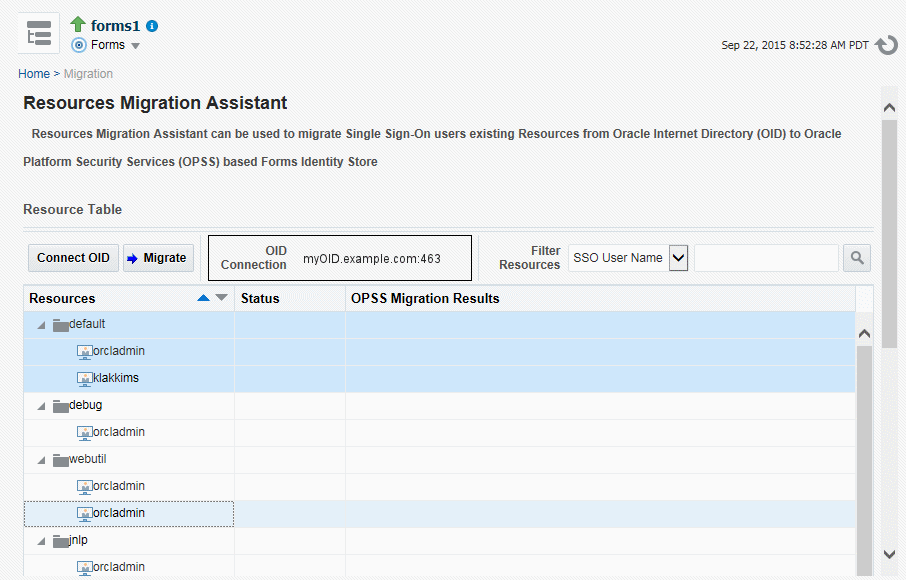
The Resource Migration Assistant page allows for the migration of Oracle Forms RADs stored in Oracle Internet Directory (OID) to be moved to Oracle Platform Security Services (OPSS). This utility is intended for the purpose of migration from OID to OPPS only.
To access the Resource Migration Assistant page, perform the following steps:
