3.7.1.1 Add Payment Preference Details
User can add the payment preference details for the loan account.
To add the preference details:
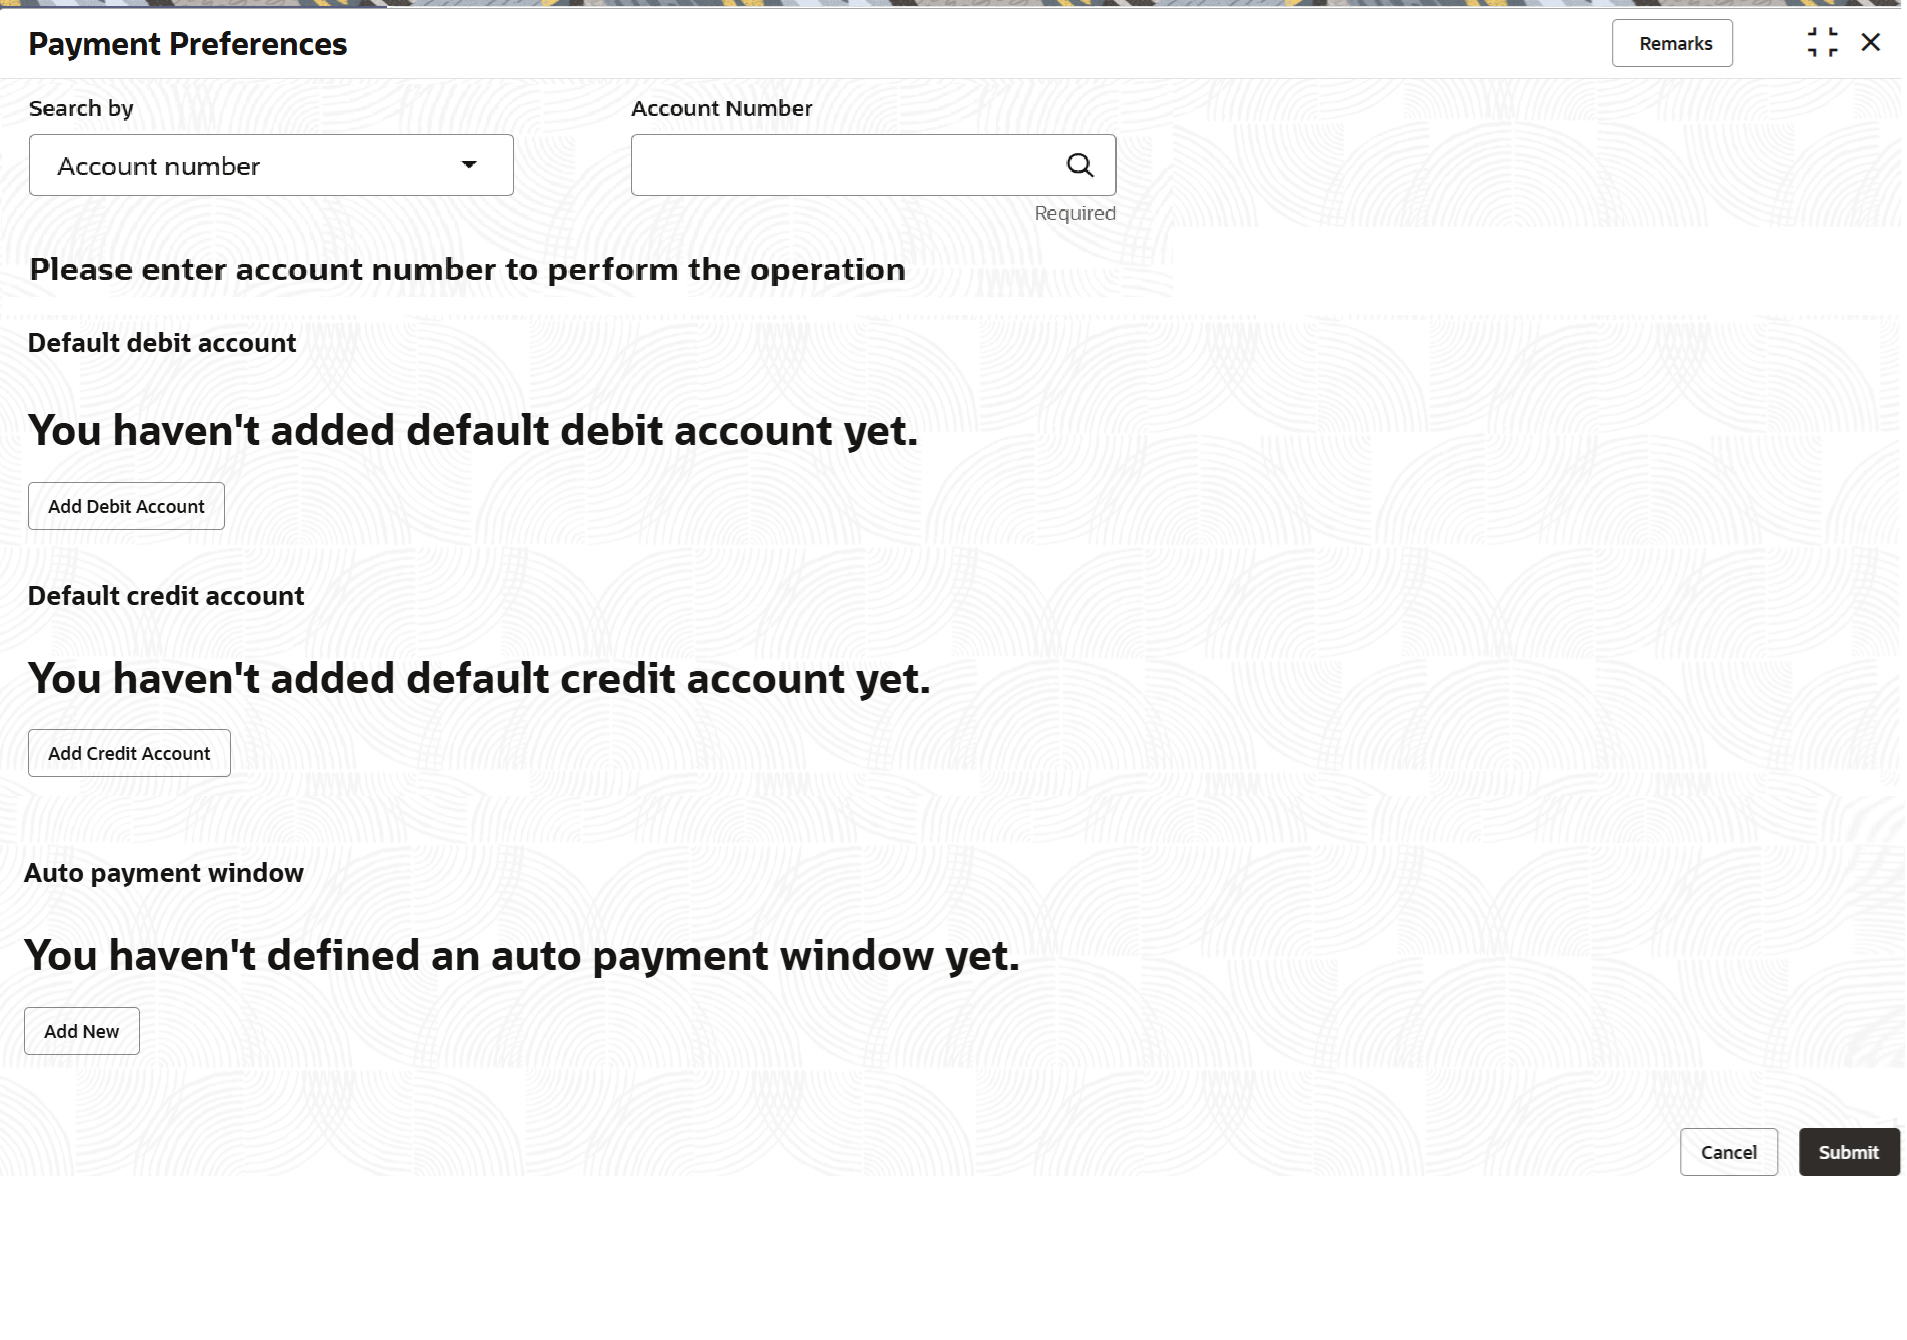
- On the Payment Preferences screen, perform the
search.The sections required for maintaining the payment preferences are displayed.
Figure 3-68 Add Payment Preference Details
- User can add the preferences details as required in the respective sections.
For more information on fields, refer to field description table below:
Table 3-40 Add Payment Preference Details – Field Description
Field Description Search by Users can search for an account number by using any of the available search criteria. The account number is set as the default search option. Users can specify the account number directly in the adjacent field or search for an account number by clicking the Search icon. Users can also search for the specific account number by providing customer ID, account number, or account name.
Other search options available in the Search by field are Customer ID, SSN, Mobile Number, and Email.
A specific customer ID can be searched by providing the customer name or customer ID. If SSN, mobile, or email IDs are chosen to find an account number, the respective IDs have to be input entirely in the adjacent field for the system to display the account number. For a given search criteria, multiple account numbers may be linked.
For example, two or more account numbers can be linked to a single mobile number. In such cases, the system displays all the account number matches and the user can select the relevant account number on which to perform a servicing operation.Note:
The label of the field adjacent to the Search by field changes dynamically. For example, if the Account number is chosen as the search criteria, the label of the adjacent field is displayed as the Account Number. If SSN is chosen as the search criteria, then the adjacent field would display the label as SSN.Default debit account This section displays a message that default debit account is not added along with the Add Debit Account button. For more information refer Add Debit Account. Default credit account This section displays a message that default credit account is not added along with the Add Credit Account button. For more information refer Add Credit Account. Auto payment window This section displays a message that an auto payment is defined for the account along with the Add New button. For more information refer Add Auto Payment. - Add Debit Account
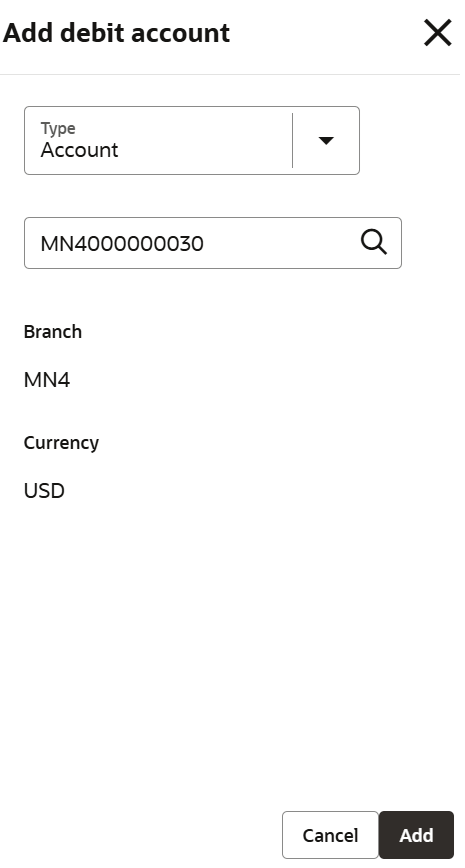
To add debit account:
- Click Add Debit Account from the
Default debit account section.The Add debit account section is displayed.
- In the Add debit account section, maintain the
required details. For more information on fields, refer to field
description table below:
Table 3-41 Add debit account - Field Description
Field Description Type Select the type of debit account. The options are: - Account
- External Account
Account Number Select the account number from the list. Note:
This field is displayed, if you select Account option from the Type field.Branch Displays the branch code for the selected account number. Currency Displays the account currency. Account Number Specify the external account number. Note:
This field is displayed, if you select the External Account from the Type field.Customer Name Specify the customer name of the external account. Note:
This field is displayed, if you select the External Account from the Type field.Routing Number Select the external account's routing number. For more information, refer Routing Number. Note:
This field is displayed, if you select the External Account from the Type field.Account Type Select the type for the external account. Note:
This field is displayed, if you select the External Account from the Type field.Standard Entry Class Code Select the appropriate code for the standard entry class. The options are: - Internet-Initiated/Mobile Entries
- Telephone Initiated
- Corporate Credit or Debit
- Pre-arranged Payment or Deposit
Note:
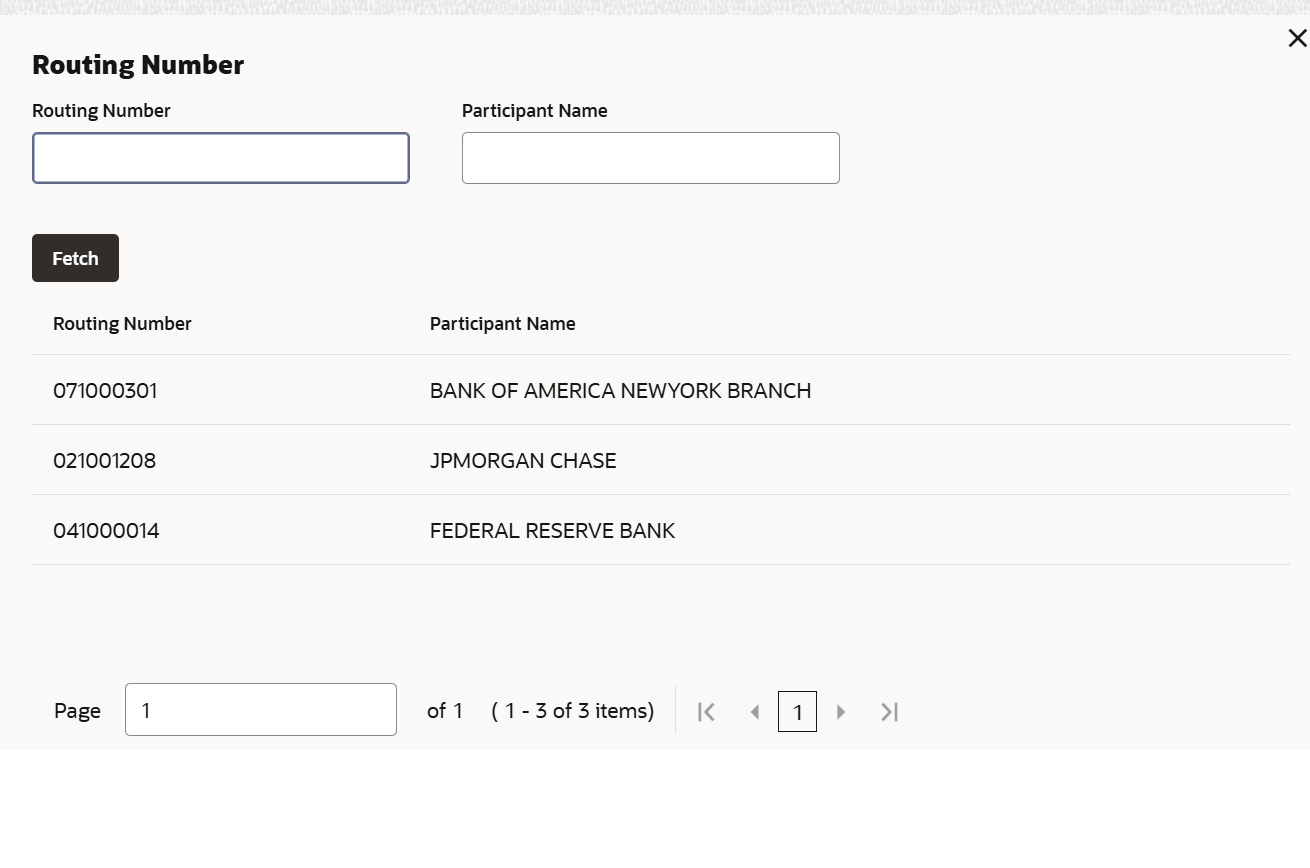
This field is displayed, if you select the External Account from the Type field.To add routing number:- Click the
 icon from the Routing Number
field.
The Routing Number section is displayed.
- User can specify the details in the Routing Number or Participant Name fields.
- Click
Fetch.
The search details are displayed in the tabular format. User can select
- Click Add.
- Add Credit Account
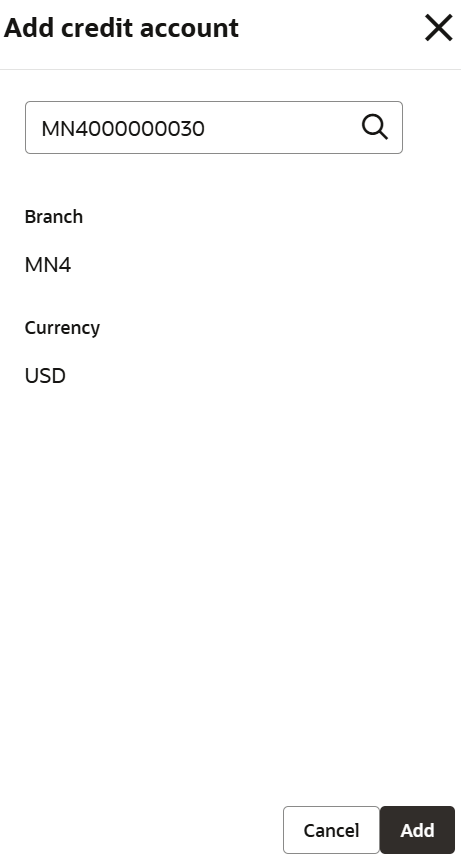
To add credit account:
- Click Add credit Account from the
Default credit account section.The Add credit account section is displayed.
- In the Add credit account section, maintain the
required details. For more information on fields, refer to field
description table below:
Table 3-42 Add credit account – Field Description
Field Description Select Account Click the 
icon and select the credit account number or specify the account number.Branch Displays the branch code for the selected account number. Currency Displays the account currency. - Click Add.
- Auto Payment Window
To add new auto payment:
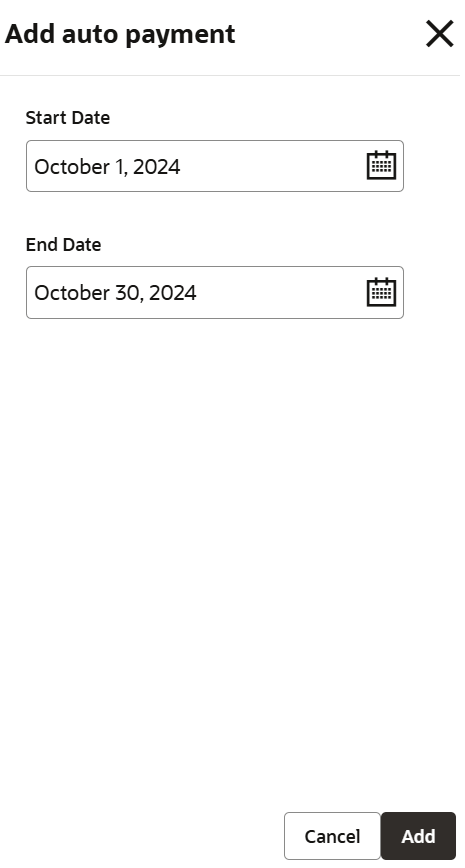
- Click Add New from the Auto payment
window section.The Add auto payment section is displayed.
- In the Add auto payment section, maintain the
required details. For more information on fields, refer to field
description table below:
Table 3-43 Add Auto Payment – Field Description
Field Description Start Date Select the start date for the auto payment. End Date Select the end date for the auto payment. - Click Add.
Parent topic: Payment Preferences
