- Payments Weblogic Configuration
- Create Resources on Weblogic
- Resource Administration
- Create Data Source
- Non-XA Enabled Data Source
Non-XA Enabled Data Source
This topic explains the systematic instructions to create the Non-XA enabled data source in the Weblogic application server.
- Start the Administrative Console of the WebLogic application server. Enter the
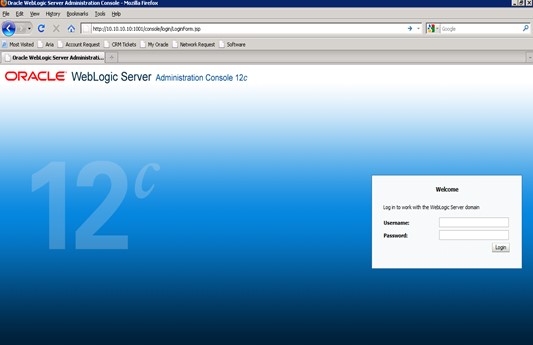
Oracle WebLogic Admin Console URL in the address bar in an internet browser. Oracle Weblogic Server - Welcome screen is displayed.
Figure 8-14 Oracle Weblogic Server - Welcome
- Specify the WebLogic Administrator Username and Password, click Log
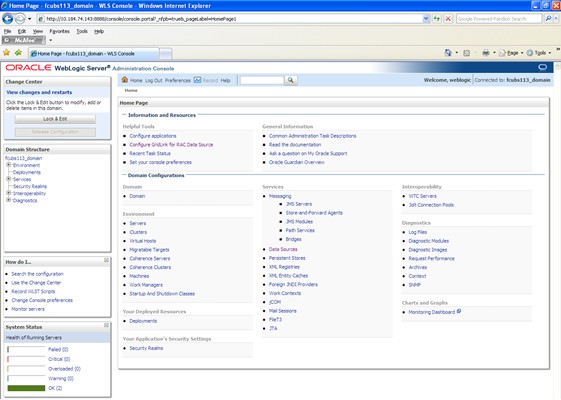
In.Oracle Weblogic Server - Home Page screen is displayed.
Figure 8-15 Oracle Weblogic Server - Home Page
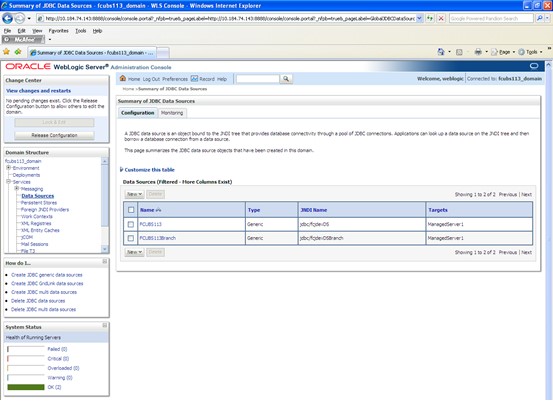
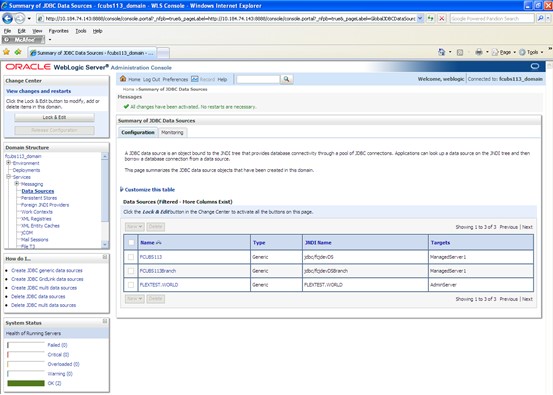
- Go to Data Sources.Summary of JDBC Data Sources screen is displayed.
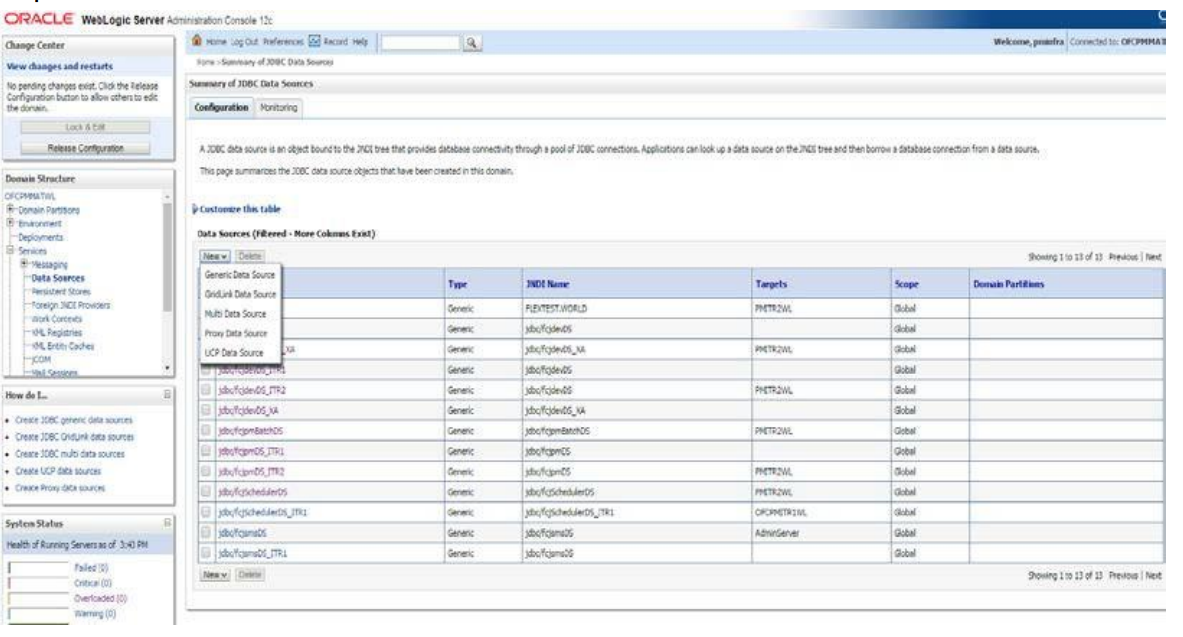
- On the left pane, under Domain Structure, expand Services and then Data Sources under it. Click the Lock & Edit button.Summary of JDBC Data Sources - Configuration screen is displayed.
Figure 8-17 Summary of JDBC Data Sources - Configuration
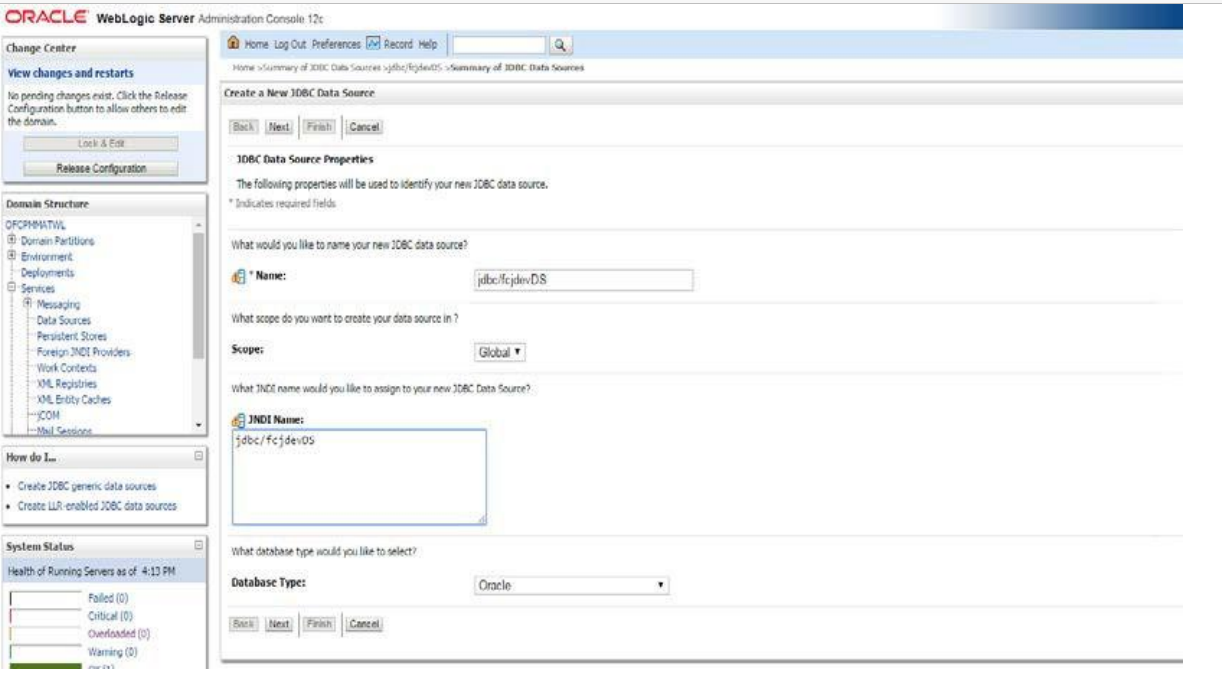
- To create a new data source, click New and select Generic Data Source from the drop-down.Create a New JDBC Data Source screen is displayed.
- On the Create a New JDBC Data Source screen, specify the fields.For more information on fields, refer to the field description table.
Table 8-3 Create a New JDBC Data Source
Field Description JDBC Datasource Name Name of the Datasource. JNDI Name JNDI for lookup. Database Type Oracle - Click Next.Create a New JDBC Data Source - JDBC Data Source Properties screen is displayed.
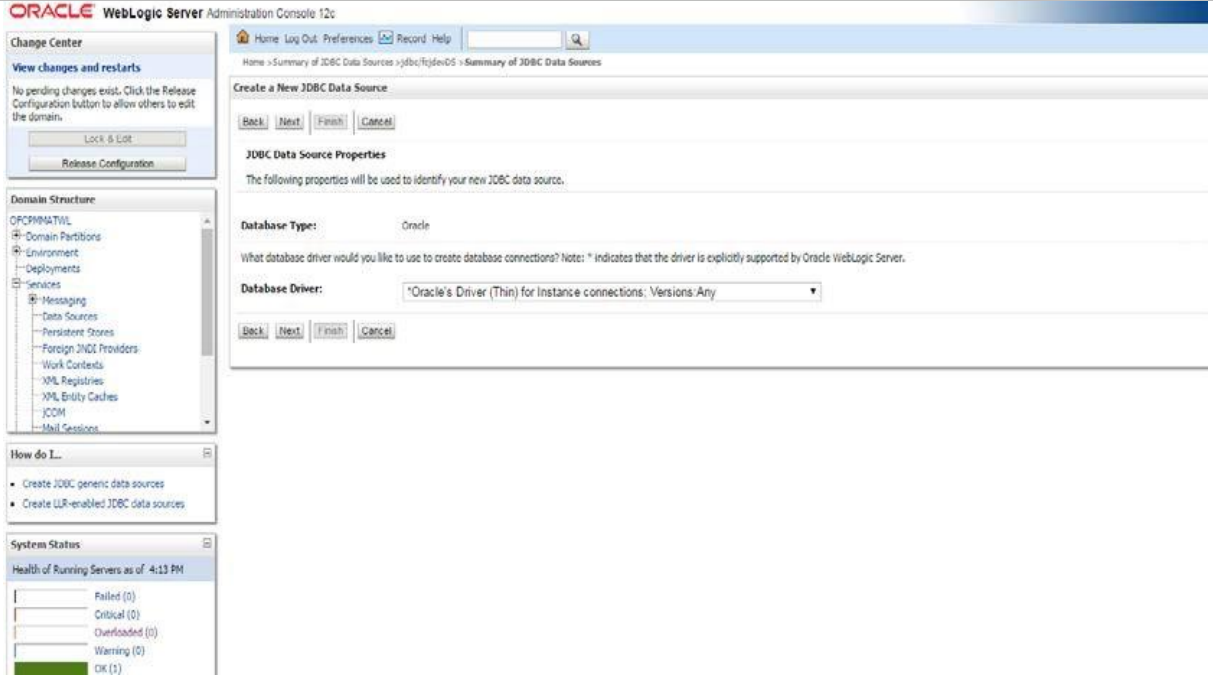
Figure 8-19 Create a New JDBC Data Source - JDBC Data Source Properties
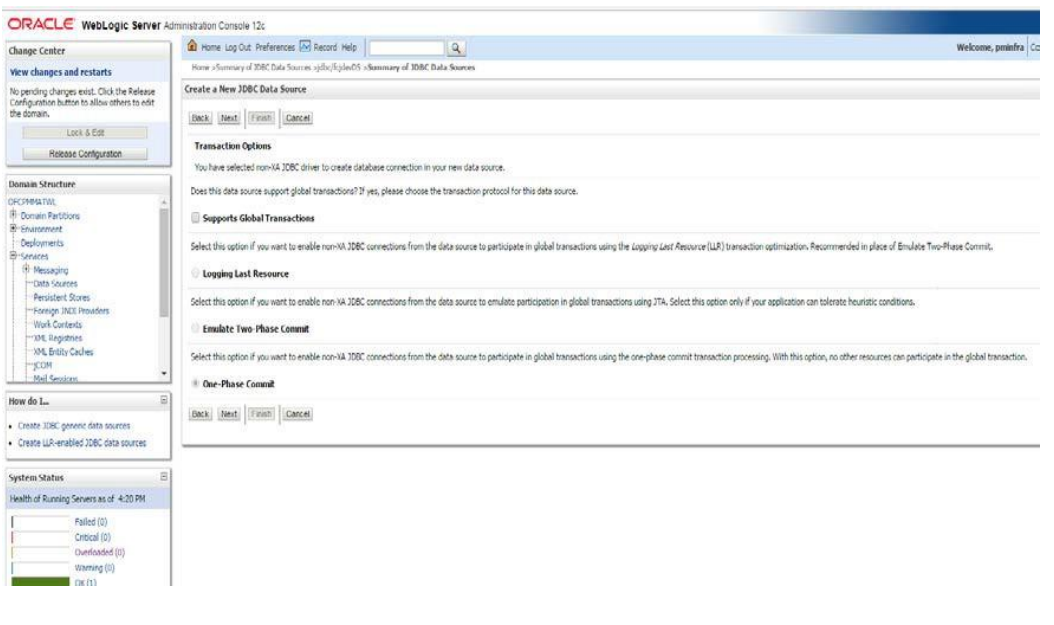
- Select the database driver as shown in the figure. For Payments Online
datasource, check Support Global Transactions and Select
Logging Last Resource.Create a New JDBC Data Source - Transaction Options screen is displayed.
Figure 8-20 Create a New JDBC Data Source - Transaction Options
- For other datasources, click Next. The following screen
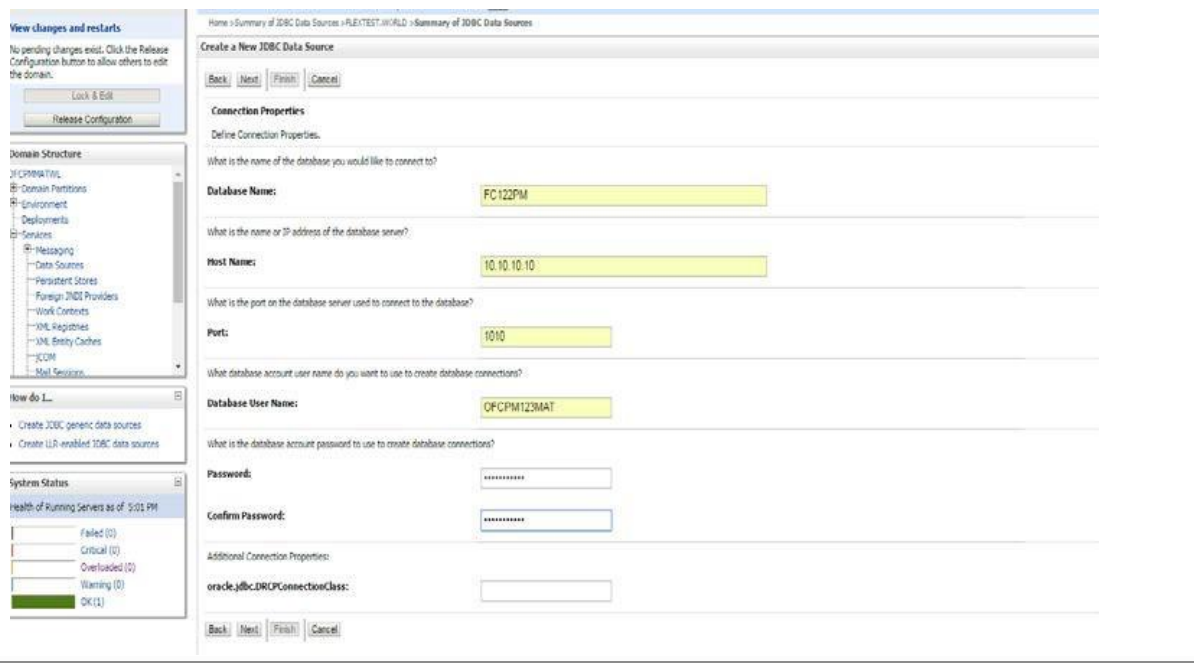
is displayed: Create a New JDBC Data Source - Connection Properties screen is displayed.
Figure 8-21 Create a New JDBC Data Source - Connection Properties
- The Create a New JDBC Data Source - Connection Properties defines the connection properties.
- Specify the Database Name, Host Name, Port of the database server to connect, Database User Name, Password, and Confirm the password.
- Click Next.Create a New JDBC Data Source - Test Database Connection screen is displayed.
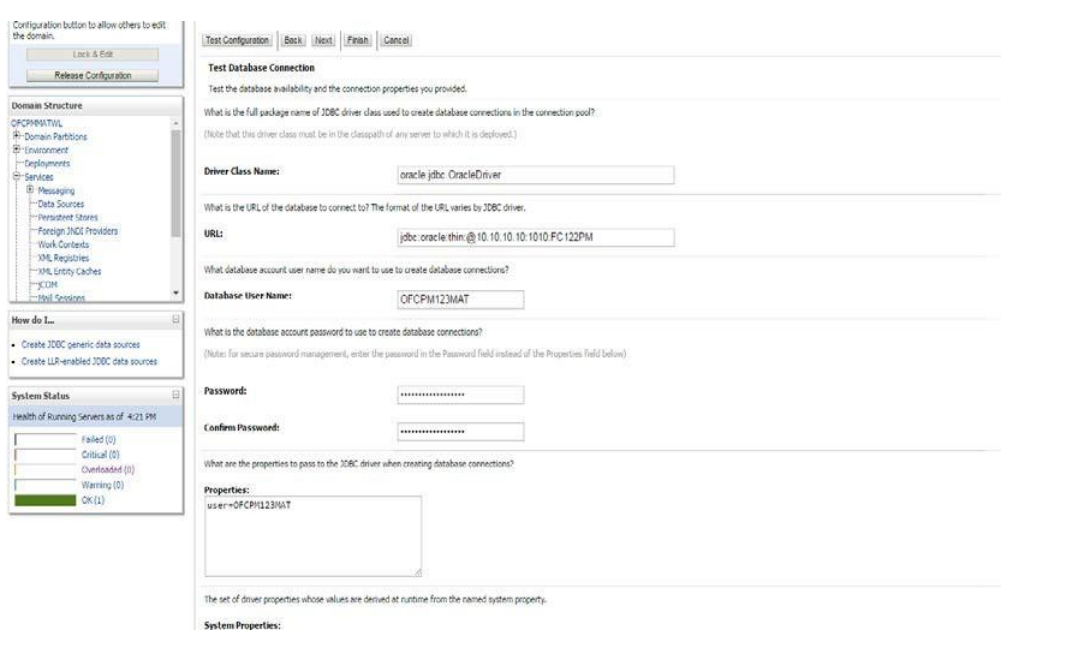
Figure 8-22 Create a New JDBC Data Source - Test Database Connection
- Specify the Driver Class Name (Eg: oracle.jdbc.OracleDriver).
- Specify the URL as jdbc:oracle:oci:@10.10.10.10:1010:<INSTANCE_NAME> from jdbc:oracle:thin:@10.10.10.10:1001<INSTANCE_NAME>.
- Specify the Database Username (Eg: testdb) and password.
- Confirm the password.
- Click on Test Configuration button.
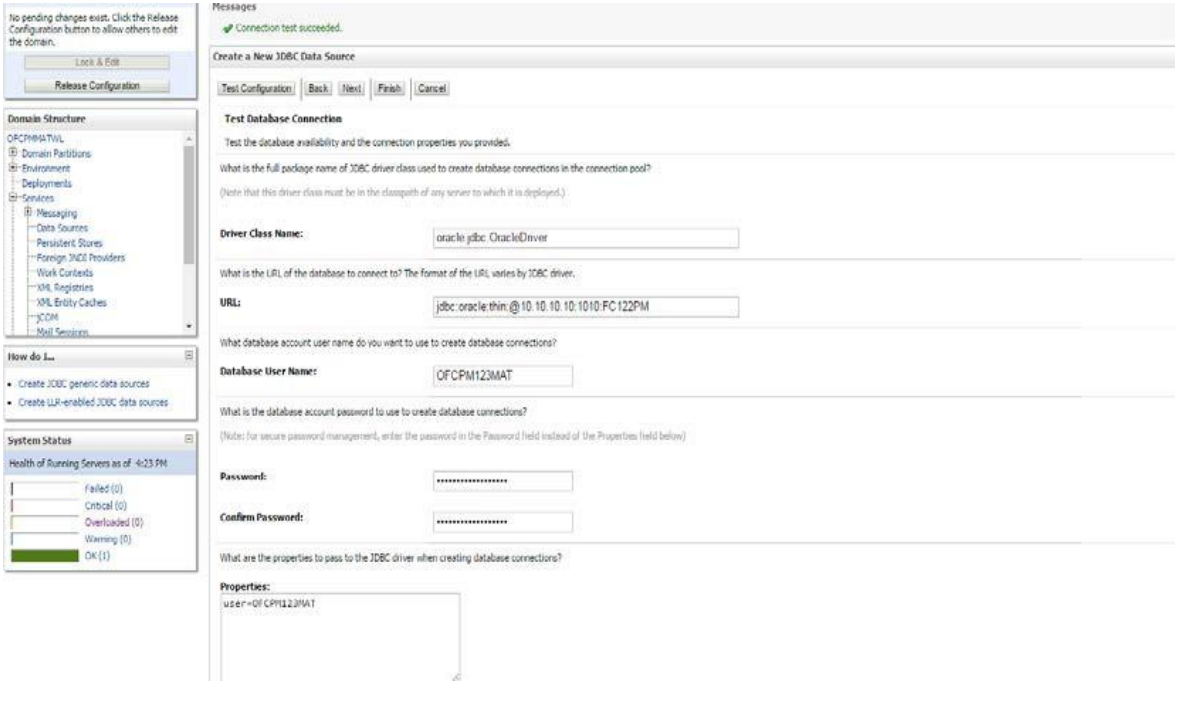
- If the connection is established successfully, the message Connection test succeeded is displayed.Create a New JDBC Data Source - Messages screen is displayed.
Figure 8-23 Create a New JDBC Data Source - Messages
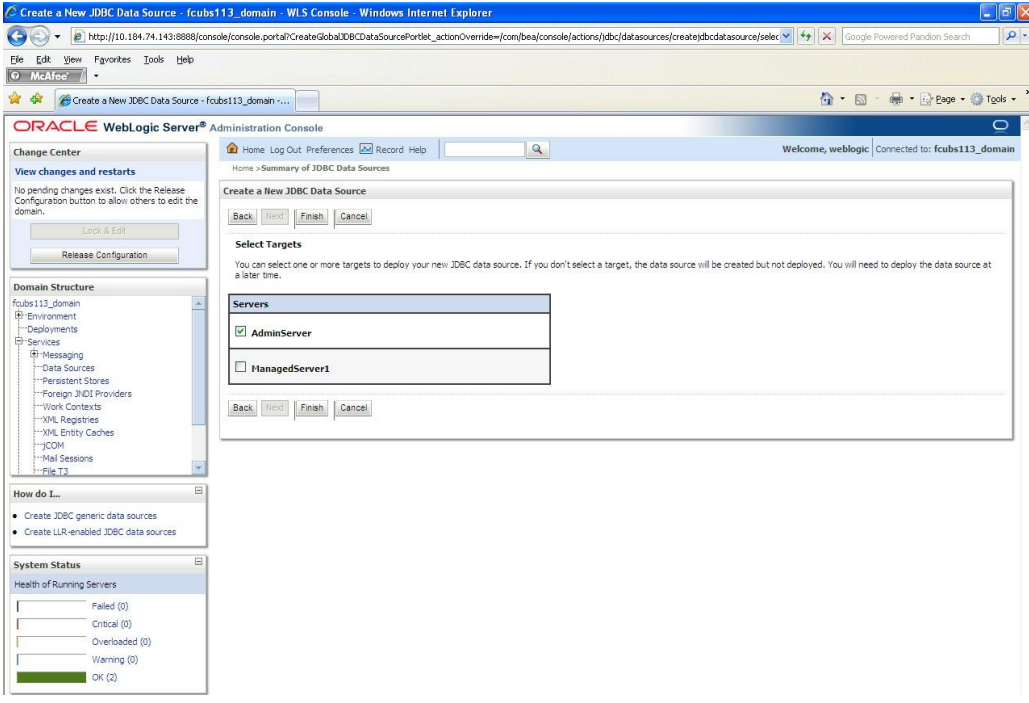
- Click Next.Create a New JDBC Data Source - Select Targets screen is displayed.
Figure 8-24 Create a New JDBC Data Source - Select Targets
- Check the boxes against the required servers and click
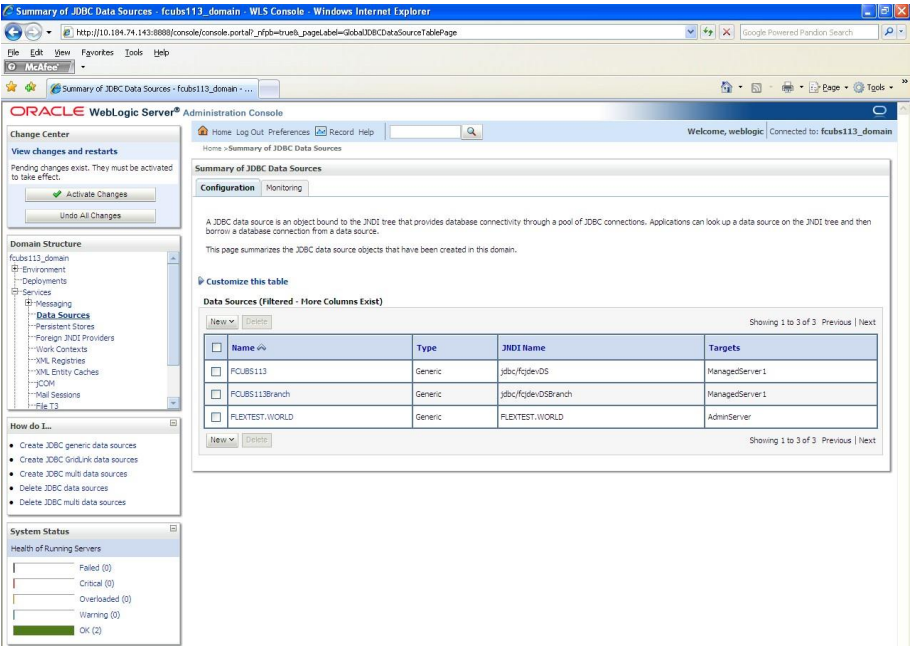
Finish.Summary of JDBC Data Sources - New Data Source screen is displayed.
Figure 8-25 Summary of JDBC Data Sources - New Data Source
- Click the Activate Changes button on the left pane. The message All the changes have been activated. No restarts are necessary is displayed.Summary of JDBC Data Sources - Activate Changes Message screen is displayed.
Figure 8-26 Summary of JDBC Data Sources - Activate Changes Message
- The FCUBSDS datasource is created.
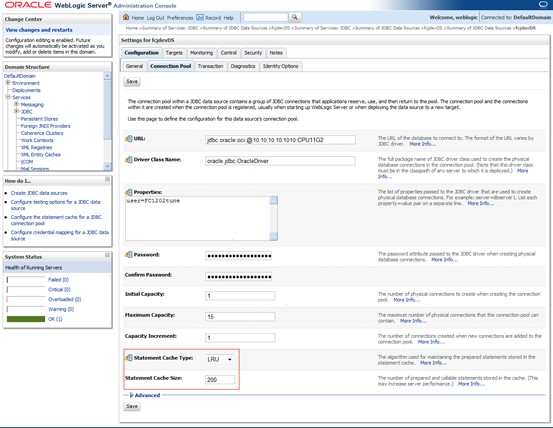
- Click the Datasource, and then click on the
Connection Pool tab.Settings for fcjdevDS - Connection Pool screen is displayed.
Figure 8-27 Settings for fcjdevDS - Connection Pool
- On the Settings for fcjdevDS - Connection Pool screen, select the statement cache type as LRU from the drop-down list.
- Specify the statement cache size as 200.
- Click on Save button.
- Refer to Resources_To_ Be_Created.doc for the list of
Non-XA data sources to be created.Note the following:
- You need to create another data source for Oracle FCpayments with the JNDI name ‘<Non-XA FCUBS HOST JNDI name>_ASYNC’ for the batch process. For example, if the Oracle FCUBS HOST Non-XA data source JNDI name is jdbc/fcjdevDS, then you need to create another data source for FCUBS with the JNDI name jdbc/fcjdevDS_ASYNC.
- While creating a branch using the Branch Parameters Maintenance (STDBRANC) screen, if you have created a data source for the branch, then you need to create a corresponding ASYNC data source with the JNDI name <Non-XA FCpayments BRANCH JNDI name>_ASYNC.
Parent topic: Create Data Source
