1.2.1.1 Data Segment

This topic describes the systematic instructions of data segment.

A data segment, as the name suggests is an individual block of data. Bringing in data segments allows to break down a huge process into smaller units, which makes easier to update, maintain and process. Business Process will consist of such several data segments that makes up the stage.

To configure the Business Process Definition:

  1. Select the stage where the data segments will be added
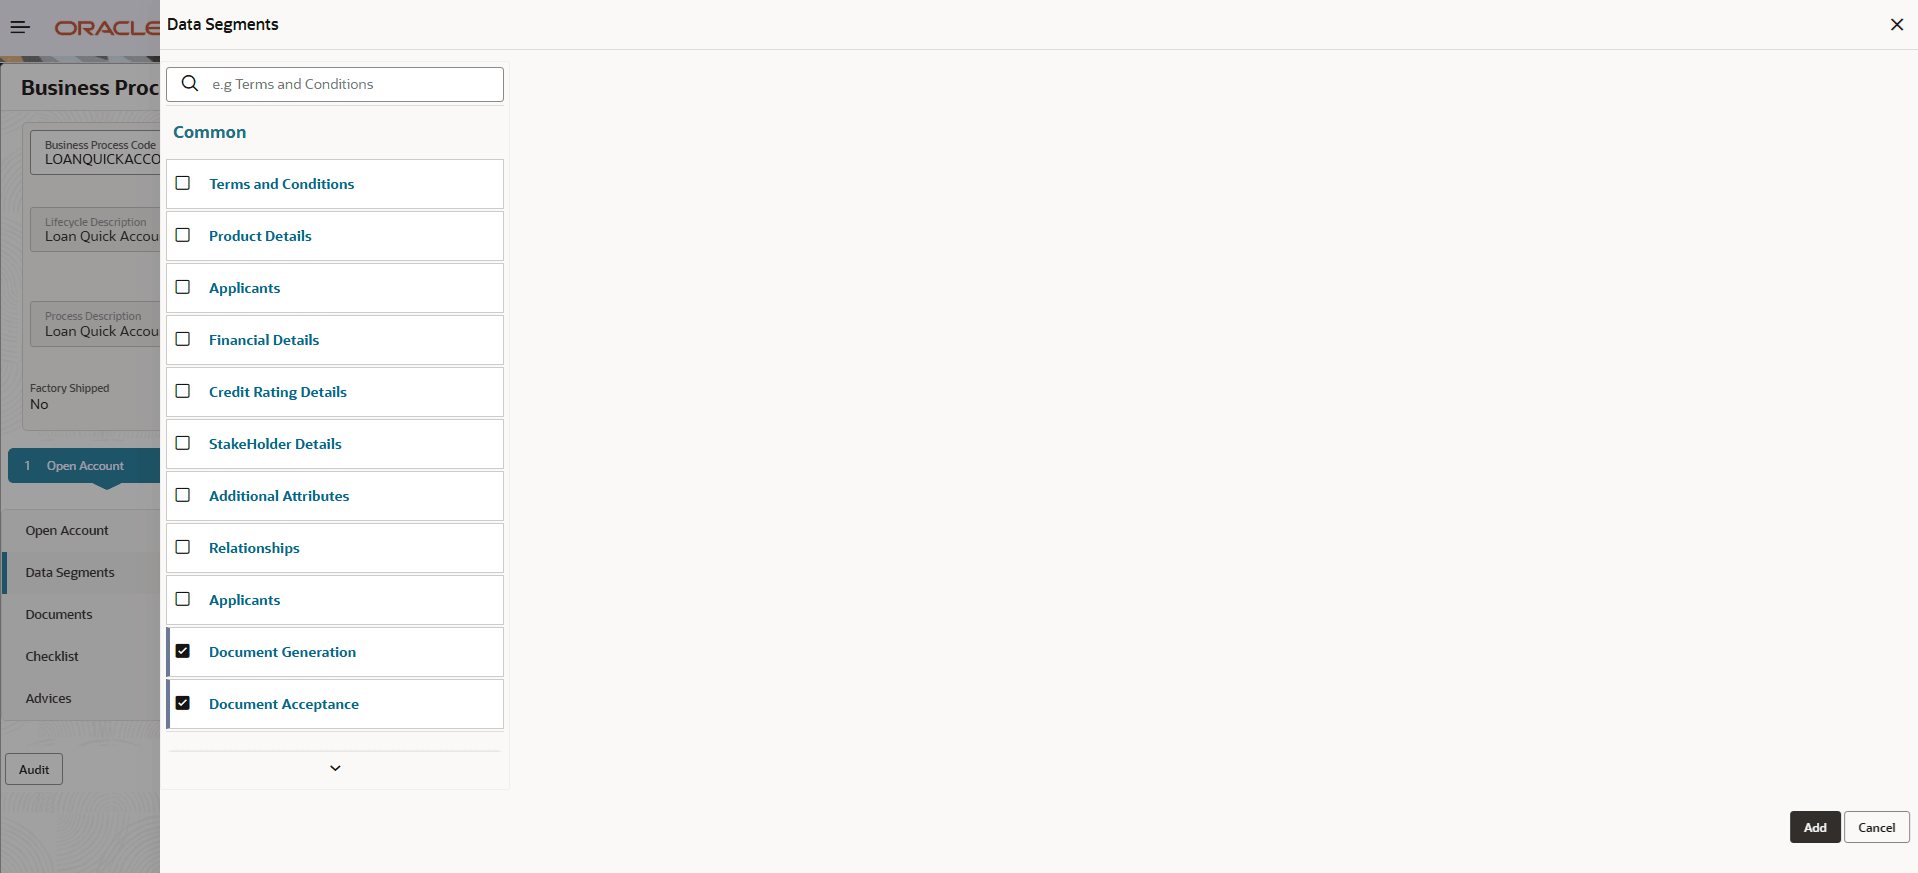
  2. Click Add to add data segments in the respective stage.
    The Data Segments screen displays.
  3. Click Add to add the selected data segments.

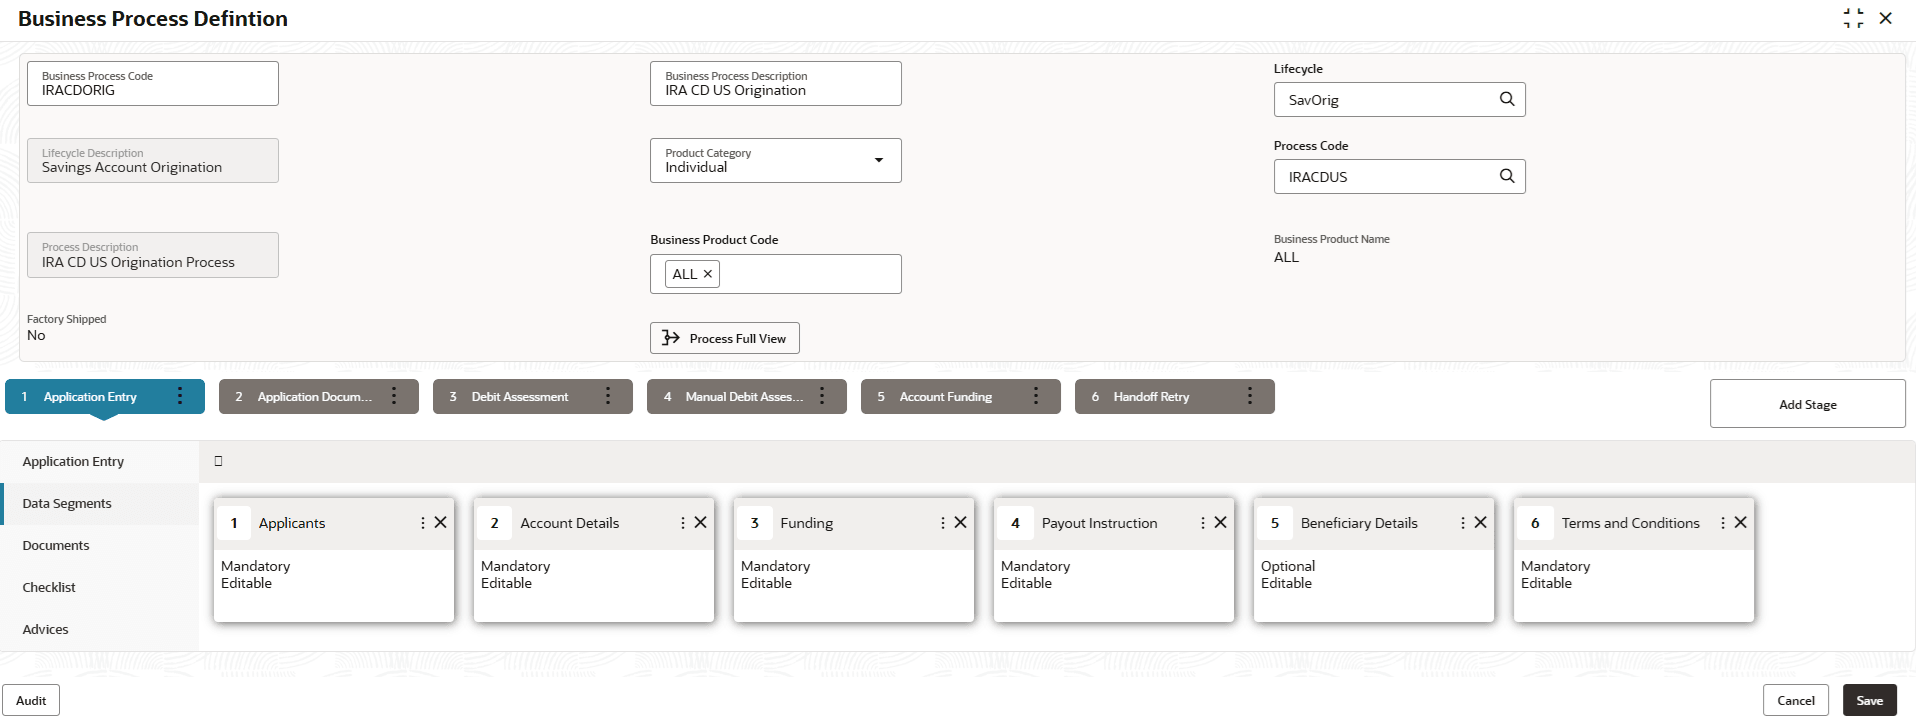
    The Create Business Process screen is displayed with added data segment.

    Figure 1-17 Create Business Process with added Data Segments


    The system allows to re-sequence the data segment by dragging and dropping over the specific data segment.

  4. Click Edit on the added data segment tile.

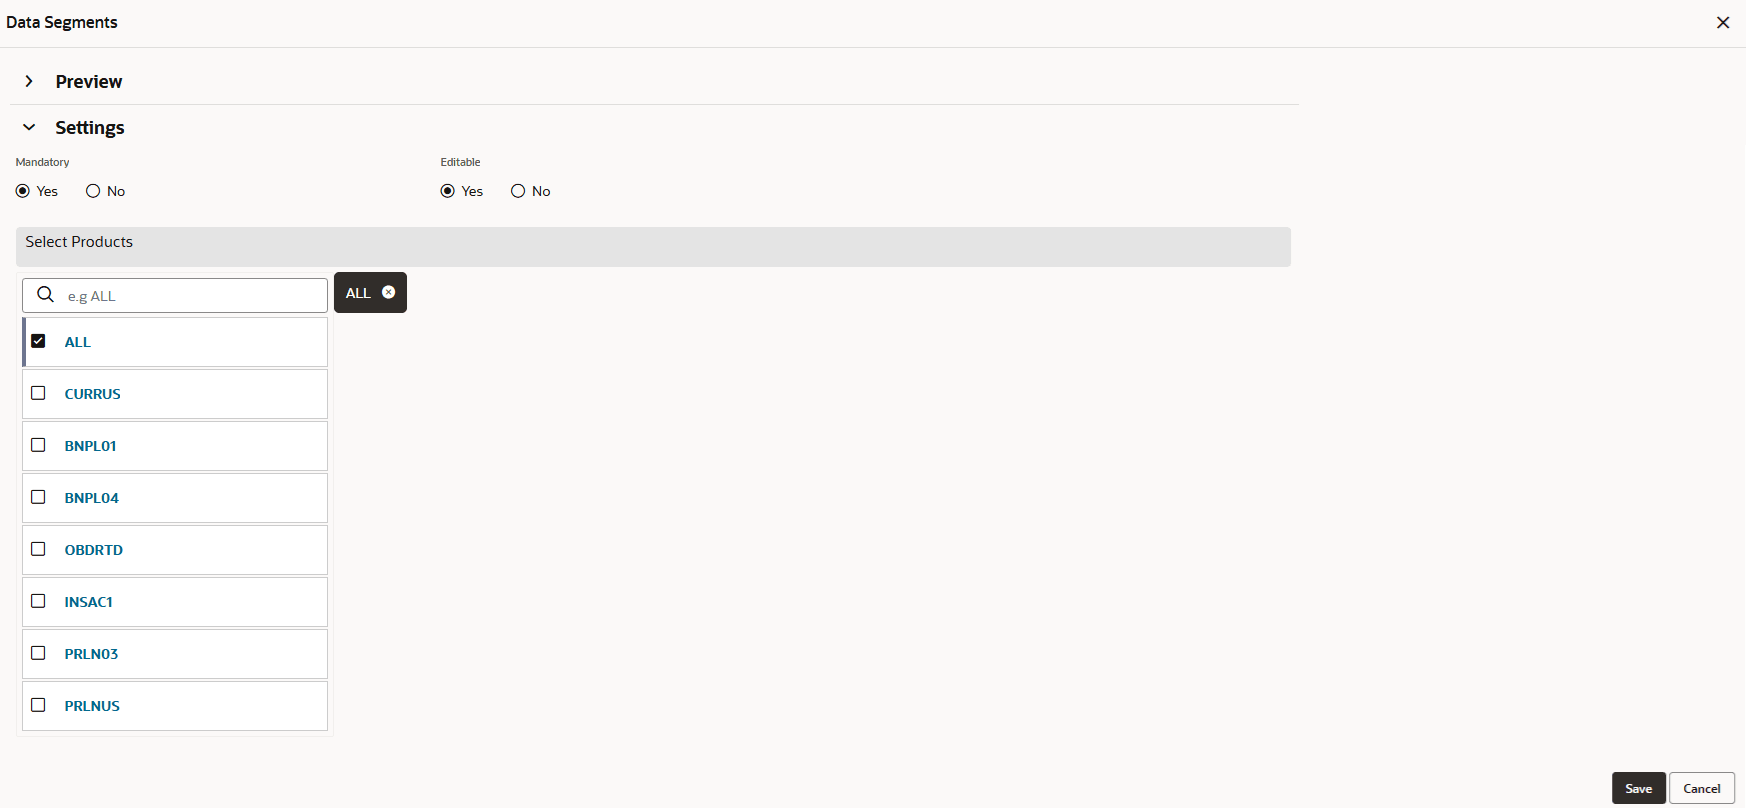
    The edit properties screen is displayed.

    Figure 1-18 Edit Data Segment Properties


    For more information, refer to the fields description table below.

    Table 1-16 Edit Data Segment Properties - Field Description

    Field Description
    Preview In this section, user can define the appearance of the selected data segment. The fields appears based on the Process code selected.
    Settings In this section, the user can set the data segment as Mandatory and editable.
    Mandatory Select whether the data segment is Mandatory. The options are:
    • Yes
    • No
    Editable Select whether the data segment is editable. The options are:
    • Yes
    • No
    Select Products Select the product which the data segment properties applied. Alternatively, select All, in such case these properties is applied to all the business products that are associated with the stage selected.
  5. Click Save.
    The properties are saved successfully.
  6. Drag and Drop the data segment tile to arrange the sequence order. Based on position set, it will appears in the respective stages.
  7. Click Save.
    The changes are saved successfully.