4.1.1.2 Bulk File Upload

This topic describes about the Bulk File Upload in Oracle Banking Digital Experience.

To create bulk expected cash flow transaction records:
  1. Perform the following navigation to access the Create Expected Cash Flow screen.
    From the Dashboard, click Toggle Menu. Under Toggle Menu, click Cash Management . Under Cash Management , click Cash Flow. Under Cash Flow , click Create Expected Cash Flow.
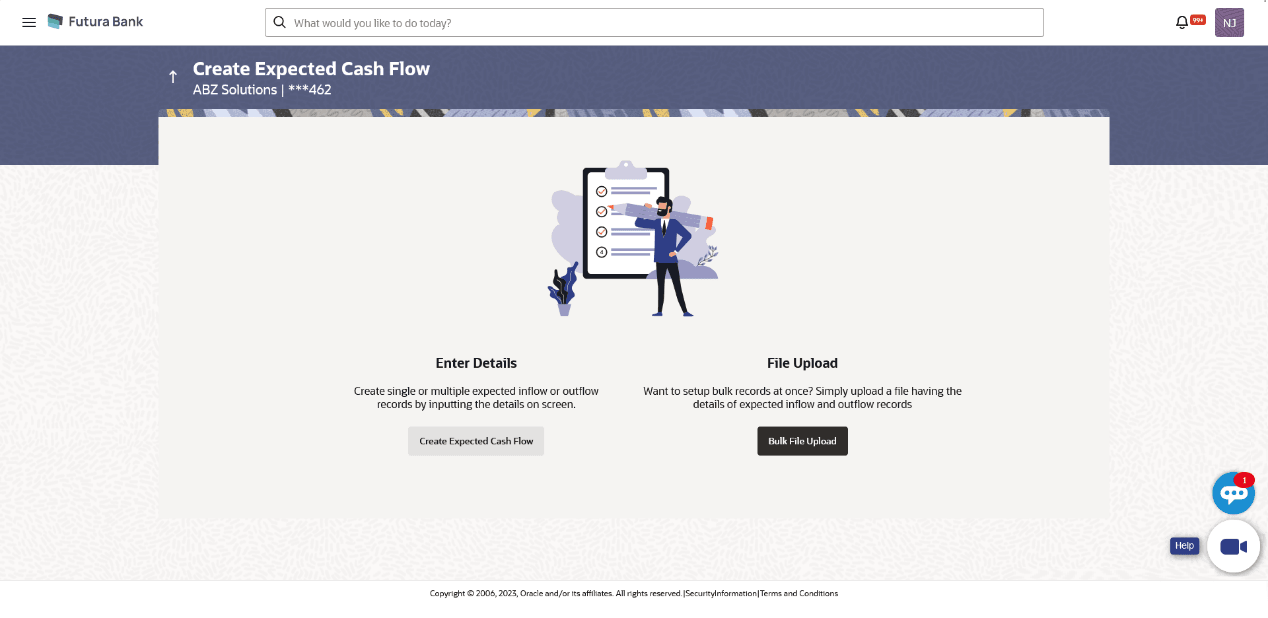
    The Create Expected Cash Flow screen displays.

    Figure 4-8 Create Expected Cash Flow


    For more information on fields, refer to the field description table below:

    Table 4-4 Create Expected Cash Flow - Field and Description

    Field Description
    Party Name & ID Displays the name and ID of the logged-in corporate party
    Enter Details Indicates the option to create single or recurring expected cash flow records by manual entry of cash flow details.
    File Upload Indicates the option to create bulk expected cash flow records through file upload.
  2. In the Create Expected Cash Flow screen, click Bulk File Upload.
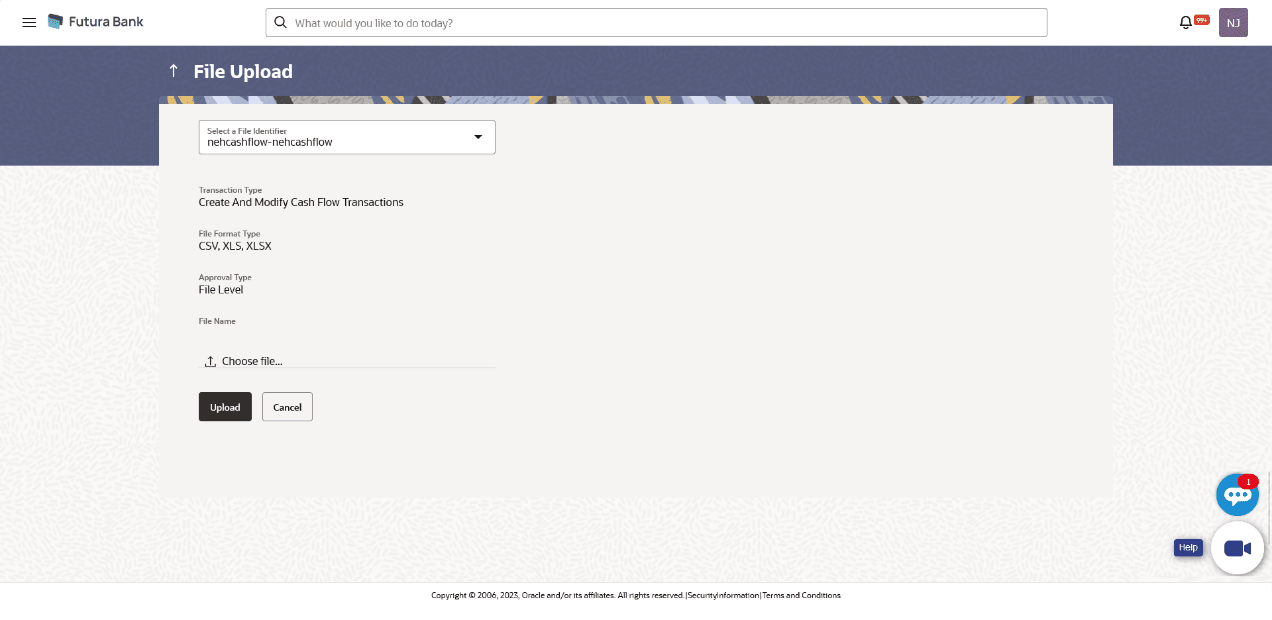
    The File Upload screen displays.

    For more information on fields, refer to the field description table below:

    Table 4-5 File Upload - Field and Description

    Field Description
    File Identifier Select the identifier associated with expected cash flow transactions.
    Transaction Type Displays the type of transaction of the bulk expected cash flow records. Information is displayed based on the parameters defined for the file identifier selected.
    File Format Type Displays the file formats that are allowed. Information is displayed based on the parameters defined for the file identifier selected. In general, the file formats supported are .xls, .xlsx, .csv, and .xml.
    Approval Type

    Displays the approval level of the file.

    The approval could be:

    • Record Level: In record type approval, the approver can approve some records (in a file), and reject others. Only approved records are processed.
    • File Level: In a file type approval, the approver accepts or rejects the entire file, and all records are either processed or rejected.

    Information is displayed based on the parameters defined for the file identifier selected.

    File Name Click Uploadto select and upload the file with the expected cash flow records data. For information on the file format, refer the Bulk File Format section below.

Bulk File Format

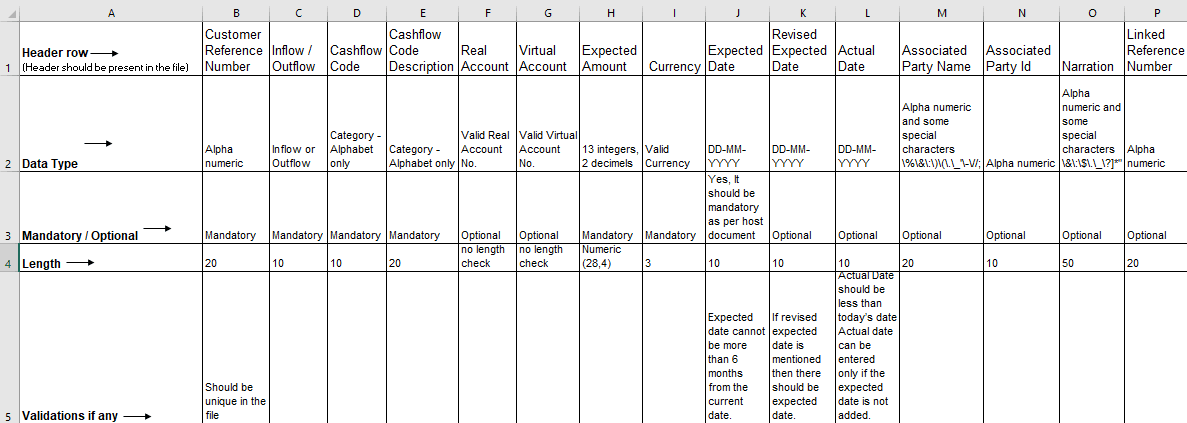
Data Format of an XLS file to upload:

Bulk File Format

Note:

Refer this file for the sequence:

While uploading a .XLSX / .XLS file, if you do not have the required data for a particular cell, and need to leave it blank, then ensure that the particular empty cell has been formatted to the data type of the expected data of that cell. For example, a cell that is supposed to hold textual content, such as name or description, should be formatted to 'Text'. Similarly, a cell that is supposed to hold a number, should be formatted to 'Number'.

For more information on fields, refer to the field description table below:

The following fields must be present in the file for bulk upload.

Table 4-6 Bulk File Format - Field and Description

Field Description
Customer Reference Number Enter the customer’s own reference number for the cash flow.
Inflow/Outflow Enter whether the cash flow is an inflow or an outflow.
Cash Flow Code Enter the code for the cash flow transaction.
Cash Flow Code Description Enter a description for the cash flow transaction.
Account Enter the account number of the corporate party for the expected cash flow transaction. The dropdown list either displays the real account numbers or the International Bank Account Number (IBAN), based on the configuration set by the bank.
Virtual Account Enter the virtual account of the corporate party for the expected cash flow transaction.
Expected Amount Enter the amount of the expected cash flow transaction.
Currency Enter the currency for the expected cash flow transaction.
Expected Date Enter the expected date of the cash flow transaction.
Revised Expected Date Enter the revised date of the cash flow transaction.
Actual Date Enter the actual date of the transaction.
Associated Party Name Enter the name of the counter party associated with the transaction.
Associated Party ID Enter the party ID of the counter party associated with the transaction.
Narration Enter the narration of the expected cash flow transaction.
Linked Reference Number Enter the linked reference number of the transaction.

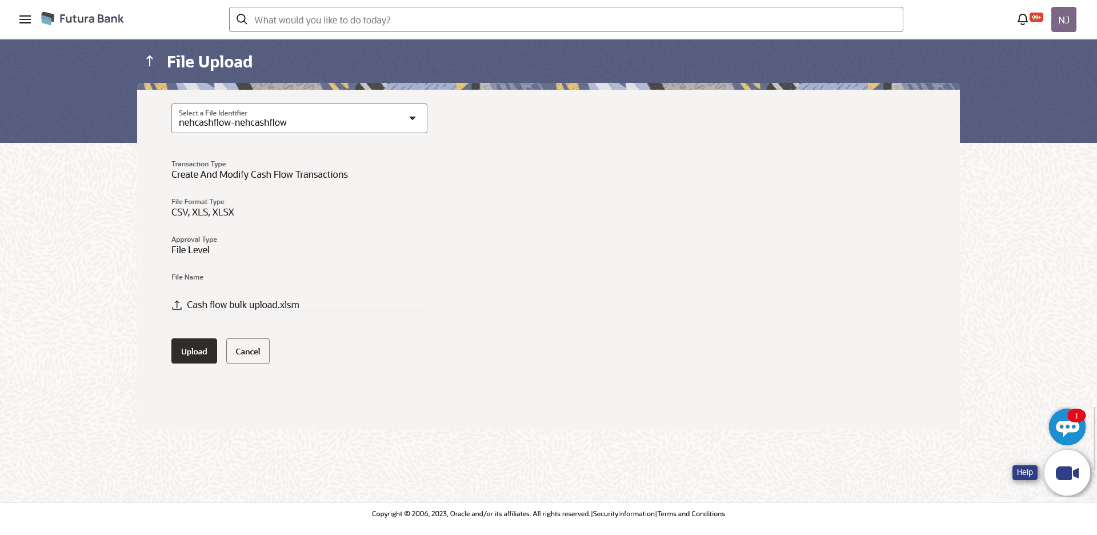
Figure 4-10 File Upload - Post Uploading File


  1. Perform the one of the following actions:
    Once you upload the required file.
    • Click Upload.

      A Confirmation message appears with the reference number and status of the transaction.

    • Click Cancel to cancel the creation of bulk expected cash flow records.
  2. In the Confirmation screen,
    • Click the File Reference ID link to view the file upload details.
    • For more information, refer the Uploaded Files Inquiry section in User Manual Oracle Banking Digital Experience Corporate Bulk File Upload – Supply Chain Finance.
    • Click Go To Dashboard to go to the main dashboard.