11.3.3 Inbound Agreement Inquiry
This topic provides the systematic instructions to users for listing the existing inbound agreements.
To view the inbound agreements:
- Perform anyone of the following navigation to access the Inbound Agreement
Inquiry screen.
- From the Dashboard, click Toggle menu, click
Menu, then click Payments .
Under Payments , then click More Actions, and then select MT101 Instructions, then click Inbound Agreement Inquiry.
- From the Search bar, type MT101 Instructions - Inbound Agreement Inquiryand press Enter.
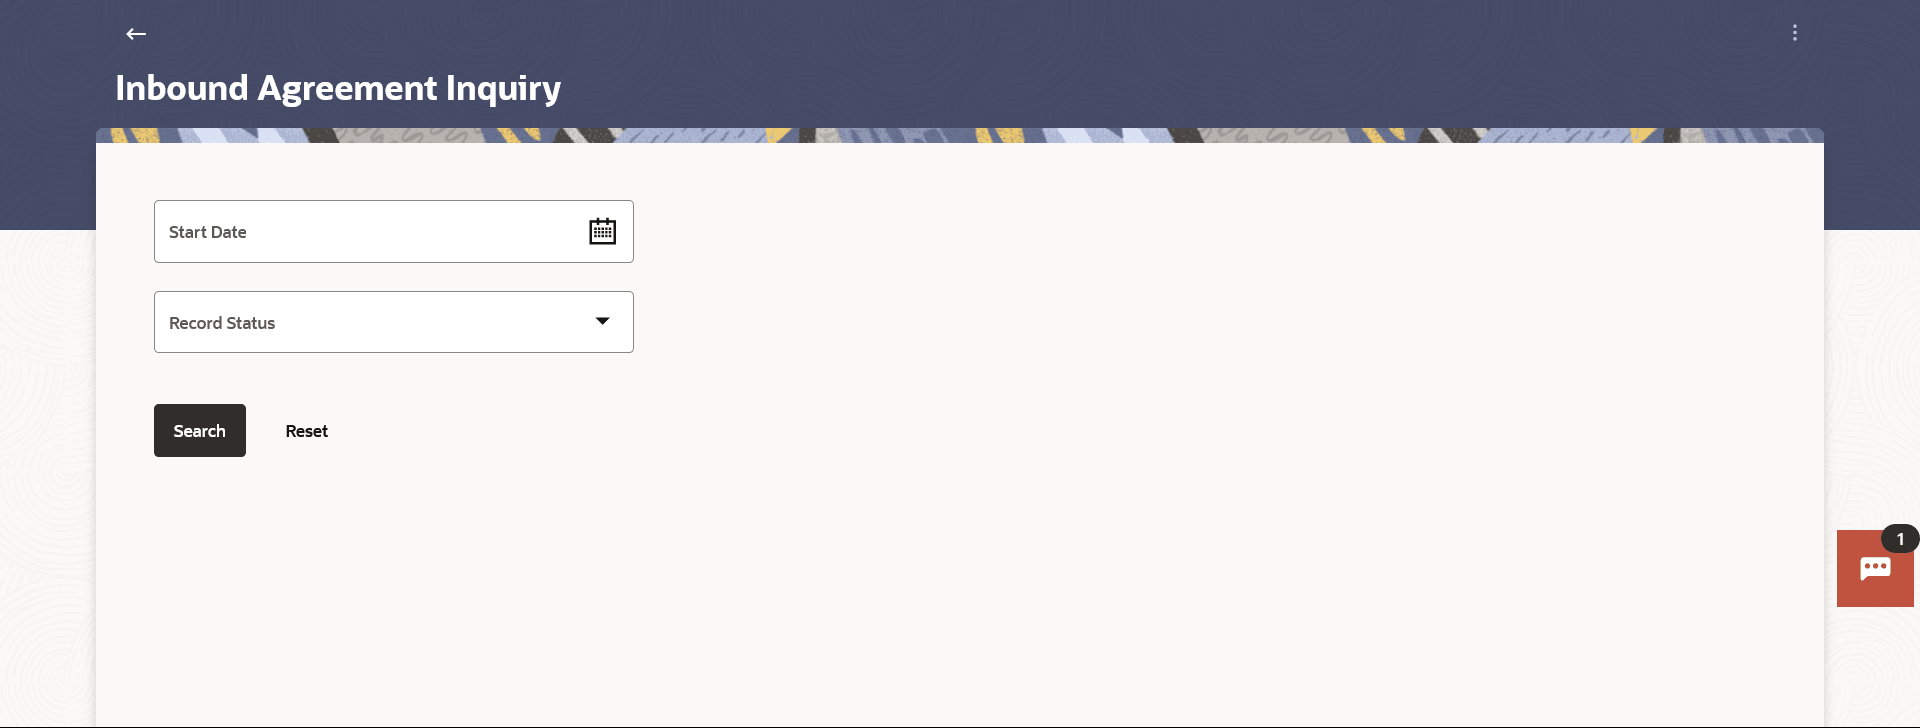
The Inbound Agreement Inquiry screen appears.
- From the Dashboard, click Toggle menu, click
Menu, then click Payments .
- From the Start Date date pickerlist, select the appropriate start date of the inbound agreement.
- From the Record Status list, select the status of the inbound agreement by which you wish to search.
- Perform one of the following actions:
- Click Search to view the list of inbound agreement
remittance.
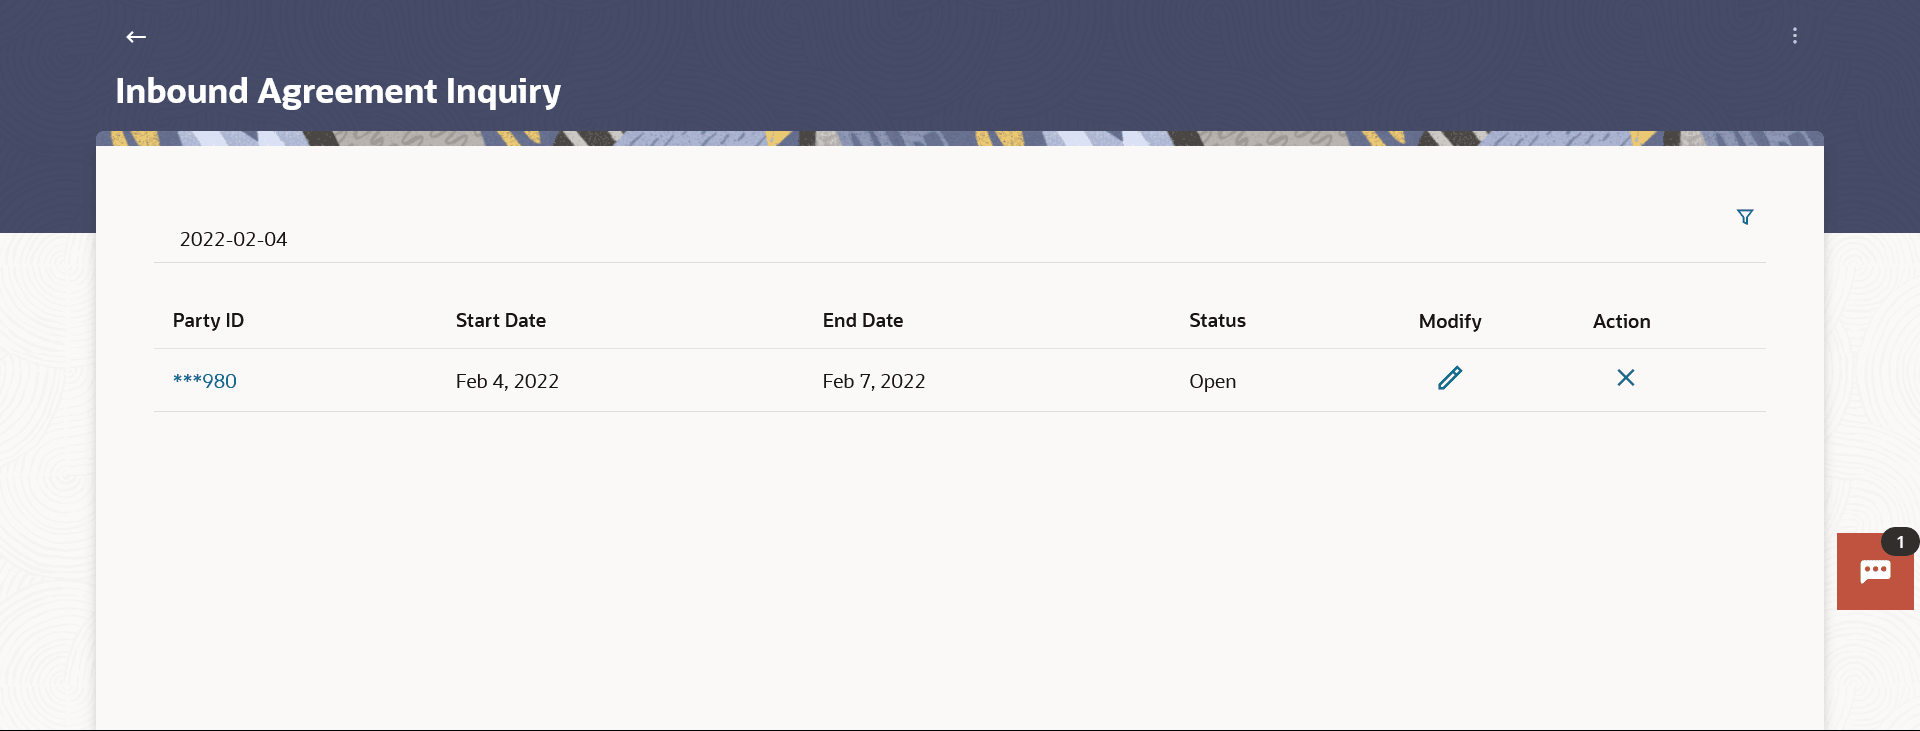
Based on the defined criteria the search result appears.
- Click Reset to clear the details entered.
- Click Cancel to cancel the transaction.
Figure 11-15 Inbound Agreement Inquiry - Search Criteria
Note:
The fields which are marked as Required are mandatory.For more information on fields, refer to the field description table.
Table 11-10 Inbound Agreement Inquiry - Search Criteria - Field Description
Field Name Description Start Date The Start Date of the agreement by which you wish to search the inbound agreement. Record Status The record status by which you wish to search the inbound agreement. Figure 11-16 Inbound Agreement Inquiry - Summary
Note:
The fields which are marked as Required are mandatory.For more information on fields, refer to the field description table.
Table 11-11 Inbound Agreement Inquiry - Summary - Field Description
Field Name Description Start Date The Start Date of the agreement Party ID Displays the party ID of the user. Start Date Displays the Start Date of the agreement. End Date Displays the End Date of the agreement Status Displays the current status of the agreement. Modify Icon to modify the inbound agreement. Action Icon to close the inbound agreement - Click Search to view the list of inbound agreement
remittance.
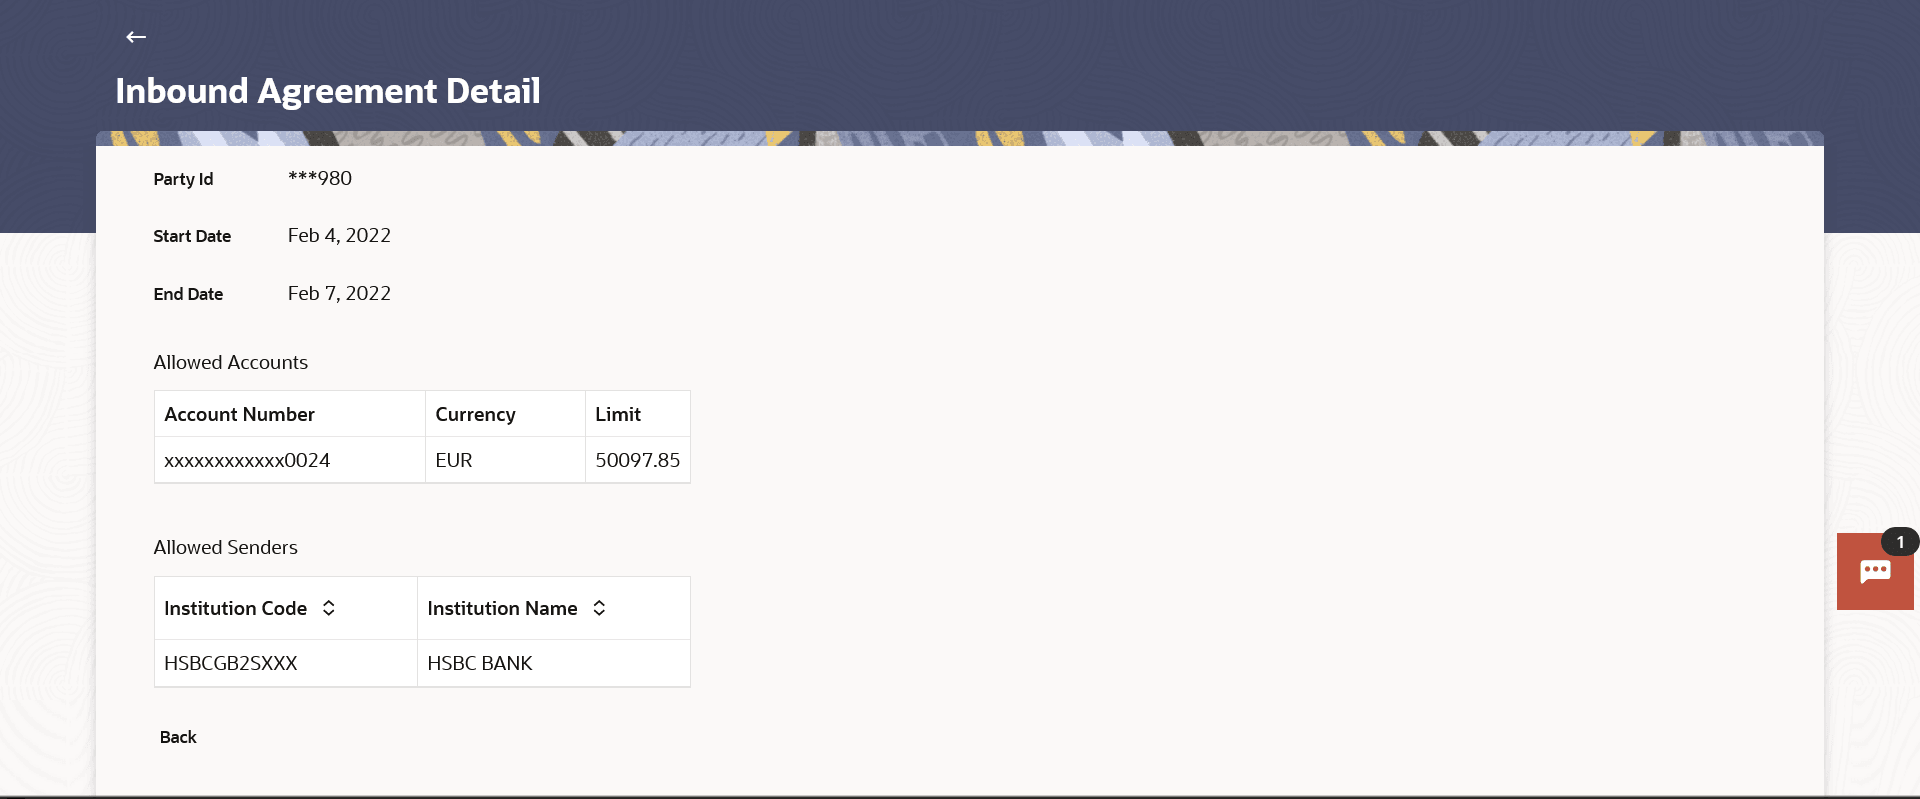
- Click on the Party ID link against the inbound agreement record
whose details you wish to view. The Inbound Agreement Details screen appears.
Note:
The fields which are marked as Required are mandatory.For more information on fields, refer to the field description table.
Table 11-12 Inbound Agreement Details - Field Description
Field Name Description Party ID Displays the party ID of the user. Start Date Displays the Start Date of the agreement. End Date Displays the End Date of the agreement. Allowed Accounts Account Number Displays the accounts applicable to the party. Currency Displays the currency for each account. Limit Displays the limit maintained for each account. Allowed Senders Institution Code Displays the BIC code of the allowed sending institution. Institution Name Displays the institution name of the sender. Perform one of the following actions:- Click Back to navigate back to previous screen.
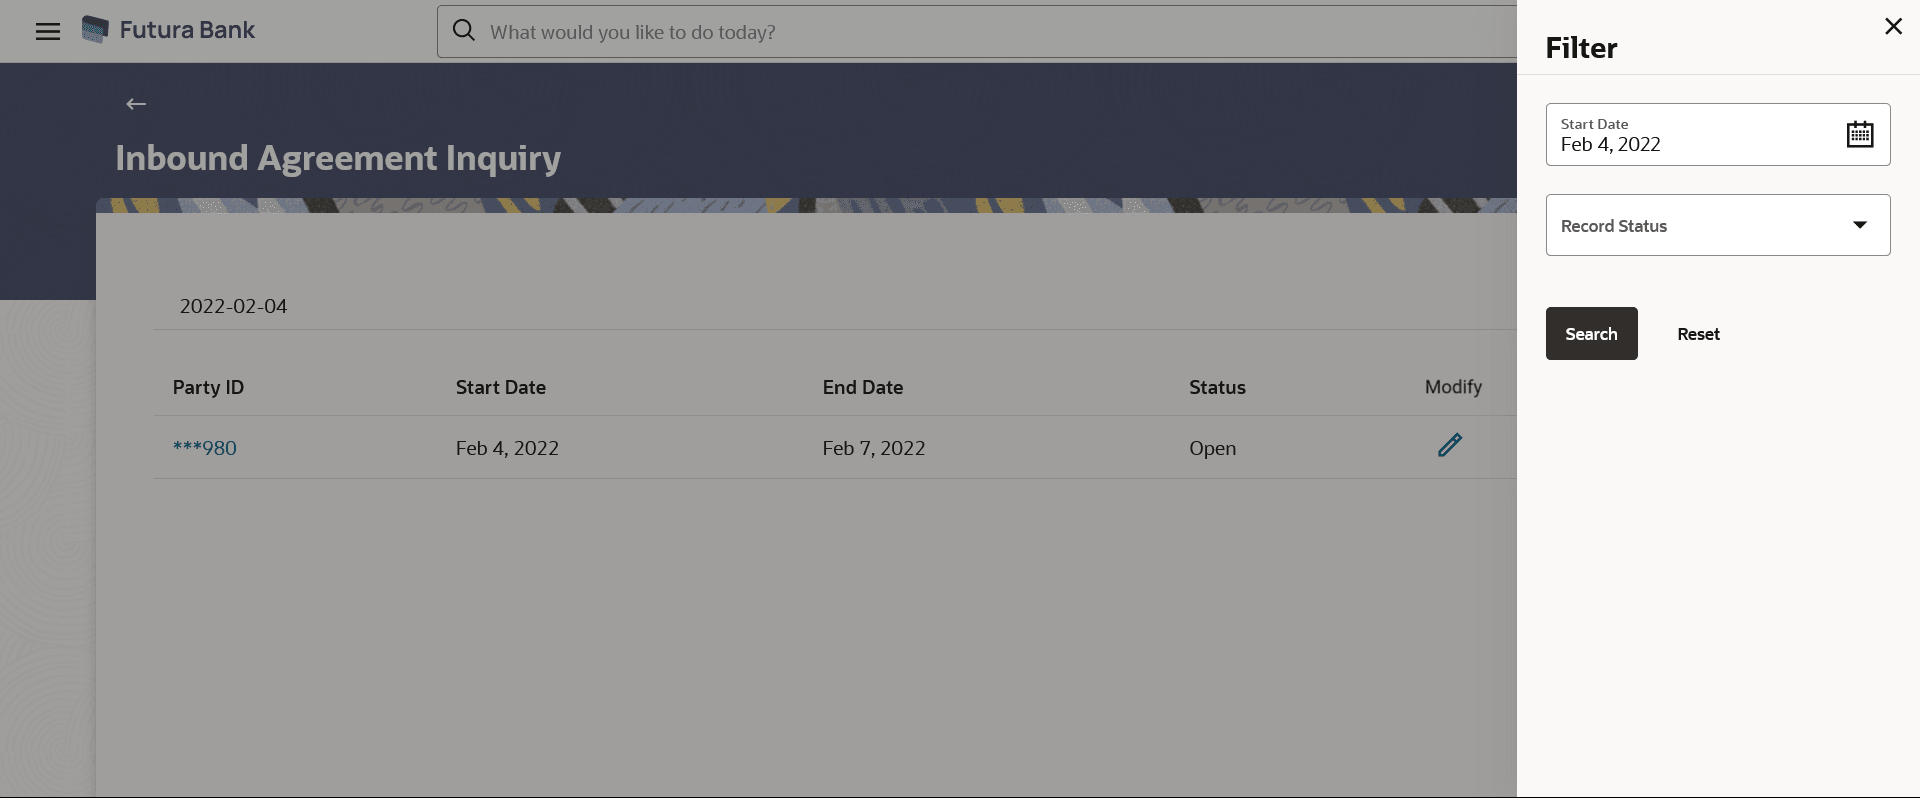
- Click the
 icon to enter new criteria in overlay screen. Based on the new criteria
you can view the details.
Figure 11-18 Inbound Agreement Inquiry - Filter Criteria
- Click the
 icon under Modify column to modify the inbound
agreement.
The system is redirects to the MT101 Inbound Agreement screen.
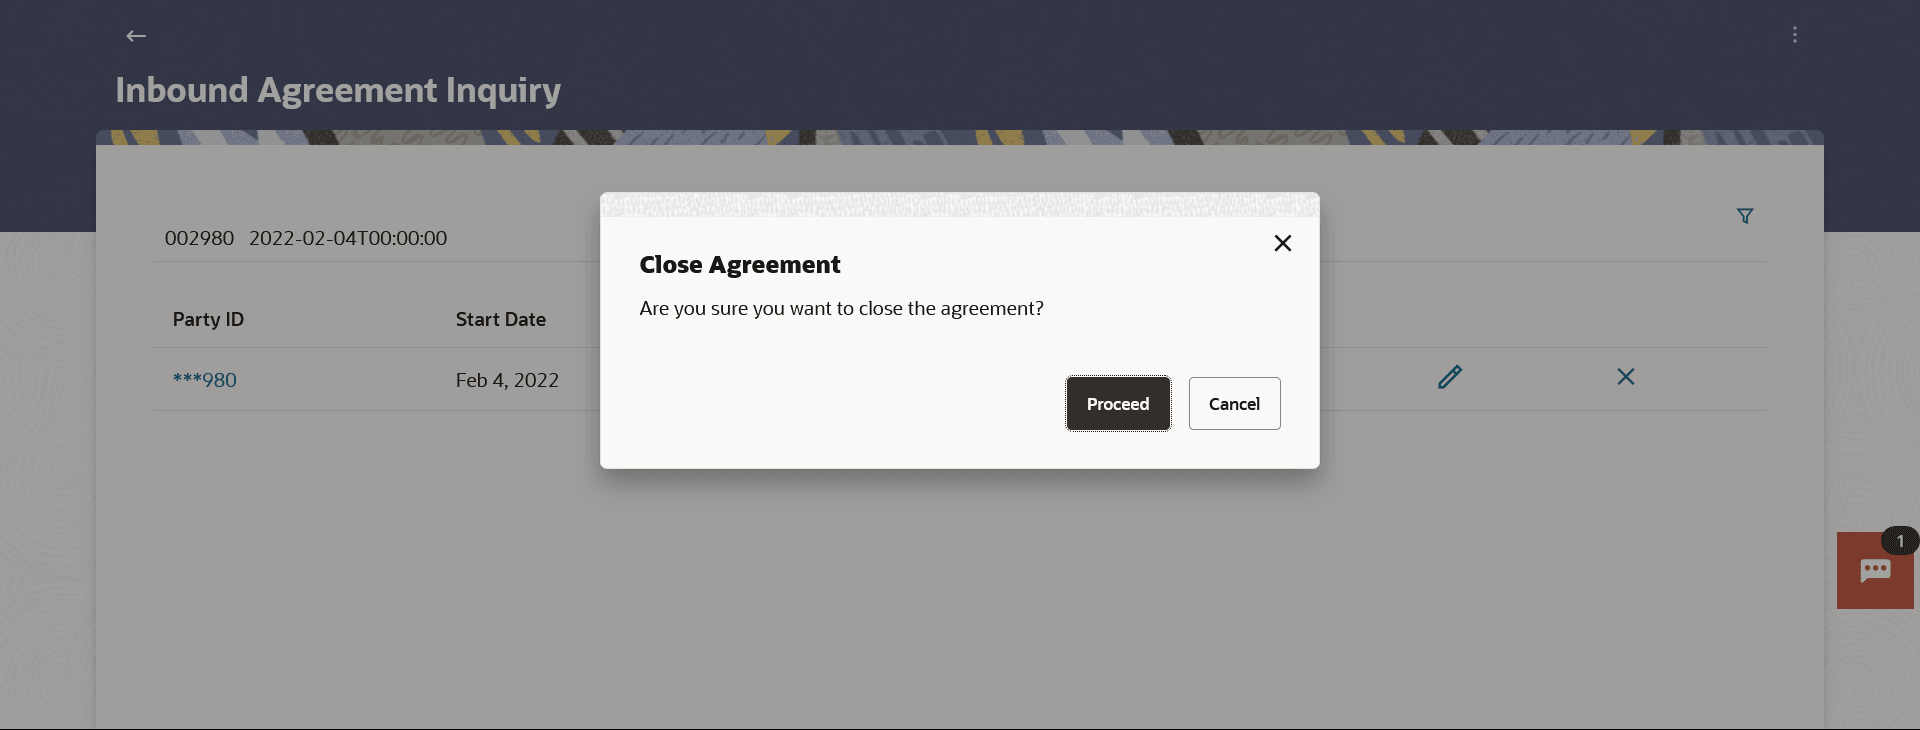
- Click on the X icon under Action column
to close the inbound agreement.
The Warning popup appears to confirm the closure of the agreement.
Figure 11-19 Inbound Agreement Details- Close Agreement
Perform one of the following actions:- Click Proceed to close the inbound agreement.
The success message of inbound agreement closed appears.
- Click Cancel to cancel the transaction.
- Click Proceed to close the inbound agreement.
Parent topic: MT101 Bilateral Agreement
