1.2.9 Configure IPM to Edit Document
This topic explains to edit the document using the IPM configuration.
If you want to configure BPEL with IPM configuration, perform the following steps.
- Login to the console, http/s:<hostname>:<port>/console with admin user.
- To add the FCJCustomProvider, Refer to the Configure Custom Authentication Provider topic.
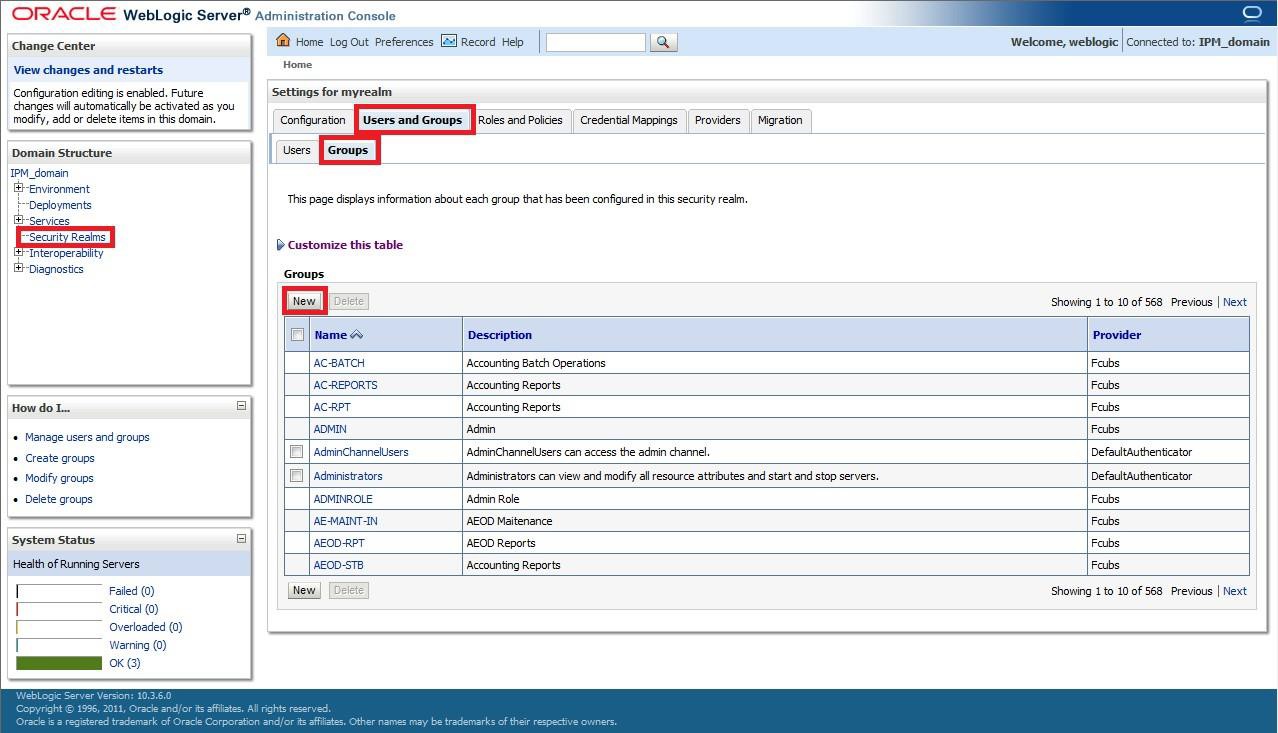
- Navigate to Security Realms, click myrealm, and click Users and Groups tab.Check if the users from the schema are displayed in the Users tab, and roles from the schema are displayed under the Groups tab.
- After adding the custom authenticator, perform the following actions:
- Navigate to Security Realms, click myrealm, click Users and Groups and click the Groups tab.The Settings for myrealm screen displays.
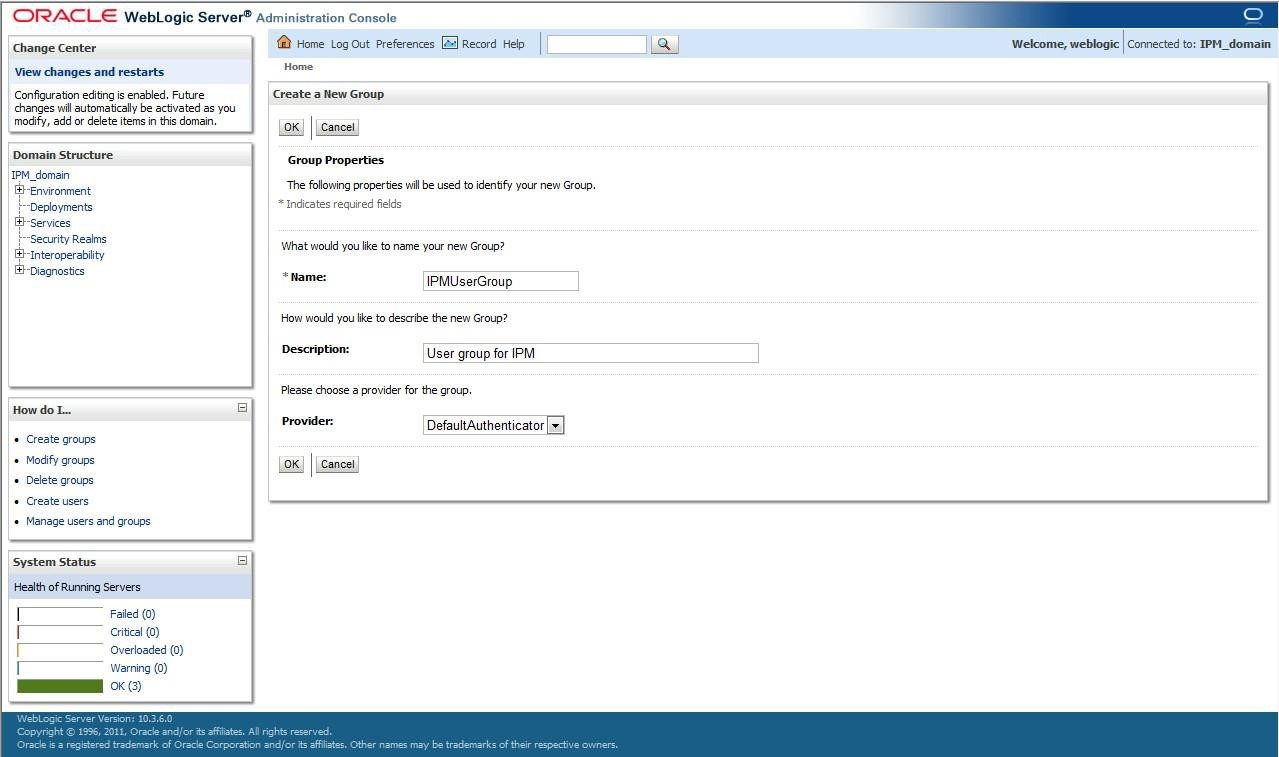
- Click the New button.The Create a New Group screen displays.
- Navigate to Security Realms, click myrealm, click Users and Groups and click the Groups tab.
- On the Create a New Group screen, specify the following details.
- Specify the name as IPMUserGroup.
- Specify the Description for the new group (optional).
- Select the Provider as DefaultAuthenticator.
- Click the OK button.
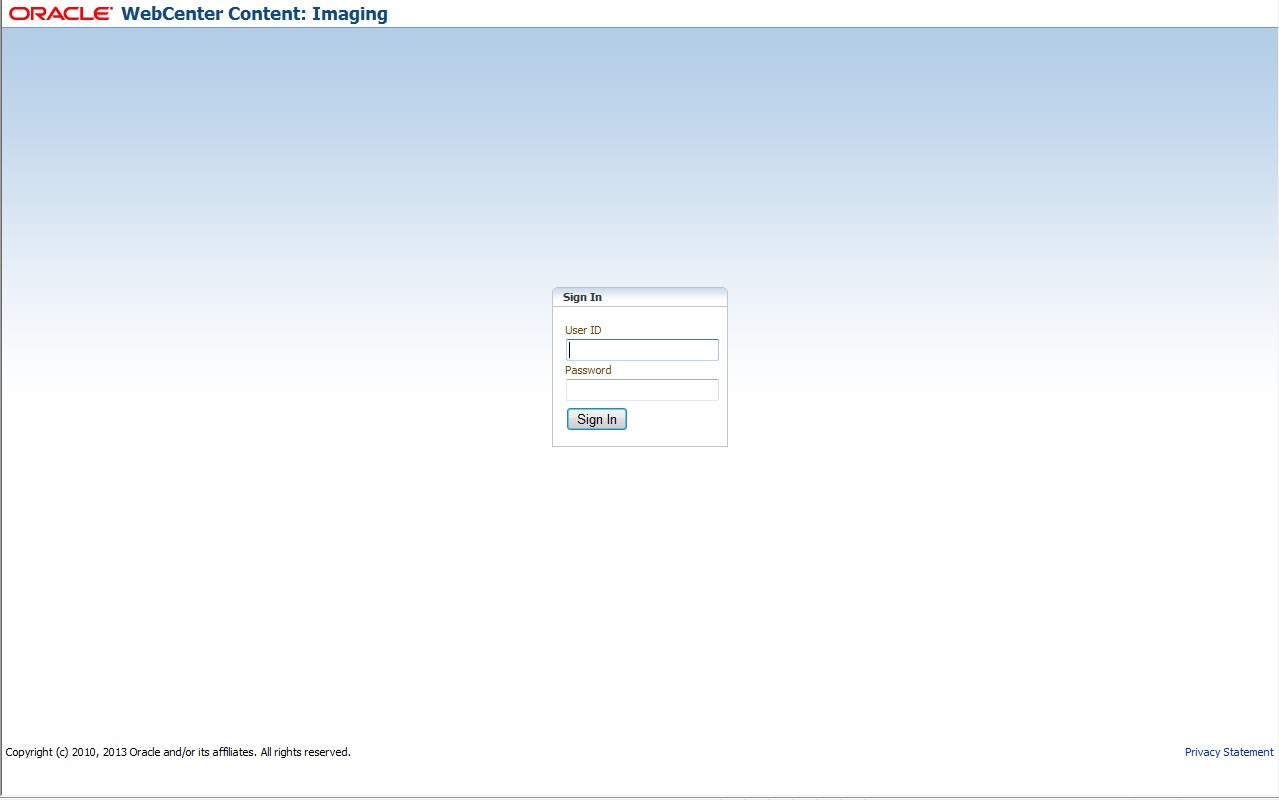
- Login to the Imaging using the following URL http/s:<hostname>:<port>/imaging with admin user.The Oracle Webcenter Content:Imaging log in screen displays.
Figure 1-96 Oracle Webcenter Content:Imaging
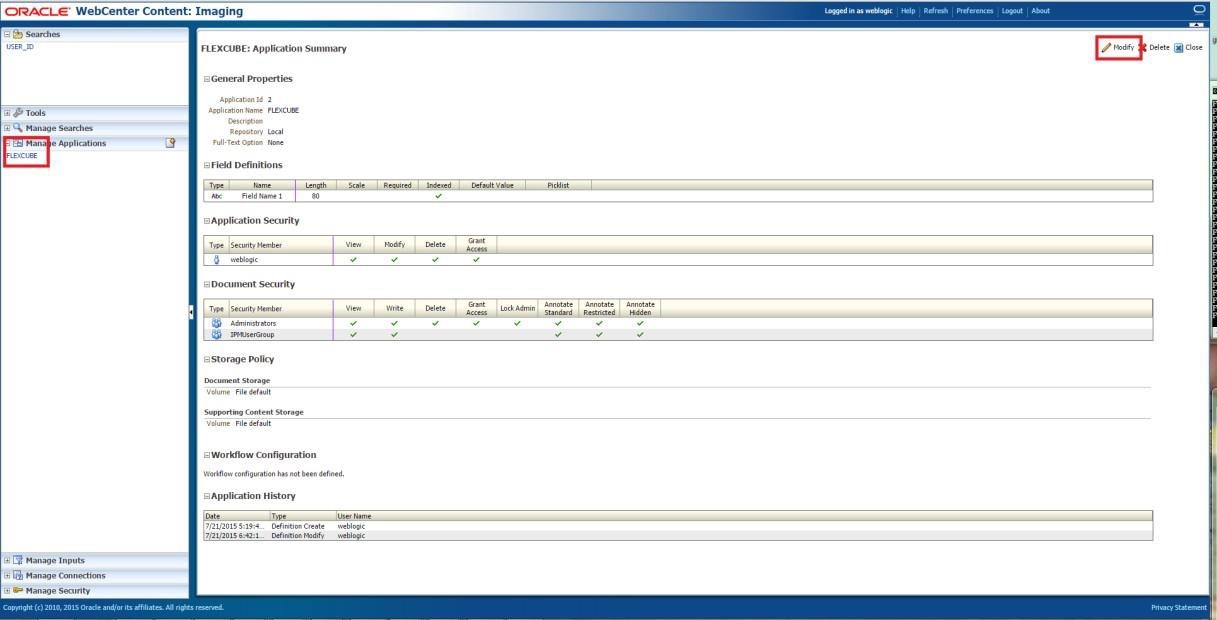
- Specify User ID and Password and click Sign in.The FLEXCUBE:Application Summary screen displays.
- Navigate to Manage Applications on the left pane.
- Click FLEXCUBE.
- Click the Modify button on the right pane.The Create Application Document Security screen displays.
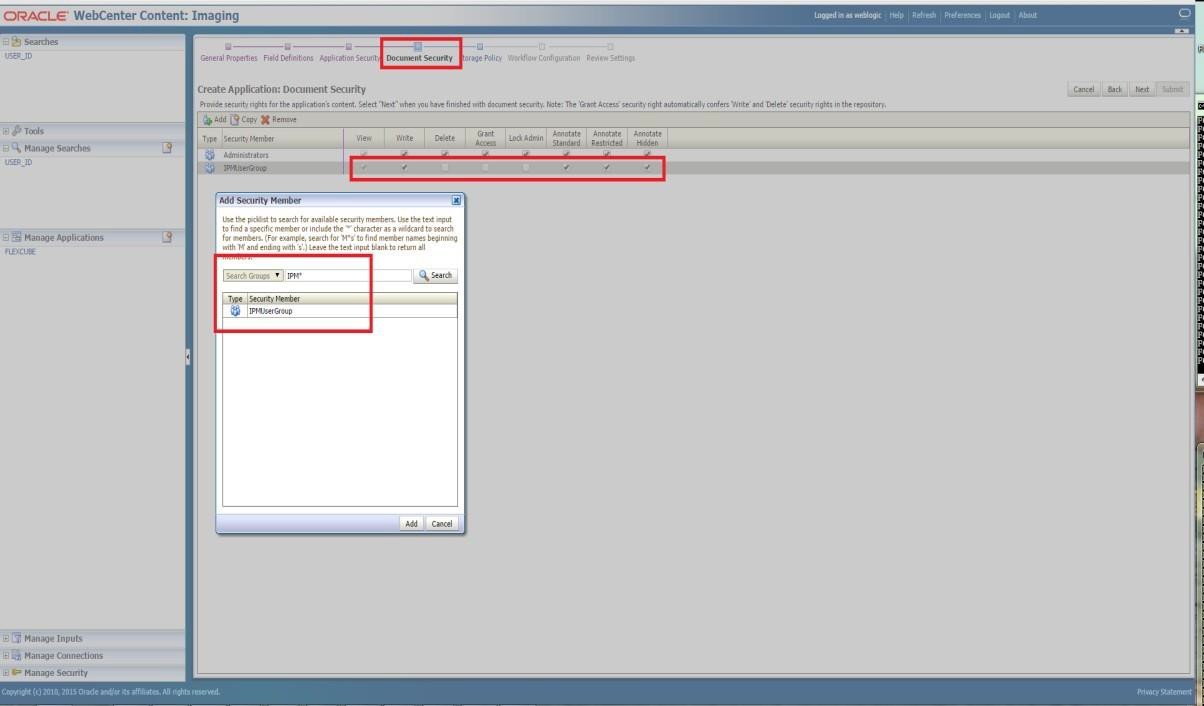
Figure 1-98 Create Application Document Security
- On the Create Application Document Security screen, perform the following steps:
- Click Document Security tab.
- Click the Add button.The Add Security Member pop-up window displays.
- Click the Search button in the Add Security Member pop-up window.
- Select the IPMUserGroup.
- Click Add. IPMUserGroup is listed in the panel.
- Select View, Write, Annotate Standard, Annotate Restricted and Annotate Hidden checkboxes.
- Click Submit.The USER_ID:Search Summary screen displays.
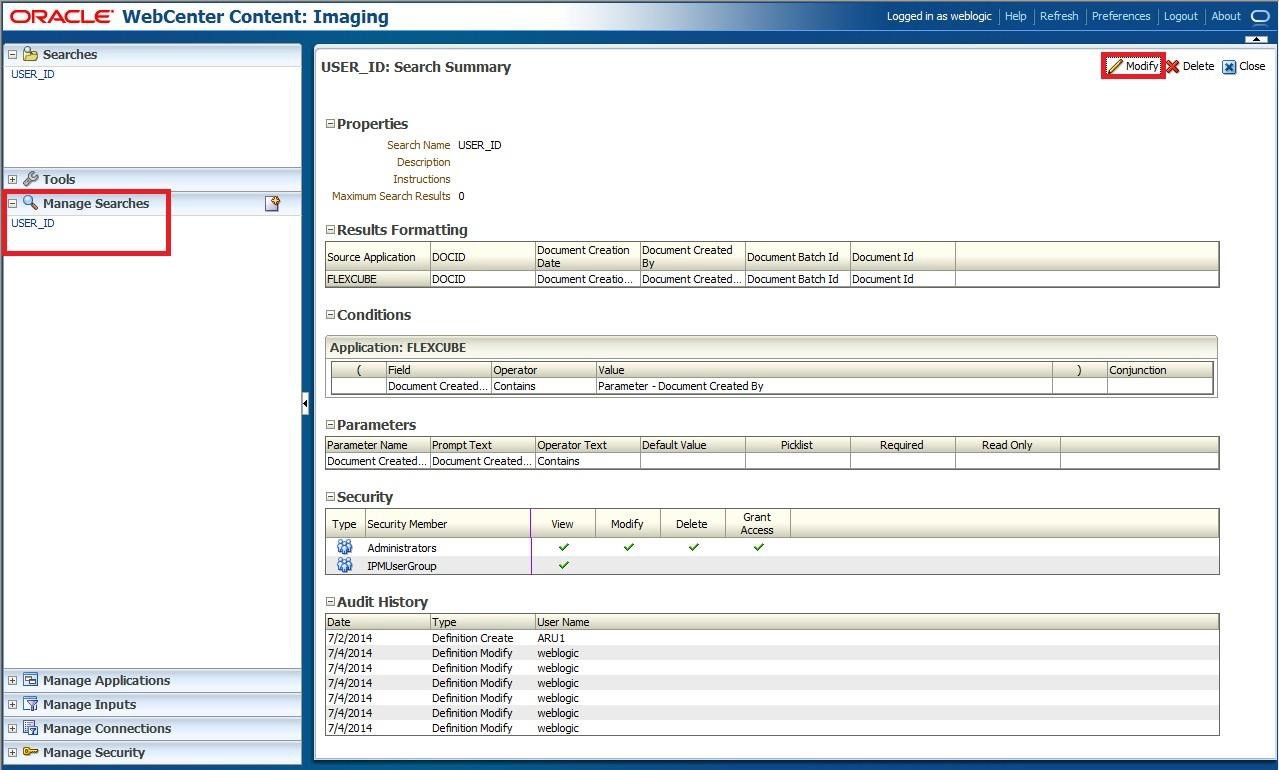
- On the USER_ID: Search Summary screen, perform the following steps:
- Navigate to Manage Searches.
- Select the available search (ex: USER_ID in this doc).
- Click the Modify button.The USER_ID:Search Security screen displays.
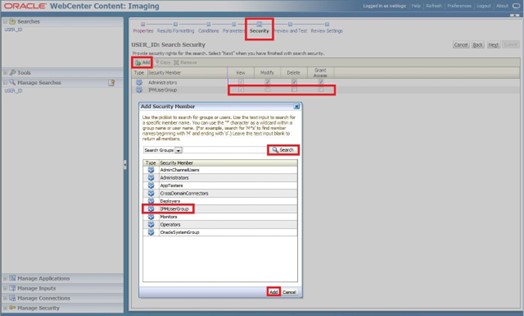
- On the USER_ID:Search Security screen, perform the following steps:
- Click the Security tab.
- Click the Add button.The Add Security Member pop-up window displays.
- Click the Search button in the Add Security Member pop-up window.
- Select the IPMUserGroup.
- Click Add button.The IPMUserGroup will be listed in the panel; don’t select any checkbox except the default View checkbox.
- Click the Submit button on the right corner.
- Copy the FCJJPSProvider.jar to location
<ORACLE_HOME >\user_projects\domains\<domian name>\lib. - Go to the location
<ORACLE_HOME>\ user_projects\domains\<Domain_created>\config\fmwconfig.- Open jps-config.xml file and search <serviceProviders> tag and add the following code between <serviceProviders> and </serviceProviders> tags.
<serviceProvider class="oracle.security.jps.internal.idstore.generic.GenericIdentityStoreProvider" name="custom.generic.provider" type="IDENTITY_STORE"> <description>DB IdentityStore Provider</description> </serviceProvider> - Similarly, search for <serviceInstances> tag and add the following code between <serviceInstances> and </serviceInstances> tags.
<serviceInstance location="dumb" name="idstore.custom" provider="custom.generic.provider">
 <description>Custom Identity Store Service Instance</description>
 <property name="idstore.type" value="CUSTOM"/>
 <property name="ADF_IM_FACTORY_CLASS"
value="com.ofss.fcc.bpel.security.idm.providers.stddb.FCIdentityStoreFactory"/>
 <property name="DATASOURCE_NAME" value="jdbc/fcjdevDS"/>
 <property name="INTERNAL_CONTEXT_REQUIRED" value="true"/>
 <property name="INTERNAL_CONTEXT_NAME" value="internalstore"/>
 </serviceInstance>
Make sure that the JNDI (jdbc/fcjdevDS) matches the value given during property file creation.
- Search for <jpsContexts default="default"> tag and add the following code between <jpsContexts default="default"> and </jpsContexts>, preferably after the default jpsContext.
<jpsContext name="internalstore">
 <serviceInstanceRef ref="credstore"/>
 <serviceInstanceRef ref="keystore"/>
 <serviceInstanceRef ref="policystore.xml"/>
 <serviceInstanceRef ref="audit"/>
 </jpsContext>
- Open jps-config.xml file and search <serviceProviders> tag and add the following code between <serviceProviders> and </serviceProviders> tags.
Parent topic: Integrate Oracle FLEXCUBE UBS and BPEL
