1.2.8 BAM Report Configuration settings
This topic explains the configuration settings for BAM reports.
Generate a deployment plan for BAM Composer Application. If you want to configure BPEL with BAM reports, follow the steps below:
- Generate a deployment plan for BAM Composer Application.
- Log in to console http://<hostname>:<port>/<console>.
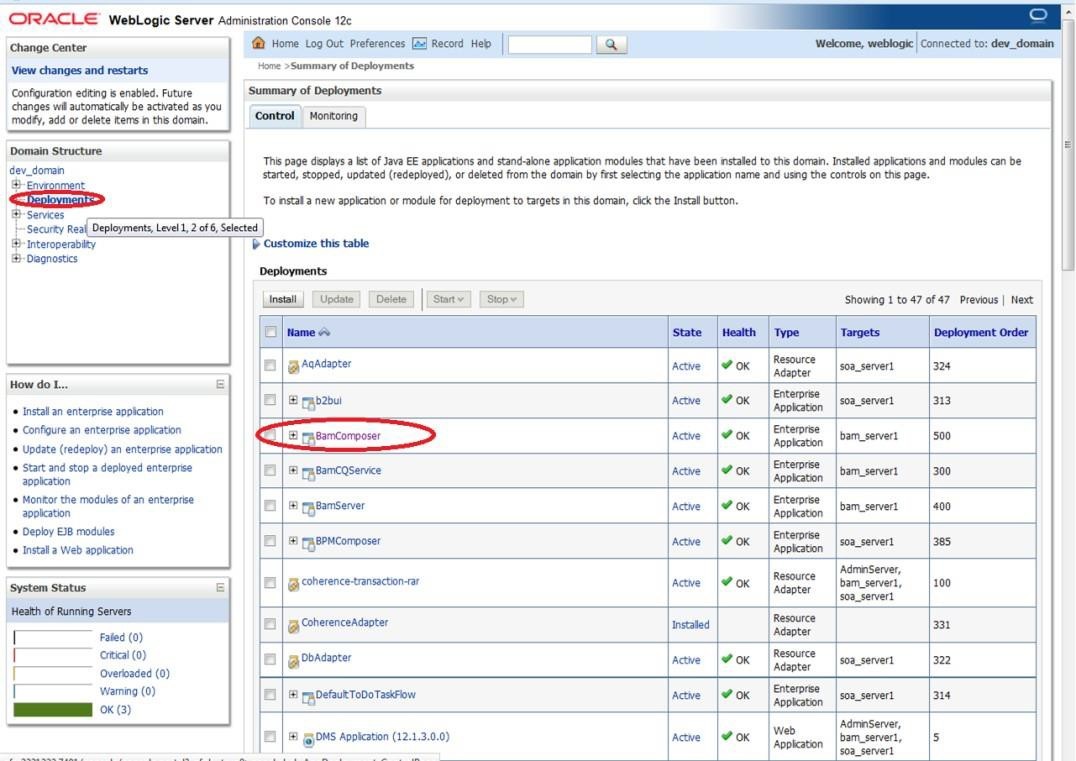
- Under the Domain Structure, click Deployments.The Summary of Deployments screen displays.
- Click BAM Composer.The Summary of BAM Composer screen displays.
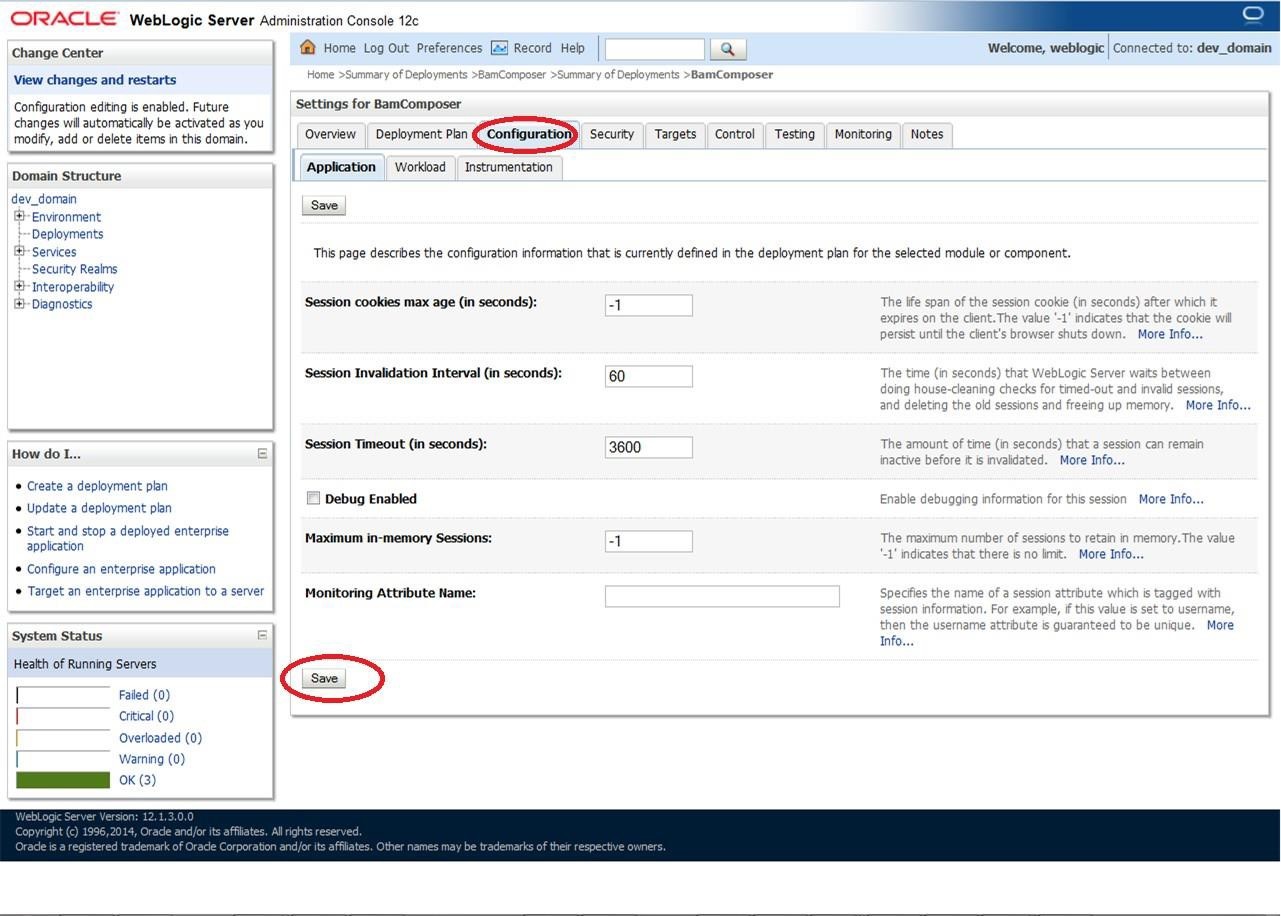
- On the Summary of BAM Composer screen, click the Configuration tab, select the Application tab and click the Save button.
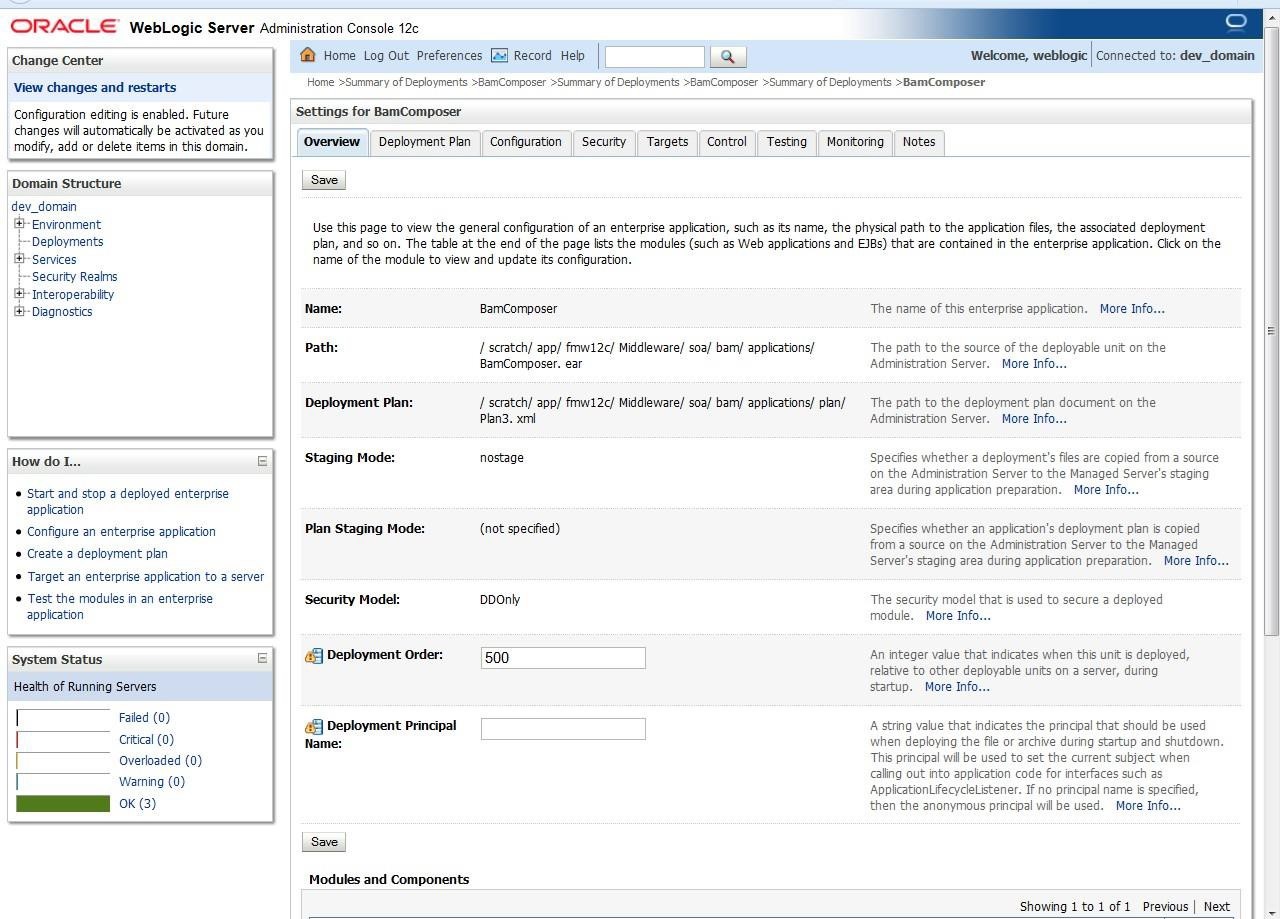
- Click the Overview tab and check the Deployment Plan location.The Summary of BAM Composer - Overview screen displays.
Figure 1-74 Summary of BAM Composer - Overview
- Add variable and variable assignment as below to the Plan.xml in
<module-name>BamComposerWeb.war</module-name>.<variable> <name>oracle.adf.view.rich.security.FRAME_BUSTING</name> <value>never</value> </variable> <module-descriptor external="true"> <root-element>web-app</root-element> <uri>WEB-INF/web.xml</uri> <variable-assignment> <name>oracle.adf.view.rich.security.FRAME_BUSTING</name> <xpath>/web-app/context-param/[paramname="oracle.adf.view.rich.security.FRAME_BUSTING"]/param-value</xpath> <origin>planbased</origin> </variable-assignment> </module-descriptor> - On the Summary of Deployments screen, click the Stop button and the following options are displayed.
- When work completes
- Force Stop Now
- Stop, but continue servicing administration requests
- Click Force Stop Now.
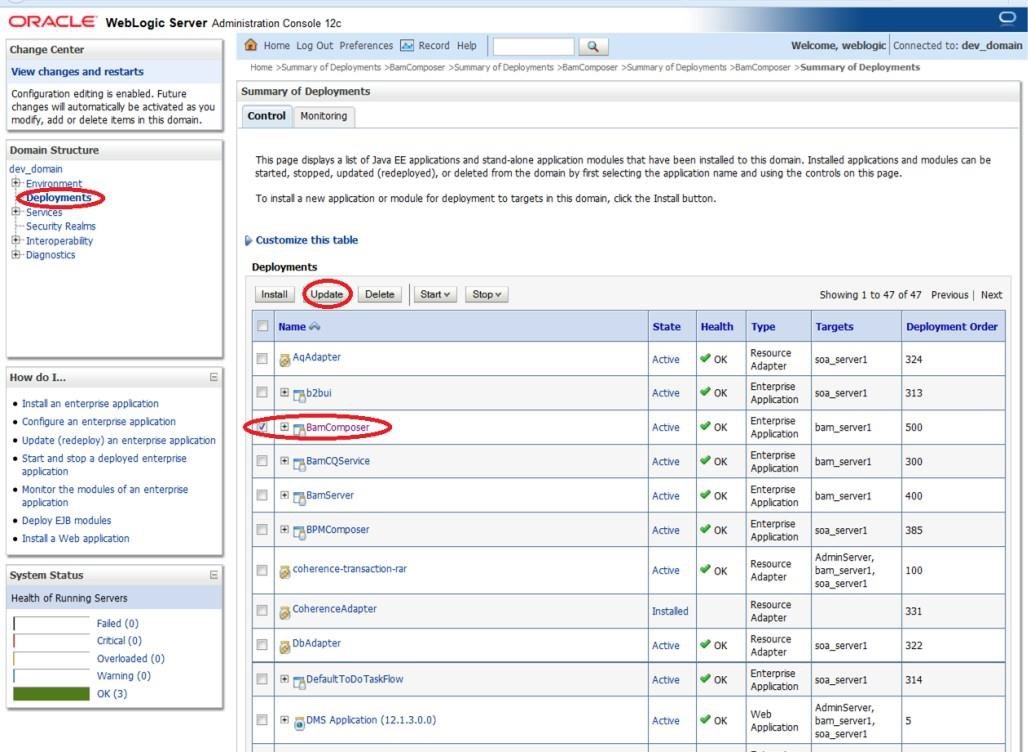
- To update the deployment plan, click Deployment and select the BAM Composer checkbox.The Summary of Deployments - Update screen displays.
Figure 1-75 Summary of Deployments - Update
- Click the Update button.The Update Application Assistant screen displays.
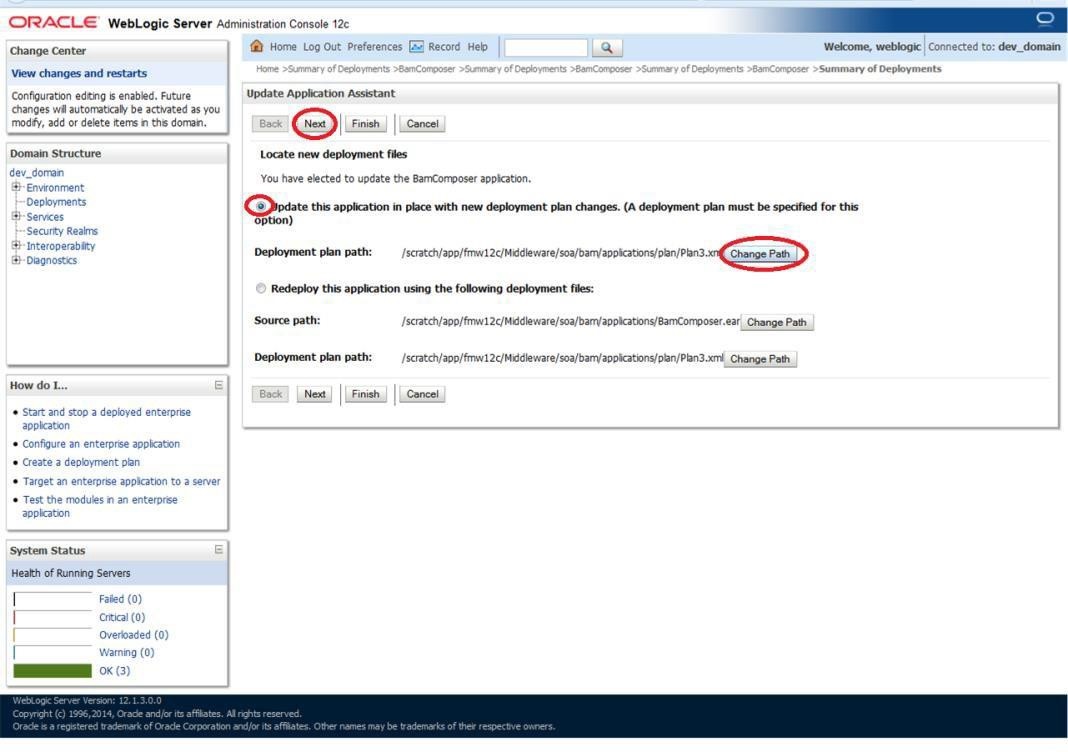
- On the Update Application Assistant screen, select the Update this application in place with new deployment plan changes option and click the change path button.
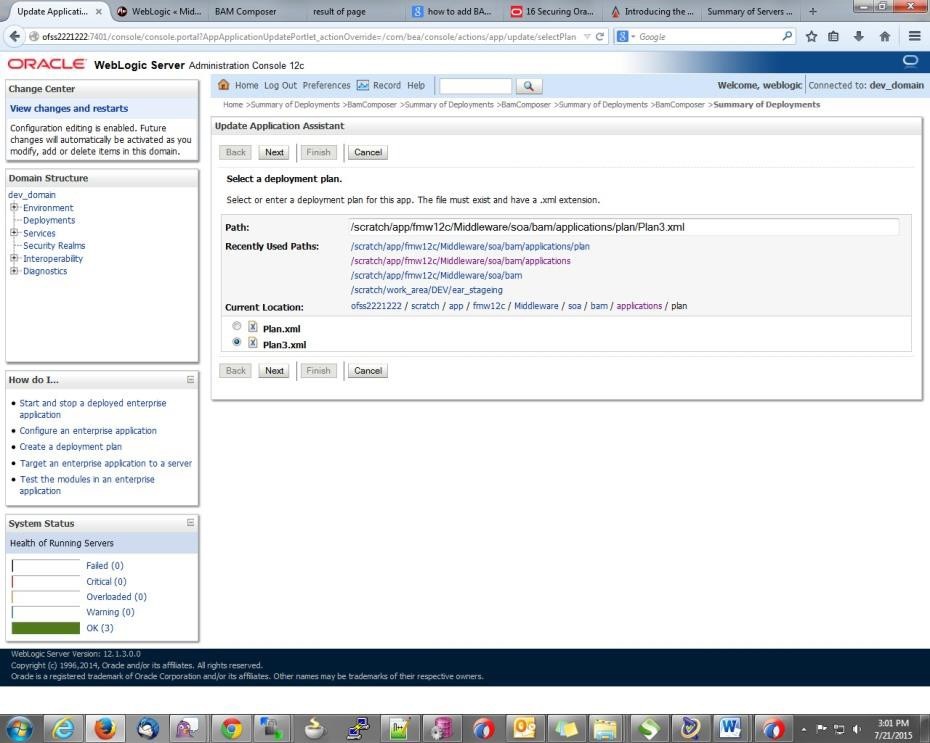
- Select the latest plan.xml in the path, and click the Next.The Update Application Assistant - Select a deployment plan screen displays.
Figure 1-77 Update Application Assistant - Select a deployment plan
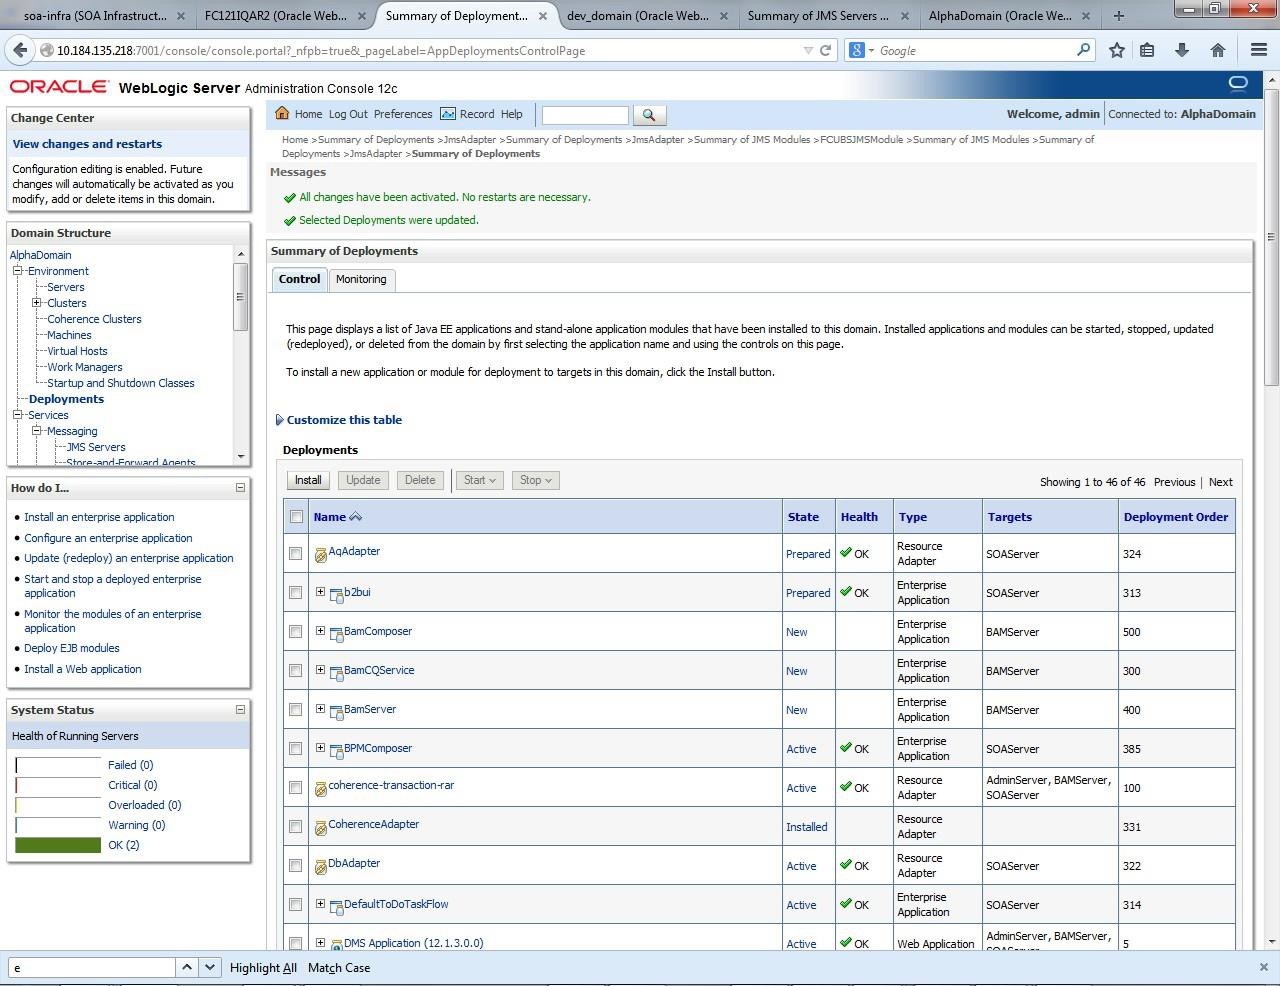
- Click Finish. Two messages are displayed on the Summary of Deployments screen.
Figure 1-78 Summary of Deployments - Messages
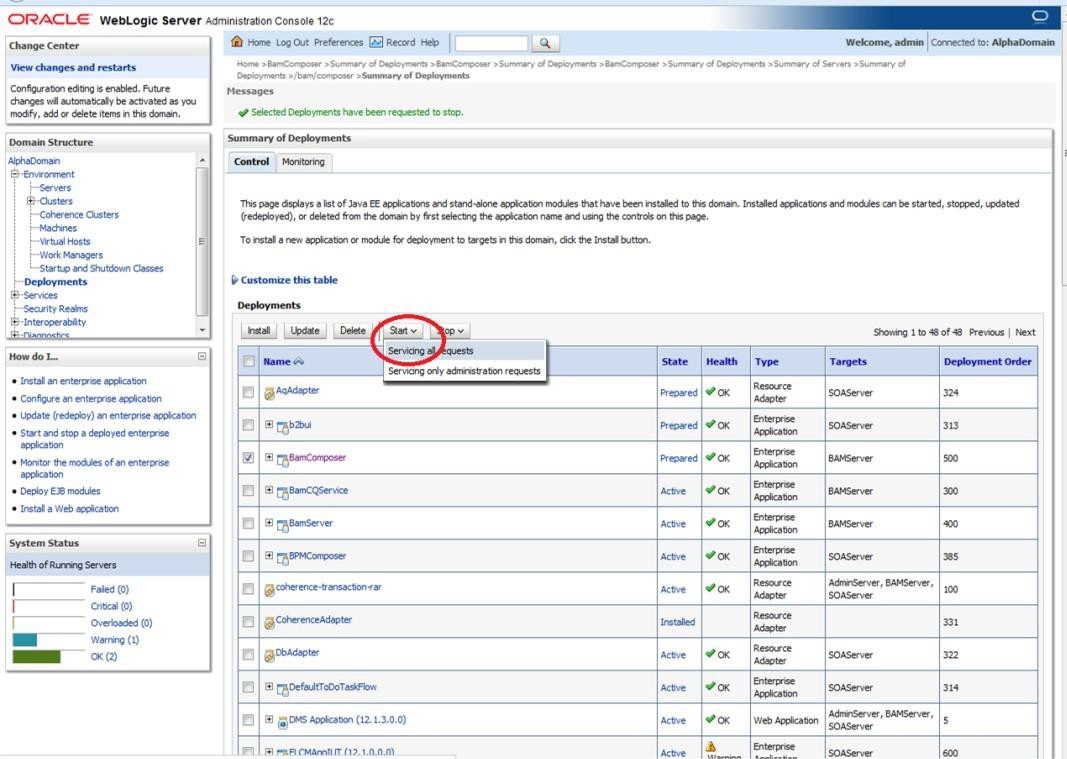
- Restart the BAM Composer application in the console.The Summary of Deployments - Restart BAM Composer screen displays.
Figure 1-79 Summary of Deployments - Restart BAM Composer
- Log in to Enterprise Manager console http://hostname:port/em.
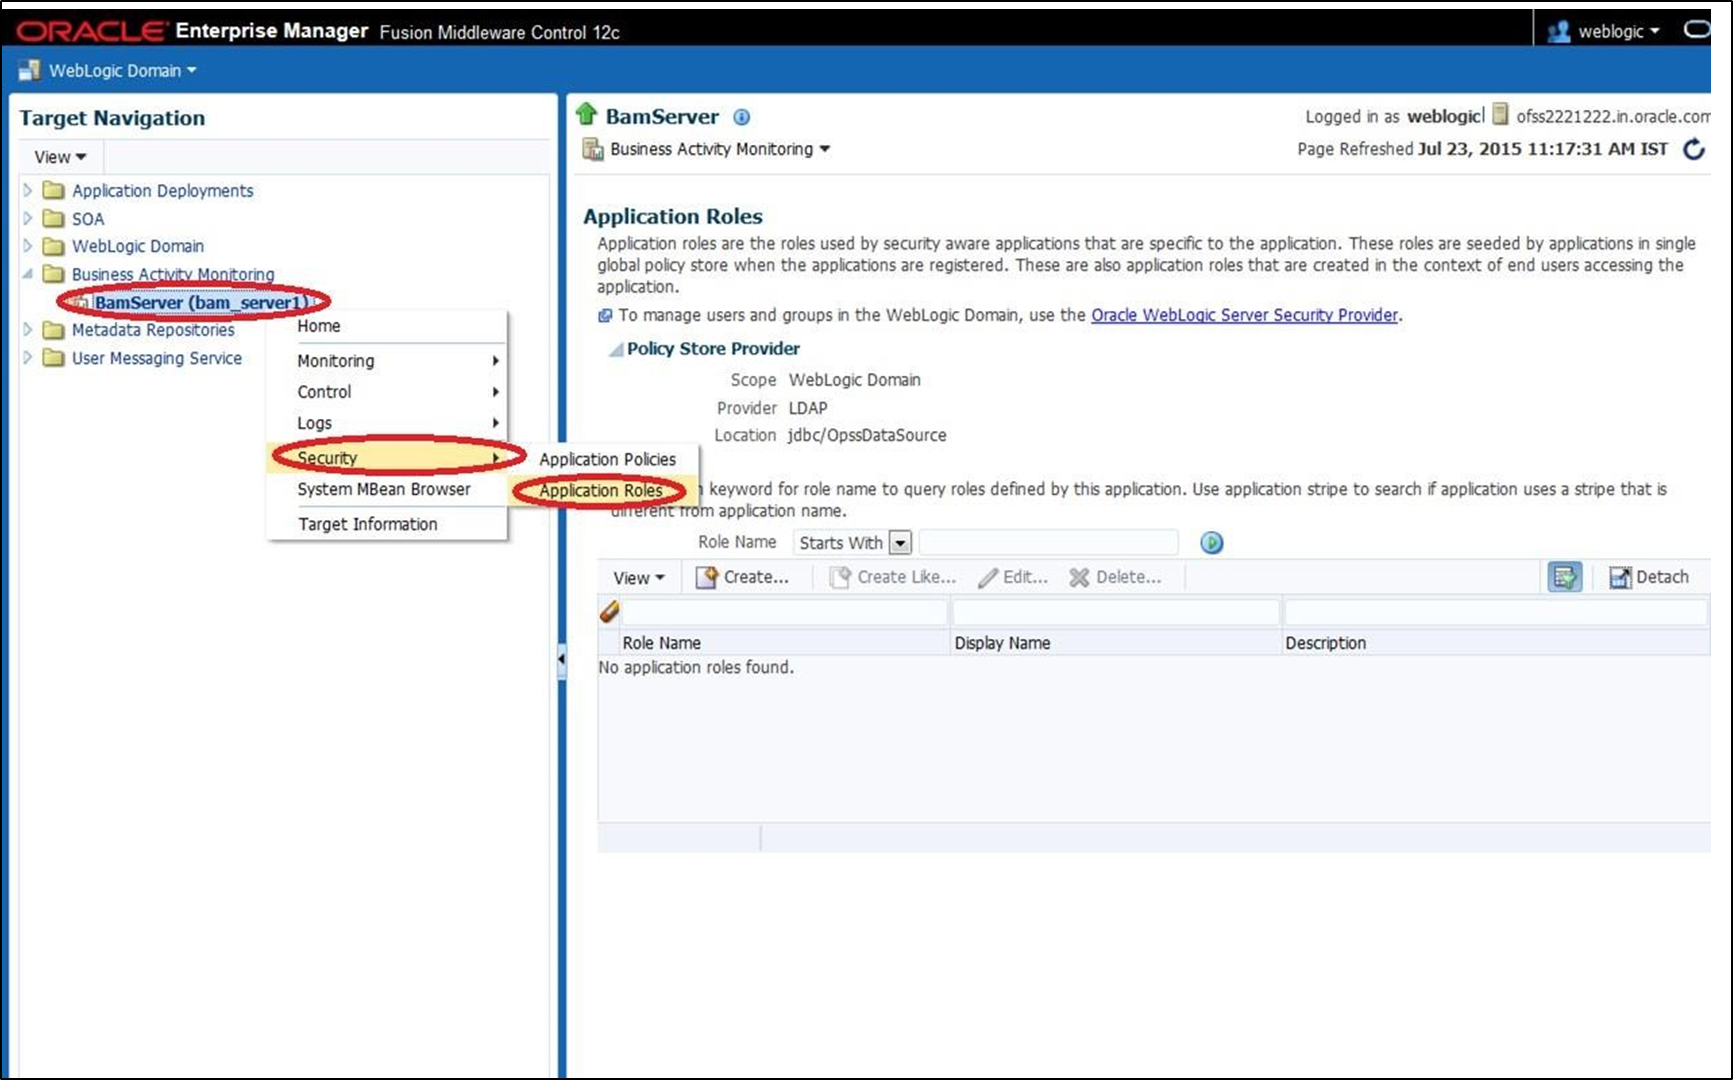
- Right click the BAM Server, and click Security and then click Application Roles.The BAM Server - Application Roles screen displays.
Figure 1-80 BAM Server - Application Roles
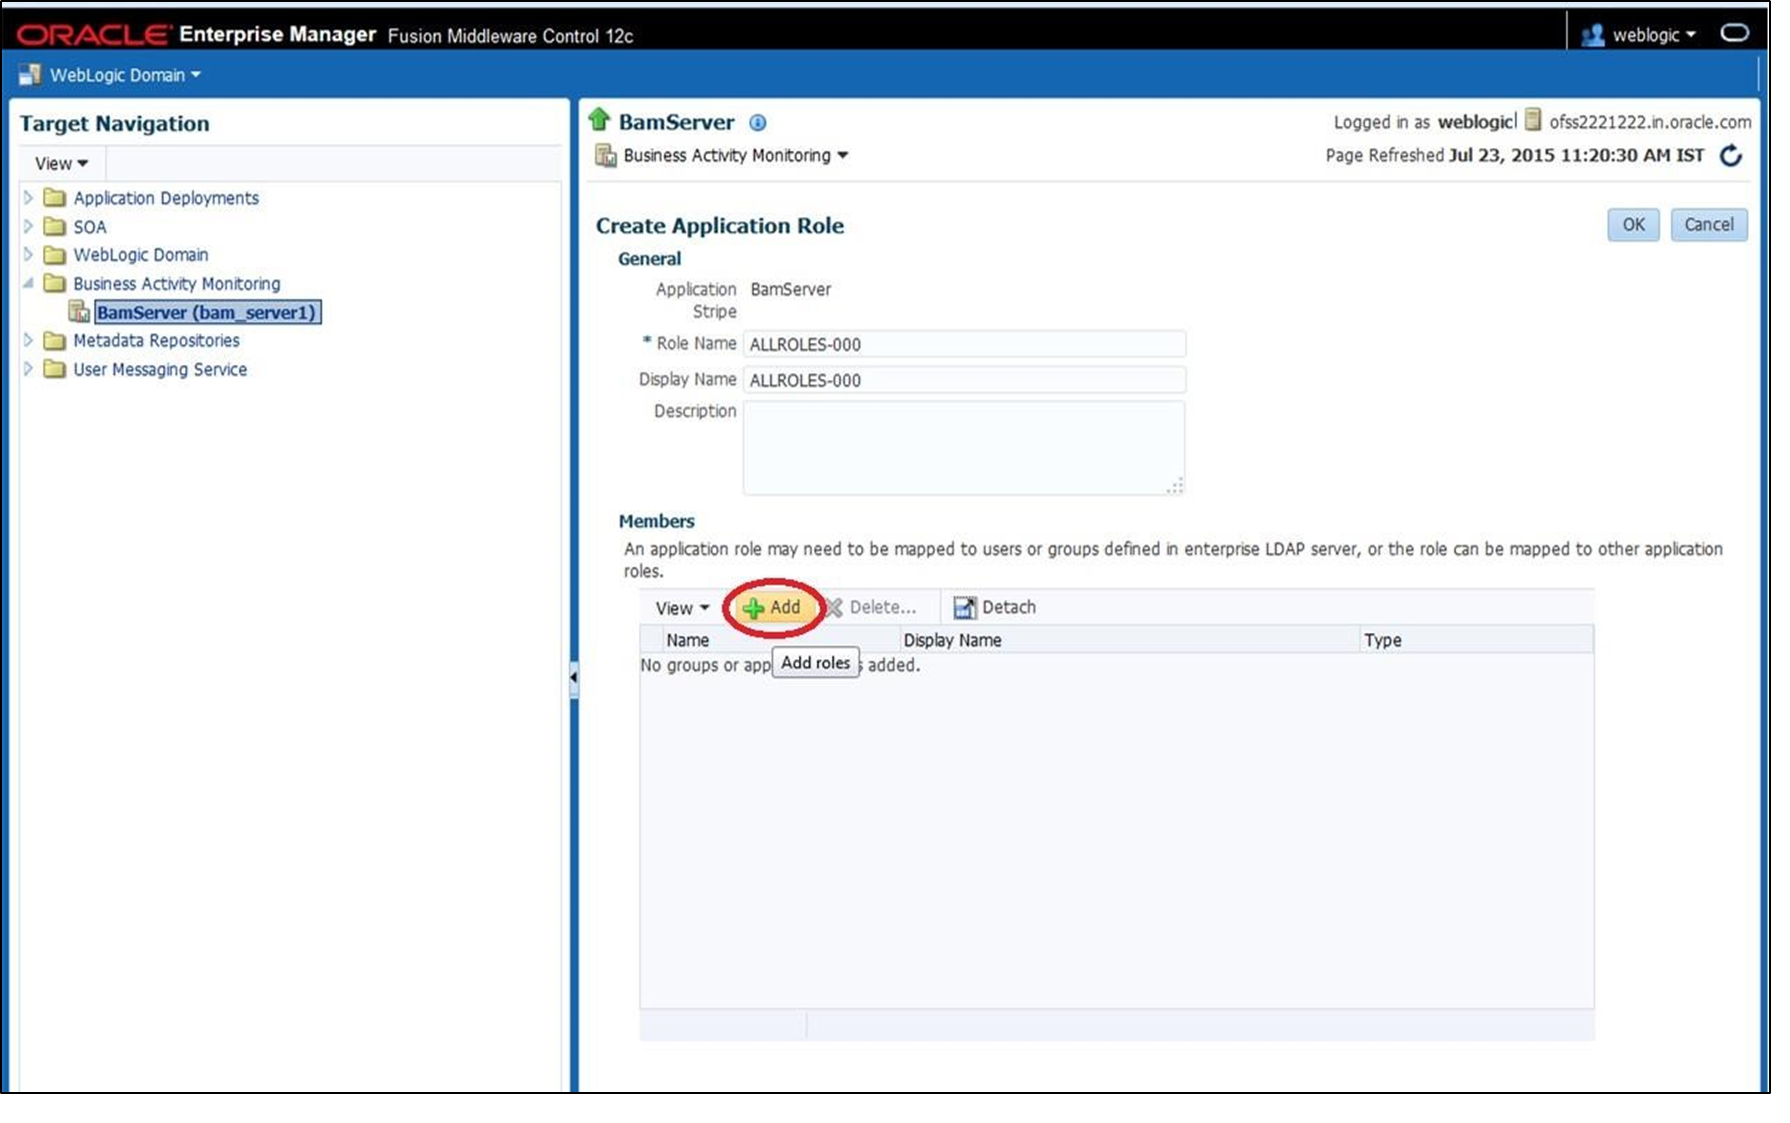
- On the Application Roles screen, click the Create button to create application role with ALL ROLES-000 name.The Create Application Role screen displays.
- Click the ADD button under the Members section.
- Select the Group from the Type drop-down list and add principle details.
- Log in to BAM Composer http://hostname:port/bam/composer.
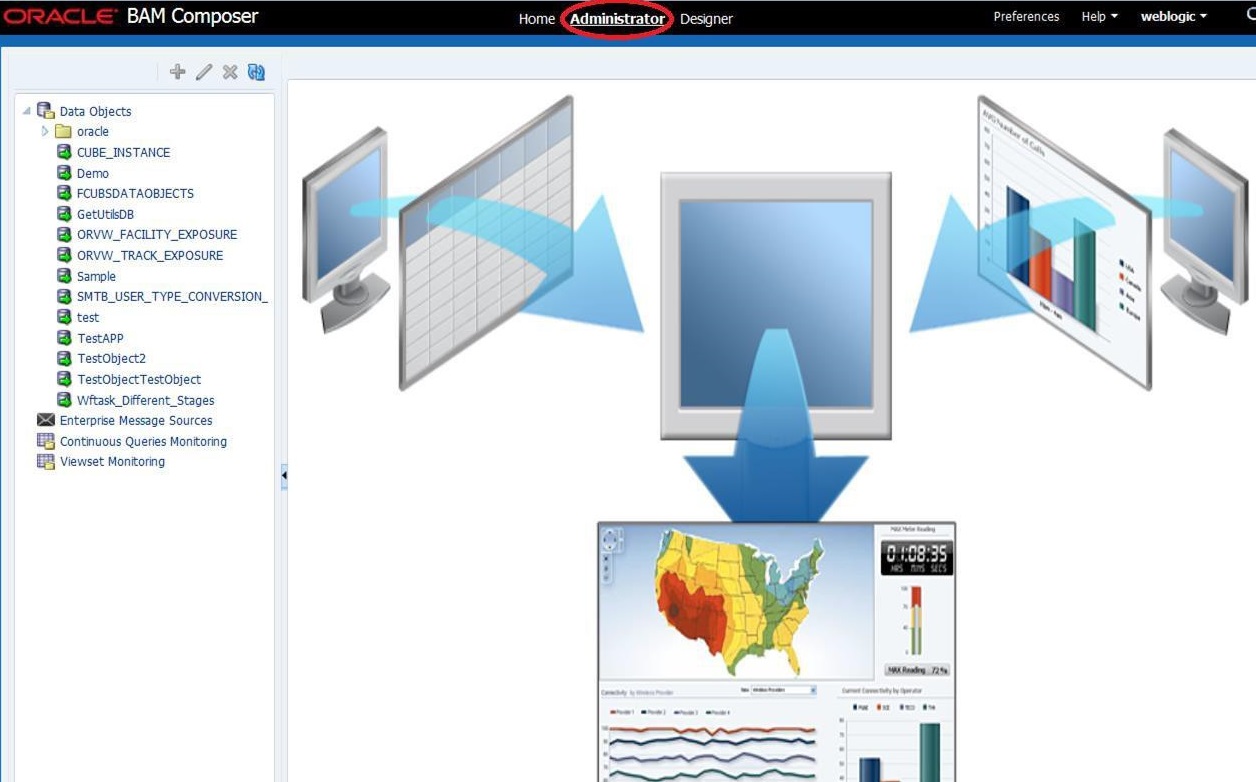
- Click Administrator.The Oracle BAM Composer - Administrator screen displays.
Figure 1-82 Oracle BAM Composer - Administrator
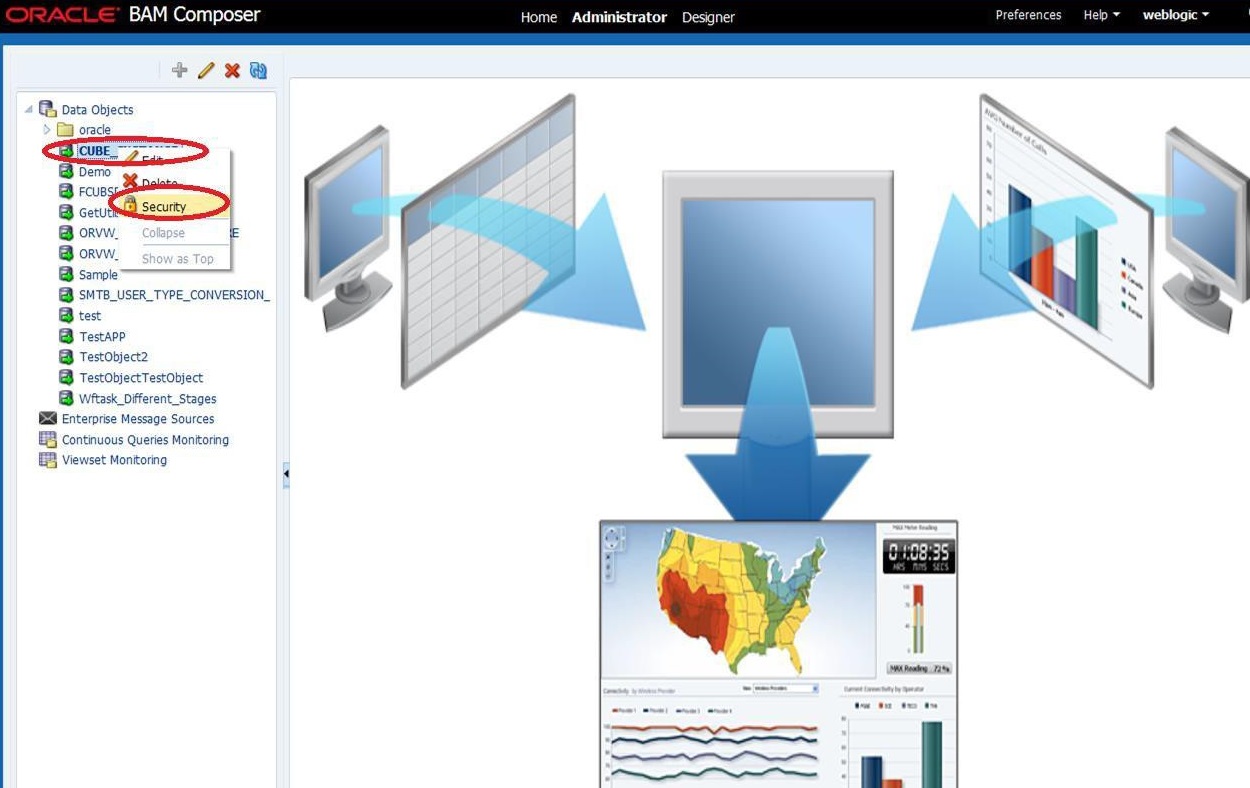
- Under Data Objects, Right click CUBE_INSTANCE and select Security.The BAM Composer - Navigate to Security screen displays.
Figure 1-83 BAM Composer - Navigate to Security
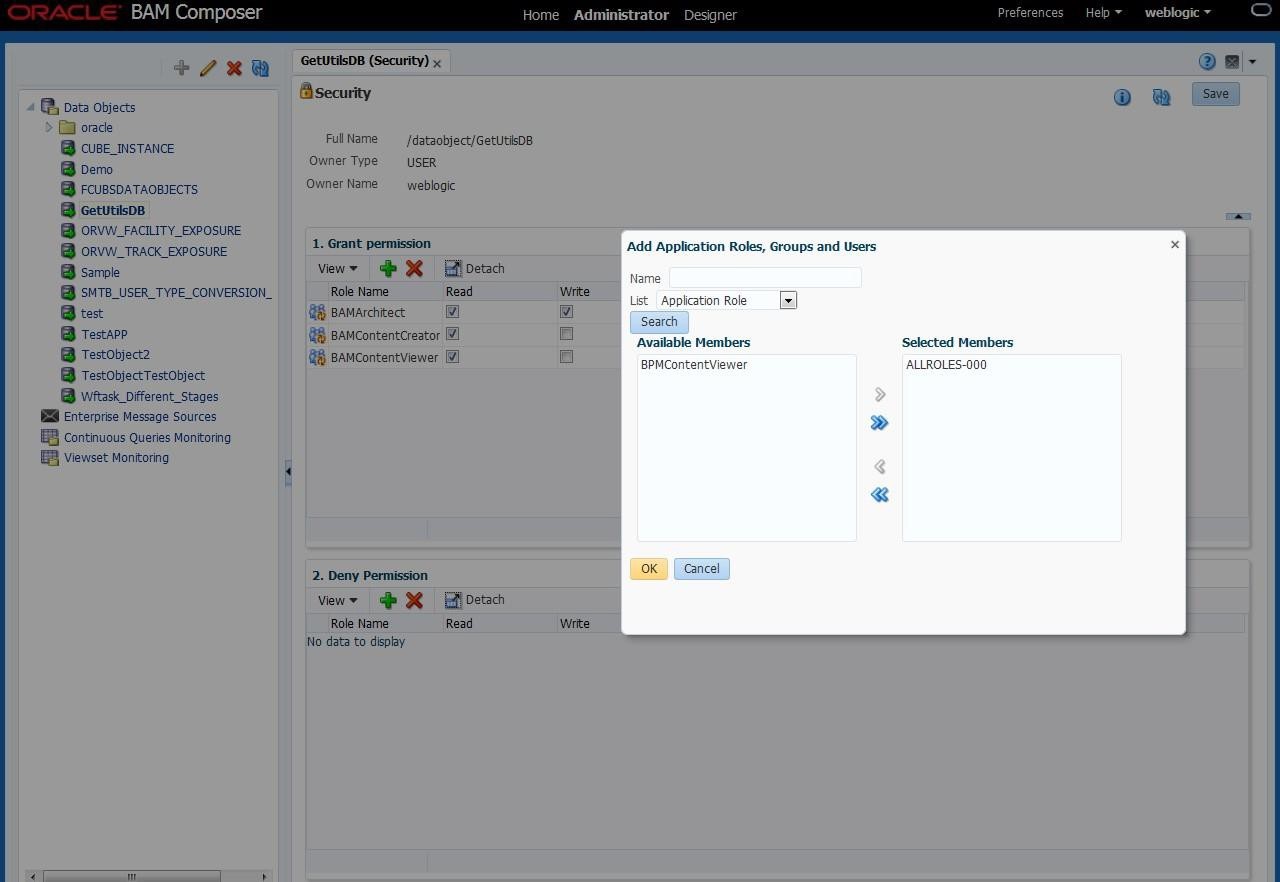
- Click the Add button under Grant permission and search the list based on the Application Role.The Security screen displays.
- Move the ALLROLES-000 to the Selected Members column.The Security - Add Application Roles, Groups and Users screen displays.
Figure 1-85 Security - Add Application Roles, Groups and Users
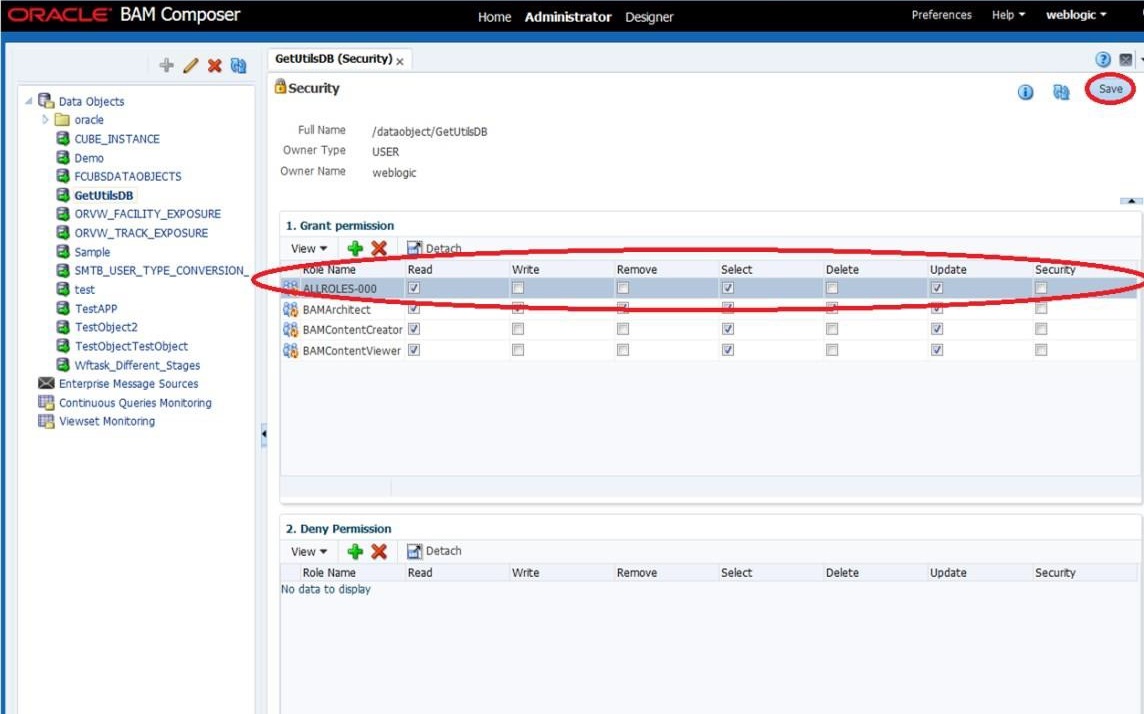
- Select Read, Select,and Update checkboxes and click the Save button.The Add Application Roles, Groups and Users - ALLROLES-000 screen displays.
Figure 1-86 Add Application Roles, Groups and Users - ALLROLES-000
- Follow the steps 21 to 27 for other Data objects as listed below:
- cube_instance
- wftask_different_stages
- ORVW_TRACK_EXPOSURE
- ORVW_FACILITY_EXPOSURE
- GetUtilsDB
- SMTB_USER_TYPE_CONVERSION_VIEW
- FCUBSDATAOBJECTS
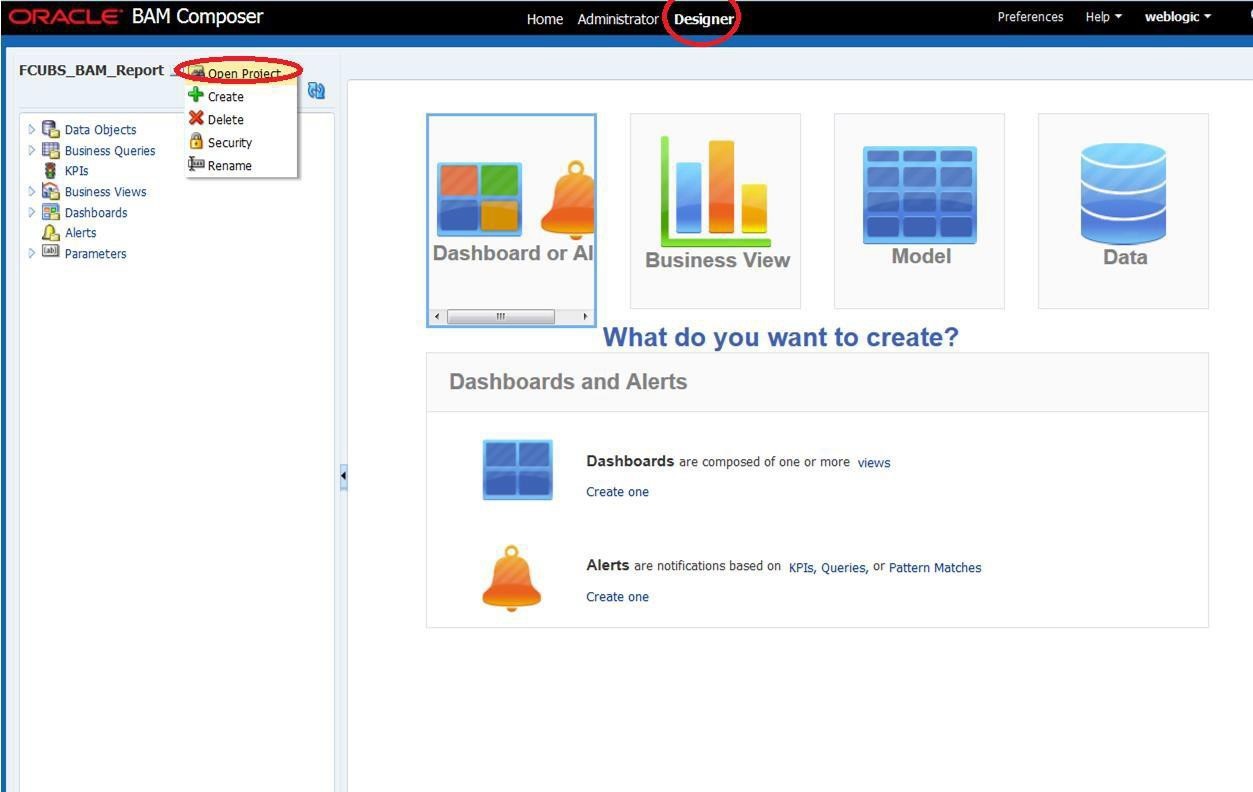
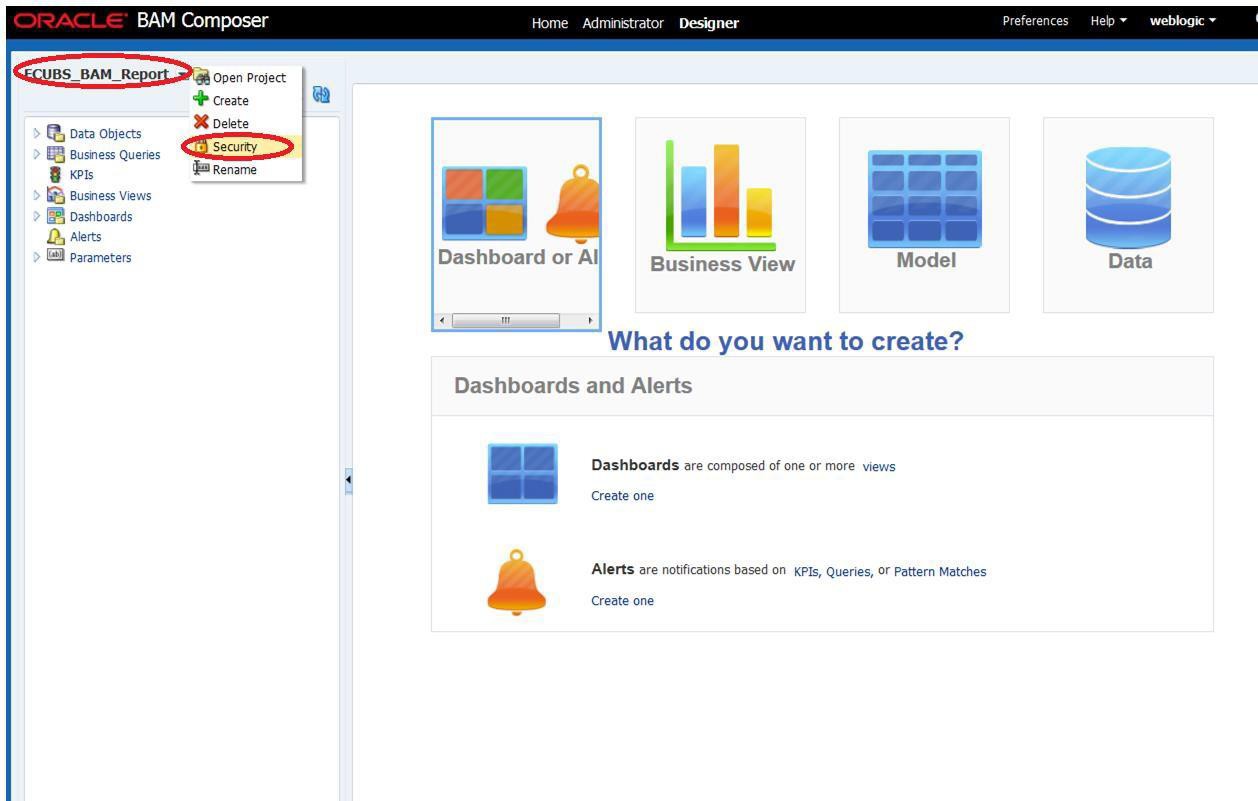
- On the Oracle BAM Composer, click the Designer.The Oracle BAM Composer Designer screen displays.
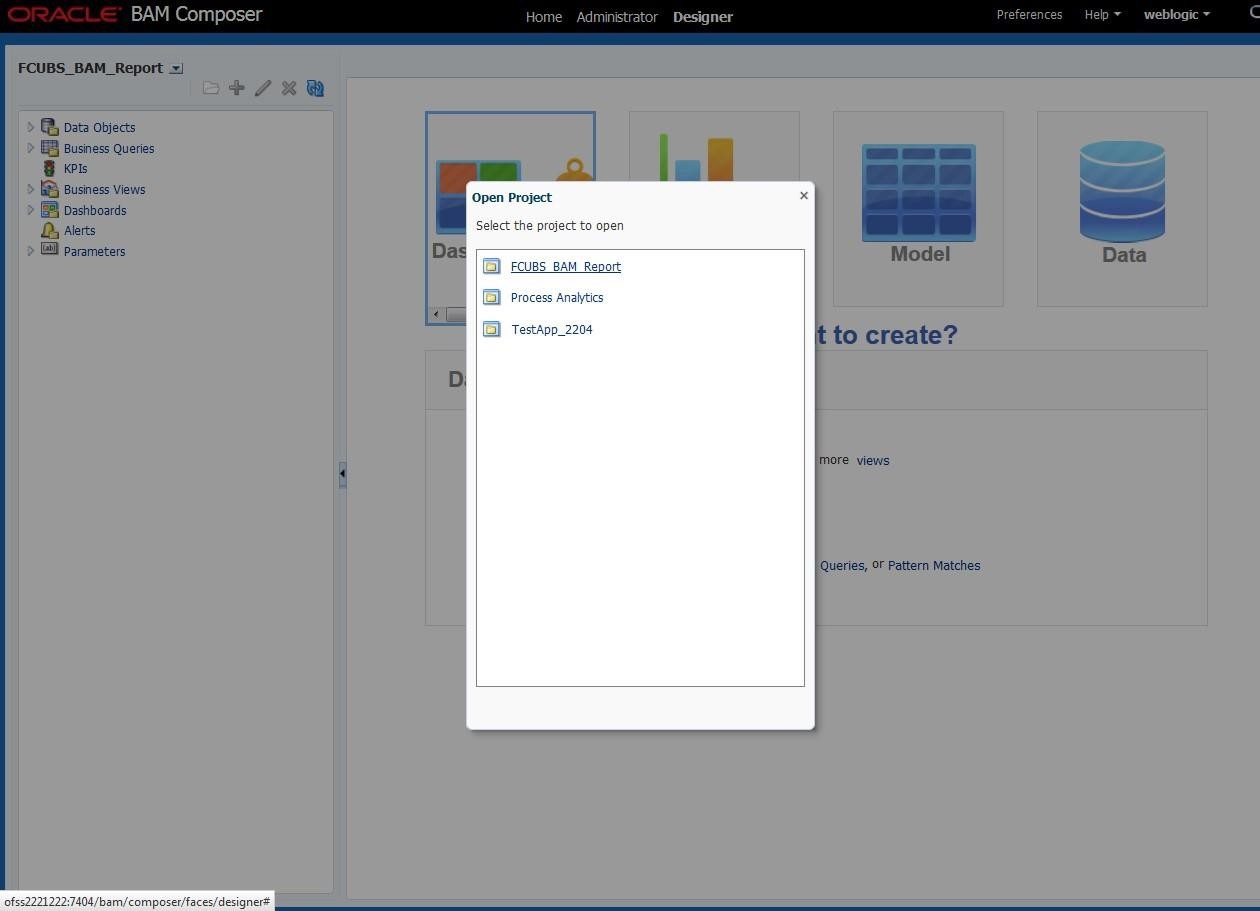
- Click Open Project.The Open Project pop-up window displays.
- On the Open Project pop-up window, click FCUBS_BAM_Report.
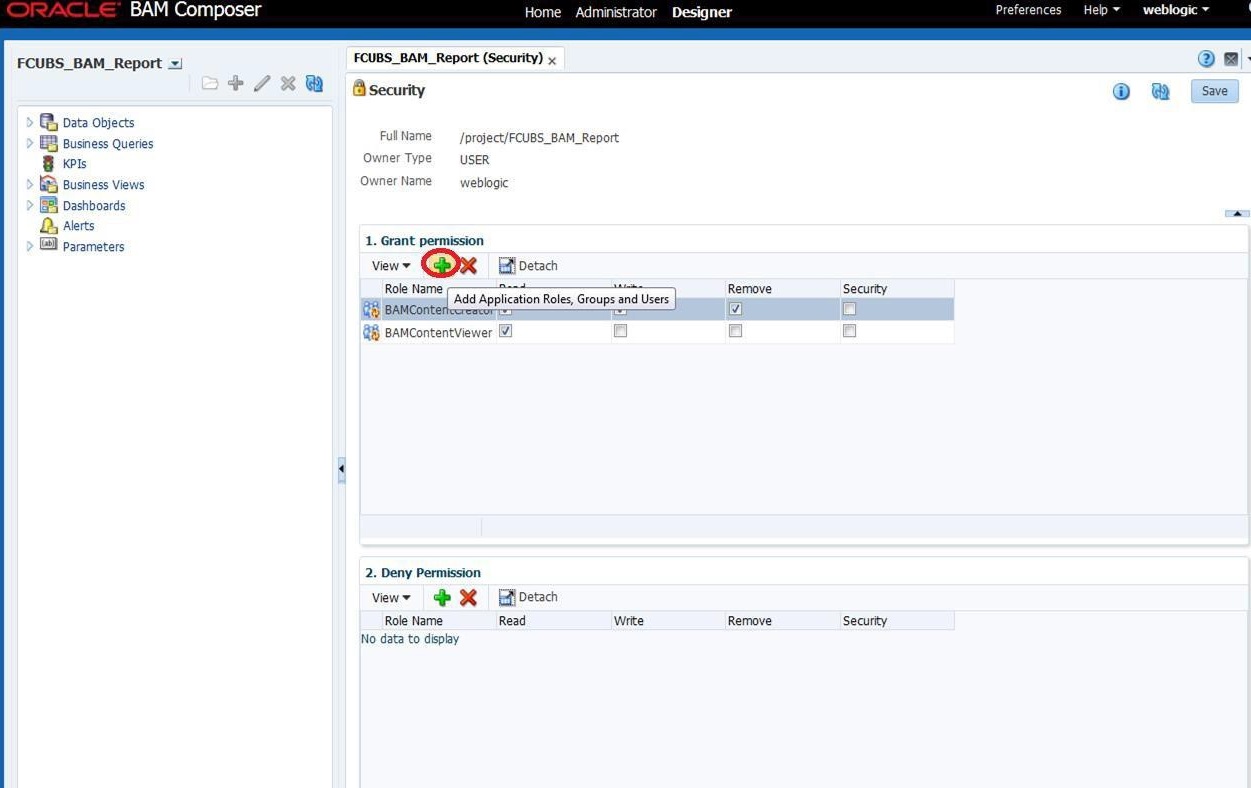
- On the Designer screen, right click FCUBS_BAM_Report and select Security.The FCUBS_BAM_Report - Security screen displays.
- On the FCUBS_BAM_Report (Security) screen, click the ADD icon under Grant Permission.The FCUBS_BAM_Report (Security) screen displays.
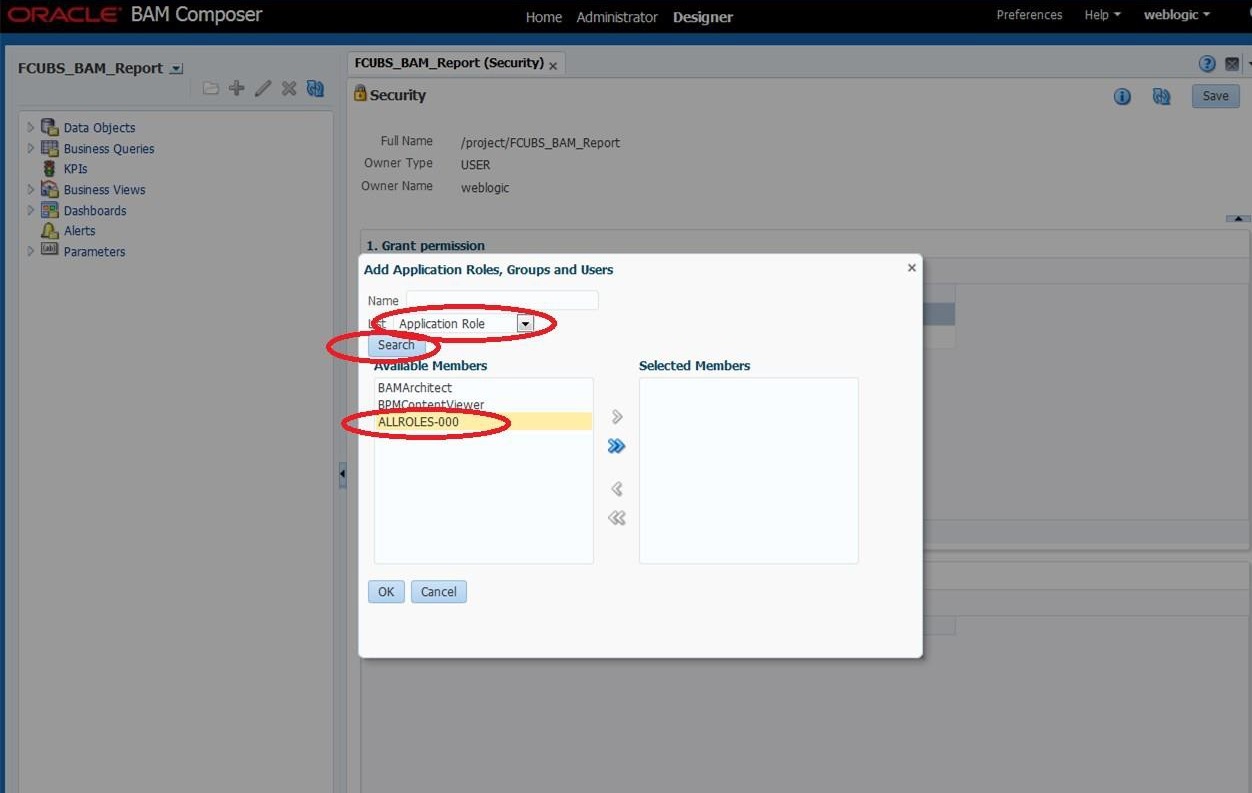
- Search the list based on the Application Roles and select the ALLROLES-000.The Add Application Roles, Groups and Users - ALLROLES-000 pop-up window displays.
Figure 1-91 Add Application Roles, Groups and Users - ALLROLES-000
- Move the ALLROLES-000 to Selected Members column and click the OK button.The Add Application Roles, Groups and Users - ALLROLES-000 - Selected Members pop-up window displays.
Figure 1-92 Add Application Roles, Groups and Users - ALLROLES-000 - Selected Members
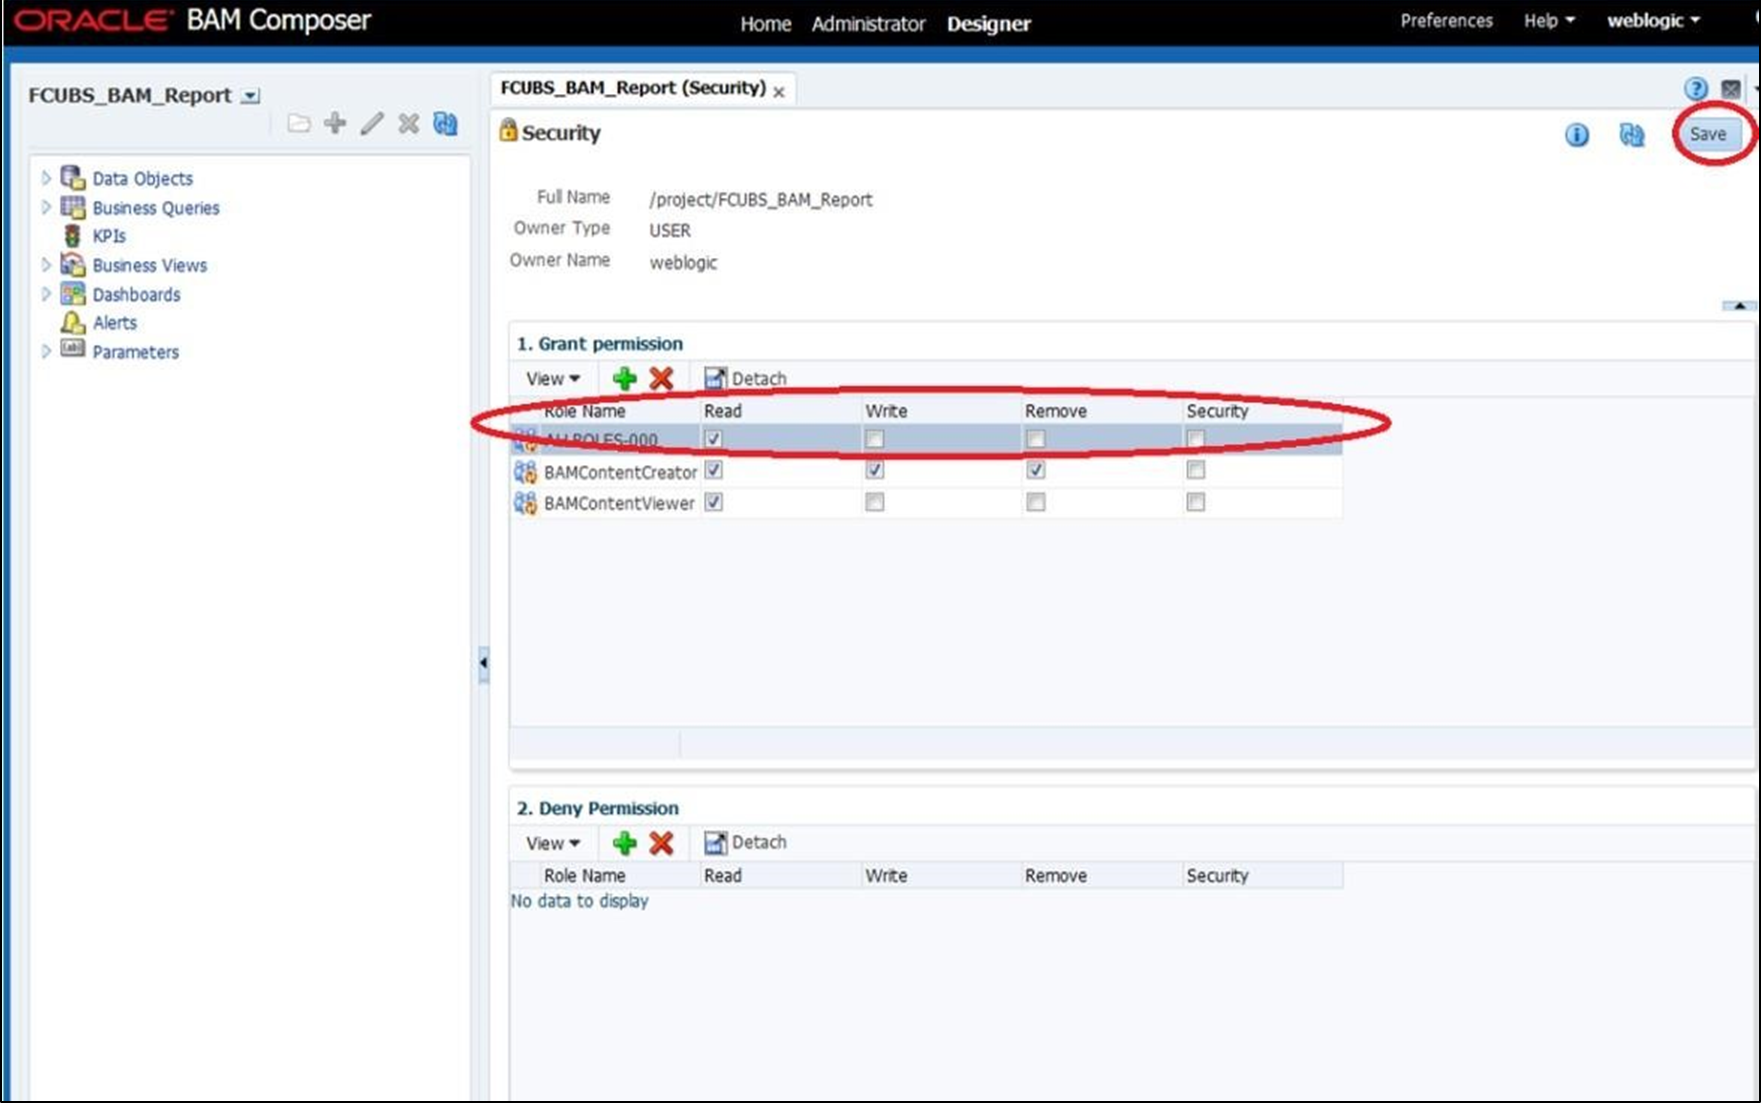
- Select the Read checkbox for ALLROLES-000 and click the Save button.The FCUBS_BAM_Report (Security) - ALLROLES-000 screen displays.
Figure 1-93 FCUBS_BAM_Report (Security) - ALLROLES-000
Parent topic: Integrate Oracle FLEXCUBE UBS and BPEL
