5.2 Account Documents Update
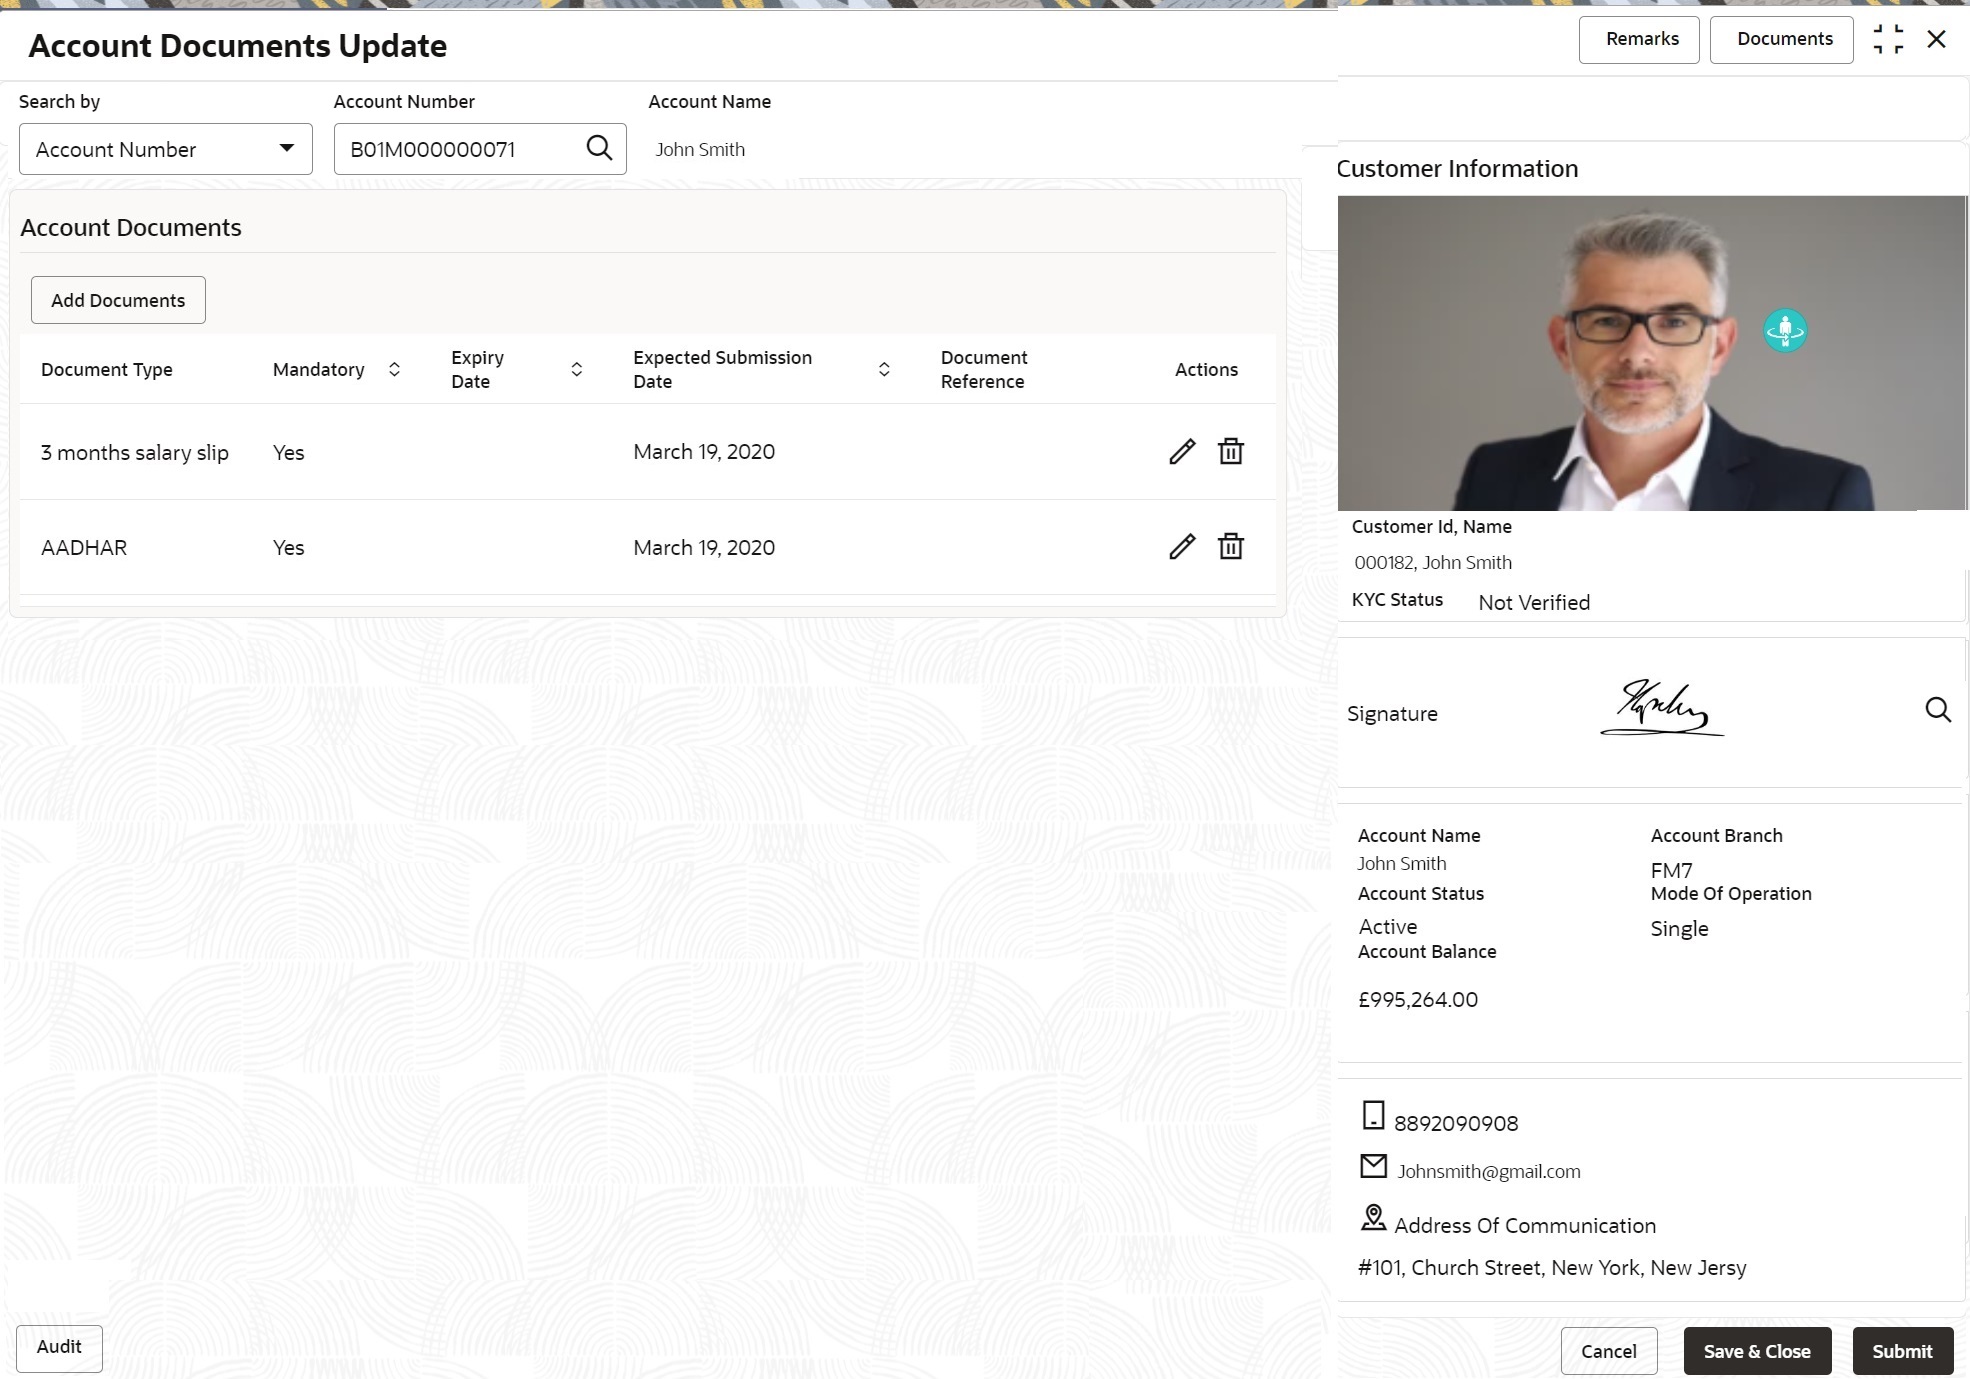
You can view, update, or delete documents submitted by the customer against document types specified for the account class using the Account Documents Update screen.
To update the documents for the account:
Note:
The fields marked as Required are mandatory.- On the Homepage, from Account
Services, under Other Services, click
Account Documents Update, or specify the
Account Documents Update in the Search icon
bar.Account Documents Update screen is displayed.
Note:
After the Account Number is selected, the system displays the available documents in the Account Documents section. - On Account Documents Update screen, specify the fields. For more information on fields, refer to the field description table.
Table 5-2 Account Documents Update - Field Description
Field Description Search by Users can search for an account number by using any of the available search criteria. The account number is set as the default search option. Users can specify the account number directly in the adjacent field or search for an account number by clicking the Search icon. Users can also search for the specific account number by providing customer ID, account number, or account name.
Other search options available in the Search by field are Customer ID, SSN, Mobile Number, and Email.
A specific customer ID can be searched by providing the customer name or customer ID. If SSN, mobile, or email IDs are chosen to find an account number, the respective IDs have to be input entirely in the adjacent field for the system to display the account number. For a given search criteria, multiple account numbers may be linked.
For example, two or more account numbers can be linked to a single mobile number. In such cases, the system displays all the account number matches and the user can select the relevant account number on which to perform a servicing operation.Note:
The label of the field adjacent to the Search by field changes dynamically. For example, if the Account number is chosen as the search criteria, the label of the adjacent field is displayed as the Account Number. If SSN is chosen as the search criteria, then the adjacent field would display the label as SSN.Account Documents This section displays the available documents. Document Type Displays the document type added for the account. Mandatory Displays whether the documents are of mandatory type. Expiry Date Displays the expiry date for the documents. Expected Submission Date Displays the expected submission date of the document. Document Reference Displays the document reference number. Actions Displays the following icons:  : Click to edit the document details. For
more information, refer Edit Documents.
 : Click to delete the attached
document.
- To add a document:
- In the Account Documents section, click
Add Documents.
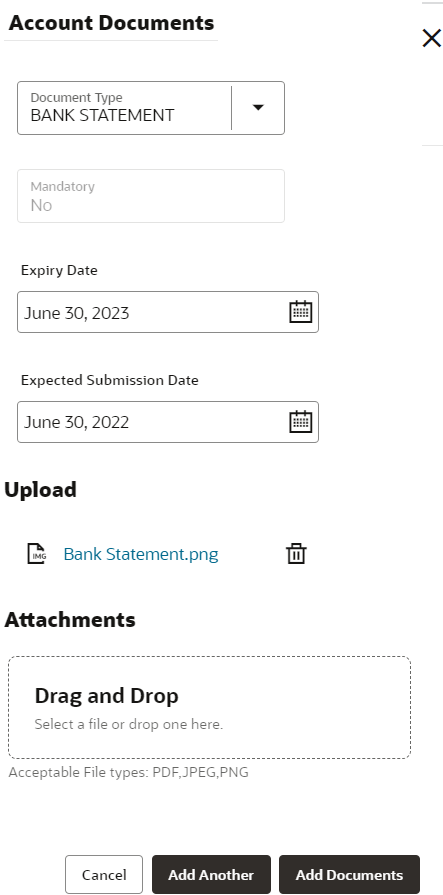
The Account Documents section is displayed.
- In the Account Documents section, maintain
the required details.
For more information on fields, refer to the field description table.
Table 5-3 Add Account Documents - Field Description
Field Description Document Type Select the type of document to be added to the account. Mandatory Displays whether the document is mandatory. Note:
By default, the field displays the value as No.Expiry Date Select or specify the expiry date of the document. Expected Submission Date Select or specify the expected submission date of the document, if the document is not submitted while adding the details. Upload Displays the documents uploaded. Note:
- The uploaded document name appears as link. You can click and view the documents.
- To remove the added document, click the
 icon.
icon.
Attachments Click to Drag and Drop box to upload the document. Note:
You can upload only PDF, JPEG, and PNG document format. - Click Add
Documents.
The documents are added successfully and displayed in the Account Documents section.
- To add more documents, you can click Add Another.
- In the Account Documents section, click
Add Documents.
- To edit the documents:
- In the Account Documents section, click the
 icon, from the Actions field.
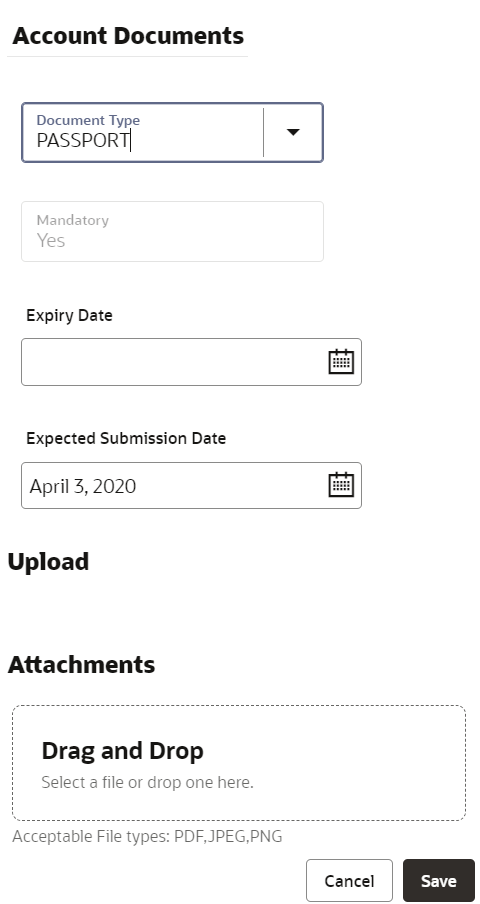
The Account Documents section is displayed.
- For information on the fields, refer Table 5-3, as the fields are same.
- Click Save.
- In the Account Documents section, click the
- Click Submit.The screen is successfully submitted for authorization.
Parent topic: Maintenance


