13.3 User Resource Access - Edit

This topic describes the systematic instruction to User Resource Access - Edit option.

The Bank Administrator gets a request with the list of remitter lists and transactions for which access details needs to be edited for a selected user of the party.

To edit remitter list and transaction access for the user:

  1. Navigate to one of the above paths.
    The User Resource Access - Edit screen appears.
  2. Perform anyone of the following actions:
    • In the Party ID enter the party id of the user.
    • In the Party Name field, enter the party name of the user.
  3. Perform anyone of the following actions:
    • Click Search.

      For a searched party, there will be a list of users displayed with information like user ID, full name of the user and initials of the user.

    • Click Cancel to cancel the transaction.
    • Click Clear to clear the search parameters.
  4. Perform anyone of the following actions:
    • Click the User Name link against the user record for which you want to edit the details.

      The User Resource Access – Mapping Summary screen appears.

    • Click Cancel to cancel the transaction.
    • Click Back to navigate to the previous screen.
  5. Click the Remitter List link.
    The User Resource Access – View screen, displaying remitter list mapping appears.
  6. Perform anyone of the following actions:
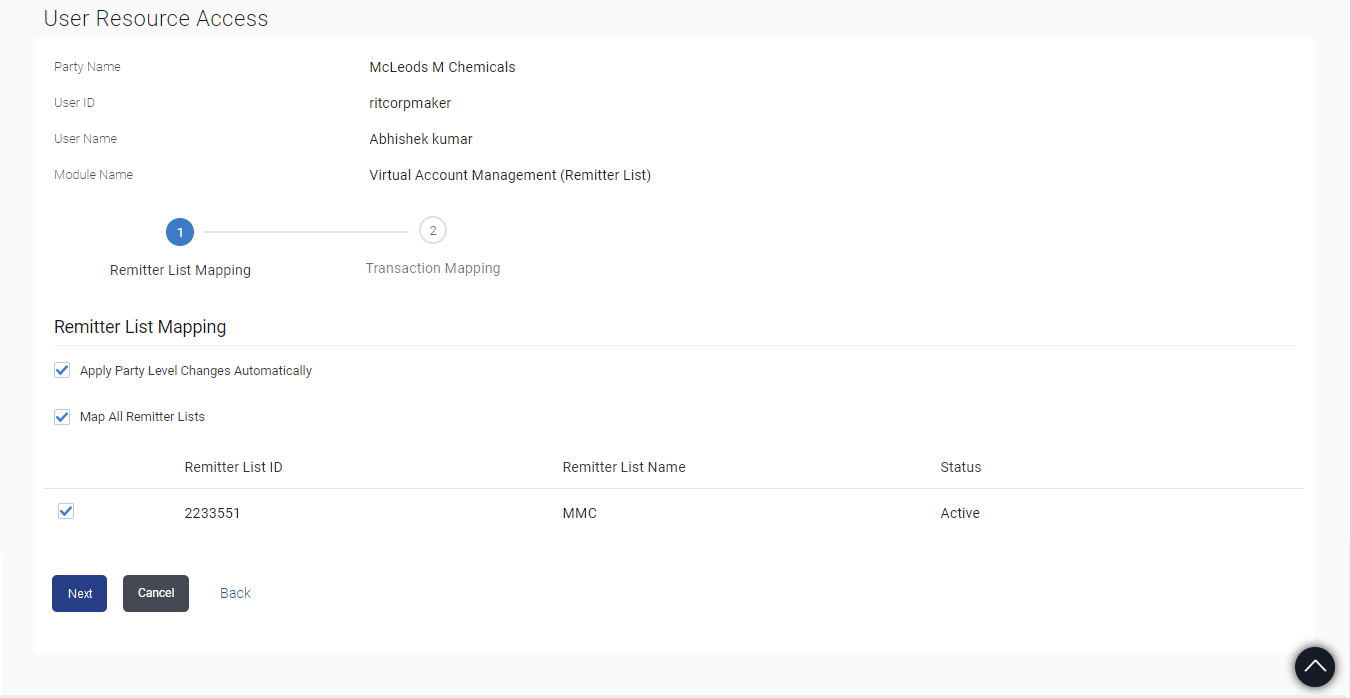
    • Click Edit. The User Resource Access - Edit screen appears. This enables the selection and de-selection option against the remitter list. There is also an option to edit check box Apply Party Level Changes Automatically to apply/ remove the party changes.
    • Click Cancel to cancel the transaction.
    • Click Back to navigate to the previous screen.

    Figure 13-13 User Resource Access – Edit


  7. Perform anyone of the following actions:
    • Select the respective check boxes preceding the Remitter List ID to be mapped.
    • Select Map All Remitter List, if you want to map all the Remitter Lists available. Select/ De-select check box Apply Party Level Changes Automatically to apply/remove the party changes.
  8. Perform anyone of the following actions:
    • Click Next .

      The User Resource Access - Edit screen with mapped remitter list appears.

    • Click Back to navigate to the previous screen.
    • Click Cancel to cancel the transaction.
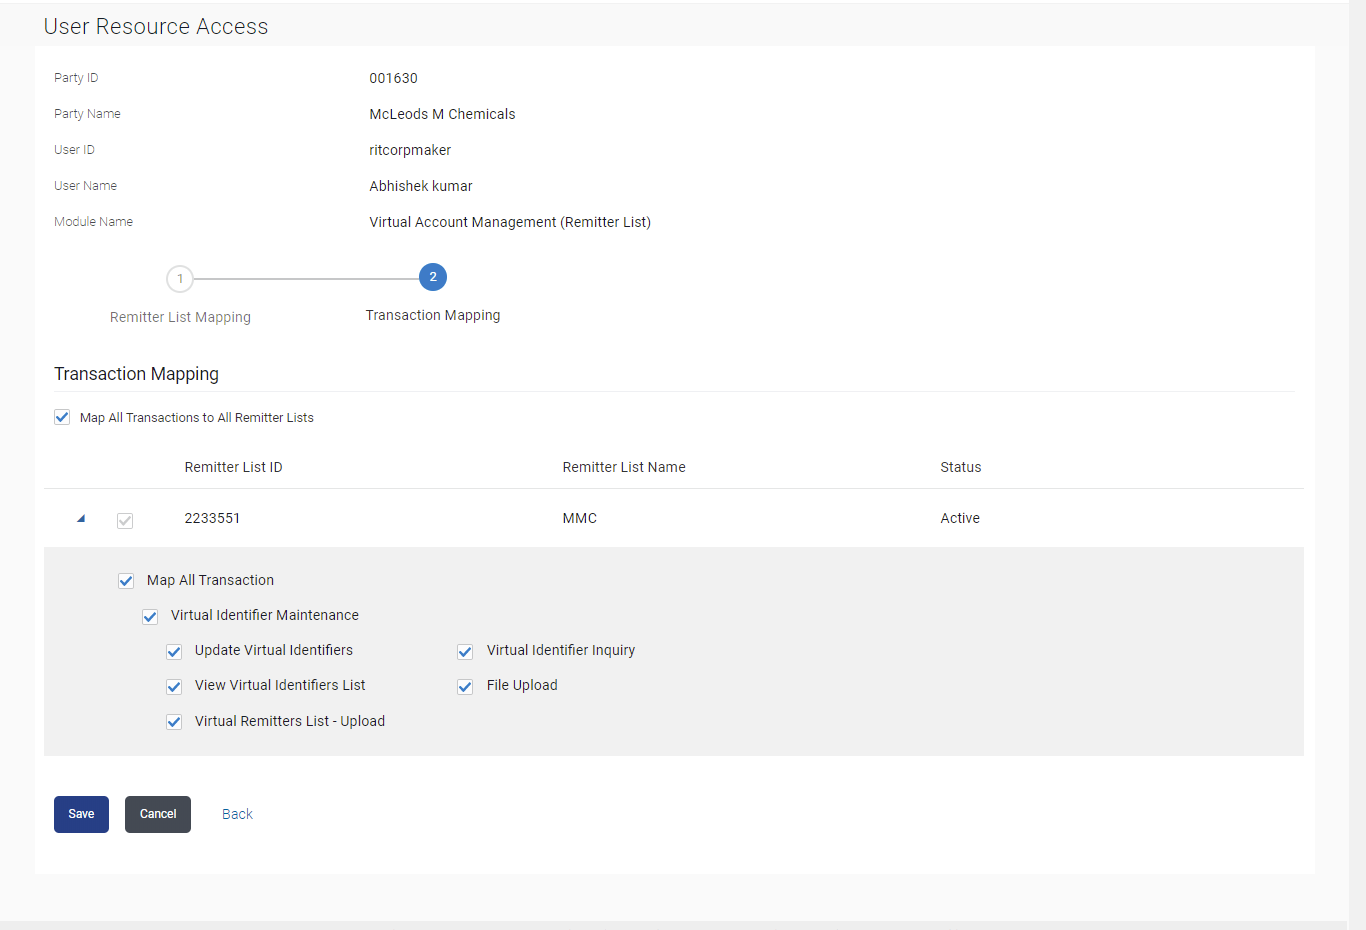
  9. To map the transactions to the remitter lists, click viewdetails icon against the particular Remitter List ID to view the transaction mapping.

    Figure 13-14 User Resource Access - Transaction- Resource Mapping - Edit


  10. Perform anyone of the following actions:
    • Select the respective check boxes preceding the transaction to be mapped.
    • Select Map All Transactions, if you want to map all the transactions to all Remitter Lists.
  11. Perform anyone of the following actions:
    • Click Save.

      The User Resource Access - Review screen appears.

    • Click Back to navigate to the previous screen.
    • Click Cancel to cancel the transaction.
  12. Perform anyone of the following actions:
    • Verify the details, and click Confirm.

      The User Resource Access - Confirmation screen with success message appears along with the reference number and status of the transaction.

    • Click Edit to edit the transaction.
    • Click Cancel to cancel the transaction.
  13. Click OK to complete the transaction.