Associate Attributes in a Dimension Build
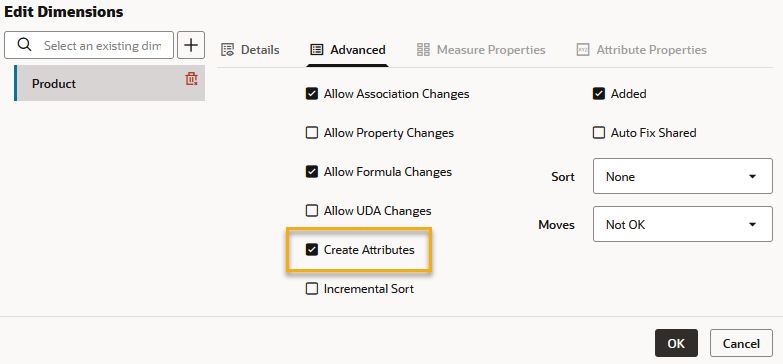
When source data contains attribute information, use one or more dimension builds to add attribute dimensions to the Essbase and to associate them with base members. Use load rule fields to add or update the attribute associations. Ensure that "Create Attributes" is enabled in the advanced dimension properties.
Whether you build the attribute dimension and associate the attribute members with the members of the base dimension in one step or in separate steps, define the fields as described in this section.
Every record of the source data must include at least two columns: one for the member of the base dimension and one for the attribute value of the base dimension member. In the same source data record, you can include additional columns for other attributes that you want to associate with the member of the base dimension. You must position the base member fields before the corresponding attribute member fields.
Example
You can have Essbase build members of base dimensions and attribute dimensions, and make attribute associations, in the same dimension build job.
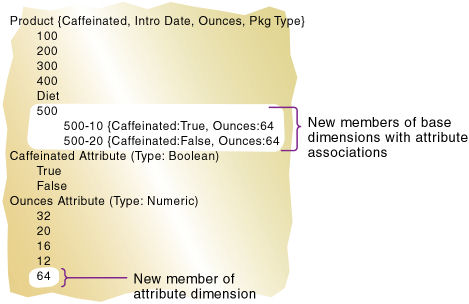
Assume you want to perform a dimension build that adds to Sample Basic new Product members 500-10 and 500-20, as children of 500.
In the same dimension build, you want to add a new numeric attribute member, 64, to the Ounces attribute dimension.
500	500-10	64	True
500	500-20	64	False
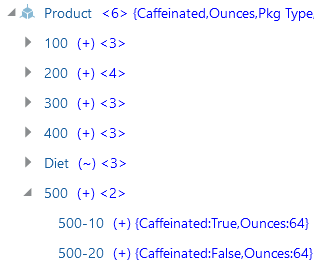
After you run the dimension build job, it builds members and associates attributes as shown in the outline below. Member 64 is a new member of the Ounces attribute dimension. Members 500, 500-10, and 500-20 are new members of the base dimension, Product, and are associated with member 64.
To recreate this example,
-
Import/build the Sample Basic cube, using the application workbook available from the gallery in the file catalog on the Essbase Server.
-
Create a tab-delimited data file like the following, name it
attrprod.txt, and upload it to the Sample Basic cube directory.500 500-10 64 True 500 500-20 64 False -
On the Home page, open the application and then open the database (cube).
-
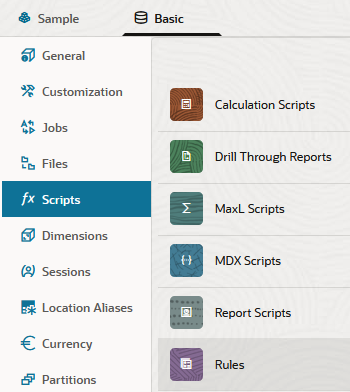
Select the Scripts tab, and then click Rules.
-
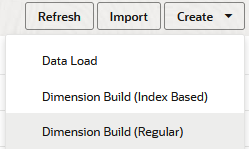
Click Create and choose Dimension Build (Regular).
-
In the New Rule dialog,
-
Enter a rule name; for example, attrprod.
-
For Source Type select File, click Catalog and navigate to
attrprod.txt.When you click Catalog, the file is expected to be located in the cube directory on the Essbase Server by default, so you must have already uploaded it using the Files section of the Essbase web interface. If the file is on your client machine, click File Browser to locate the file.
-
Leave the Header Record Number and Dimension Build Record Number fields as 0. Header records are not useful for dimension builds.
-
Change the Delimiter value from Comma to Tab.
-
Click Proceed.
-
The dimension build rule opens with undefined fields, and preview data (from the text file) populating the grid below the fields.

-
-
As this is a new rule, there are no dimensions associated yet.
- Click Dimensions.

- Type in or search for a dimension name; for example, Products, and click Add.

- Click Dimensions.
-
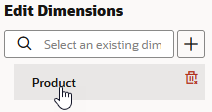
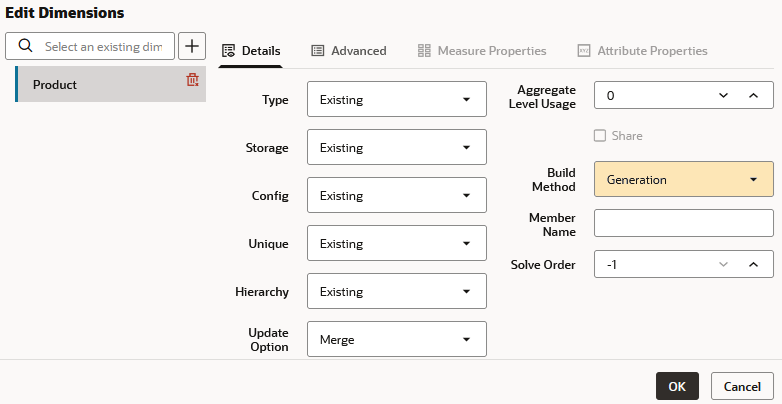
Now you need to define the build method and check other dimension build operational instructions. Click Product to edit the properties.
-
Ensure Build Method is Generation. Leave the Member Name field below it blank.
- Click Advanced, and select Create Attributes.
- Click OK.
- In the attrprod rule:
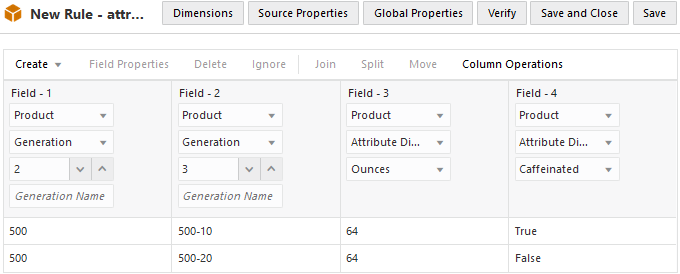
- In Field 1, select Product for the Dimension, and Generation for the Type. Increment the Generation field to 2.
- In Field 2, select Product for the Dimension, and Generation for the Type. Increment the Generation field to 3.
- In Field 3, select Product for the dimension, and Attribute Dimension for the Type. Below it, select Ounces.
Field 3 contains members of the Ounces attribute dimension associated with the Product dimension. Because this field immediately follows the data field defined as the generation 3 member of the base dimension Product, Essbase associates the attribute member 64 with the 500-10 and 500-20 members.
- In Field 4, select Product for the dimension, and Attribute Dimension for the Type. Below it, select Caffeinated.
Field 4 shows how to associate an attribute from an additional single-level attribute dimension. Because the base dimension is already specified, you need only to define an additional field for each attribute that you want to associate with the member of the base dimension.
Note:
When you are working with numeric ranges, you may need to build attribute dimensions and perform associations in separate steps. See Numeric Range Attributes. -
Verify the rule, then save and close. If there are any errors, see Requirements for Valid Dimension Build Rule Files.
-
Run the dimension build job.
- Open the outline. Before checking results of your dimension build, adjust the displayed columns to show attribute associations. On the outline toolbar, select the Display selected columns in the table icon.

- Scroll down. For property name Attributes, click Show in name. Click Apply and Close.
- Expand the Product dimension, and then expand the member, 500.
After you run the dimension build job, it builds members and associates attributes as shown in the outline below. Member 64 is a new member of the Ounces attribute dimension. Members 500, 500-10, and 500-20 are new members of the base dimension, Product, and are associated with member 64.
Note:
You should not create an outline in which a shared member is located before its prototype member. If you do this, you will encounter an error while validating the outline.
Remove Attribute Associations
To remove attribute associations, edit the dimension build rule as follows:
-
In the General tab of the Field Properties dialog box, select Remove if null for the attribute field. (This option is ignored if Allow association changes is not selected.)
-
Leave the field empty or NULL in the source data.