Emailing Transactions
Email is now the main method of sending transactions to customers for most users. With NetSuite, you can email the transaction directly from the active screen. NetSuite automatically saves a copy of the message and records the audit trail. Users with the Email Templates and Custom Transaction Forms permissions can select which transaction email template to use for each transaction type when sending transaction emails with a PDF attachment. For information about determining the content of the email message, see Working with Email Templates and Assigning an Email Template to a Transaction Type.
You don't need special permissions to email a transaction, but your account needs to be set up to enable the action. An administrator must do the setup. For information, see Setting Email Preferences.
Following are methods to email a transaction:
-
To send the transaction by email as you complete or edit it, select Save & Email from the Save menu.
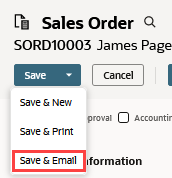
Save & Email verifies that the To Be E-Mailed box is checked and the field contains an email address. The box and field are located on the Communication > Messages subtab of the transaction record.
The To Be E-Mailed box must be checked and the field must contain an email address. If the field is blank, NetSuite prompts you to provide an email address. If the field contains an email address, the Save & Email method immediately saves the transaction and sends an email message with the transaction.
The default address in the To Be E-Mailed field is the email address specified in the header of the customer or vendor record. The box is automatically checked when the Email box is checked on the Preferences subtab of the entity record.
You can view a log of sent transaction email, including any attachments in the entity record on the Communication > Messages subtab. A list of sent email is also available in the same location on the transaction record. To view the list, your role must have at least View level access to the Track Messages permission, and meet one of the following criteria:
-
you're the author, the recipient, or a related entity
-
you have access to the author, the recipient, or a related entity
-
or you've access to a related record, such as a transaction, event, or custom record.
For information about how to set up a history log of all recently sent transaction email, see Creating a Sent Log for Transaction Email.
-
-
To send the transaction to one or more specific email addresses, go to the Communication > Messages subtab, check To Be E-Mailed. Enter the email address you want to send the transaction to. Separate multiple addresses with semicolons. Optionally, you can select a standard message from the Select Message list or type a message in the Customer Message field.
To send a saved transaction by email in view mode, from the Actions list, select Email.
Transactional email isn't subject to monthly send limits. You can send an unlimited number of transactional email messages during the month.
To send a bulk e-mail with a mass update on a transaction, don't exceed the 4000 character limit for the field (including HTML tags), otherwise, the e-mail doesn't save.