Configuring Field Groups
This topic provides an overview of field groups in NetSuite and describes how to configure field groups on standard forms. If you want to add or manage field groups on custom record custom forms, see Adding Field Groups to Custom Forms of Custom Records.
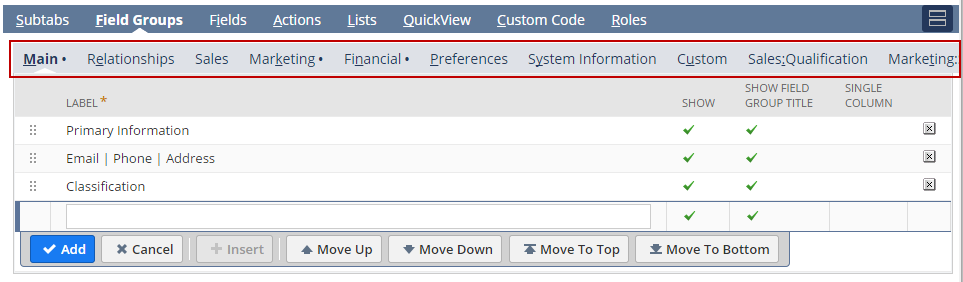
Use the Field Groups subtab to customize the field groups that appear on your forms. Field groups support body fields only. You can't create a field group for sublist fields.
You can use the Field Groups subtab to change the UI label of a field group, the fields within the field group, and the placement of a field group on the page. You can also use the Field Groups subtab to create new field groups and organize all fields into specific field groups. The order of field groups on the Field Groups subtab determines the order of field groups on your form.
Any unassigned fields are listed together below all other fields that are assigned to field groups. These unassigned fields are always displayed last and can be reordered among all other unassigned fields. If you want to move a field up higher on a subtab, assign it to a field group.
Be aware that adding custom fields to field groups can change how field text displays, regardless of the display size attributes set for the custom fields. For more information, see Setting Display Options for Custom Fields.
To configure field groups:
-
Click the Field Groups subtab.
-
To customize field groups that appear in the main body area of a page, click Main. To customize the field groups that appear on other subtabs on the form, click another field group subtab.
-
In the Label column, edit field group headings.
-
In the Show column, clear a field group to hide it on the form.
-
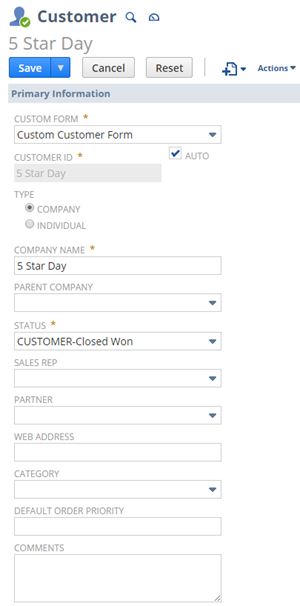
In the Single Column column, to have the column display vertically rather than horizontally, check a field group. The following screenshot provides an example of the Primary Information field group displayed vertically.
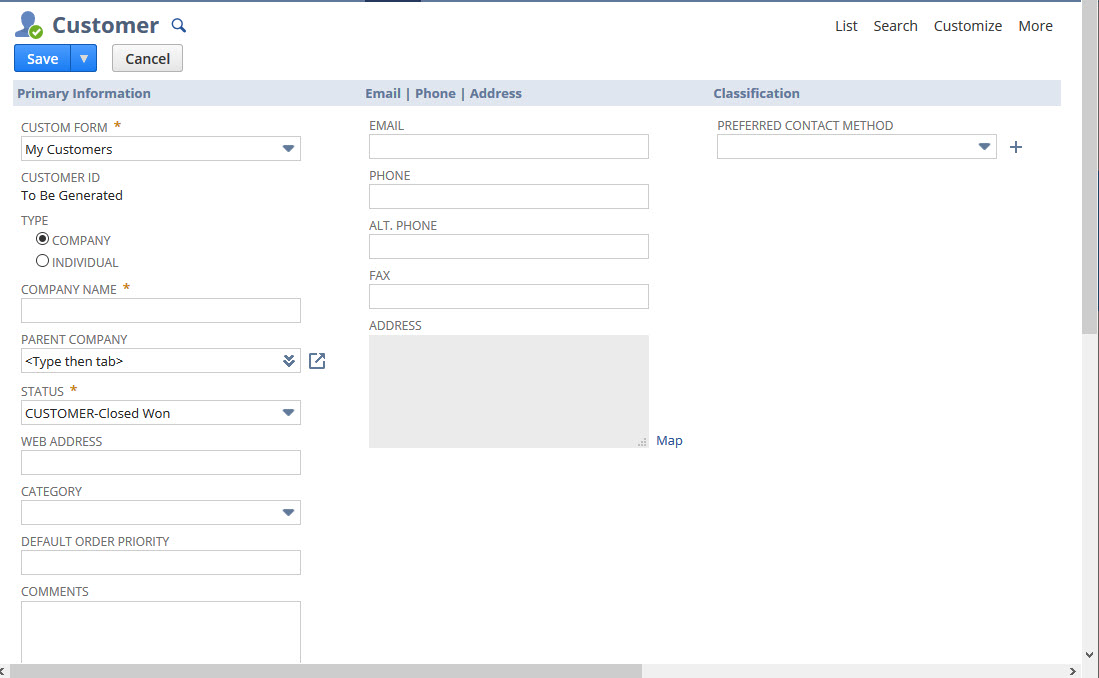
Note that if you select Single Column for three field groups together, the field groups appear side by side in the UI, because three field group columns make a row.
-
To delete a field group, click the X icon. The fields display at the bottom of the page. However, the fields aren't assigned to any field group because that field group has been deleted.
-
After configuring your field groups, you can click the Fields subtab (for Entry forms) or the Screen Fields subtab (for Transaction forms) to configure the fields that appear in each field group. For more information, see Configuring Fields or Screens.
For information about managing field groups on custom forms for custom records, see Adding Field Groups to Custom Forms of Custom Records.
Related Topics
- Creating Custom Entry and Transaction Forms
- Custom Entry Form Properties
- Custom Transaction Forms Properties
- Storing Custom Forms with Transactions
- Configuring Subtabs for Custom Entry and Transaction Forms
- Moving Fields and Lists Between Subtabs
- Configuring Fields or Screens
- Configuring Buttons and Actions
- Configuring Printing Fields
- Configuring Sublists
- Configuring Sublist Fields
- Configuring QuickViews
- Associating Custom Code (Client SuiteScript) Files With Custom Forms
- Defining Preferred Forms
- Adding Disclaimers to Transaction Form Footers
- Specifying Check Layout by Subsidiary
- Customizing Multiple Page Transaction Forms
- Linking Transaction Forms