Creating Custom Transaction Line Fields
Custom transaction line fields let you add information specific to your business needs to the line items of your transaction records.
These records include:
-
expense items
-
purchase items
-
sale items
-
store items
-
revenue arrangements - available if Advanced Revenue Management is enabled
-
journal entries
-
expense reports
-
item receipts or fulfillments
-
opportunity items
-
time cards
-
inventory adjustment
-
inventory transfer
-
fulfillment requests
-
store pickup fulfillments
-
work orders
-
paycheck earnings
-
paycheck deductions
-
paycheck employee taxes
-
paycheck company taxes
-
paycheck company contributions
Additional options for custom transaction line fields include controls for displaying fields on printed forms (such as picking tickets or packing slips), grouping on invoices, storing with item groups, and applying to kit/assembly component lines. These options do not represent separate transaction types, but rather define display and storage behaviors for the custom field.
To create or modify custom transaction line fields:
-
Go to Customization > Lists, Records, & Fields > Transaction Column Fields.
-
On the Custom Transaction Line Fields page, each custom field is listed, with columns providing detailed information about the field and which records the field has been applied to.
-
Choose an option:
-
To edit an existing custom Transaction Line field, click the field name in the Description column and then modify the field definition as needed.
-
To add a new custom Transaction Line field, click New.
For more information, see Creating a Custom Field.
-
-
Fill in the required fields on the Transaction Line Field page, and then click Save.
You can use SuiteCloud Development Framework (SDF) to manage custom transaction line fields as part of file-based customization projects. For information about SDF, see SuiteCloud Development Framework. The Copy to Account feature lets you copy a custom transaction line field to another one of your accounts. Each custom transaction line field page has a clickable Copy to Account option in the upper right corner. For information about Copy to Account, see Copy to Account.
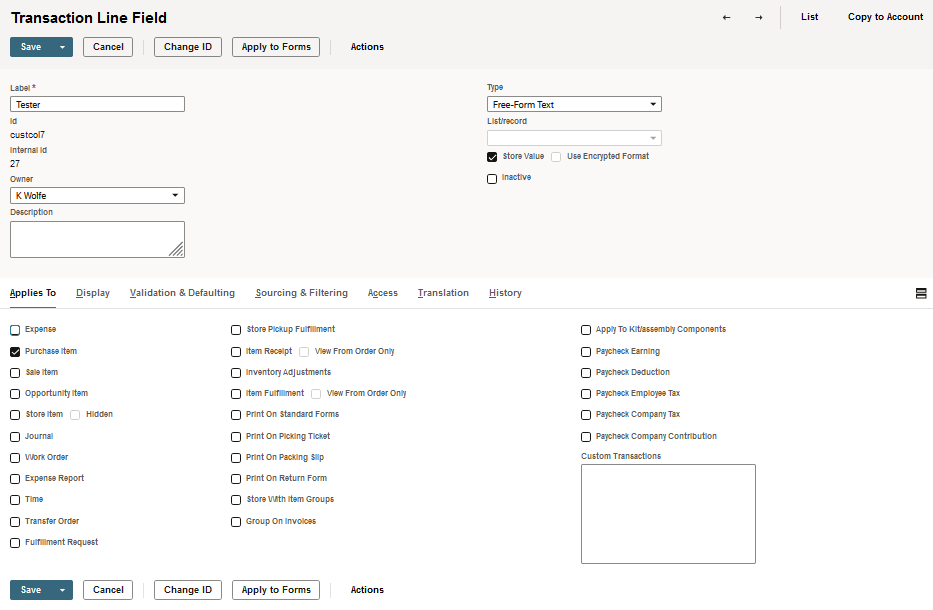
Here is an example of a custom transaction line field.
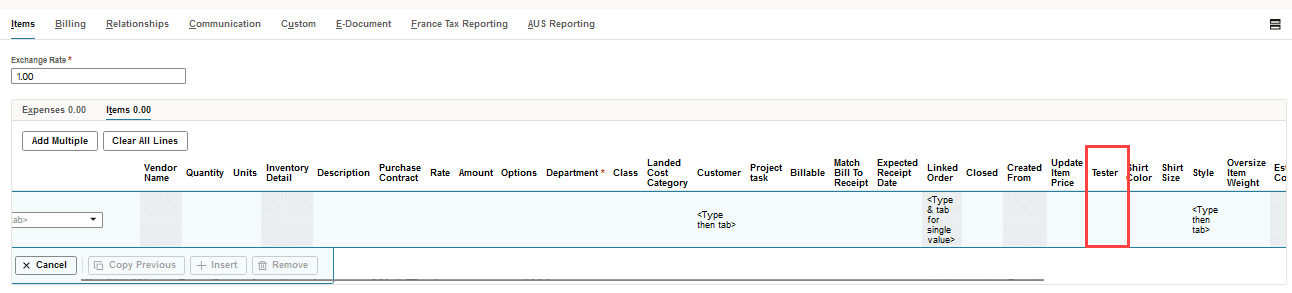
When the custom transaction line field is included in a form, it could look like the following example.
If you set the Display Type to Hidden, the field is still included on all forms, but it won't be visible. Any changes you make to show or hide the field on forms won't affect the custom transaction line field.
Check Box Type Limitation
There's a limitation on custom transaction line fields when all of these conditions are met:
-
Type = Check Box
-
Store Value = checked
-
Applies To = only Item Fulfillment is checked
-
On the Validation & Defaulting subtab, Default Checked is checked
-
Create a sales order and add at least one item
-
Click Save & Fulfill
However, on the item fulfillment transaction, you'll notice the transaction line field isn't checked, even with the previous settings. This happens because NetSuite takes the custom field info from the sales order, and if the check box isn't applied, it defaults to the system value. To work around this, you can apply the field to sales orders and hide it on the sales order forms, if needed.
Related Topics
- Custom Field Types
- Creating Custom Fields by Type
- Creating Custom CRM Fields
- Creating Custom Entity Fields
- Creating Custom Item Fields
- Creating Custom Transaction Body Fields
- Creating Custom Transaction Item Options
- Creating Custom Item Number Fields
- Creating Other Record Fields
- Creating Other Sublist Fields
- Apply to Kit or Assembly Components Setting for Custom Segments and Transaction Line Custom Fields