Customizing Inventory SuiteAnalytics Workbooks
You can customize inventory workbooks to add fields to pivot tables, create tables and charts, or modify specific elements.
When you customize a standard workbook, you must use the Save As option to save a copy of your custom inventory workbook. Don't overwrite the default inventory workbooks. Your copy of a workbook is saved under My Workbooks. You can share your custom workbook with other users. For more information, see Accessing and Sharing Workbooks and Datasets.
-
Add fields to pivot tables
You can customize pivot tables by displaying more fields from transactions. For example, on the Sales Orders to Fulfill pivot table, you can add the Date field to display the creation date of a transaction. By adding more fields, you can view more details for each transaction.
On a pivot tab, drag a field from the Fields list, and then drop it on the appropriate section in the Layout panel. To view the default fields for inventory workbooks, see the following topics:
-
Create charts
You can add charts based on transactions included in a workbook. For example, you can create an accompanying chart for the Sales Orders to Fulfill pivot table. Select the fields you want to view on the chart and arrange them according to your business requirements.
On a workbook tab, you can create charts by clicking the plus icon, and then clicking Add Chart. In the Layout panel of a new chart, you can specify the chart type, such as column or bar chart. In the X-Axis, Series, and Measures sections, you can drop the fields that you drag from the Fields list. On the Properties panel, you can enter your chart title and labels.
For example, to create a column chart for Sales Orders to Fulfill by Customer, you can select the following fields:
-
X-Axis: Entity
To sort by entity, click the Entity field to display and click its Field Menu icon. From the menu list, click your sorting preference.
-
Measures: Transaction
To sort by transaction, click the Transaction field to display and click its Field Menu icon. From the menu list, click your sorting preference.
See an example of the column chart in the following image:
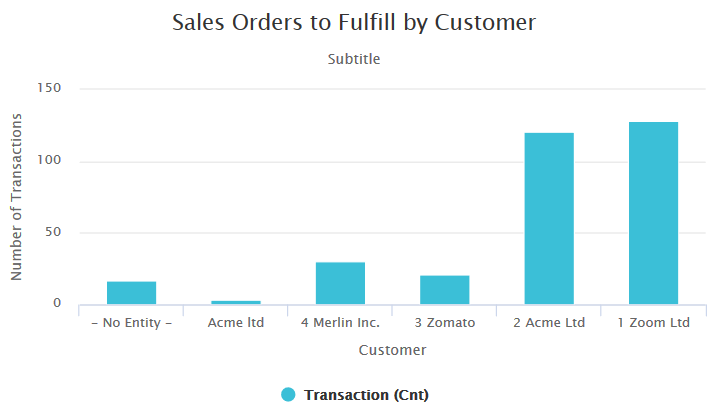
-
After editing a workbook, you must refresh it to view the changes. For more information, see Retrieving Updates for Workbooks.
For detailed instructions and other ways of customizing workbooks, see the following topics: