Tutorial: Using Postman with OAuth 2.0
This tutorial walks you through the setup for OAuth 2.0 in both NetSuite and Postman. Once you're set up, you'll be able to perform CRUD actions on elements of your NetSuite account.
Prerequisites
Before starting, you will need the proper roles, permissions, and features set up in your NetSuite account. For more information, see Prerequisites and Setup for REST Web Services. You will also need to install the Postman desktop application. For more information, see Installing Postman
Step 1: Integration record for application
-
In your NetSuite account, create a new integration record. Don't save it yet. For how to create this record, see Create Integration Records for Applications to Use OAuth 2.0.
An integration record is what allows for a connection between Postman and your NetSuite account.
-
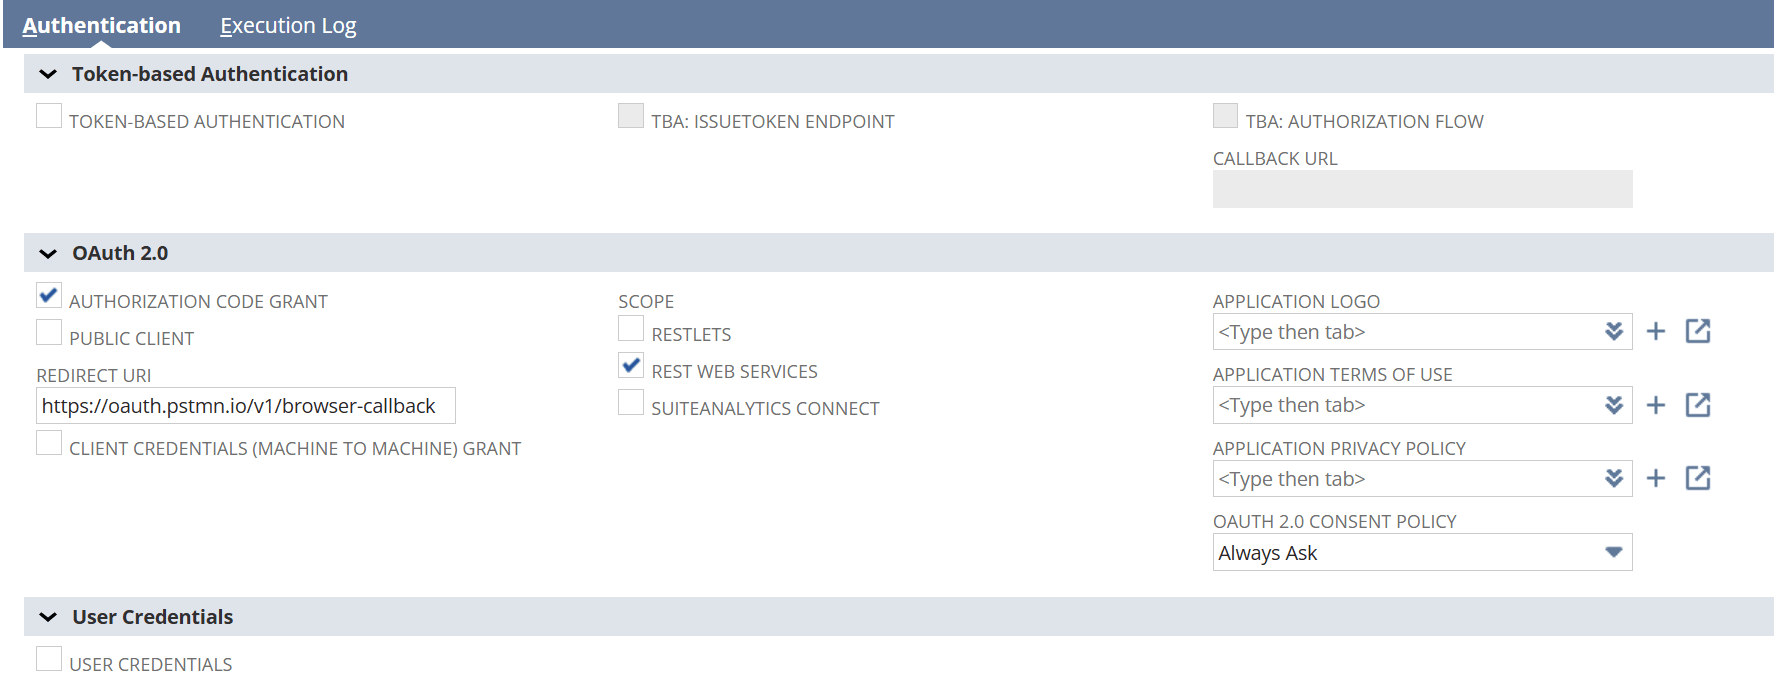
In the Authentication tab, set up your integration record:
-
Under Token-based Authentication, make sure all options cleared.
-
Under OAuth 2.0, make sure only the following options are checked or filled in:
-
Authorization Code Grant
-
REST Web Services
-
Redirect URI: If you're not sure what to enter here, you can use Postman's callback URL.
-
OAuth 2.0 Consent Policy: Select whichever option makes the most sense for you. Learn more about Integration Record and Prompt Parameter Combinations.
-
-
Under User Credentials, leave all options cleared.
-
-
Before clicking Save, note that when you do, the client ID and secret will display at the bottom of the page. Make note of both the ID and secret, as you'll need them later and you won't be able to access them again.
Important:The system displays the client ID and client secret only the first time you save the integration record. After you leave this page, these values cannot be retrieved from the system. If you lose or forget the client ID and client secret, you will have to reset them on the Integration page, to obtain new values. Treat these values as you would a password.
-
Click Save.
Step 2: Postman environment
-
Follow these steps to import and set up a Postman environment: Importing and Setting Up a Postman Environment.
-
Follow these steps to import a Postman collection: Importing the Postman Collection.
-
Follow these steps to test a request: Sending a Request From the Imported Collection.
Step 3: Postman token
Creating the token:
-
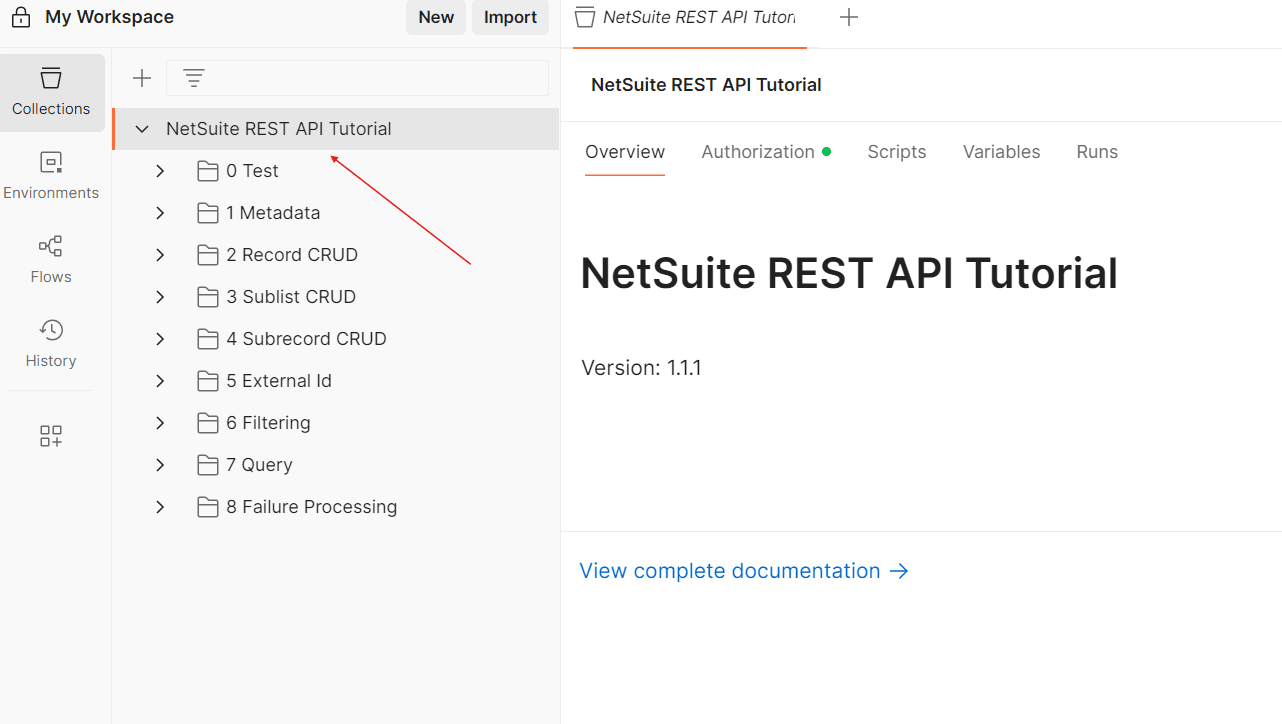
In Postman, open the Collections tab and select your collection that you created in step 2.
-
Open the Authorization tab then make the following selections:
-
For Auth Type, select OAuth 2.0.
-
For Add authorization data to, select Request Headers.
-
-
In the Configure New Token section, select or fill in the following:
-
Token name: Give your token a name.
-
Grant type: Select Authorization Code.
-
Callback URL: The same URL you used for the Redirect URI.
-
Auth URL: https://<youraccountID>.app.netsuite.com/app/login/oauth2/authorize.nl
Replace <youraccountID> with your own account ID.
-
Access Token URL: https://<youraccountID>.app.netsuite.com/services/rest/auth/oauth2/v1/token
Replace <youraccountID> with your own account ID.
-
Client ID: Use the client ID from your integration record.
-
Client Secret: Use the client secret from your integration record.
-
Scope: rest_webservices
-
State: This can be any random string of ASCII characters. It must include at least 22 characters.
-
Client Authentication: Send as Basic Auth header
-
-
Click Get New Access Token. If you get the NetSuite login screen after clicking Get New Access Token, log in to your account and confirm the message that appears.
-
Click Use Token.
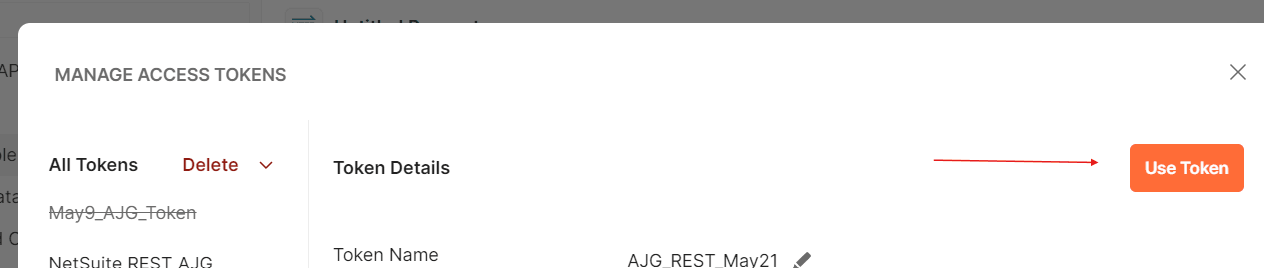
The token will now show up as your selection under Current Token.
-
Click Save.

Testing the token:
-
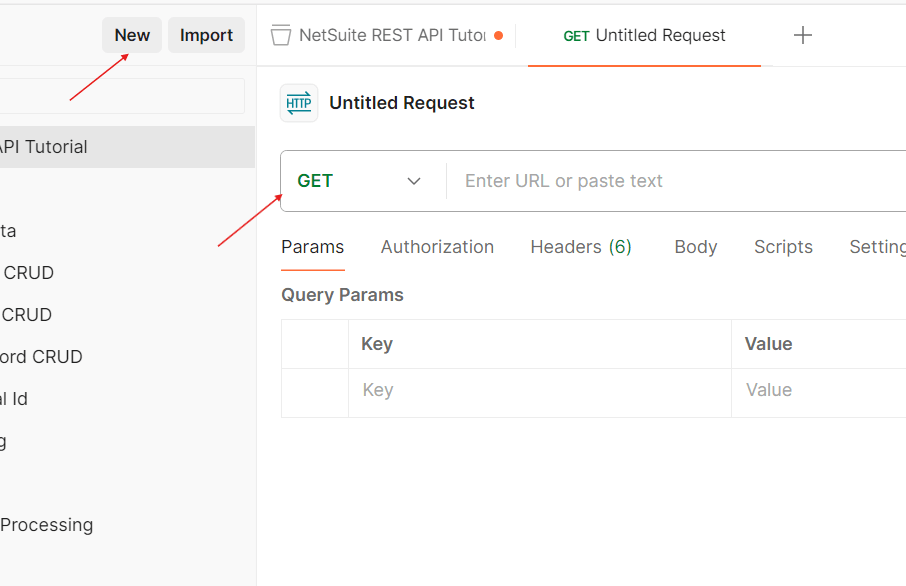
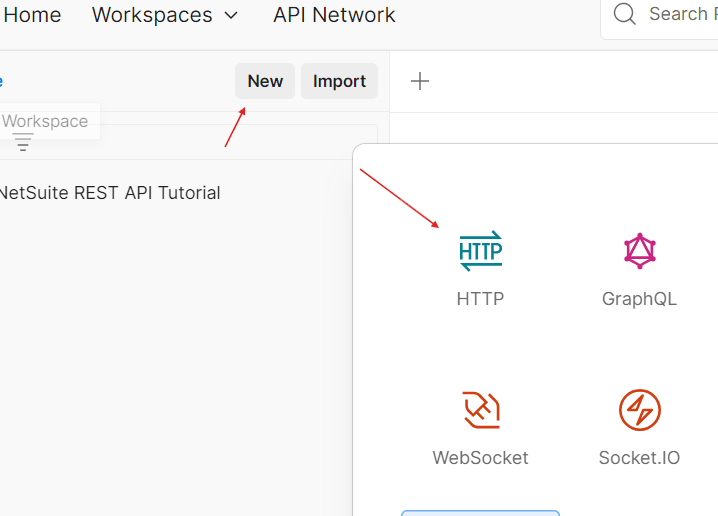
Create a new HTTP GET request.
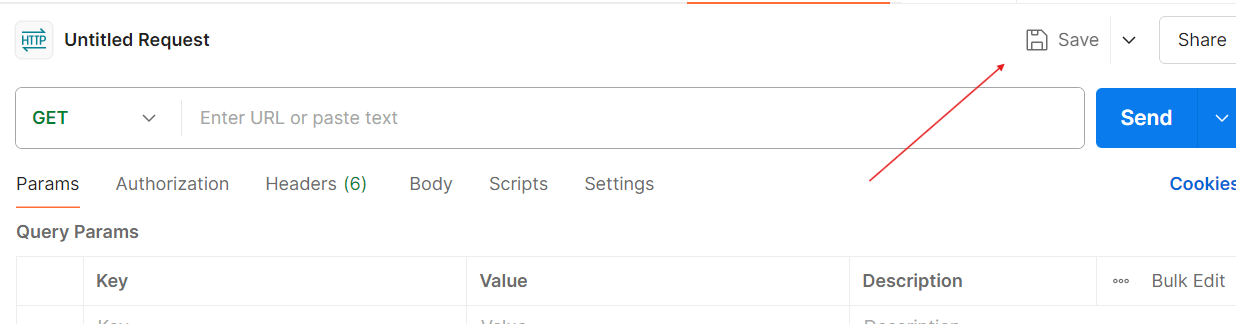
-
Click Save.
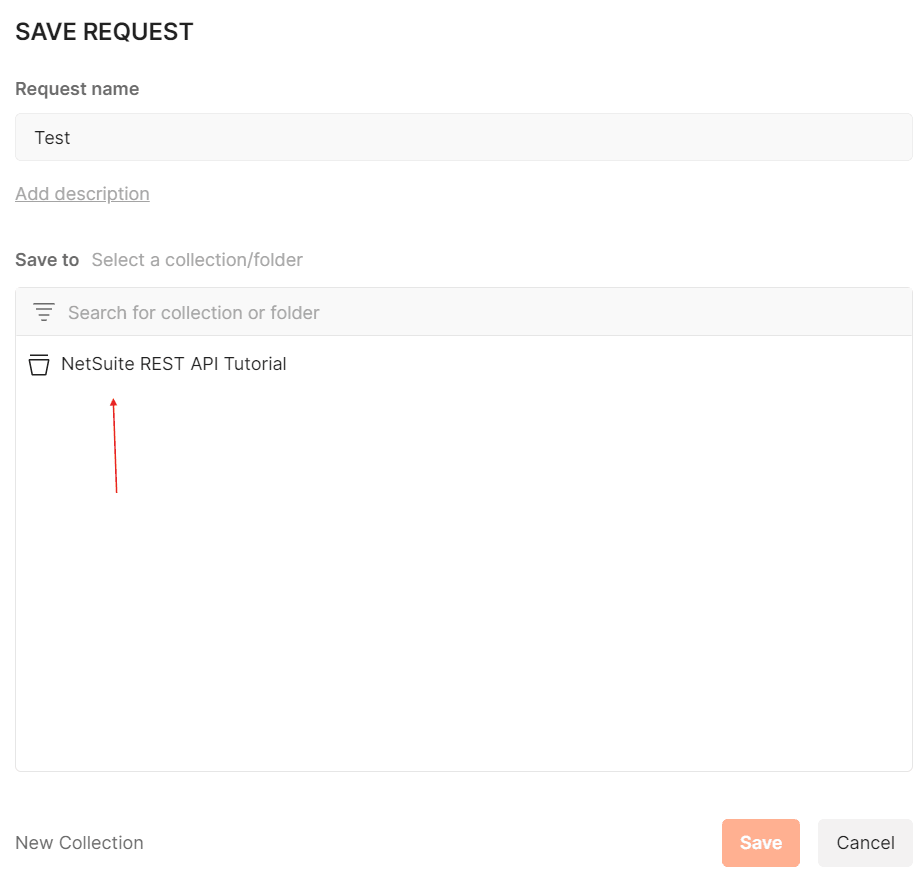
-
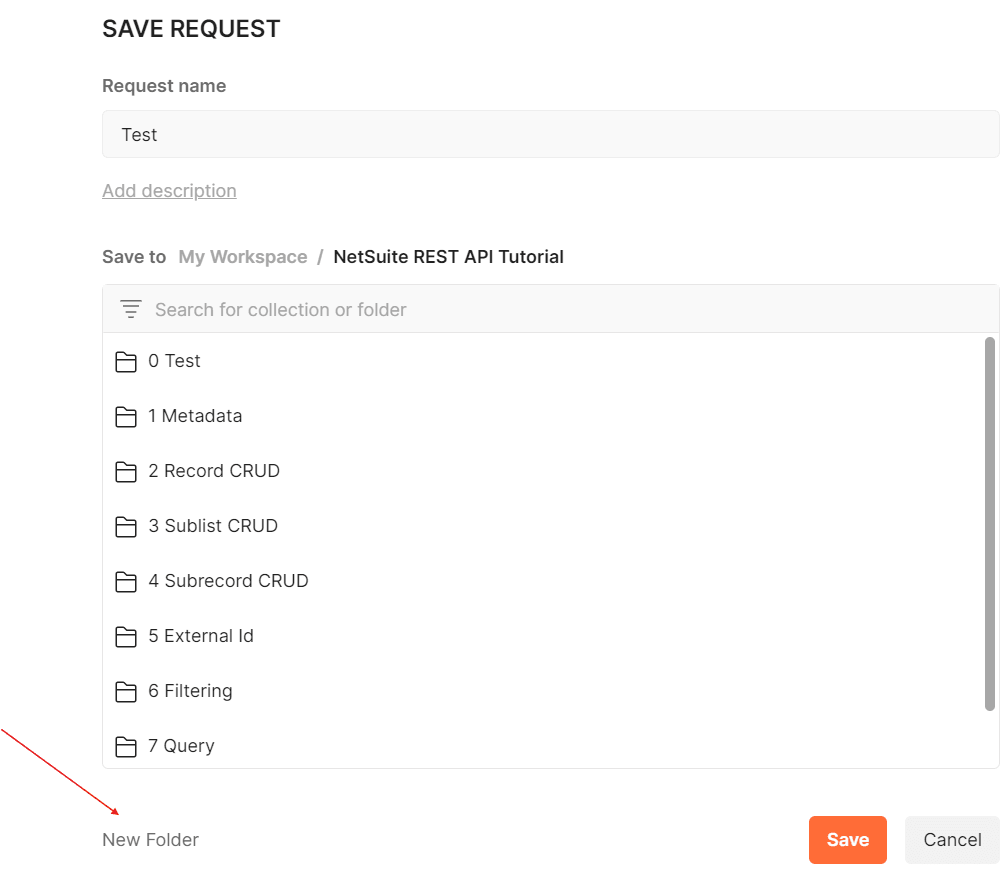
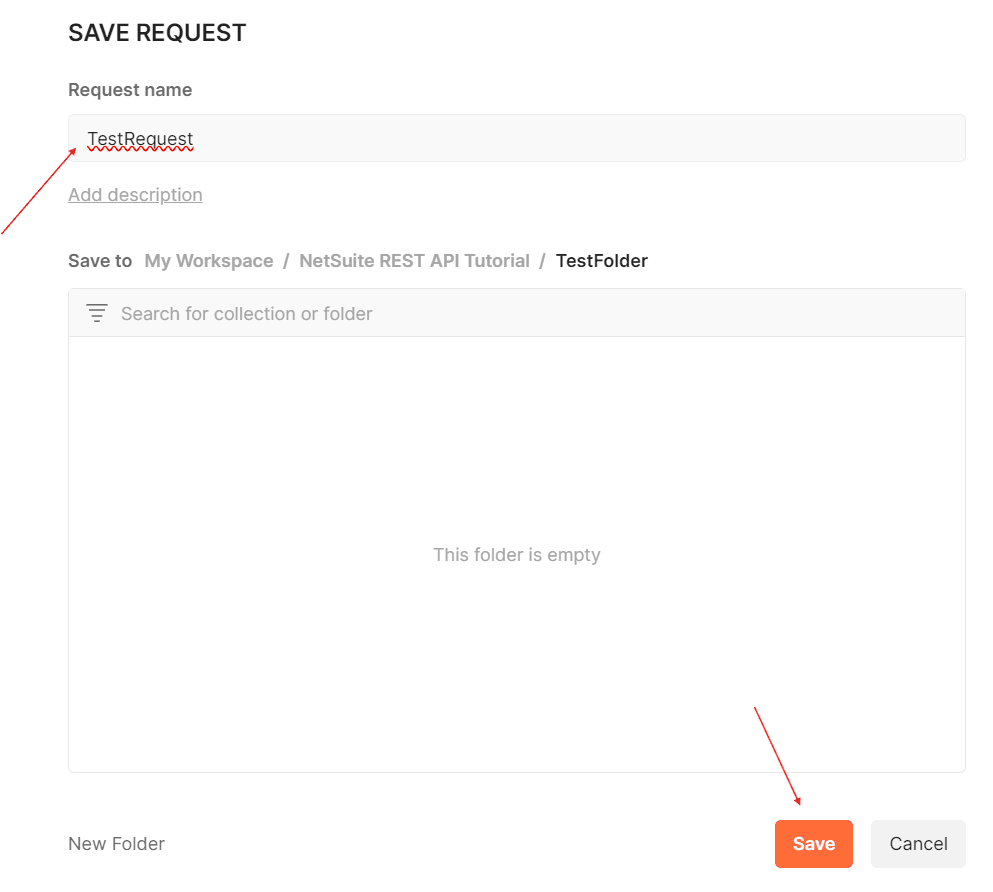
Select the collection you set up in step 2, then click New Folder and create a new folder.
-
Give your request a name and click Save.
-
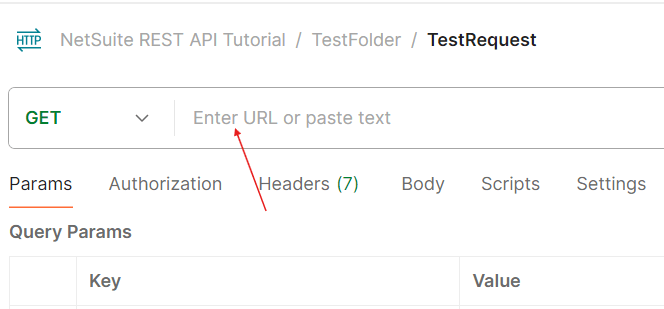
Insert the URL into the GET field. To learn more about this URL, see REST Web Services URL Schema and Account-Specific URLs. For this tutorial, you can use https://<youraccountID>.suitetalk.api.netsuite.com/services/rest/record/v1/metadata-catalog/customer
Replace <youraccountID> with your account ID.
-
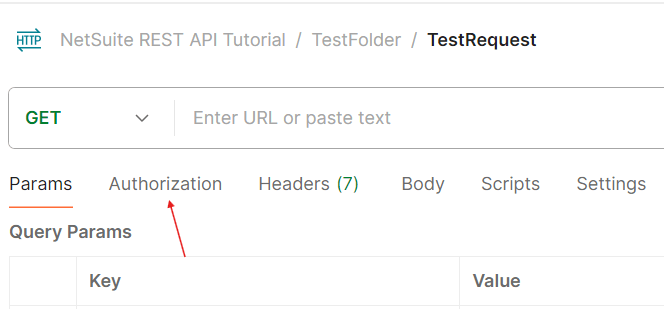
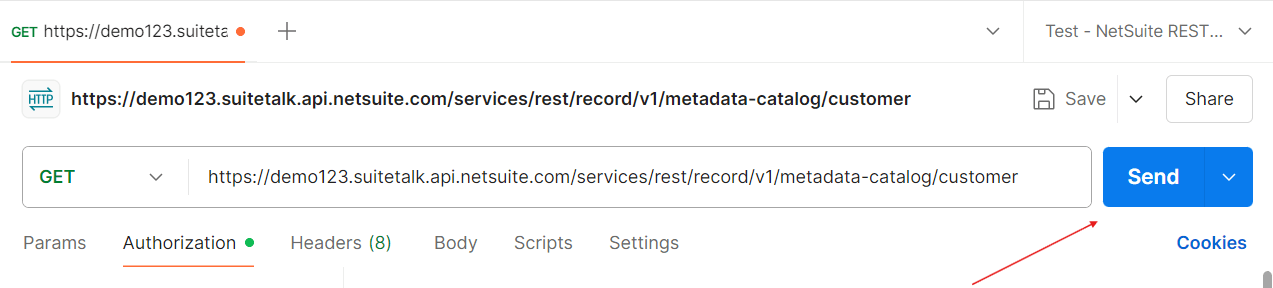
Open the Authorization tab.
-
Under Auth Type, select Inherit auth from parent.
-
Click Send to test if the connection works.
Step 4: CRUD in Postman
You can now perform CRUD in Postman for your NetSuite account. Try completing the following examples:
Creating a contact:
-
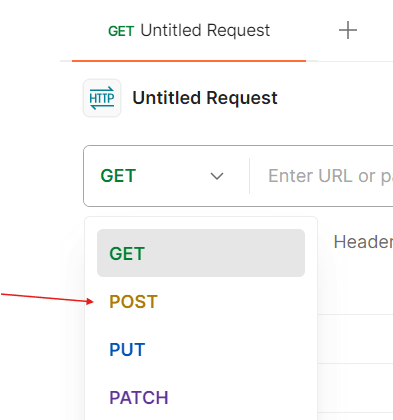
Create a new HTTP request.
-
Make sure the request is POST.
-
Save this request in the same folder you created when testing the token (see "Testing the token" under "Step 3: Postman token").
-
Under the Authorization tab, select Inherit from parent.
-
Insert the URL into the POST field. For this example, you can use https://<youraccountID>.suitetalk.api.netsuite.com/services/rest/record/v1/contact
Replace <youraccountID> with your own.
-
Open the Body tab, and select the raw option. Make sure the drop-down option has JSON selected.

-
Enter the information you want for your contact. At a minimum, you should include an entityId. You can see all the available fields for contact records as well as data types here.

For this example, you can enter the following.
{"entityid": "ExampleContact_1234","comments":"Example text"} -
Click Send.
You should see a "204 No Content" message if the POST was successful.
-
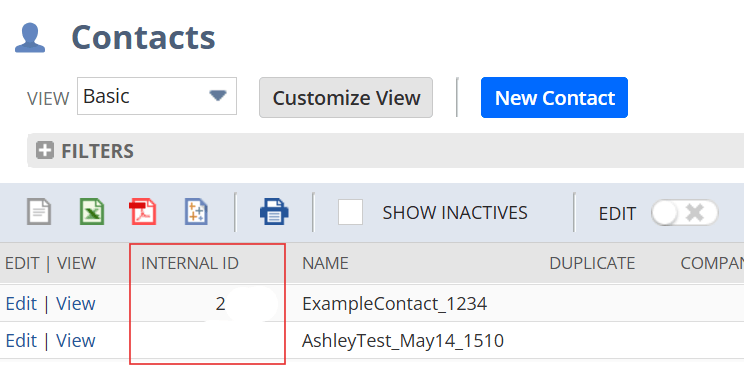
If you go into NetSuite, the contact now appears in your contacts list.
Updating a contact:
-
Create a new HTTP request.
-
Make sure the request is a PATCH.
-
Save this request in the same folder you created when testing the token (see "Testing the token" under "Step 3: Postman token").
-
Under the Authorization tab, select Inherit from parent.
-
Insert the URL into the PATCH field. For this example, you can use https://<youraccountID>.suitetalk.api.netsuite.com/services/rest/record/v1/contact
Replace <youraccountID> with your own.
-
Add the Internal ID for the contact you just created to the end of the URL. https://<youraccountID>.suitetalk.api.netsuite.com/services/rest/record/v1/contact/<internalId>
You can find a contact's internal ID on the Contacts page.
-
Open the Body tab, and select the raw option. Make sure the drop-down option has JSON selected.
-
Enter the information you want updated for your contact. For this example, you can update the entityId. You can see all the available fields for contact and their names as well as data types here.
{"entityid": "ExampleContact_5678"} -
Click Send.
You should see a "204 No Content" message if the PATCH was successful.
-
Now, if you refresh the page in NetSuite, the contact's name will be updated.
Deleting a contact:
-
Create a new HTTP request.
-
Make sure the request is a DELETE.
-
Save this request in the same folder you created when testing the token (see "Testing the token" under "Step 3: Postman token").
-
Under the Authorization tab, select Inherit from parent.
-
Insert the URL into the DELETE field. For this example, you can use https://<youraccountID>.suitetalk.api.netsuite.com/services/rest/record/v1/contact
Replace <youraccountID> with your own.
-
Add the Internal ID to the end of the URL. https://<your account ID>.suitetalk.api.netsuite.com/services/rest/record/v1/contact/<internalId>
-
Click Send.
You should see a "204 No Content" message if the DELETE was successful.
-
Now, if you refresh the page in NetSuite, the contact will be gone from your contact list.