Load Data from Snowflake into Oracle NetSuite Analytics Warehouse (Preview)

As a service administrator, you can use the Oracle NetSuite Analytics Warehouse extract service to acquire data from a Snowflake instance.

You can later use this data to create data augmentations for various Enterprise Resource Planning and Supply Chain Management use cases. Establish the connection from NetSuite Analytics Warehouse to your Snowflake instance to start data acquisition followed by augmentation.

Note:

Snowflake some times requires API calls to originate from a known IP address. If you're experiencing connection issues due to an unauthorized IP, then submit an Oracle Support ticket to obtain the necessary Oracle IP address for your Snowflake allowlist.

Ensure that Snowflake is enabled on the Enable Features page prior to creating this connection. See Make Preview Features Available.
  1. In NetSuite Analytics Warehouse, create the Snowflake data connection:
    1. In NetSuite Analytics Warehouse Console, click Data Configuration under Application Administration.
    2. On the Data Configuration page, click Manage Connections.
    3. On the Manage Connections page, click Create and then click Connection.
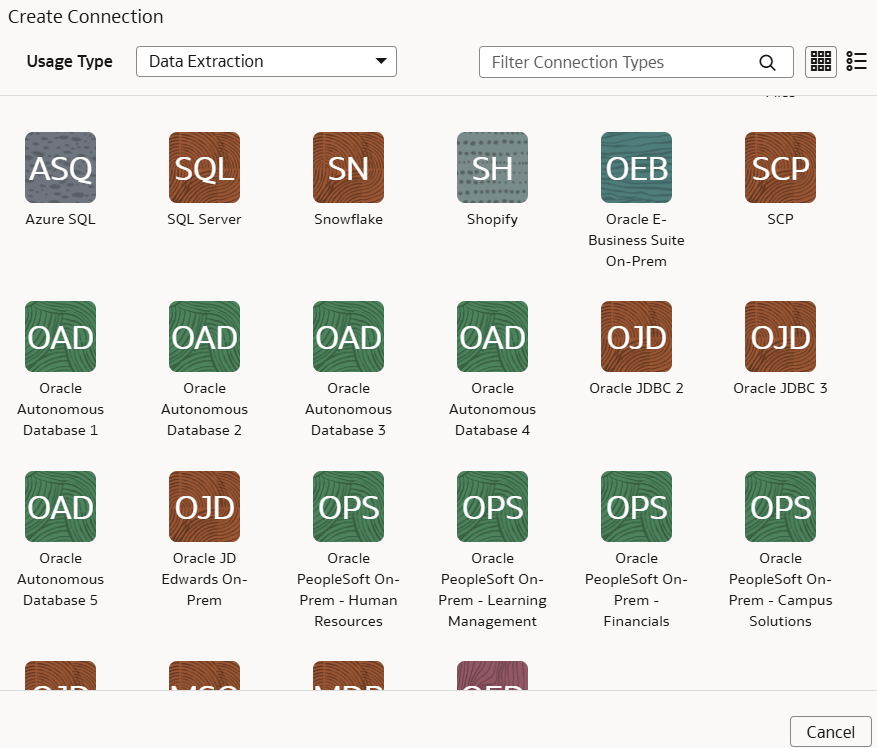
    4. In Create Connection, select Data Extraction in Usage Type and then select Snowflake as the connection type.
      Snowflake connection option
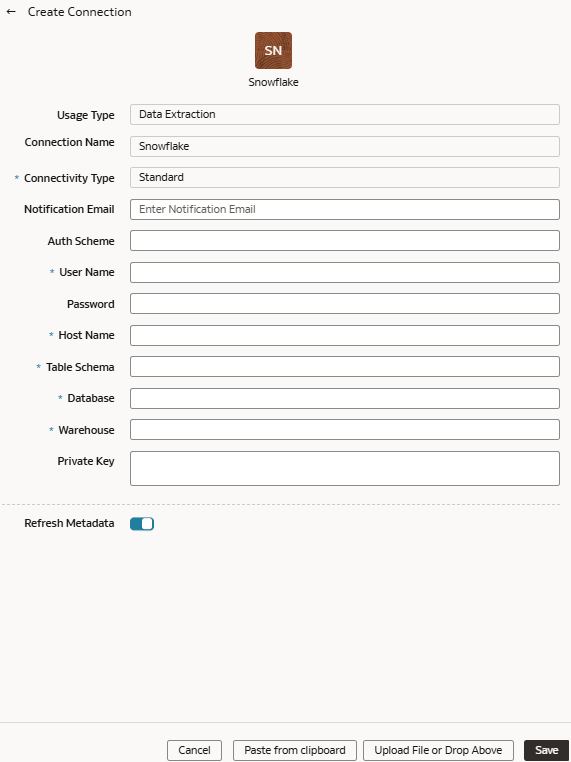
    5. In Create Connection, enter these details and then click Save:
      • Connectivity Type: Standard.
      • Notification Email: An email address to receive notifications.
      • Auth Schema: Enter “BASICAUTH” if you’re using username and password to establish the connection. Enter “PRIVATE_KEY” if you’re using token-based authentication.
      • User Name: Enter username only if you're using the basic authentication.
      • Password: Enter password for the username only if you're using the basic authentication.
      • Host Name: Complete host name of your Snowflake instance.
      • Table Schema: Your Snowflake table schema such as TPCH_SF1.
      • Database: Mentioned in your Snowflake account under Data.
      • Warehouse: The compute resources in your Snowflake instance that you can find by running SHOW WAREHOUSES [ LIKE '<pattern>' ]. See SHOW WAREHOUSES.
      • Private Key: Generate the Private Key in Snowflake, if you don’t have one already, and paste it here. See Generate the Private Key.

      Create Snowflake connection

    6. Verify that the Refresh Metadata toggle is enabled to ensure that the metadata is refreshed when you save the connection.
      You can later refresh the metadata from the Actions menu on the Manage Connections page, if required.

      Note:

      You can’t create augmentations for Snowflake unless you perform a metadata extract.
    7. Click Save.
  2. On the Manage Connections page, select Actions for the Snowflake connection and then select Test Connection.
  3. To delete a connection, on the Manage Connections page, click Actions for the applicable connection and select Delete.

    Note:

    Ensure that you delete the functional areas, data augmentations, and custom data configurations related to the data connection before deleting it. You can't update or load data from deleted data connections to the warehouse.
  4. After the connections are successfully established, navigate to the Data Configuration page, select the connection in Data Source, then click the Data Augmentation tile, and create a data augmentation using the Snowflake data. Select the applicable Snowflake source tables. See Augment Your Data.