Load Data from Oracle Autonomous Database into Oracle NetSuite Analytics Warehouse (Preview)
As a service administrator, you can use the Oracle NetSuite Analytics Warehouse extract service to acquire data from Oracle Autonomous Database and use it to create data augmentations.
Note:
Currently, you can't connect to a private autonomous transaction processing database (ATP database).- In Oracle NetSuite
Analytics Warehouse, create the autonomous
database connection using these instructions:
- In Oracle NetSuite Analytics Warehouse Console, click Data Configuration under Application Administration.
- On the Data Configuration page, click Manage Connections.
- On the Manage Connections page, click Create and then click Connection.
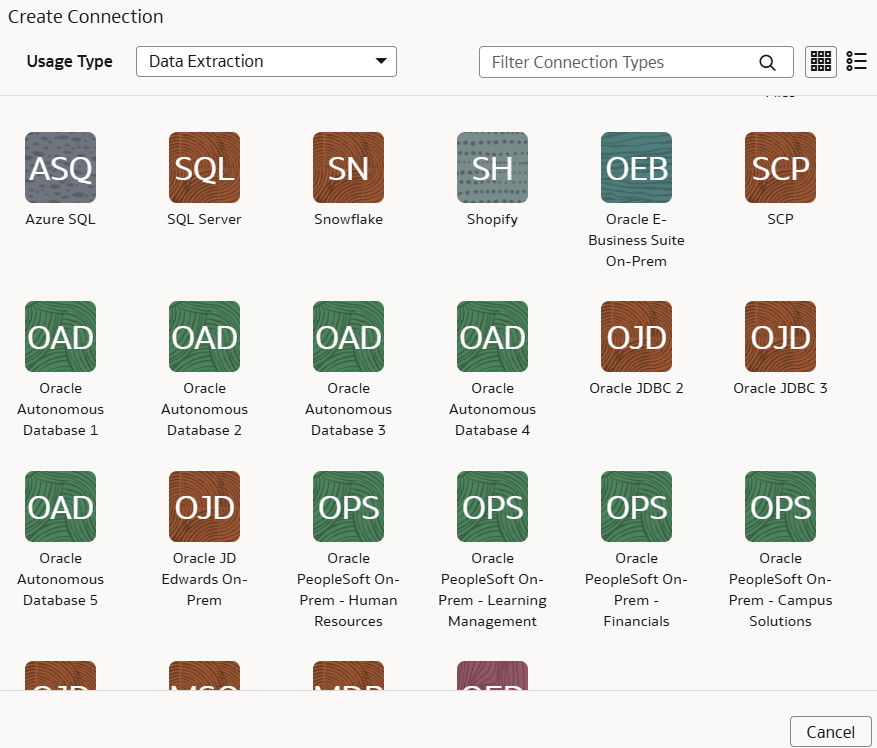
- In Create Connection, select Data Extraction in
Usage Type and depending on the number of
connections, select options such as Oracle Autonomous
Database 1, or Oracle Autonomous
Database2 as the connection type.

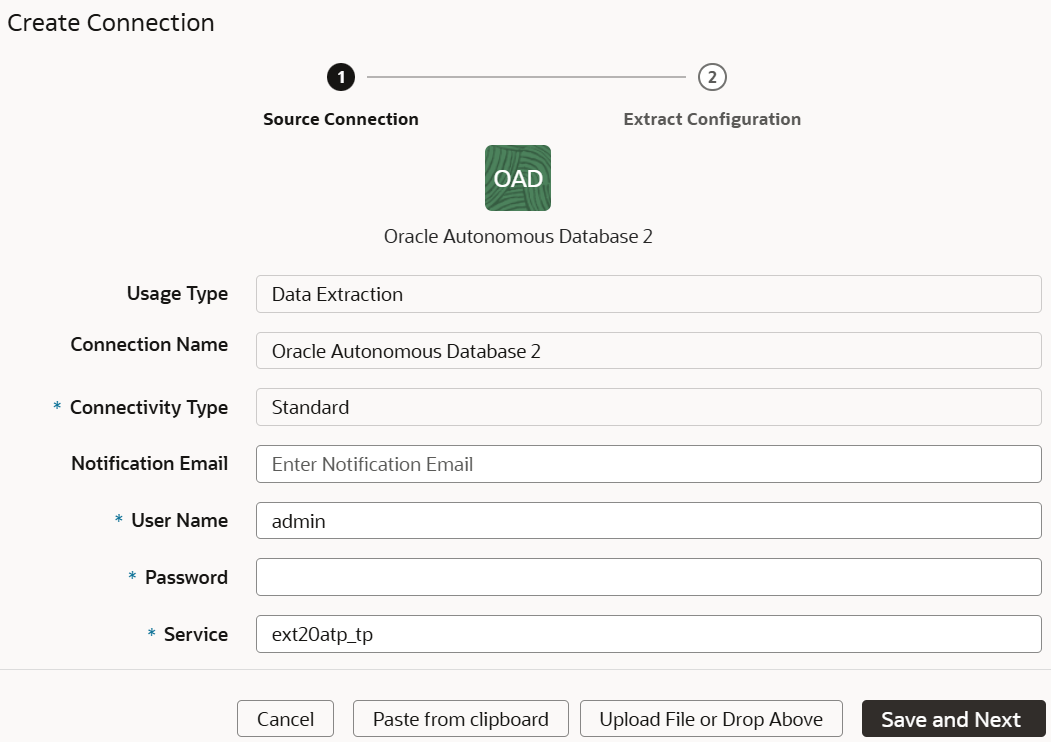
- In the dialog for the Oracle Autonomous Database connection, provide
these details in Source Connection and then click Save and
Next:
- Select Standard in Connectivity Type.
- Enter an email address to receive notifications in Notification Email.
- Enter the credentials to access the database in User Name and Password.
- Enter the database service details in Service.
- In Wallet, drag and drop the database wallet details.

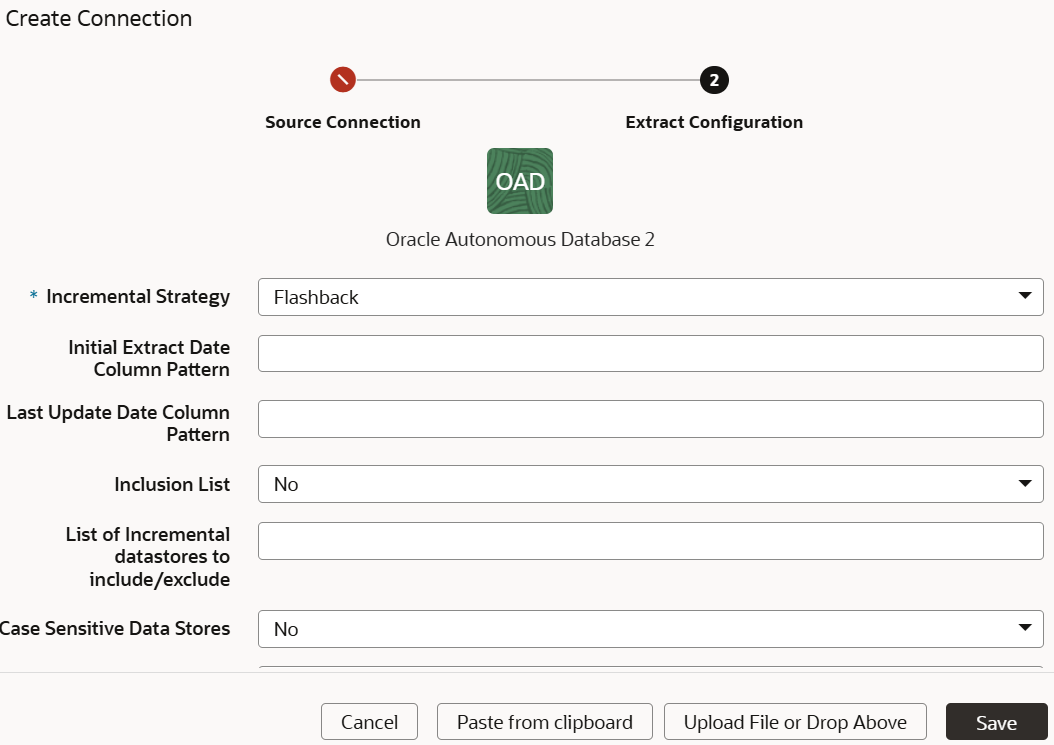
- In the dialog for the Oracle Autonomous Database connection, provide
these details in Extract Configuration and click
Save:
- In Incremental Strategy, select the incremental strategy (Flashback, Golden Gate, or RowSCN) that is compatible with your database configuration.
- In Initial Extract Date Column Pattern, provide the initial extract date pattern that matches the pattern in your source.
- In Last Update Date Column Pattern, provide the last update date pattern that matches the pattern in your source.
- In Inclusion List, select Yes or No to include the mentioned list of datastores in the incremental strategy or not.
-
In List of Incremental datastores to include/exclude, enter a comma separated list of datastores names.
If you don't provide, then the connector uses the incremental strategy for all the datastores. If you provide and IS_INCLUSION_LIST=true, only the provided list use the specified incremental strategy. If provided and IS_INCLUSION_LIST=false, the provided list won’t use the incremental strategy. If INCREMENTAL_STRATEGY property is available, then the connector uses IS_INCLUSION_LIST and INCR_DATASTORES_LIST for all strategies. If not available, then for FLASHBACK the connector checks if ENABLE_FLASHBACK_INCREMENTAL and FBA_INCR_DATASTORES_EXCEPTION_LIST is provided and for ROWSCN, it checks if ENABLE_ORA_ROWSCN_INCREMENTAL and ROWSCN_INCR_DATASTORES_EXCEPTION_LIST is provided.
- In Case sensitive Data Stores, select Yes or No.
- In Schema Name, enter the schema name to extract data from.
- In Data Store Name Pattern, specify the name pattern of the data stores that you want extracted. If you provide this value, then the connector extracts only data stores matching the pattern.
- Verify that the Refresh Metadata toggle
is enabled to ensure that the metadata is refreshed when you
save the connection. You can later refresh the metadata from the
Actions menu on the Manage Connections page, if required.
Note:
You can’t create augmentations for autonomous database unless you perform a metadata extract.

- On the Manage Connections page, select Actions for the autonomous database connection and then select Test Connection.
- To delete a connection, on the Manage Connections page, click
Actions for the applicable connection and select
Delete.
Note:
Ensure that you delete the functional areas, data augmentations, and custom data configurations related to the data connection before deleting it. You can't update or load data from deleted data connections to the warehouse. - After the connections are successfully established, navigate to the Data Configuration page, select the connection in Data Source, then click the Data Augmentation tile, and create a data augmentation using the autonomous database data. Select the applicable autonomous database source tables. See Augment Your Data.