Load Data from Oracle Analytics Publisher into NetSuite Analytics Warehouse (Preview)

As a service administrator, you can use the NetSuite Analytics Warehouse extract service to acquire data from the Analytics Publisher reports and use it to create data augmentations for various use cases.

Currently, the BI Publisher Reports connector only supports:
  • The Analytics Publisher in Oracle Fusion Cloud Applications for data augmentation.
  • Only those reports that complete within the Analytics Publisher report execution timeout limit that's typically 300 seconds.
  • The connector only supports CSV file formats with a comma-separated delimiter. Other delimiters are not currently supported.

The BI Publisher Reports connector workflow must observe the security rules of Oracle Fusion Cloud Applications. You must ensure that the password rotation and update are done on time before executing the BI Publisher Reports connector pipeline. Otherwise, those pipeline jobs will hang and eventually those jobs will get deleted, and the data source will be disabled until you update the password and resubmit the job.

Ensure that BI Publisher Reports is enabled on the Enable Features page prior to creating this connection. See Make Preview Features Available.
  1. In BI Publisher, build a comma separated values (CSV) report for the targeted tables. See Create Reports and Generate CSV Output.
  2. In NetSuite Analytics Warehouse, create the data connection to the BI Publisher reports using these instructions:
    1. In NetSuite Analytics Warehouse Console, click Data Configuration under Application Administration.
    2. On the Data Configuration page, click Manage Connections.
    3. On the Manage Connections page, click Create and then click Connection.
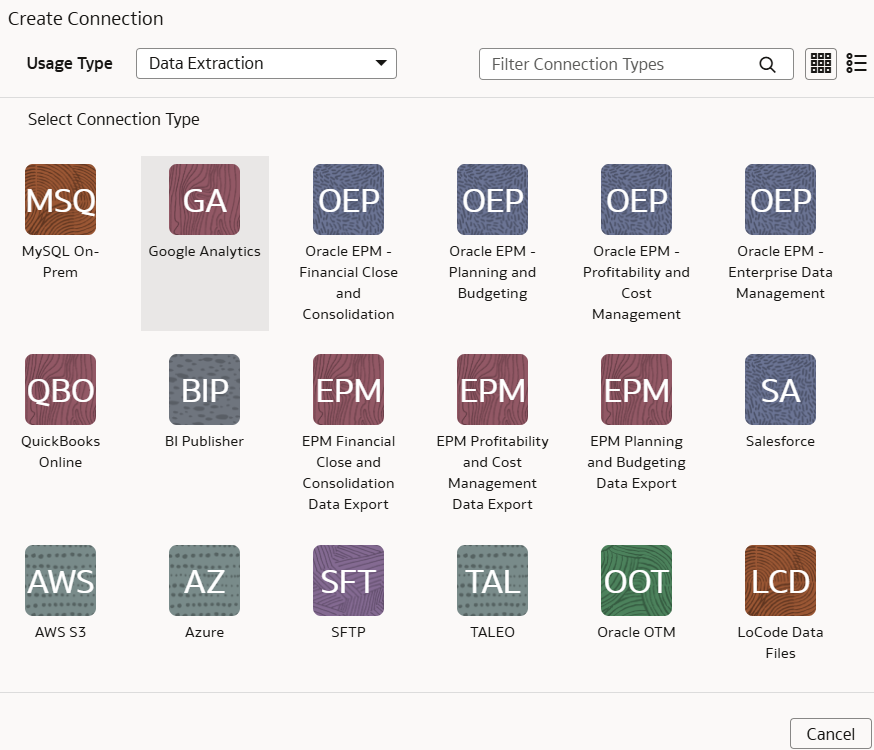
    4. In Create Connection, select Data Extraction in Usage Type and then select BI Publisher Reports as the connection type.

      BI Publisher connection option

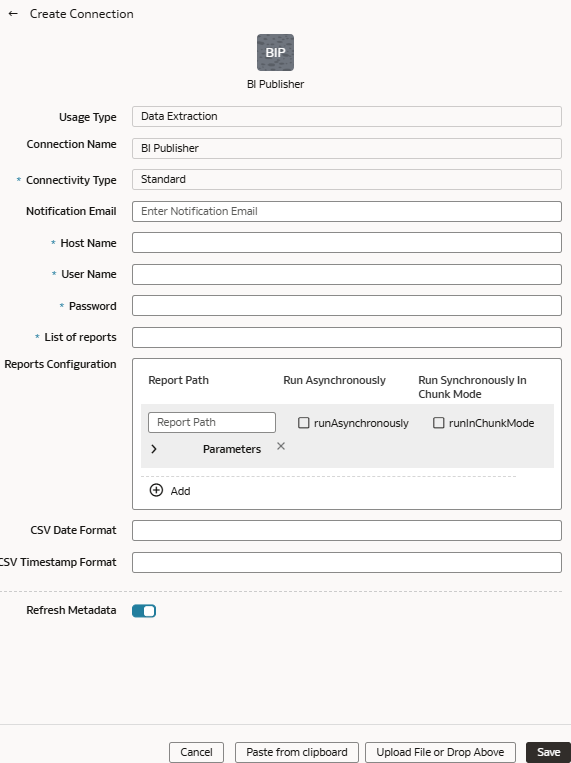
    5. In the dialog for the BI Publisher connection, provide these details in Source Connection and then click Update and Next:

      Note:

      Some properties are defined on the Extract Configuration tab. These properties are visible, but read-only on the Source Connection tab.
      • Enter an email address to receive notifications in Notification Email.
      • Host name of the BI Publisher in Host Name.
      • Credentials to access your BI Publisher in User Name and Password

      Source Connection for BI Publisher dialog

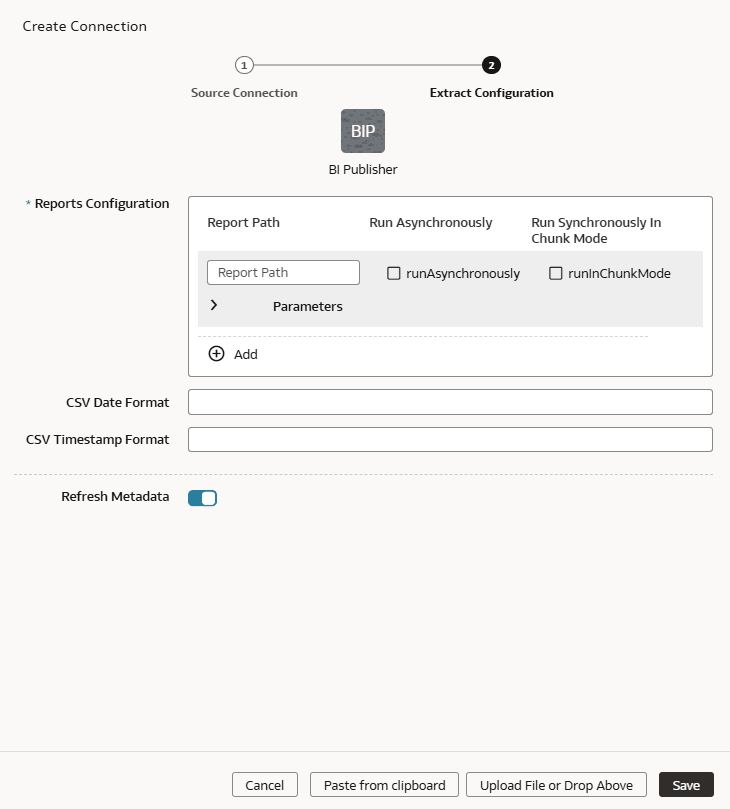
    6. In the dialog for the BI Publisher connection, provide these details in Extract Configuration and then click Update and Next:
      • In Reports Configuration, provide the path of the report in Oracle Analytics Publisher, select Run Asynchronously if the report takes a long time to execute, else select Run Synchronously In Chunk if the report has a large volume of data (more than 7 MB in size) because this enables you to download the report in chunks of data.

        Note:

        • If the report execution is completed before the timeout limit and generates large volume of data then set runInChunkMode: true. The recommendation is to set runInChunkMode to true if the report output file is over 7MB.
        • If the report has parameters defined, then provide the values in the "params" section of the report configuration array. If the value in the params array is set with placeholder __lastUpdateDate__, then the connector applies the initial extract date or last successful extract date to the param.
      • For CSV Date Format and CSV Timestamp Format, see About Date and Timestamp Formatting for CSV File-based Extractors.

        Note:

        Ensure that the date format used in Oracle Analytics Publisher and NetSuite Analytics Warehouse match.

      Extract Configuration for BI Publisher dialog

    7. Verify that the Refresh Metadata toggle is enabled to ensure that the metadata is refreshed when you save the connection.
      You can later refresh the metadata from the Actions menu on the Manage Connections page, if required.

      Note:

      You can’t create augmentations for the BI Publisher reports unless you perform a metadata extract.
    8. Click Save.
  3. On the Manage Connections page, select Actions for the BI Publisher reports connection and then select Test Connection.
  4. To delete a connection, on the Manage Connections page, click Actions for the applicable connection and select Delete.

    Note:

    Ensure that you delete the functional areas, data augmentations, and custom data configurations related to the data connection before deleting it. You can't update or load data from deleted data connections to the warehouse.
  5. After the connections are successfully established, navigate to the Data Configuration page, select the connection in Data Source, then click the Data Augmentation tile, and create a data augmentation using the BI Publisher reports data. Select the applicable BI Publisher source tables. See Augment Your Data.