Updating Excel-based Reference Doclets Using the Ribbon
To update reference doclet content using the Narrative Reporting ribbon:
- Open the report package.
- Open, and then check out the reference doclet.The reference doclet should open in Excel. If you opened the report package in Word or PowerPoint, Excel is launched when opening the reference doclet.
- Optional: Perform Oracle Smart View for Office tasks, such as refresh the data points or change the POV in a report.
- Optional: Perform Excel tasks, such as reformat a grid or chart.
-
Optional: Change the name, optional description, or table column resize option of
available content:
- In the Narrative Reporting ribbon, click Inspect.
- In the Properties dialog box, select the Embedded Contents tab.
-
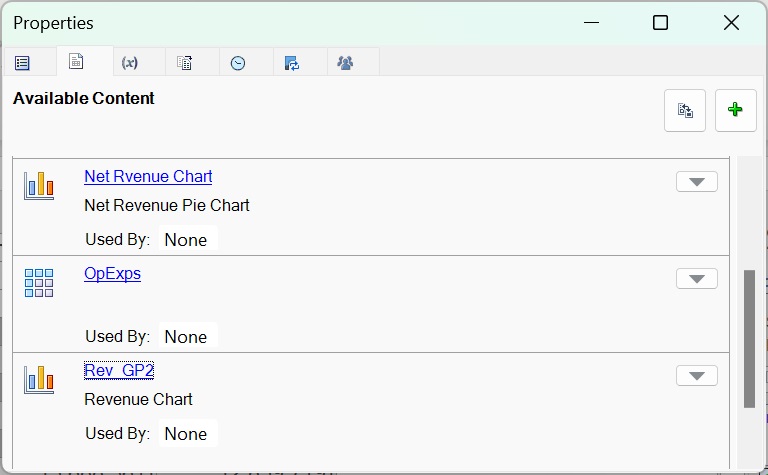
Under Available Content, click the link for the
content properties you want to change.
For example, to add a description to the Ops_Exps content, click the OpExps link:
The Edit dialog box is displayed, where you can change the content name, optional description, and table column resizing option.
-
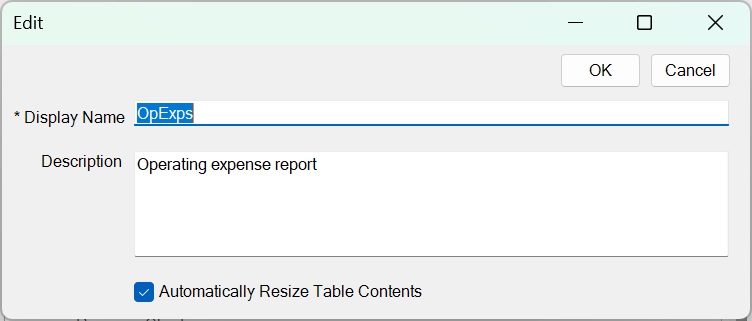
Optional: In the Edit dialog, make any necessary changes
to the Display Name and optional
Description fields.
In the following example, we've added a description:
-
Optional: Enable or clear the Automatically Resize Table
Contents check box, as you require.
Disable the Automatically Resize Table Contents option to minimize the variations between the embedded Word table and the source reference table or grid.
This option is enabled by default when you create available content by using the Available Content button.
-
When finished, click OK to close the
Edit dialog.
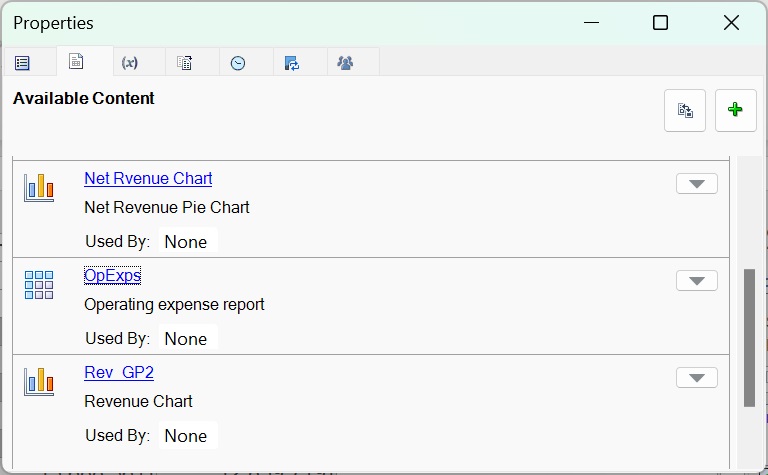
In the following example, the updated description now appears in the list under Available Cotent in the Properties dialog:
- Repeat to make changes to any other content in the list.
-
Optional: To remap available content within a reference doclet:
- In the Narrative Reporting ribbon, click Inspect.
- In the Properties dialog box, select the Available Contents tab.
-
Click
 next to the content to remap and select
Remap from the drop-down menu.
For example, below we are selecting to remap Rev_GP2.
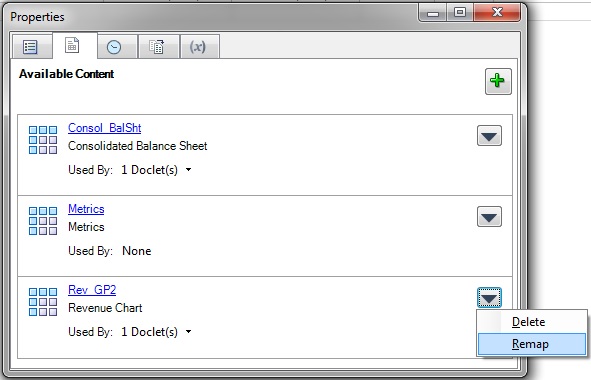
The Remap dialog is displayed.
-
In the Remap dialog, click on the associated
Select link for the content to remap.
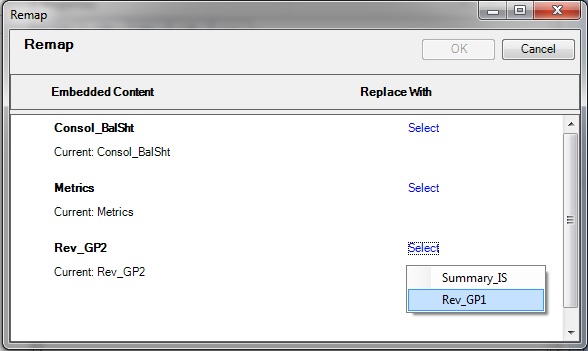
A list of available content that is not already mapped is displayed. In the following illustration, the list contains two item, Summary_IS and Rev_GP1.
Rev_GP2 is currently mapped to available content called Rev_GP2. We want to remap to the unmapped content called Rev_GP1.
-
From the Select drop-down list, select an
available content item to remap to.
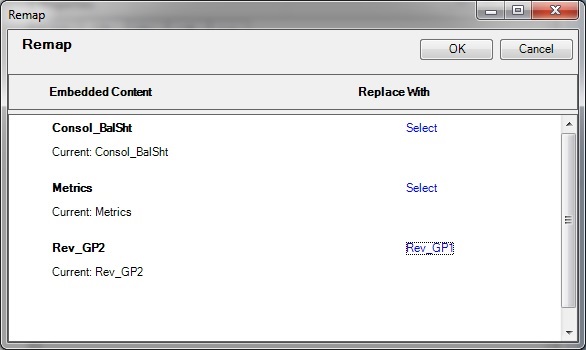
After you make a selection, the range you chose is shown in the Replace with column.
In the following example, the Rev_GP1 range is now showing in the Replace with column.
- Repeat step 6.c. through step 6.e. for each available content item that you want to remap.
- When you're finished remapping content, click OK to close the Remap dialog.
- Click X in the upper left corner of Properties to close the dialog.
- When finished with all updates to the reference doclet, upload it and check it in.