Add a Window Action

The window action switches a robot's focus to a browser window or tab that opens from the currently selected window, such as a pop-up window.

Use Cases

You can use the window action for the following scenarios.

Scenario Example

A web application opens multiple child windows

  • Main window

    • Child window 1

    • Child window 2

    • Child window 3

A web application opens a child window, which opens a child window, which opens a child window

  • Main window

    • Child window 1

      • Child window 2

        • Child window 3

For a detailed use case that uses this action, see Use Case: Switch Windows.

Alternatives

If the robot must interact with a window or tab that is already open, use the switch browser action. See Add a Switch Browser Action.

Add a Window Action

Note:

You must use the low-code capabilities to add this action to a robot. Keep reading for step-by-step instructions.
  1. Open the robot to edit.
  2. Add the action to the robot.
    1. On the canvas, point to an action, and click +.
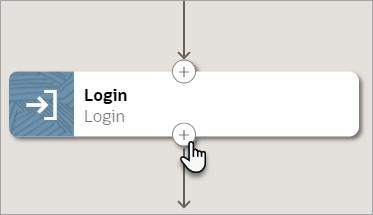
      A mouse cursor points to an action in the canvas and hovers over the plus sign button, which appears at the bottom of the rectangle that represents the action. A plus sign button also appears at the top of the rectangle, for adding an action after the current action.

      A menu of available actions appears.

    2. Select Window.

      A Window action appears on the canvas, and the Window panel appears.

  3. In the panel, enter a Name and Description for the action.

    The Name appears on the action in the canvas and should help you and others understand the goal of the action.

  4. From the Operations drop-down, select how the robot interacts with a window.
    Operation Description

    Close

    Close the currently selected window.

    This operation doesn't switch focus to a different window. If you need to switch focus to another window, finish defining the window action, and then add another window action that uses the Switch To operation.

    Get Window Handles

    Get an array of strings with the identifiers of all windows that the robot has interacted with up until now.

    You can store the string values in a collection variable and then use a log action to report the values in the activity stream. See Add a Log Action.

    Additionally, you can use use this operation to close all open windows. Use a foreach loop to perform this task. See Add a Foreach Loop.

    Get Window Titles

    Get an array of strings with the titles of all windows that the robot has interacted with up until now.

    You can store the string values in a collection variable and then use a log action to report the values in the activity stream. See Add a Log Action.

    You typically use this operation when troubleshooting a robot that isn't working as expected. The robot might be trying to work in the wrong child window. Getting the titles of all the possible windows can help you fix the robot.

    Switch To

    Switch to another window or tab that opened from the currently selected window.

    This operation doesn't close any windows. If you need to close the current window, first close the window using a window action that uses the Close operation. Then, add a window action that uses the Switch To operation.

  5. Provide values for the operation that you selected.
    Operation Fields to update

    Close

    No additional fields.

    Get Window Handles

    Save to: Select the string collection variable to save the window handles to:

    1. Select within the Save to field, and select Variables Variables.

      The Variables panel appears.

    2. If the variable to use doesn't exist yet, create it. See Create a Variable. You must create a string collection variable.

    3. From the Available variables list, select a string collection variable, and drag it to the field.

    Get Window Titles

    Save to: Select the string collection variable to save the window titles to:

    1. Select within the Save to field, and select Variables Variables.

      The Variables panel appears.

    2. If the variable to use doesn't exist yet, create it. See Create a Variable. You must create a string collection variable.

    3. From the Available variables list, select a string collection variable, and drag it to the field.

    Switch To

    Input tab

    • Window Id: Choose the window to switch to.

      If you're switching to a window that opens from the currently selected window, you can usually choose the new window according to its relationship to the currently selected window. However, if you're switching to a previously selected window, or if you're trying to navigate among a few windows, selecting a variable is usually less error prone.

      • Choose the new window according to its relationship to the currently selected window.

        • NEW: Switch to the window that opened most recently.

          If the robot is already working in the window that opened most recently, an error occurs when the robot runs.

        • MAIN: Switch to the window that opened the currently selected window.

          For instance, you might return to the main application window or a window that the main window launched.

        • CURRENT: Don't switch to another window. Instead, remain in the current window.

      • Select the variable that defines the handle of the window to switch to.

        When you define a Window action that uses the Switch To operation, the Output tab lets you specify a variable that holds the window handle for the currently selected window. For example, when you switch from the main window to its first popup, create a variable named mainWindowHandle, and choose this variable on the Output tab. Whenever you need to return to this window, you can specify this variable as the Window Id for the Switch To operation.

        1. Select within the Window Id field, and select Variables Variables.

          The Variables panel appears.

        2. If the variable to use doesn't exist yet, create it. See Create a Variable.

        3. From the Available variables list, select a variable, and drag it to the field.

    • Timeout (seconds): Enter the maximum amount of time to wait for the new window to appear. When a robot instance runs, the action completes as soon as the window appears. If the time elapses before the window appears, the robot instance fails.

    • Full page screenshot after this action: Select this option if you want to capture a screenshot after the robot opens the window.

    Output and Post Validate tabs

    • Save to: Select the variable in which to store the current window's handle. You can create the variable now.

      For example, when you switch from the main window to its first popup, create a variable named mainWindowHandle, and choose this variable in the Save to field. Whenever you need to return to this window, you can select this variable as the Window Id for the Switch To operation.

      1. Select within the Save to field, and select Variables Variables.

        The Variables panel appears.

      2. If the string variable to use doesn't exist yet, create it. See Create a Variable.

      3. From the Available variables list, select a string variable, and drag it to the field.

    • Page state: Specify whether to complete any validation before and after the action. See Add Validation to a Robot Action.

  6. Click OK.
  7. Above the canvas, select Save.